Introduction to Straw Bale Gardening for Carrots
If you’ve ever struggled to grow perfectly straight, plump carrots in your backyard, straw bale carrots might be your secret weapon. Straw bale gardening is an innovative technique that uses bales of straw as both planting beds and growing medium, solving common challenges like rocky soil, poor drainage, or limited space. This method is gaining popularity among home gardeners because it’s affordable, reduces bending and weeding, and often leads to faster growth and healthier produce.
Carrots especially thrive in the loose, airy texture of decomposing straw bales. Unlike heavy garden soil that can cause carrots to fork or grow misshapen, straw bales offer the perfect environment for roots to elongate and thicken without obstruction. Plus, this setup keeps your carrot crop cleaner and makes harvesting easier.
Ready to transform your carrot harvest? In this article, we’ll guide you step-by-step through growing carrots in straw bales—from conditioning your bales and sowing seeds to watering techniques and harvest tips. By the end, you’ll see why more gardeners are ditching dirt in favor of straw—and how you can join them for your best carrot crop yet!
Choosing and Conditioning Your Straw Bales
Selecting the right straw bales is the crucial first step to success with straw bale carrots. Focus on clean, seed-free straw bales made from wheat, barley, or oats—these varieties break down at a steady pace and don’t introduce unwanted weeds. Avoid hay bales, as they contain grass seeds that can quickly outcompete your carrots.
Once you have your bales, place them in a sunny spot that receives at least 6 to 8 hours of direct light daily, with good airflow to help prevent mildew. Avoid low-lying areas where water might puddle and cause rot. Set your bales directly on soil or on a layer of landscape fabric for better drainage and to keep weeds from growing underneath.
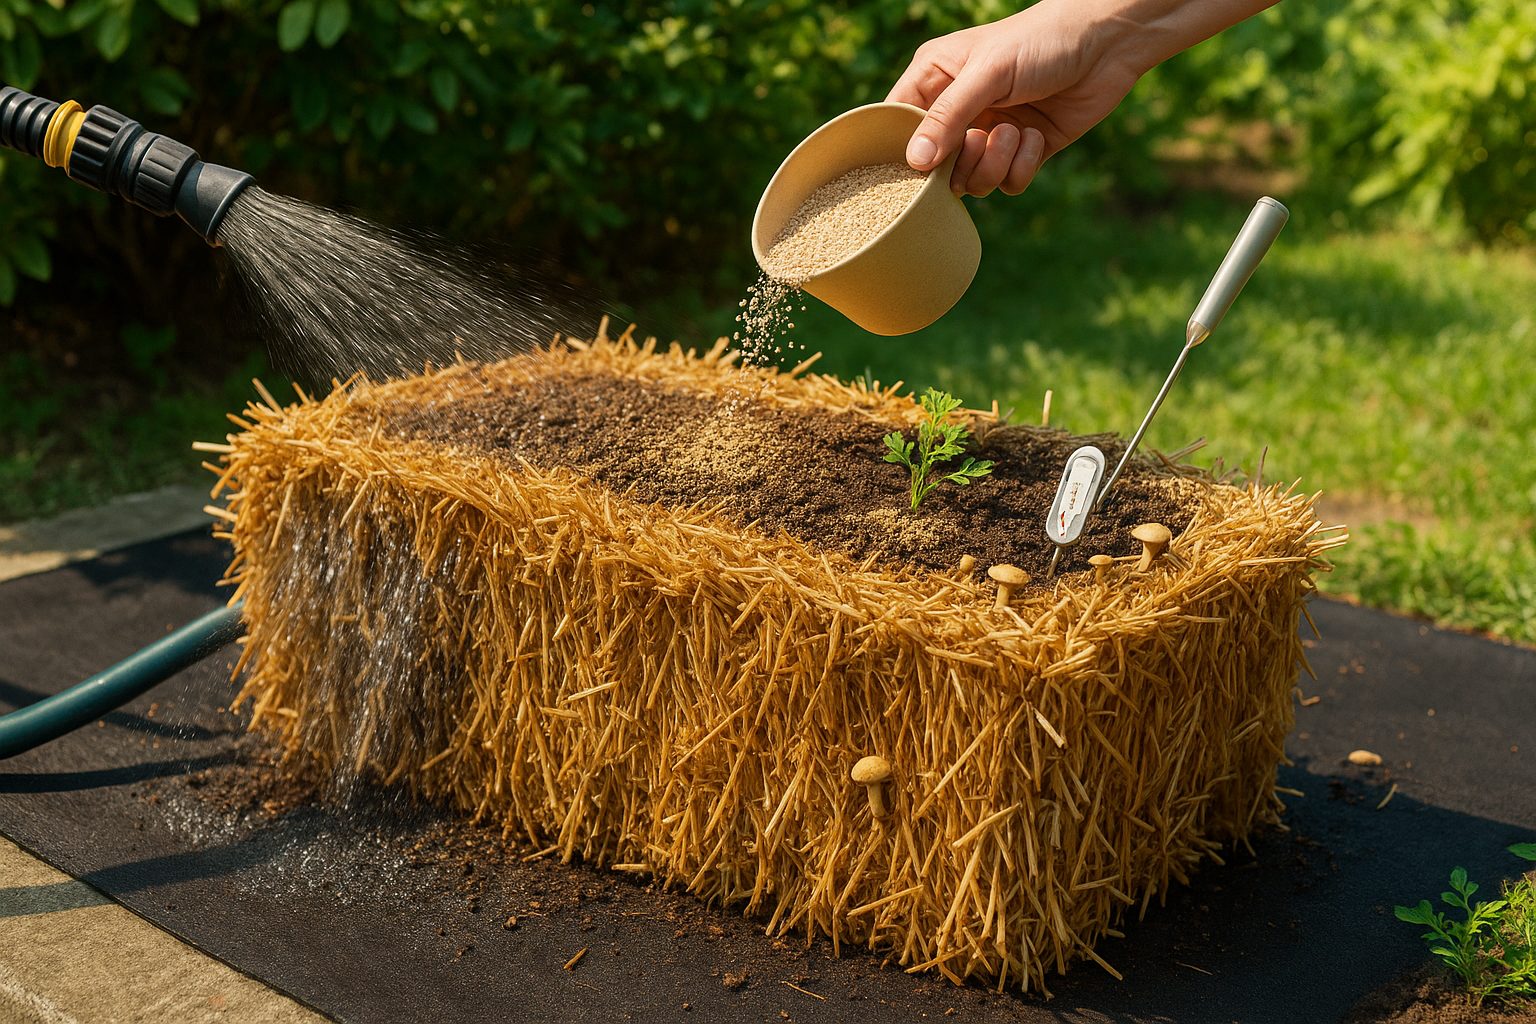
Conditioning your straw bales prepares them to act like loose, nutrient-rich soil. About 10 to 14 days before planting, soak the bales thoroughly with water each morning to encourage decomposition. Every other day during this period, sprinkle a high-nitrogen fertilizer—such as blood meal or an all-purpose lawn fertilizer—over the top of each bale, then water it in so the nutrients penetrate deeply. Follow manufacturer recommendations for quantities, reducing the amount slightly after the first week.
By the end of two weeks, the center of your bales should feel warm to the touch, a sign that microbial activity is breaking down the straw. This process transforms the bale into a soft, nutrient-rich medium that’s perfect for sowing carrot seeds. Skipping or rushing the conditioning stage can lead to poor seed germination or nutrient deficiencies, so patience here truly pays off.
Preparing for Planting: Soil and Seed Considerations
To give your straw bale carrots the best start, begin conditioning the bale about two weeks before planting. Keep the bale consistently moist and feed it every few days with a high-nitrogen fertilizer, such as blood meal or urea, to jumpstart the decomposition process and create a nutrient-rich environment.
After ten days, top off the bale with a blend of high-quality seed starting mix and finely sifted compost—aim for 2-3 inches across the planting area in the bale’s crevice or center. This soft layer mimics garden soil, providing ideal conditions for delicate carrot seeds to germinate and establish roots easily.
When choosing carrots for straw bales, consider varieties that do well in shallow, loose environments. Nantes and Chantenay types are top choices because they’re naturally shorter and tolerate inconsistent soil depth well.
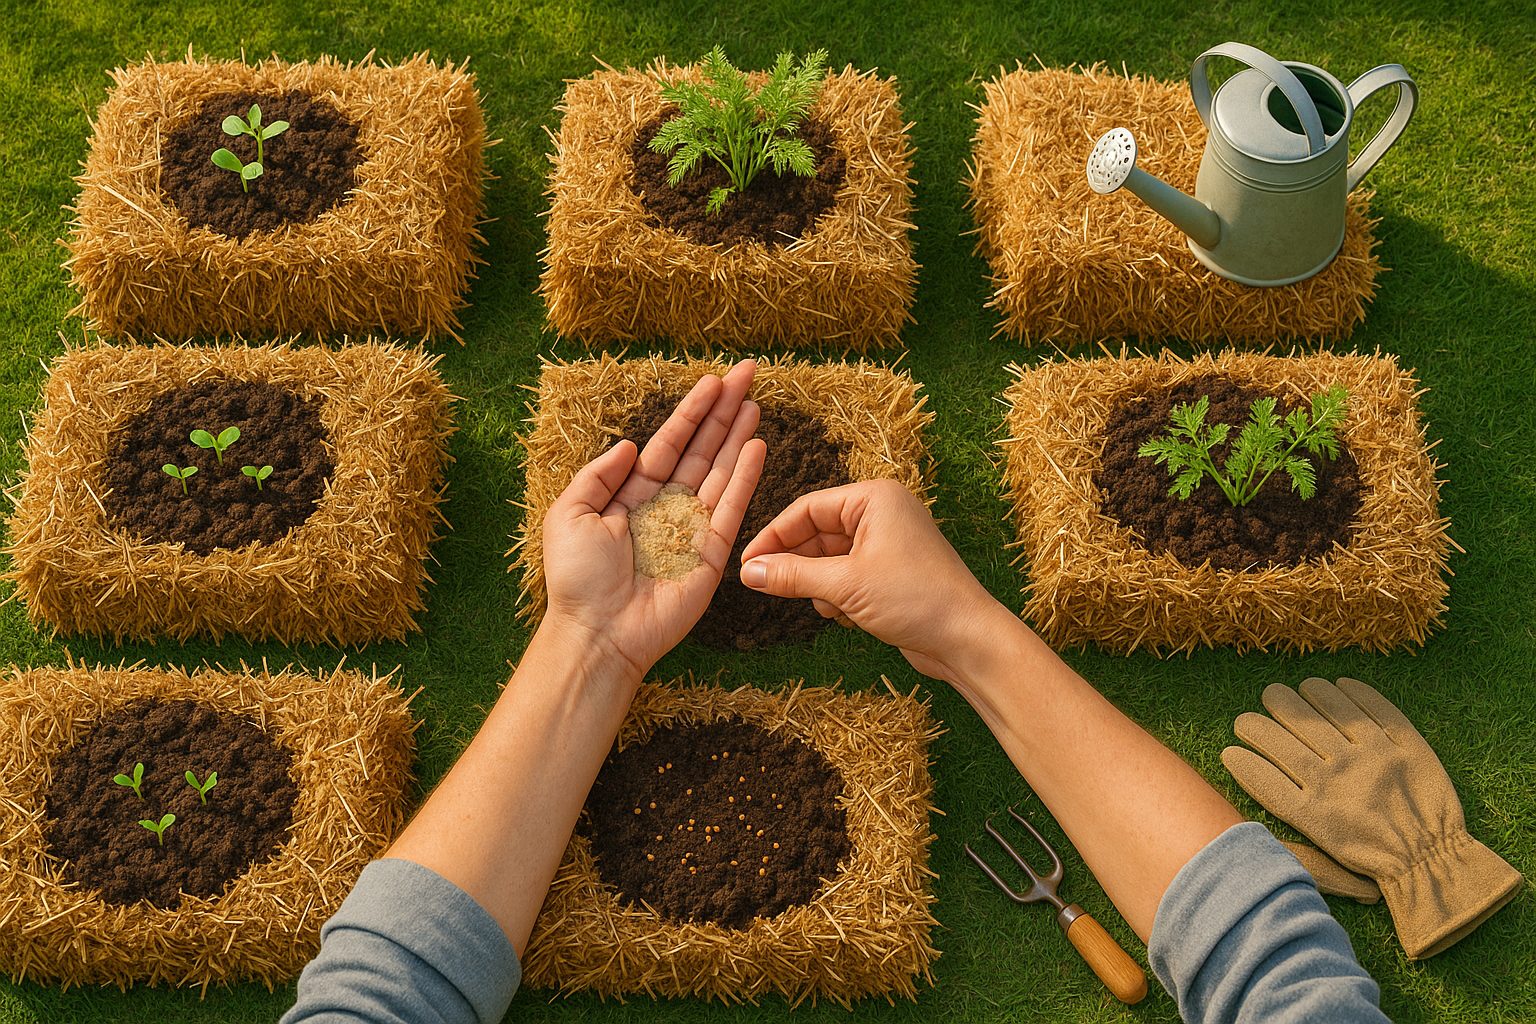
For planting, gently press lines or shallow troughs—no deeper than a quarter inch—into the soil mix. Sprinkle carrot seeds thinly and evenly, spacing them about 1-2 inches apart to prevent overcrowding. Cover the seeds with a very light dusting of the soil mix, then gently water using a spray bottle or fine mist setting to avoid washing them away.
Be patient, as carrots can take up to three weeks to germinate. Once seedlings reach a couple of inches tall, thin them to about 2-3 inches apart to give each root plenty of room to grow straight and minimize competition for nutrients.
Daily Care: Watering, Feeding, and Temperature Management
Caring for straw bale carrots requires a slightly different approach than traditional in-ground gardening, especially when it comes to watering. Straw bales dry out faster than soil, so maintaining consistent moisture is essential—check your bales every morning and evening, aiming to keep them damp but never soggy. Using a soaker hose is ideal, as it delivers slow, deep watering directly to the bales.
During hot or windy conditions, you might need to water daily, while in cooler or rainy weather, watering every other day may be enough. Fertilizing is also important because bales contain fewer natural nutrients than garden soil. Before planting, precondition the bales with a high-nitrogen fertilizer or organic alternatives like blood meal or fish emulsion. Once sprouts appear, switch to a balanced organic fertilizer—such as compost tea or a vegetable-specific mix—every two to three weeks.
Temperature plays a key role during germination—carrots prefer cool, stable conditions between 55–75°F (13–24°C). If gardening in early spring or cooler climates, cover the bales at night with row fabric or plastic to trap warmth and speed up sprouting. Conversely, in hot regions, shading the bales during the hottest parts of the day helps prevent overheating and drying out.
By staying attentive to watering, feeding, and temperature, you’ll provide your straw bale carrots with the steady, supportive environment they need to thrive and grow their sweetest roots.
Common Challenges and How to Overcome Them
Growing straw bale carrots comes with its share of challenges, but being prepared can help you enjoy a productive harvest. One common issue is the rapid decomposition of straw bales, which can cause them to sink or heat up, harming young seedlings. To prevent this, always pre-condition your bales with water and a gentle nitrogen source (like blood meal), and monitor the temperature before sowing.
Another frequent problem is drying out—since straw dries faster than soil, check moisture daily, especially during hot spells. Mulching the top with extra straw can help retain water. Weeds can sneak in, too, typically through wind-borne seeds or imperfect bales. Pull weeds promptly by hand and consider using a floating row cover for added protection.
Pests like slugs and carrot rust flies may try to feast on your crop; barriers such as copper tape for slugs or fine mesh for flies are effective deterrents. Diseases like root rot or fungal molds appear if bales stay too wet, so ensure good drainage beneath the bales and avoid overwatering.
Troubleshoot issues like slow growth by checking sunlight (carrots need 6-8 hours), soil fertility (add balanced fertilizer if needed), and ensuring the bales don’t get compacted. If your carrots are forked or misshapen, it’s often due to compacted straw, overcrowded seedlings, or leftover straw nodes. Thin your carrot seedlings to about 2 inches apart and break apart stubborn bale clumps as you plant.
With attentive care, most straw bale carrot challenges can be resolved, leading to a satisfying and healthy crop.
Harvesting Your Straw Bale Carrots
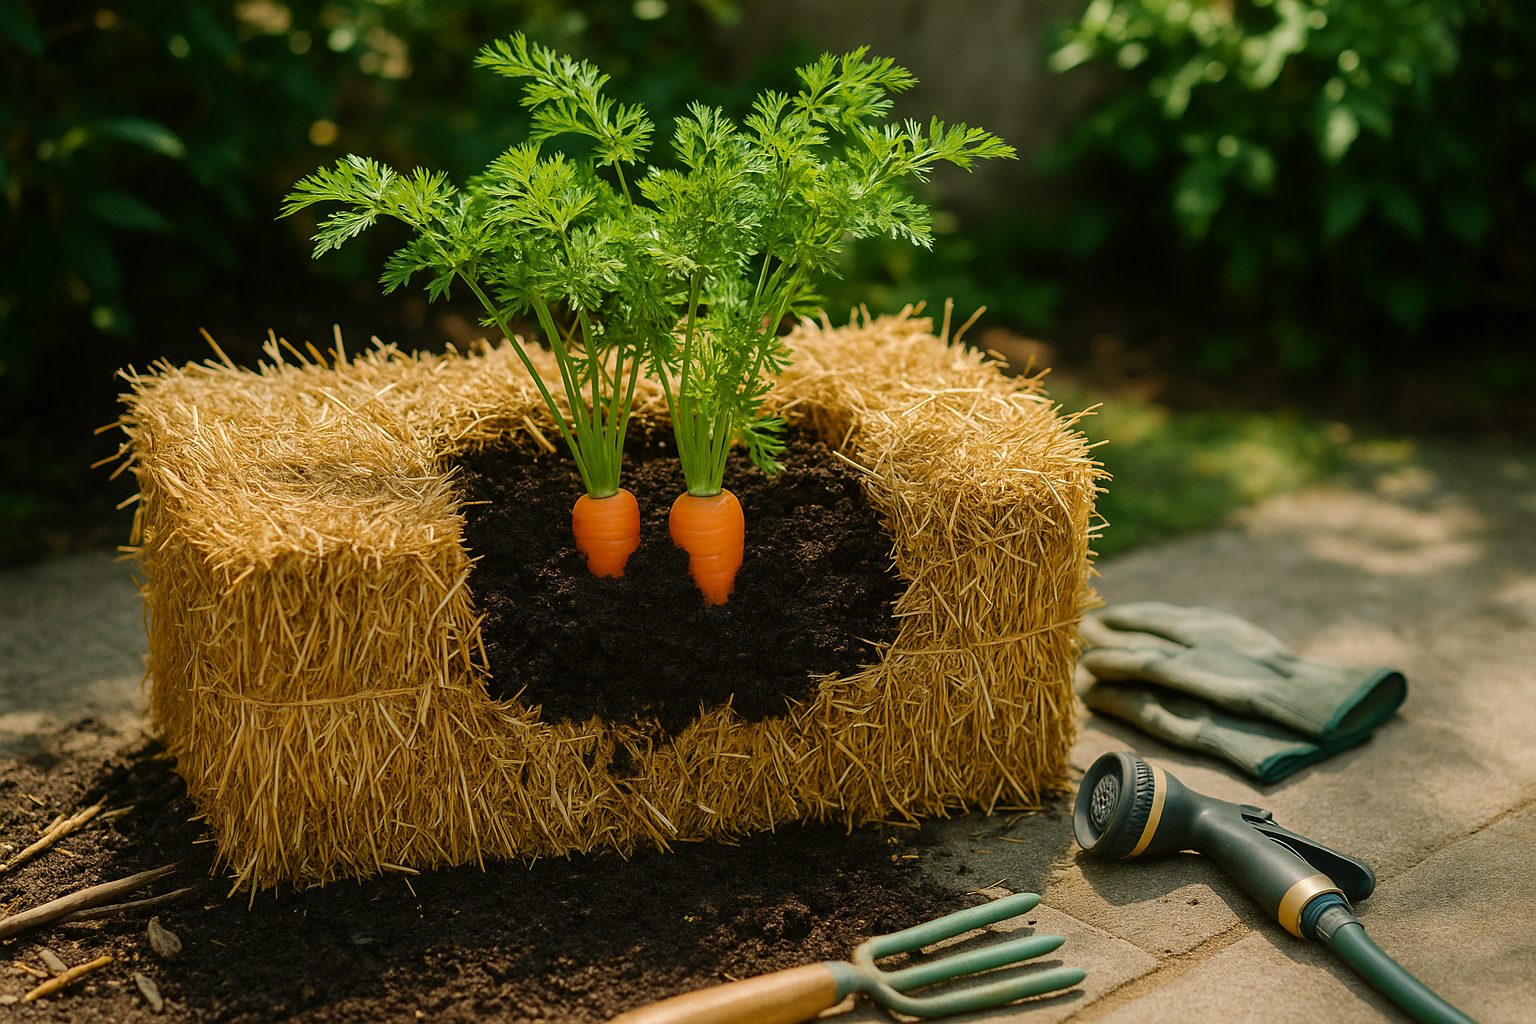
Knowing when your straw bale carrots are ready to pick is key to enjoying sweet, crisp roots. Usually, carrot tops turn a deep green, and the shoulder of the carrot—the part near the stem—will start to peek out above the straw. Depending on the variety, harvest time typically falls between 60 and 80 days after sowing.
To check maturity, gently brush aside the straw and inspect the exposed portion—if it’s about the diameter of your finger, it’s likely ready. When harvesting, avoid yanking the foliage; instead, loosen the surrounding straw with your hands or a small garden fork to prevent breaking the roots. Hold the carrot close to the base and pull steadily to lift it out with minimal damage.
Brush off excess straw, but don’t wash the carrots until you’re ready to use them—this helps preserve their freshness. For storage, keep unwashed roots in the refrigerator’s vegetable bin or in a cool, humid cellar. Alternatively, you can store them in a container filled with moist sand or sawdust to maintain moisture and crispness.
Freshly harvested straw bale carrots are perfect for snacking, roasting, or adding crunch to salads—enjoy their exceptional flavor within a few weeks for the best results.
Tips for Reusing and Recycling Your Straw Bales
Once your straw bale carrots are harvested, don’t let those bales go to waste—there are plenty of eco-friendly ways to repurpose them in your garden. Used straw bales make excellent compost material; just break them apart and mix them into your compost pile to boost organic matter. Another great option is using the straw as mulch around flower beds, fruit trees, or vegetable patches. This helps retain soil moisture and suppress weeds.
Spent bales can also serve as a base layer when creating new raised beds—simply top them with soil for a nutrient-rich foundation. After removing the bales, rake up any loose straw and remove debris and roots to prevent diseases from lingering in the area. If you plan to plant in the same spot next season, consider tilling the remaining straw into the soil to enrich it. By recycling your straw bales, you support a healthier and more sustainable garden year after year.