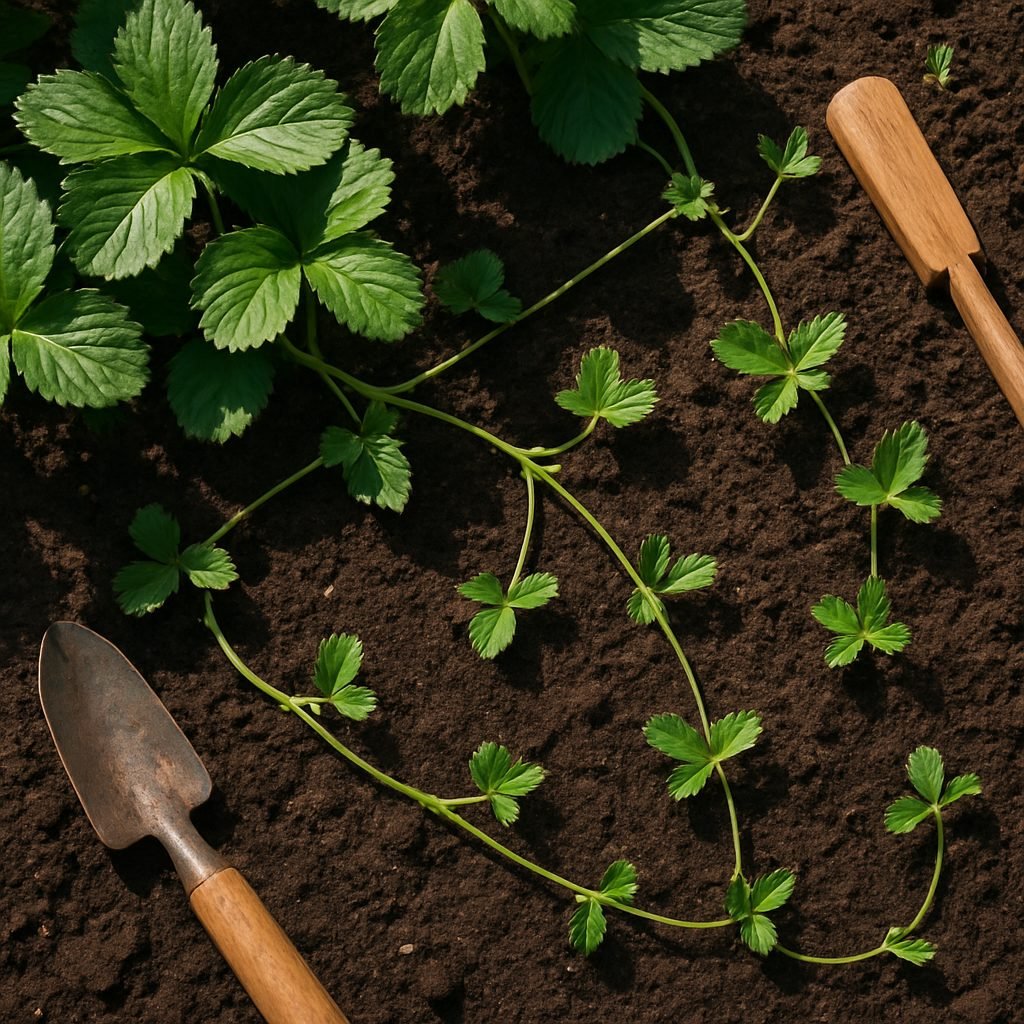
What Are Strawberry Runners?
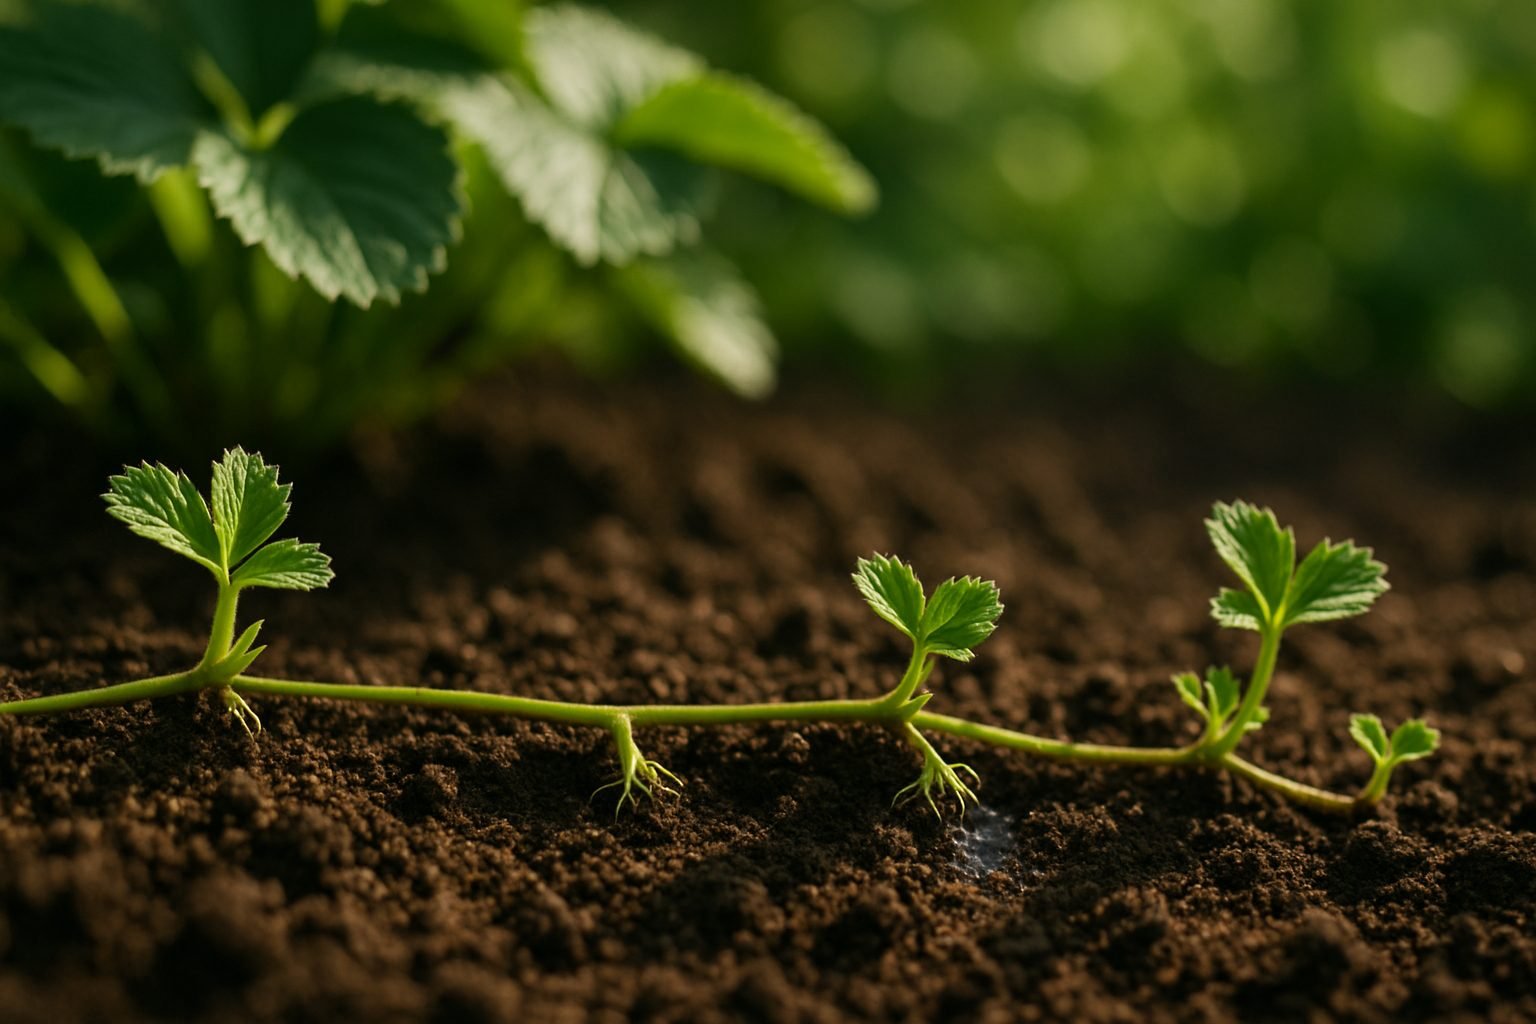
If you’re eager to expand your garden, learning how to propagate strawberries can be both rewarding and cost-effective. One of the simplest methods is by using strawberry runners. But what exactly are strawberry runners, and why are they fundamental for strawberry plant reproduction?
Strawberry runners are long, slender stems that emerge from the main strawberry plant, typically during the warmer months of late spring and summer. These runners trail along the soil surface, periodically forming small nodes. At these nodes, new baby plants—called “daughter plants”—begin to form. Over time, the runner roots itself into the soil at these nodes, allowing the daughter plant to establish independently while still receiving nutrients from the mother plant. This allows your strawberry patch to gradually expand with minimal effort on your part.
The lifecycle of runners is directly influenced by the age and health of your strawberry plant, as well as environmental conditions like sunlight and temperature. Most commonly, strawberries produce runners after their first fruiting season, when the plant channels its energy into reproduction rather than fruit production. This natural process is the plant’s own strategy for survival and spreading.
Using runners to propagate strawberries offers plenty of advantages. It’s an efficient way to clone healthy, productive plants, ensuring your new plants inherit the best traits of their parent. Plus, propagating from runners requires no special skills or expensive equipment—simply peg down the runner and wait for the daughter plant to root. This approachable method is how many home gardeners cultivate vigorous strawberry patches that yield sweet, abundant fruit season after season.
When & How to Harvest Strawberry Runners
The ideal time to harvest strawberry runners is in late summer or early fall, when plants are mature and actively producing these long, leafy stems. Aim to choose runners from mother plants that are at least one year old and show robust health—look for lush foliage and consistent berry production.
To identify healthy runners, examine each vine for nodes, which are small bumps where roots and leaves emerge. Opt for runners with at least two to three well-developed leaves and visible root nubs, as these have the highest chance of thriving on their own.
First, gently pin the selected runner down into a small pot filled with moist potting mix while it’s still attached to the parent. Allow it to root for two to three weeks; you’ll know it’s ready when you see strong roots peeking through the soil or when a gentle tug feels resistance.
To detach, use clean garden scissors or pruners to snip the runner about two inches away from the new plantlet, taking care not to damage the crown of the parent plant. Avoid removing more than a third of the runners at once to prevent shocking the original plant.
For best results, water thoroughly after transplanting and provide partial shade for a few days to help the new plants settle in. Remember, patience is key—it’s better to wait until runners have a healthy root system rather than rushing and risking weak transplants.
Preparing Runners for Planting
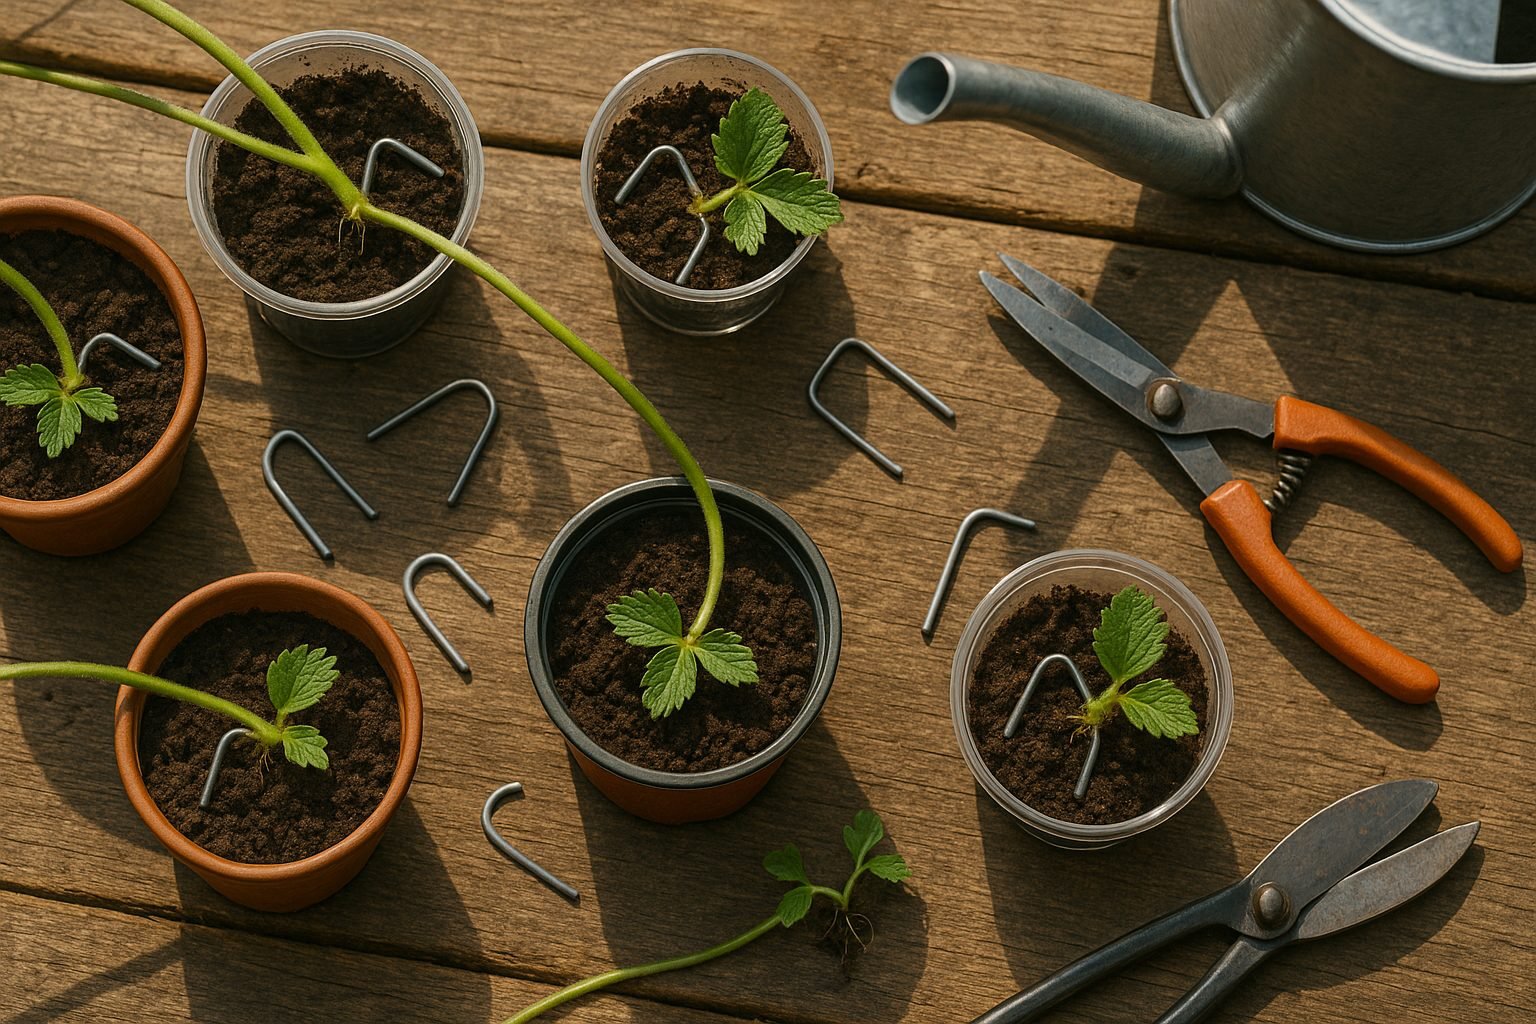
When preparing strawberry runners for planting, it’s important to let them develop strong, healthy roots while still attached to the parent plant. Start by selecting sturdy, disease-free runners and gently guiding them toward the spot where you want them to root.
You can peg the runner nodes—these are the points where leaves emerge—into small pots filled with moist, well-draining soil using U-shaped garden staples, popsicle sticks, or bent pieces of wire. Make sure the runner’s node is firmly in contact with the soil, as this is where new roots will form.
Keep the soil consistently damp, but not soggy, and place the pots next to the parent plant to keep things organized. Some gardeners prefer using small plastic cups with drainage holes or seedling trays as convenient alternatives to pots.
Over the next few weeks, watch for signs that the runner is rooting, such as fresh leaf growth, resistance when you gently tug on the runner, and visible roots at the bottom of the pot or soil.
Once your runner has established a healthy root system—usually after four to six weeks—it’s safe to snip the stem connecting it to the parent plant. Be sure not to rush this process, as underdeveloped runners may struggle once separated.
By taking the time to carefully peg down and nurture strawberry runners, you give them a much better chance of thriving in their new home.
Planting Strawberry Runners in Pots or Beds
Transplanting strawberry runners is a great way to expand your patch or start new plants. You can do this in either pots or directly in garden beds, depending on your space and preferences.
To start, gently detach the runner from the mother plant once it has developed a few roots about 2 to 4 inches long.
Planting in Pots
Choose a container at least 8 inches deep with good drainage holes. Fill it with a rich soil mix made by blending equal parts potting soil, compost, and a handful of perlite to boost drainage and nutrients.
Planting in Garden Beds
Select a sunny spot with slightly acidic, well-draining soil amended with compost or well-rotted manure. Space each runner 12-18 inches apart to avoid overcrowding and encourage airflow, which reduces disease risk.
Bury the roots so the crown (where leaves emerge) sits at soil level. Water thoroughly after planting, and keep the soil consistently moist but not soggy—strawberries don’t like wet feet.
Sunlight and Positioning
Position your pots or beds where the plants will receive at least 6-8 hours of sunlight daily for the best fruit production.
- Pots: Offer flexibility since you can move them to chase the sun or protect from frosts, but they might dry out faster and need more frequent watering and feeding.
- Beds: Can handle larger patches and may yield more berries, but are less mobile and can be harder to protect from pests.
Either way, mulching around your plants helps retain moisture and keeps fruit cleaner. Regularly remove any weeds, and check on your plants every few days, especially during hot, dry spells.
Whether in pots or beds, giving your strawberry runners the right start will reward you with sweet, homegrown berries as the plants mature.
Aftercare and Troubleshooting
After planting, getting your new additions off to a strong start is all about attentive aftercare. In the first few weeks, keep the soil consistently moist but not soggy—water early in the morning to allow foliage to dry and help prevent disease.
For sun-sensitive plants, use temporary shade such as garden fabric or even an old bedsheet during unusually hot afternoons. Mulch around the base to retain moisture and reduce weeds, but keep the mulch a couple of inches away from the stem to avoid rot.
Check your plants daily for signs of wilting, which often means they need more water, or for yellowing leaves, which could indicate overwatering or transplant shock. If you spot holes in leaves or tiny insects, treat pests early with a gentle soap spray or remove them by hand.
Slow or stunted growth might signal compacted soil—lightly loosen the surface or consider a light feeding with a balanced, slow-release fertilizer about three weeks after planting. Avoid over-fertilizing, as too much can burn young roots.
Encourage healthy establishment by holding off on heavy pruning, keeping the area weed-free, and supporting delicate stems with stakes if needed. Regular check-ins, good watering habits, and quick action can make all the difference in helping your plants thrive.
Frequently Asked Questions About Strawberry Runners
Most strawberry varieties—especially June-bearing and everbearing types—propagate efficiently by runners, those long, thin stems that creep across the soil to form new baby plants. Day-neutral strawberries also produce runners but usually a bit less vigorously. On average, a healthy mother plant can send out 5 to 10 runners during the growing season, each with its own potential to root and grow into a new, fruit-producing plant.
After planting a runner and letting it root, you can typically expect a modest harvest the following year, although full, bountiful fruiting usually happens by the second year. Beginners sometimes mistakenly let too many runners grow, which strains the mother plant and leads to smaller berries—limit runners to 2-3 per plant for stronger, more productive offspring.
Another common error is planting runners too deeply; make sure the crown (where the leaves meet the roots) sits just above the soil surface to prevent rot. Remember to keep the soil consistently moist and weed-free, and pinch off any flowers that appear on new runners in the first season to help them channel energy into strong root development for an even better crop next year.