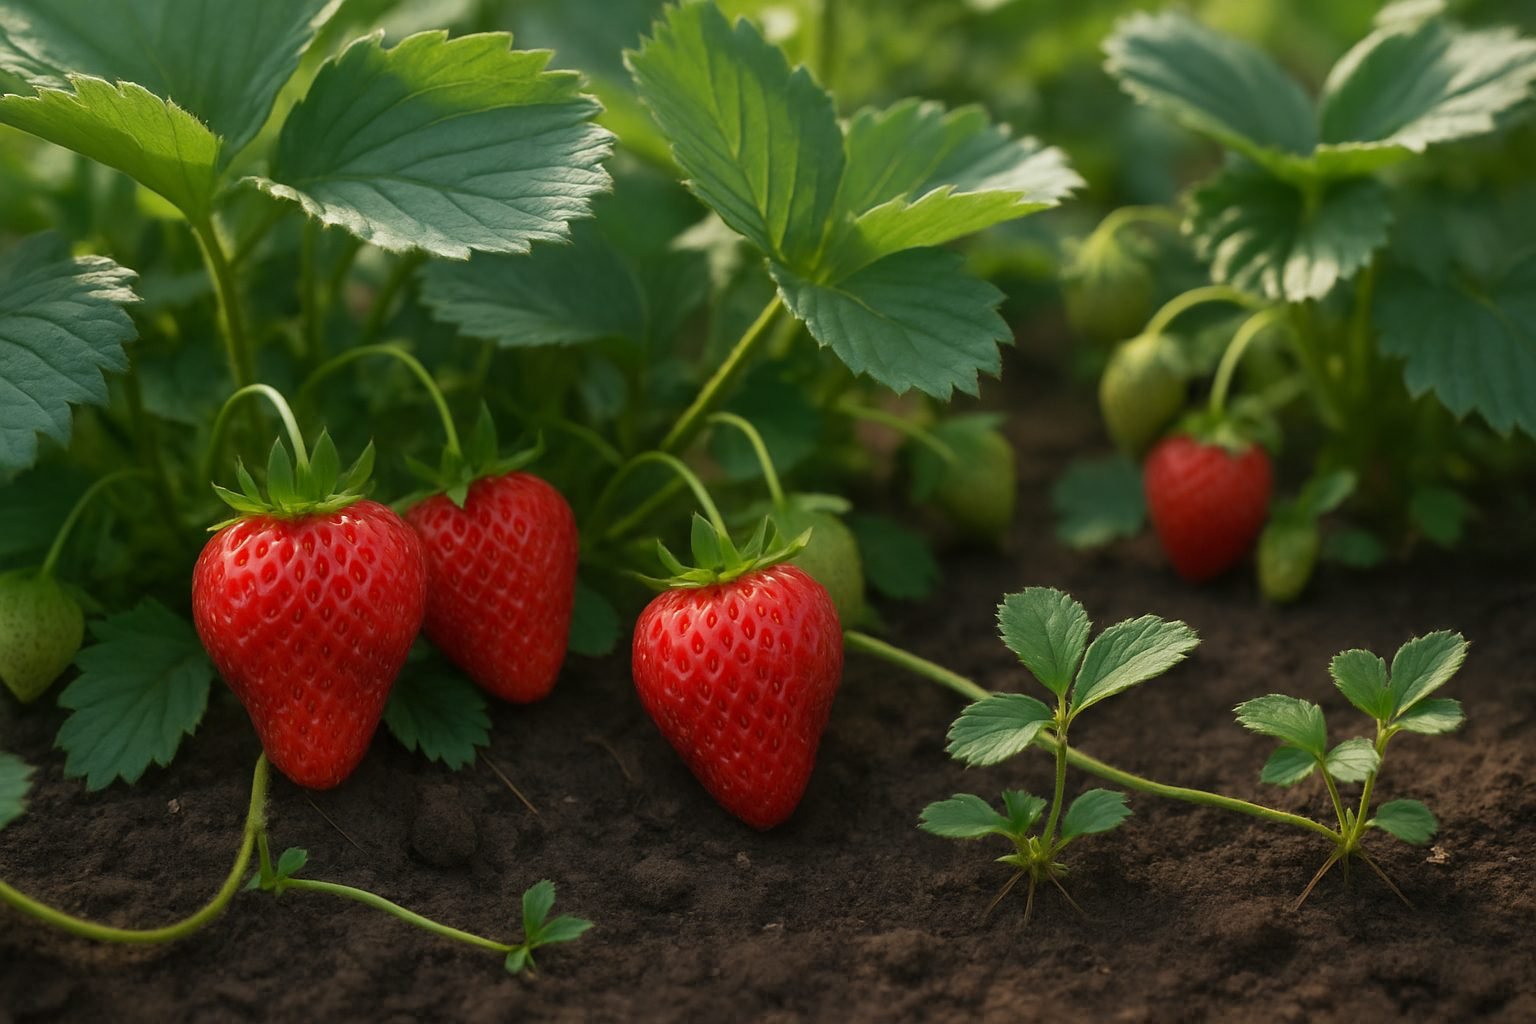
Understanding Strawberry Propagation
Dividing strawberry plants is one of the most rewarding ways to expand your berry patch and keep your strawberries healthy and productive. While strawberries can be grown from seed, most home gardeners find that using runners or dividing mature crowns is much more effective.
Seeds can be unpredictable and slow to produce fruit, but runners—those long stems sprouting from the mother plant—naturally root and develop into new, identical plants. Division, which involves carefully splitting older, crowded clusters of strawberry crowns, rejuvenates aging plants and encourages more vigorous growth.
For backyard growers, these methods mean you can create new plants for free instead of buying seedlings each year. Not only does propagating your own strawberries save money, but it also helps you maintain strong, disease-resistant plants adapted to your garden’s unique conditions.
By understanding how to propagate through runners or division, you’ll enjoy bigger harvests and robust, long-lived strawberry beds with just a bit of hands-on care—something every strawberry lover can appreciate.
Growing Strawberries From Seeds
Growing strawberries from seeds is a rewarding project, especially if you enjoy experimenting with unique varieties not often found in nurseries. You can purchase strawberry seeds online, from gardening stores, or occasionally harvest them by gently scraping seeds from fresh, organic berries.
Unlike planting starter plants, starting strawberries from seeds takes patience—germination and fruiting take longer, sometimes even a full year until you see berries. One big perk is being able to choose rare or heirloom types, making it a fun option for gardeners who like a challenge. However, downsides include slower growth, and seed-grown strawberries might not always grow true to the parent plant, leading to unpredictable fruit size or flavor.
To boost your success, start seeds indoors about 8-10 weeks before your last frost date. Strawberries usually need “stratification”—an artificial winter—to sprout reliably. Place seeds in a damp paper towel, seal in a plastic bag, and refrigerate for 2-3 weeks before sowing.
Then, sprinkle the seeds on top of moist seed-starting mix; they need light to germinate, so don’t cover them. Place trays in a warm spot with indirect sunlight or under grow lights, and mist gently to keep the soil barely damp.
With patience and care, you’ll soon have seedlings ready to transplant outdoors after the threat of frost has passed, and the satisfaction of growing your own strawberries from start to finish.
Propagating Strawberries from Runners
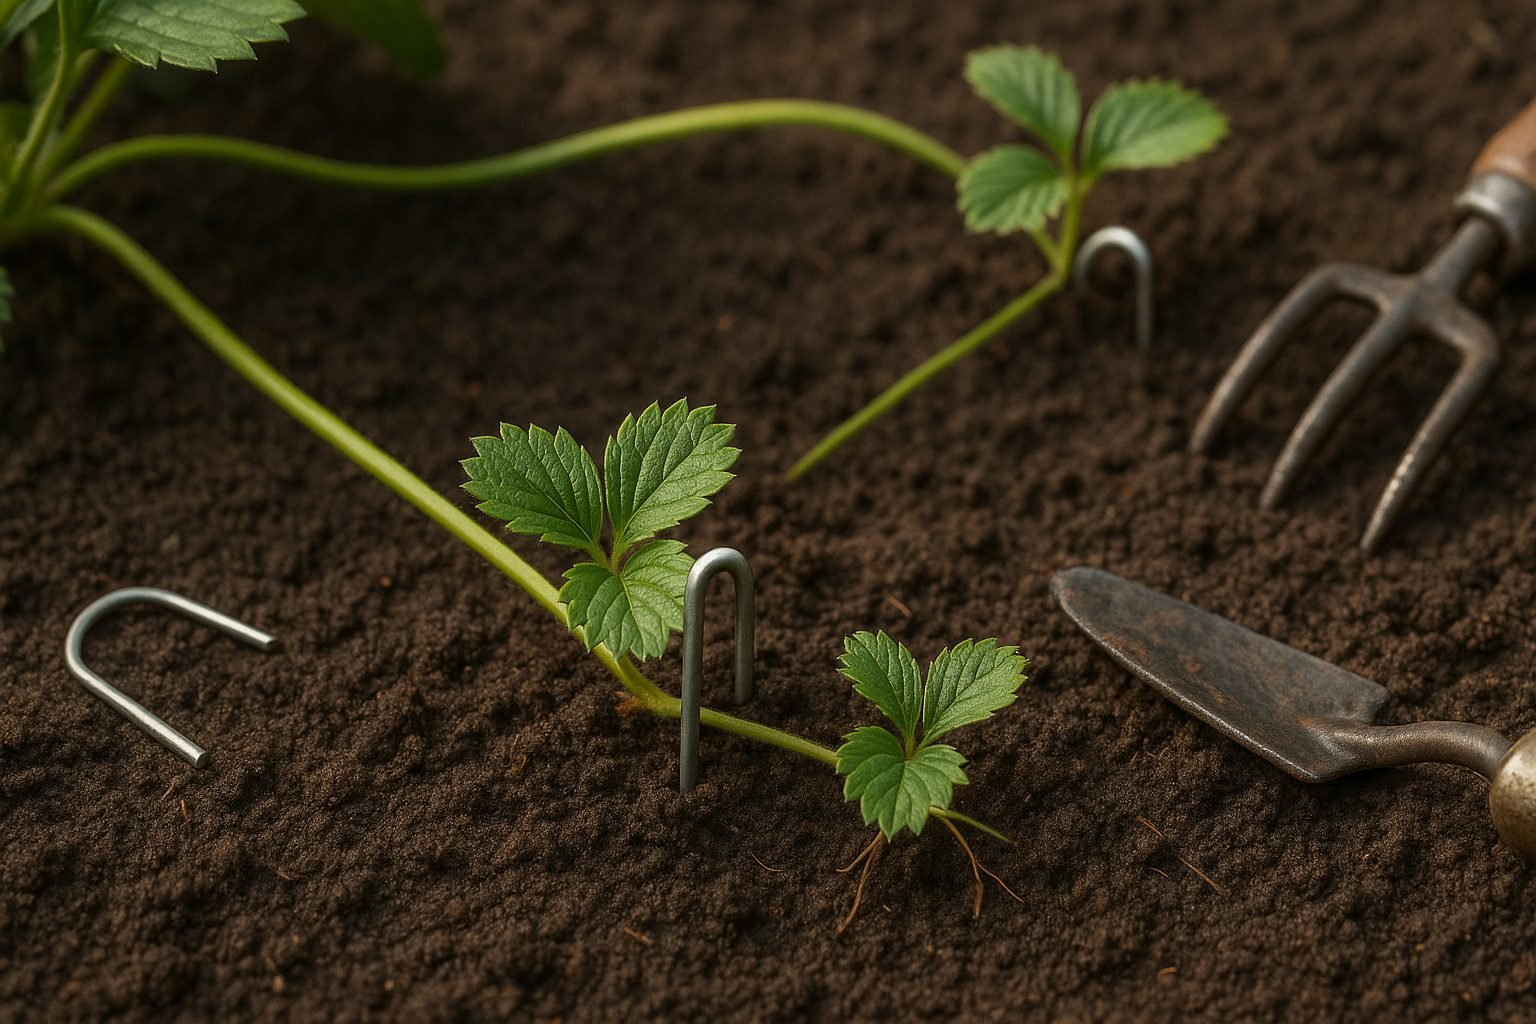
Strawberry plants are nature’s little propagators—each season, they send out long, slender stems called runners, which touch the soil and produce small plantlets. To multiply your patch, let a healthy mother plant generate runners, then pick the strongest, disease-free offshoots for propagation.
Once you spot plantlets forming, gently press or “pin” each one onto loose, moist soil using a U-shaped piece of wire or even a bent paperclip to keep it stable and encourage root growth. Aim for about 6–8 inches between each runner so they have enough room to develop full root systems.
Leave them attached to the mother until their roots are clearly established—usually two to four weeks—watering regularly but not saturating. When roots are an inch or more long and the little plant stands firm when you give it a gentle tug, it’s time to snip the stem connecting it to the mother plant and relocate the new strawberry start to its permanent spot.
Late summer to early fall is ideal for this process, as the weather is mild, giving new plants ample time to establish before winter. Always select runners from vigorous, productive plants, avoiding any from weak or disease-prone stock.
To avoid overcrowding and maximize fruit production later, leave at least 12–18 inches between new plants when transplanting. With a bit of attention and careful spacing, you’ll transform a single plant into a thriving strawberry bed, ensuring plenty of berries for seasons to come.
Dividing Mature Strawberry Plants
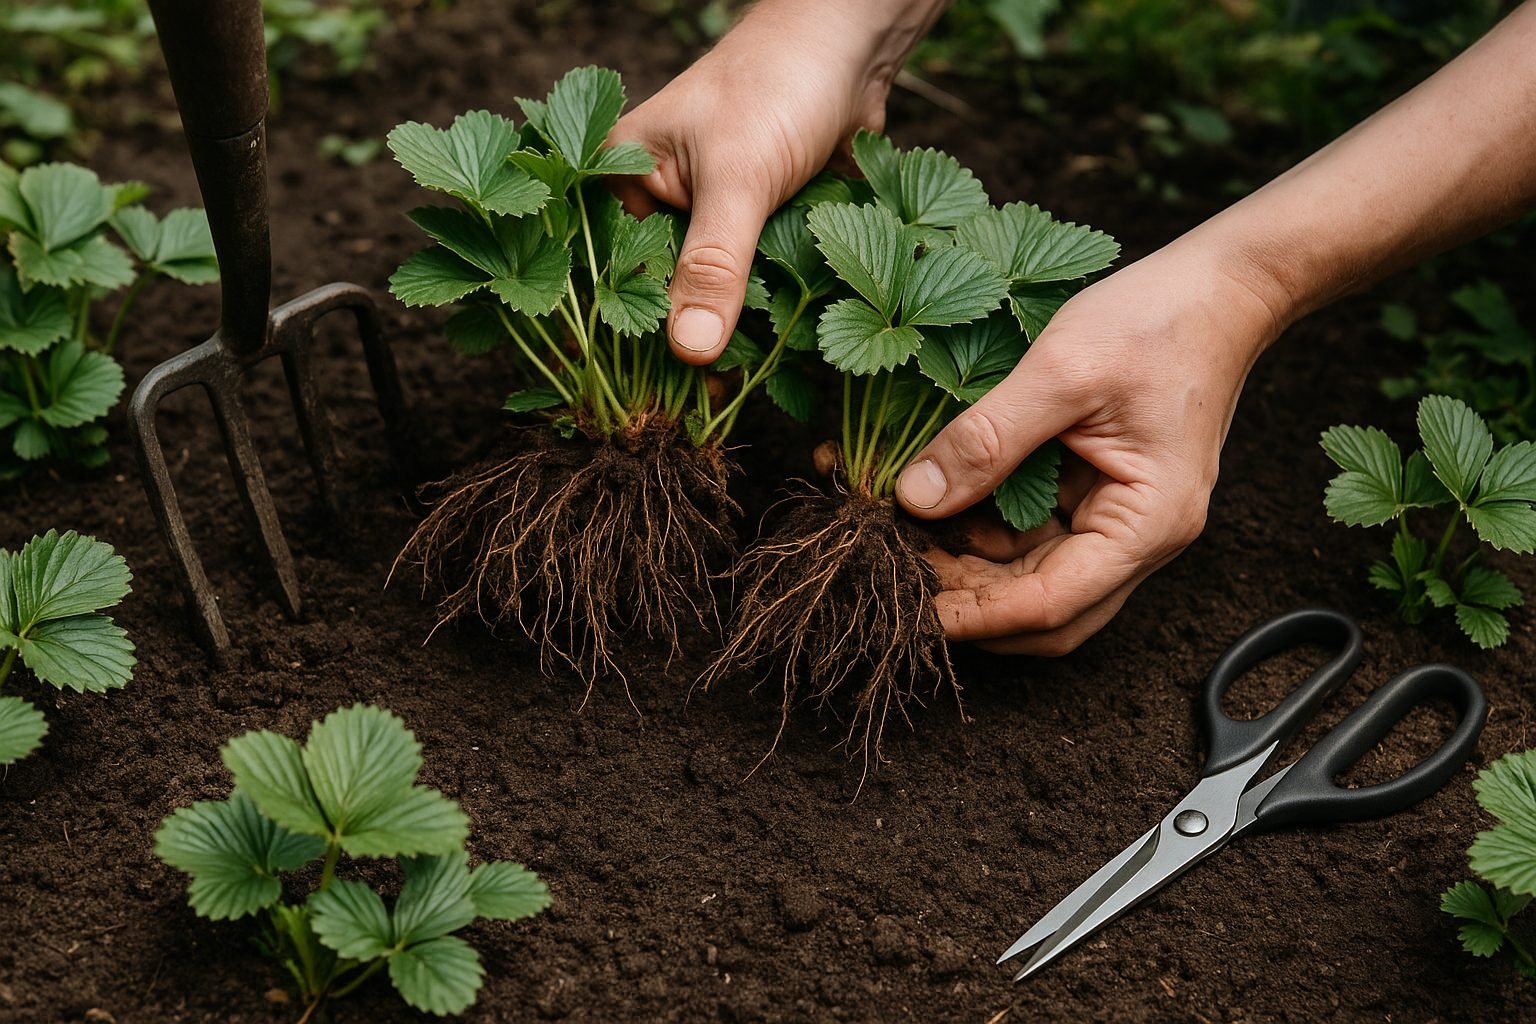
Dividing mature strawberry plants is a simple gardening technique that involves digging up existing plants, gently separating the rooted crowns, and replanting them to rejuvenate your strawberry bed. Over time, older strawberry beds can become crowded and less productive as plants compete for nutrients and space.
By dividing and replanting the healthiest portions of your original plants, you encourage vigorous growth, better fruit yields, and can expand your patch without purchasing new starts.
How to Divide Strawberries
Start by choosing a cool, cloudy day or working in the early morning to prevent stress. Use a garden fork to carefully lift the clump of connected plants from the soil, taking care to sever as few roots as possible. Shake off excess soil and identify crowns—the central growing points with healthy roots attached.
Using clean, sharp scissors or a knife, separate the crowns so that each division has its own roots and at least one leafy shoot. Replant each crown immediately, spacing them about 12–18 inches apart in a well-prepared, fertile bed.
Aftercare Tips
- Water the newly planted strawberries thoroughly and keep the soil consistently moist, but not soggy, for the first few weeks.
- Shield them with a bit of mulch to help retain moisture and suppress weeds.
- Regularly remove old leaves or damaged runners to promote healthy growth.
With a little ongoing care, your divided strawberry plants will quickly settle in, sending out new roots and leaves—ready to reward you with a bumper crop in the next season.
Aftercare and Encouraging a Successful Harvest
Once you’ve successfully propagated your plants, giving them the right aftercare is key to ensuring strong growth and a healthy future harvest. Start by keeping the soil moist but not soggy, watering gently to encourage young roots without washing them away—check the top inch of soil and water when it feels dry.
Applying a layer of organic mulch, like straw or shredded leaves, will help lock in moisture, keep roots cool, and suppress weeds. Watch for common pests such as aphids or slugs, and use simple barriers or natural solutions like neem oil to protect your young plants.
About a month after propagation, begin feeding with a balanced, slow-release fertilizer to support robust root and shoot development. Expect most fruiting plants to take one to three years to bear their first significant harvest, depending on the species and growing conditions.
To maximize your future yields, follow these steps:
- Thin out overcrowded seedlings early.
- Prune mature plants to improve airflow.
- Pollinate flowering plants by hand if natural pollinators are scarce.
With consistent care and patience, you’ll set up your new plants for a bountiful—and rewarding—harvest season.