Introduction to Garlic Growing Stages
garlic growth stages are the secret behind those plump, flavorful bulbs you love adding to your favorite dishes. Garlic isn’t just a staple in kitchens across the globe—it’s also valued for its remarkable health benefits, from immune support to heart health. But whether you’re a backyard gardener or a small-scale farmer, understanding garlic growth stages is key to maximizing your harvest and ensuring top-notch quality.
Each phase—starting from careful clove selection and planting, through the crucial periods of sprouting, leafy growth, bulb formation, and the essential drying and curing—plays a unique role in the plant’s development. If you’ve ever wondered why some garlic heads turn out smaller or less robust than expected, the answer often lies in timing your care perfectly for each stage.
In this article, we’ll walk you through every step of the garlic life cycle. You’ll discover what to look for as your garlic matures, learn tips for common troubleshooting issues, and get advice on everything from soil preparation to drying after harvest. By the end, you’ll have the knowledge you need to confidently guide your garlic from a simple clove to a fully seasoned, aromatic bulb ready for your pantry—or your next culinary masterpiece.
Whether you’re a beginner or looking to refine your technique, understanding these stages will set you up for garlic-growing success.
Choosing and Preparing for Planting
When deciding which type of garlic to grow, start by understanding the differences between hardneck and softneck varieties. Hardneck garlic, known for its robust flavor and easy-to-peel cloves, thrives in cooler climates—think northern states or regions with harsh winters. It also produces edible flower stalks, called scapes, which are a culinary bonus.
Softneck garlic, on the other hand, prefers mild winters and tends to grow best in southern regions. This type stores longer, making it ideal if you want fresh garlic on hand for months.
Once you’ve picked the right type for your area, focus on preparing your planting site. Garlic loves well-drained, fertile soil in a sunny spot. Before planting, check for compacted earth and consider rotating crops if garlic or onions were grown there last season to prevent disease. Test your soil’s pH, aiming for a slightly acidic to neutral range (6.0–7.0).
Amend heavy clay with compost or well-rotted manure to boost drainage and nutrients, and mix in a slow-release organic fertilizer if the soil is lacking key minerals like phosphorus or potassium.
The ideal time to plant garlic is in the fall, about 4–6 weeks before the ground freezes; this allows the cloves to establish roots without sprouting aboveground. If you missed the fall window, early spring planting is possible, though the bulbs may be smaller.
For the healthiest crop, purchase high-quality seed garlic from reputable garden centers or seed companies—avoid grocery store bulbs, which are often treated to prevent sprouting and may carry diseases. Look for firm, plump, and unblemished cloves, and avoid any with mold or soft spots.
By carefully choosing the right garlic type, preparing nutrient-rich, well-drained soil, and sourcing premium seed cloves, you set the stage for a rewarding harvest of flavorful bulbs.
Planting Garlic: Step-by-Step Guide
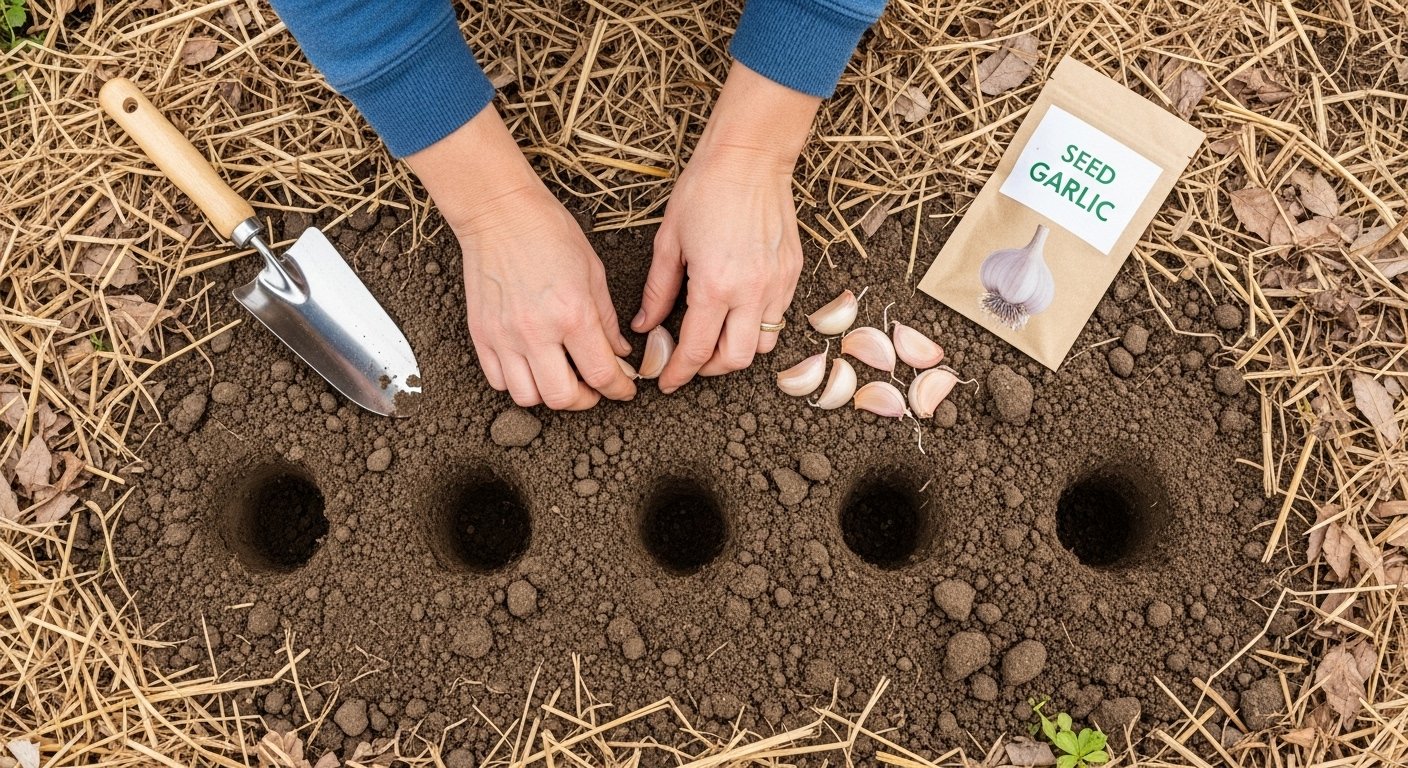
Planting garlic is a simple process that pays off with a bountiful harvest, but a few key steps can make all the difference. Start by choosing healthy, firm garlic bulbs—avoid any with mold or soft spots.
Break the bulbs apart carefully, keeping the papery skins on each individual clove. Plant cloves with the pointed end up and the root side down; this ensures the green shoot pushes up through the soil.
Set cloves about 2 inches deep and space them 4–6 inches apart in rows that are at least a foot apart, giving each plant room to grow and preventing competition for nutrients.
In most climates, plant garlic in the fall, a few weeks before the ground freezes—this allows roots to establish before winter dormancy. If you live in a mild winter zone, you can also plant in early spring as soon as the soil can be worked, though yields may be smaller.
Always select a well-drained spot with loose, rich soil, as garlic dislikes soggy conditions; raised beds or mounded rows work great.
Mulch the bed with straw or chopped leaves to insulate cloves and suppress weeds, and water sparingly at first—overwatering can cause rot.
Avoid planting garlic in the same spot where onions or other alliums grew last year, as this reduces the risk of disease buildup.
Don’t forget to label your rows, so you remember the variety and planting date.
With attention to these details—right depth, spacing, timing, and soil conditions—you’ll give your garlic the best start for robust growth and strong bulbs come harvest time.
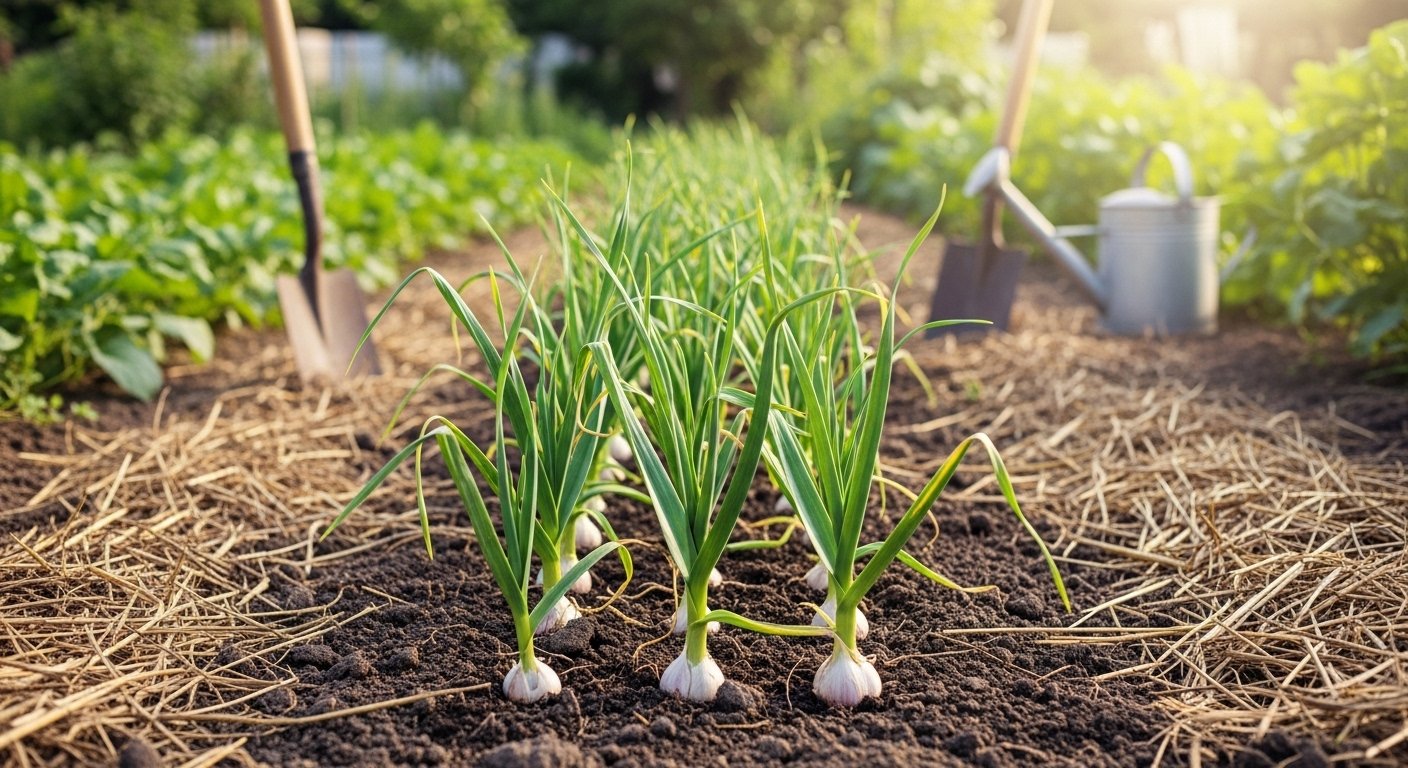
Early Growth and Care: From Germination to Leafy Growth
Garlic’s journey begins with germination, typically starting within one to three weeks after planting cloves in cool, moist soil. As temperatures hover between 32°F and 50°F (0°C–10°C), roots take hold and slender green shoots push upward. During this crucial period, keeping the soil consistently moist—but never soggy—is key. A simple rule is to water deeply once per week, adjusting based on rainfall and ensuring the top few inches stay damp.
As leaves begin to develop, usually within two to four weeks of germination, they’re highly sensitive to stress. To support healthy growth, lightly fertilize with a nitrogen-rich product—like fish emulsion or blood meal—every two to three weeks, but avoid over-fertilizing, which can cause tender foliage to burn. Mulching is another smart move: spread a two to three-inch layer of straw or shredded leaves around the garlic soon after shoots emerge. This helps retain moisture, suppress weeds, and insulate young roots from drastic temperature swings.
However, early growth stages aren’t without challenges. Weeds compete fiercely for nutrients and water, often overtaking slow-sprouting garlic if not pulled promptly by hand or with a hoe. To prevent pest outbreaks, regularly inspect young leaves for signs of onion maggot or aphid damage; floating row covers can offer extra protection, especially in the first weeks. Also, avoid overhead watering to keep leaves dry, since excess moisture invites fungal diseases.
By combining regular checks, careful watering, gentle feeding, and proactive mulching, you can give your garlic the strongest start—leading to robust, leafy growth and a plentiful harvest down the line.
Bulb Development and Maturation
As garlic plants progress through their life cycle, a key transition occurs when the focus shifts from producing leafy growth to developing the underground bulb—the part we harvest and eat. This change typically happens as daylight hours increase and the plants mature in mid to late spring, prompting energy to be redirected from the leaves into bulb swelling below the soil.
You’ll notice the lower leaves may begin to yellow or die back slightly as the bulbs start forming; this is normal and signals that the plant is reallocating resources. Healthy bulb development is marked by firm, plump bulbs with tight, intact wrappers, and lush green upper leaves that gradually reduce their growth.
Conversely, warning signs such as soft or shriveled bulbs, persistent white spots, or a strong, foul odor from the soil can indicate issues like rot, fungal diseases, or pest infestations.
Keep an eye on soil moisture—garlic prefers evenly moist but not soggy conditions, so adjust watering depending on rainfall, and avoid overhead irrigation to reduce disease risk. Mulching with straw can help regulate soil temperature and moisture while minimizing weeds that compete for nutrients.
Mid-season is also a great time to gently loosen compacted soil around the plants, being careful not to disturb the bulbs, which can encourage more robust expansion.
By closely observing changes in leaf color, soil moisture, and bulb appearance, you can spot problems early and make timely adjustments, ensuring your garlic crop develops into full, flavorful bulbs ready for harvest.
Harvesting and Curing Garlic
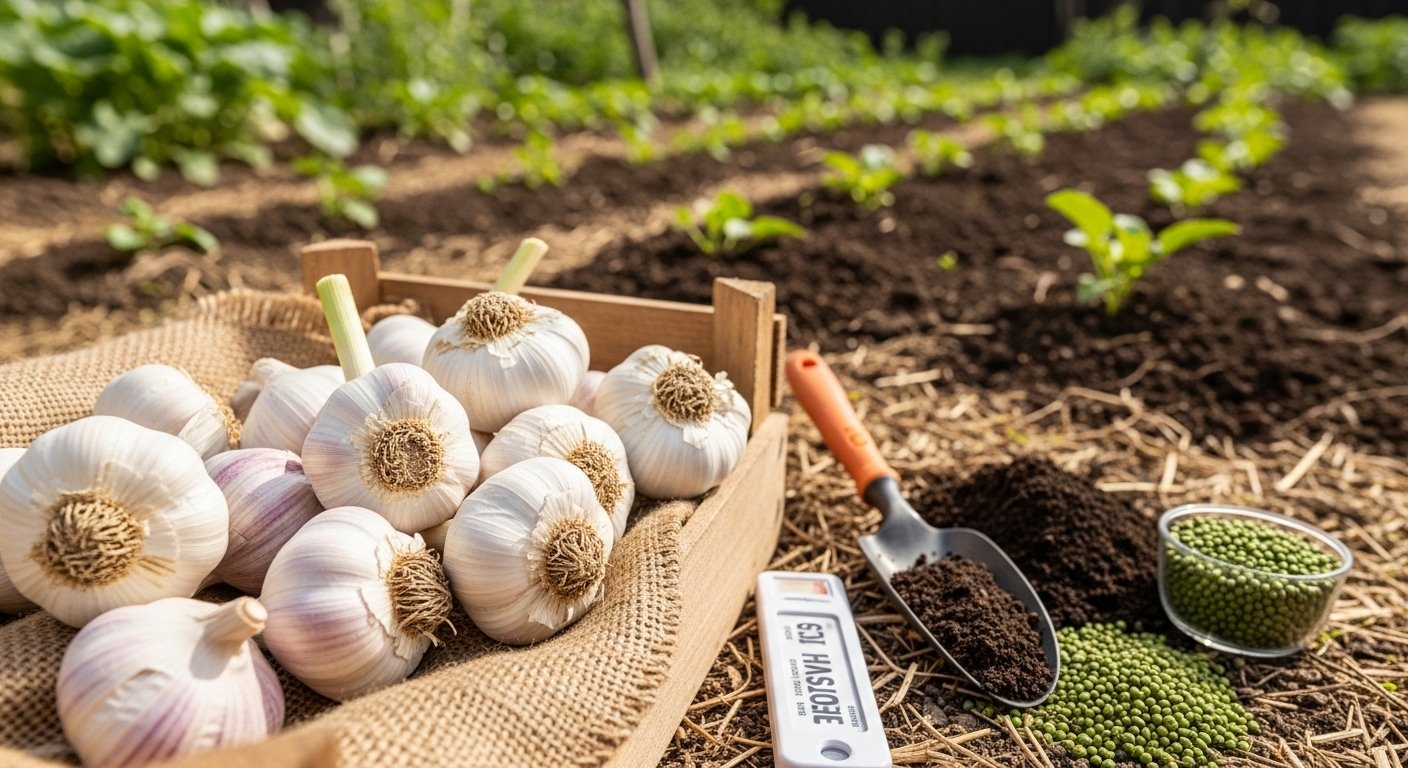
Knowing when to harvest garlic is key to getting bulbs that store well and taste great. Watch for physical signs—the green leaves will start to yellow from the bottom up, but the upper third should still be green. Check the bulbs by gently brushing back some soil; mature garlic will have plump cloves with tight, papery skins.
To harvest, avoid pulling the bulbs by the stems, as this can cause bruising. Instead, use a garden fork to loosen the soil a few inches away from each bulb, then lift it out gently by hand. Shake off excess dirt but don’t wash the bulbs; moisture can encourage rot.
Once all the bulbs are out, it’s time to cure them. Lay the garlic out in a single layer, or tie them in small bunches and hang them upside down in a well-ventilated, dry, and shaded spot like a garage or shed. Leave the outer skins, roots, and stems intact, as they help protect the bulbs during this process.
Curing usually takes two to three weeks—garlic is ready when the skins are dry and papery. After curing, trim the roots close to the bulb and cut the stems about an inch above the bulb, unless you want to braid softneck garlic for storage.
Store your cured bulbs in a cool, dry place with good airflow, such as mesh bags or open baskets, avoiding plastic bags that trap moisture. Properly harvested and cured garlic can last for months, so you’ll have homegrown cloves ready whenever you need them in the kitchen.
Storing Garlic and Troubleshooting Problems
Storing garlic properly not only extends its shelf life but also preserves its flavor and prevents waste. For long-term storage, keep bulbs unpeeled in a well-ventilated, cool, and dry spot. Braiding and hanging them in mesh bags works well for softneck varieties, while hardnecks do best in open baskets.
Avoid refrigeration, as it can trigger unwanted sprouting; instead, aim for temperatures around 60°F (15°C) with low humidity. Periodically check your stored garlic for soft spots or mold, and promptly remove any affected bulbs to prevent the spread.
Common Problems and Solutions
- Diseases: Issues like white rot and downy mildew often result from overly wet conditions. Practice crop rotation and avoid planting garlic in the same soil two years in a row.
- Pests: Onion maggots can be deterred by using row covers and promptly removing plant debris after harvest.
- Poor Bulb Development: Usually caused by late planting or overcrowding. Plant cloves in loose, fertile soil with enough space between them, and water moderately, especially as bulbs form.
Don’t get discouraged if you hit a setback; every season offers a chance to learn. For deeper dives into troubleshooting or advanced techniques, check out university extension sites, gardening forums, or books like The Complete Book of Garlic by Ted Jordan Meredith.
With the right storage habits and a little perseverance against common issues, you’ll enjoy homegrown garlic year-round!