Introduction to Growing Garlic in Pots
If you’ve ever searched for the best soil for garlic, you’re probably eager to unlock the secret to growing plump, flavorful bulbs—even if you don’t have a huge backyard. One of the most satisfying things about growing garlic in pots is that it lets you cultivate this kitchen staple right on your balcony, patio, or sunny windowsill. Whether you’re an urban gardener or simply short on space, container gardening for garlic means you can skip the sprawling garden beds and still enjoy homegrown cloves that elevate everything from stir-fries to salad dressings.
Garlic isn’t just a dinnertime essential—it’s surprisingly easy to grow, even for beginners. By controlling the potting environment, you minimize pests, keep weeds at bay, and can experiment with specialty varieties often missing from grocery stores. Plus, there’s a special thrill in harvesting your own garlic and slicing it fresh into soups, sauces, or your next homemade pizza.
In this article, we’ll break down exactly how to choose the best soil for garlic in containers. You’ll discover the key ingredients for a nutrient-rich, well-drained mix, practical tips for planting and maintenance, and guidance on when and how to harvest your container crop. Whether you have a small balcony or a sunny kitchen ledge, you’ll see why growing garlic in pots is not only possible—it’s addictively rewarding for cooks and gardeners alike.
Choosing the Right Garlic Variety and Container
When starting your garlic-growing journey in containers, it’s crucial to understand the differences between softneck and hardneck garlic, as each brings its own benefits.
Softneck garlic, known for its flexible stems and numerous cloves, thrives in milder climates and typically stores longer—up to 9 months—making it a great choice for those who want garlic on hand year-round. Its flavor tends to be milder and less complex than hardneck varieties.
Hardneck garlic, meanwhile, grows better in colder climates and produces fewer but larger cloves, along with flavorful edible stems called scapes in spring. Its bolder, spicier taste and shorter storage life—usually around 4-6 months—appeal to garlic lovers seeking rich flavor.
For container gardening, softneck varieties like California Early or Inchelium Red are popular picks due to their adaptability and storage capabilities. If you have chilly winters and crave that robust garlic kick, try hardneck types such as Music or German Extra Hardy.
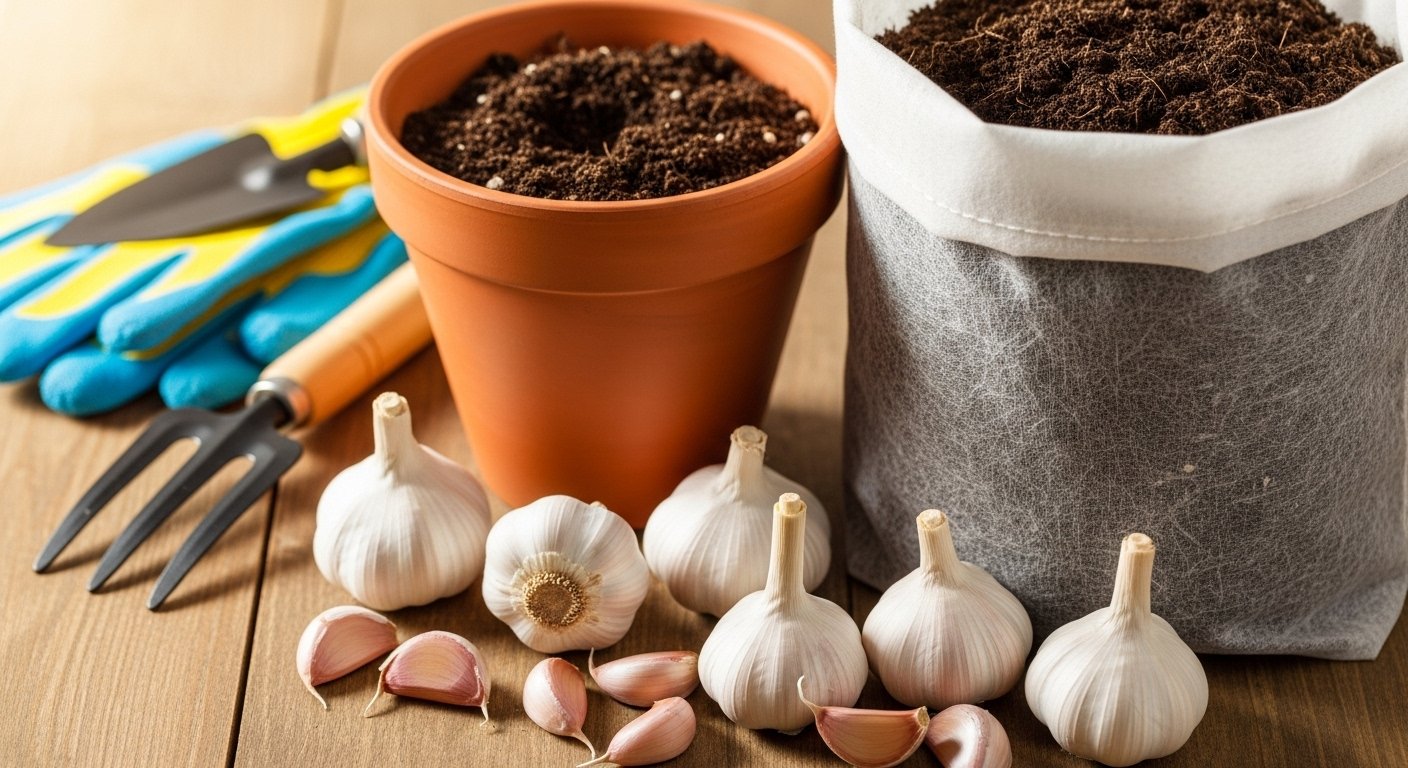
When it comes to selecting a pot, opt for one that’s at least 12 inches deep and wide to allow ample room for root development and proper clove spacing. Terracotta or other breathable materials are ideal as they prevent excess moisture that can lead to rot. Make sure your container has at least one good drainage hole—pro tip: add a layer of gravel at the bottom for extra drainage insurance.
Place your pot in a sunny spot and water when the soil feels dry a couple of inches below the surface. With the right garlic type and a well-prepped container, you’ll set yourself up for a bountiful harvest—even on a small patio!
Optimizing Potting Mix and Garlic Nutrition
Growing garlic successfully in containers starts with choosing or creating the right potting mix. Garlic bulbs need loose, well-drained soil with plenty of organic matter—aim for a texture that feels crumbly but holds together when squeezed (like a moist chocolate cake).
To boost drainage and avoid soggy roots, look for commercial potting mixes labeled “well-draining,” or blend your own with equal parts high-quality compost, coconut coir or peat moss for moisture retention, and perlite or coarse sand for drainage. Store-bought mixes are convenient, but adding a few handfuls of worm castings or well-rotted manure can make a big difference in nutrition.
If you’re mixing your own, steer clear of heavy garden soil, which compacts in pots and suffocates garlic roots. Garlic is a heavy feeder, so organic fertilizing is key—start by mixing a slow-release organic fertilizer (such as bone meal or a balanced granular feed) into the soil before planting.
For ongoing nutrition, side-dress with compost or apply a liquid seaweed or fish emulsion every four weeks during active growth, tapering off as bulbs begin to form (about mid-spring). These steps not only help roots grow strong but also ensure plump, flavorful bulbs at harvest.
Remember, consistent, moderate watering—never leaving the soil bone-dry or soggy—is just as essential as good soil and feeding for garlic grown in pots.
How and When to Plant Garlic in Pots

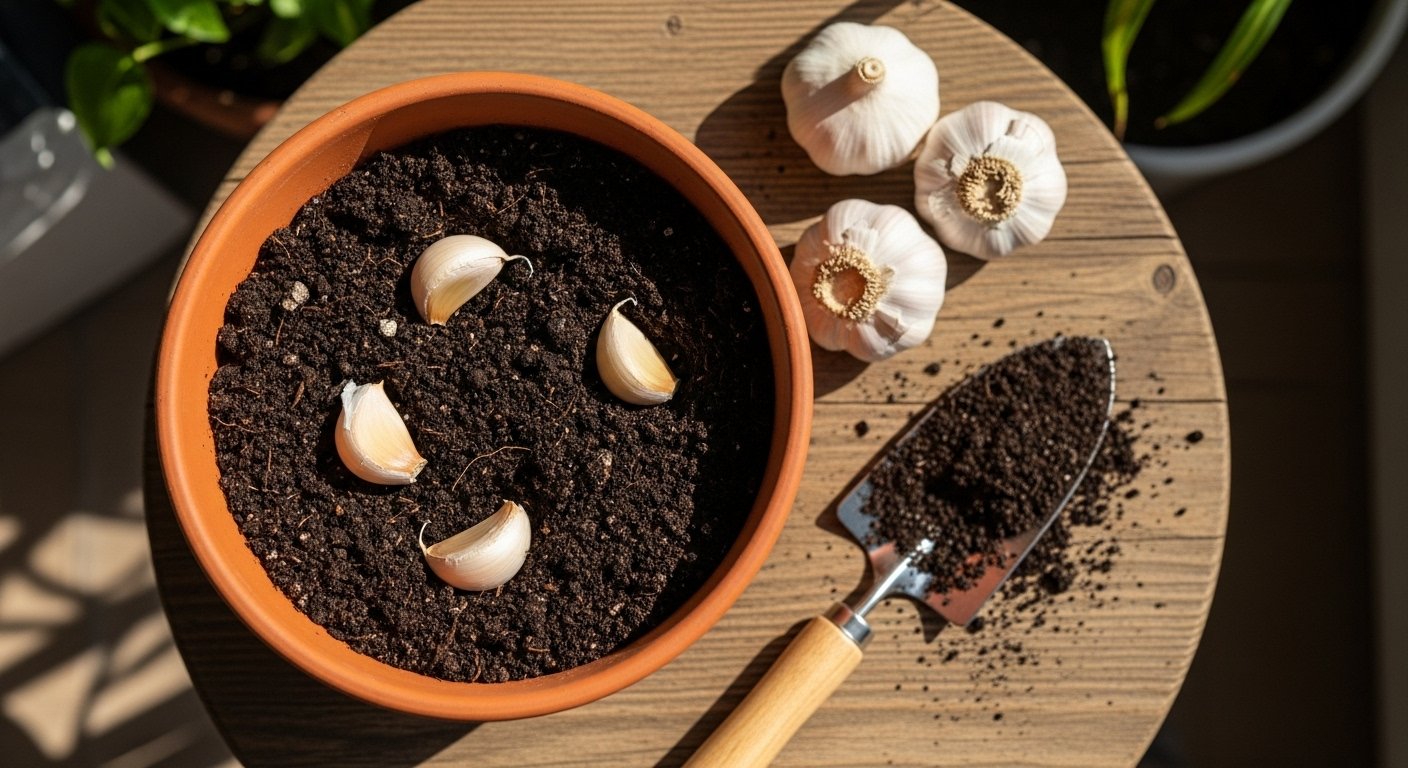
Planting garlic in pots is a rewarding way to enjoy fresh cloves, even if you’re short on garden space. Getting the steps right will help you achieve the best harvest. Start by choosing a large, well-draining pot at least 10 inches deep—garlic roots need plenty of room to stretch. Use high-quality, loose potting mix amended with compost for added nutrients.
When selecting cloves, always choose healthy, large bulbs from a nursery or seed supplier. Avoid supermarket garlic, which may be treated to prevent sprouting. Gently separate the bulb into individual cloves, keeping the papery skin intact. Plant each clove with the pointed tip facing up, about two inches deep in the soil, and space them three to four inches apart to give each plant enough breathing room. Water well after planting, and keep the soil moist but never soggy.
Best Time to Plant Garlic
The best time to plant garlic depends on your climate:
- In zones with cold winters, like the northern U.S. or Canada, plant garlic in pots in the fall—four to six weeks before the ground freezes (usually late September or October). This timing allows the cloves to establish roots without sprouting leaves.
- In warmer climates with mild or frost-free winters, you can plant in late fall or even early spring once the coldest weather passes. However, fall planting generally produces bigger bulbs.
If you’re keeping pots outdoors through winter, place them in a sheltered spot or mulch heavily to prevent freezing. Indoors, a bright balcony or an unheated garage works well during the coldest months.
With careful clove selection, proper spacing, and timing suited to your climate, you’ll set yourself up for a delicious homegrown garlic harvest.
Caring for Garlic: Watering, Light, and Common Issues
Caring for garlic is straightforward but requires a little attention to detail. Water your garlic consistently, keeping the soil moist but not waterlogged. A deep watering once a week is usually enough, though you should check more often during dry spells.
Garlic loves sunlight, so choose a spot that gets at least six hours of direct sun each day. If you’re gardening in a cold climate during winter, mulch around your garlic with straw to protect the bulbs from freezing.
However, avoid overwatering, as soggy soil can cause rot or fungal diseases. Pests like onion maggots and fungal issues such as white rot are common threats. Use crop rotation each year and remove any affected plants immediately to limit their spread.
If you notice yellow leaves or stunted growth, it often signals overwatering, nutrient deficiency, or disease. Let the soil dry out a bit between waterings and test the soil’s pH, aiming for a slightly acidic to neutral range (pH 6.0–7.0). Adding a balanced organic fertilizer can help boost growth if nutrients are lacking.
By keeping an eye out for these early signs and adjusting your care routine, you’ll help your garlic thrive through each stage of the growing season.
Harvesting and Storing Pot-Grown Garlic
Knowing when to harvest pot-grown garlic is key to getting big, flavorful bulbs. Watch for the lower leaves turning yellow and starting to dry—usually about eight or nine months after planting. Don’t wait until all the leaves are dead; when one-third to half are brown but the upper leaves are still green, your garlic is at its peak.
To harvest, stop watering a week ahead to let the bulbs firm up and avoid rotting. On a dry, sunny day, gently loosen the soil around each bulb with your hands or a small trowel—avoid pulling by the stems, which can damage the garlic. Lift each bulb carefully, keeping the papery outer layers intact. Shake off excess soil, but skip washing since moisture shortens shelf life.
Next, tie the harvested bulbs in small bundles and hang them in a cool, shady, well-ventilated spot to cure for 2–3 weeks; garages and covered porches work well. Once fully dry, trim roots and cut stems an inch above each bulb, then brush off remaining soil.
Store cured garlic in breathable containers like mesh bags, baskets, or paper bags. Avoid sealing bulbs in plastic or placing them in the fridge, as moisture can cause sprouting or mold. Well-cured, pot-grown garlic lasts up to 6 months at room temperature, ready for your next recipe whenever you need a fresh, homegrown kick.
Common Questions and Troubleshooting
If your garlic bulbs turn out small or the cloves don’t form properly, don’t worry—these are common hurdles for beginners. Usually, undersized bulbs are caused by planting the cloves too close together, not using high-quality seed garlic, or harvesting too soon.
For bigger bulbs next season, leave about 4–6 inches between cloves and wait until the leaves turn brown before pulling them up.
Yellow leaves can signal overwatering, poor drainage, or nutrient deficiencies; make sure your potting mix drains well and give your plants a balanced fertilizer if needed.
After harvest, don’t grow garlic in the same soil or pot for at least two years to prevent disease—rotate your crops and refresh the soil with compost. Always wash and disinfect containers before replanting to keep pests and diseases away.
If this is your first try, remember that garlic is forgiving and every attempt teaches you something new. Stick with it, adjust your spacing and watering, and enjoy experimenting with different garlic varieties in your containers—each season brings you one step closer to a bountiful harvest.