Choosing the Right Cabbage Variety
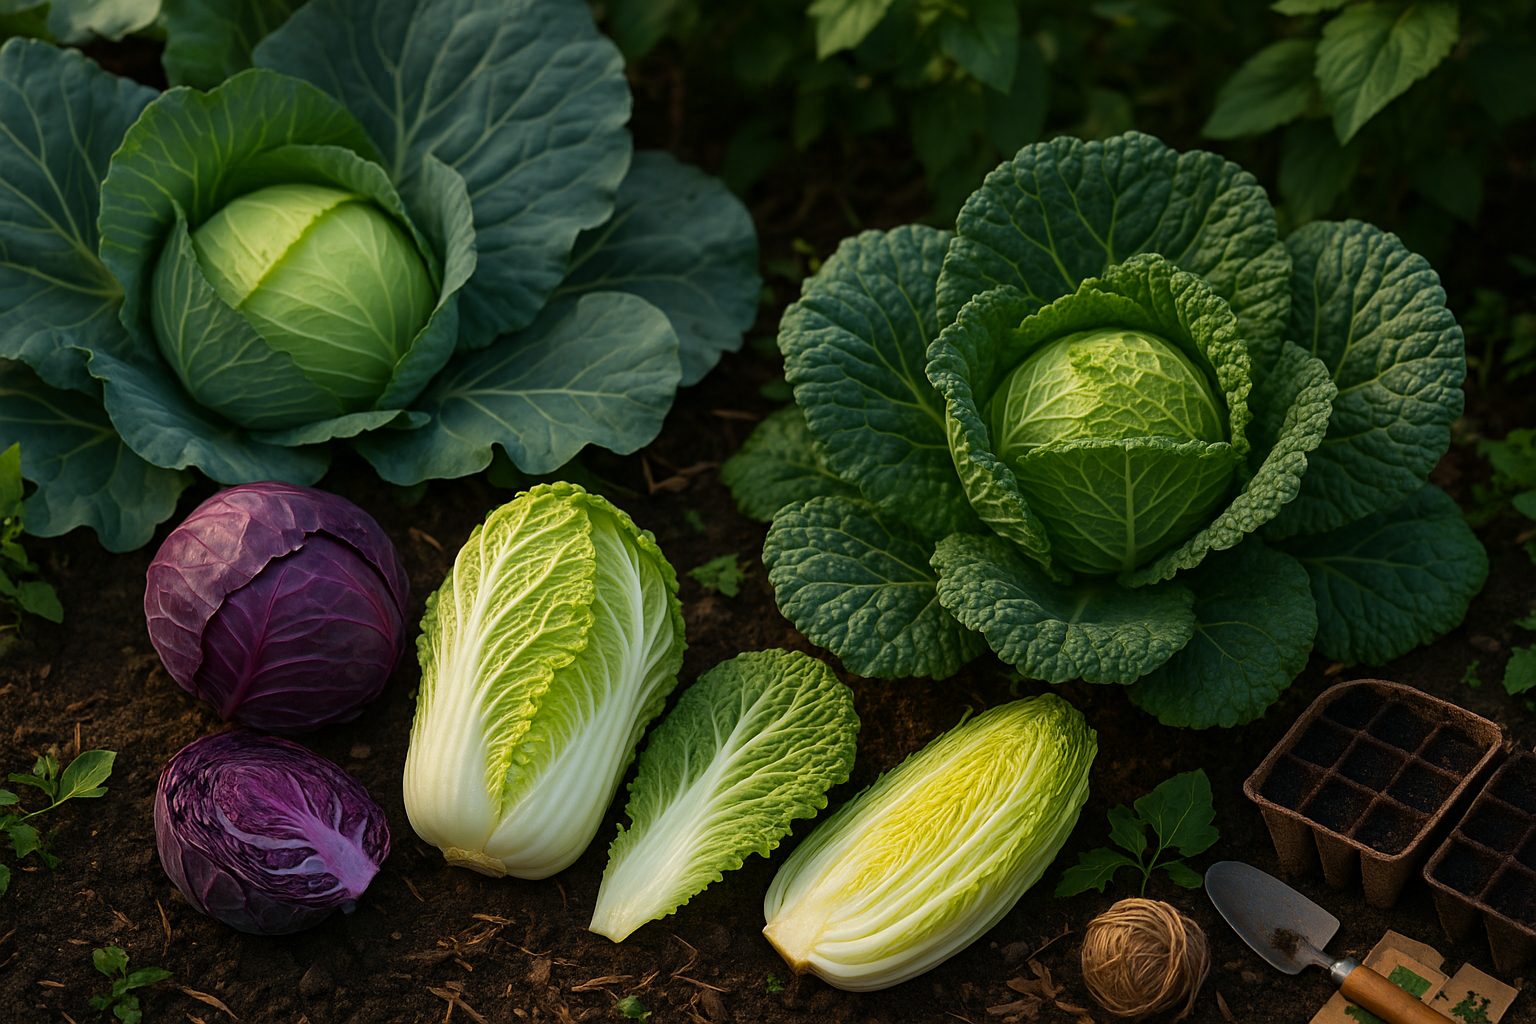
Thinking about starting cabbage seeds indoors but unsure which variety to choose? With so many types—green, red, Savoy, and Napa—picking the right one for your garden can feel overwhelming. Each variety has unique characteristics:
- Classic green cabbage is crisp and versatile.
- Red cabbage offers vibrant color and extra antioxidants.
- Savoy cabbage is known for its tender, crinkled leaves and mild flavor.
- Napa (or Chinese cabbage) brings a delicate texture, perfect for salads and stir-fries.
To select the best match for your space, start by considering your local climate. Green and red cabbages are hardy and tolerate cooler temperatures, making them a safe bet for many regions. Savoy holds up well to frost but prefers milder weather, while Napa thrives in cooler spring or fall conditions.
Next, think about taste and how you’ll use your harvest—maybe you want crunchy slaw, hearty soups, or fresh wraps. Garden space also matters; standard cabbages need about 18–24 inches of room to grow, but compact or mini varieties are available if you’re tight on space.
Disease resistance is another key factor—look for seeds labeled “disease resistant,” especially if you’ve had issues with clubroot or black rot in the past. Finally, check maturity periods for each variety, as some cabbages mature in as little as 60 days while others can take over 90.
Choosing the right cabbage seeds now leads to a healthier, hardier crop down the road—so invest a few thoughtful minutes, and you’ll be rewarded with robust heads perfect for your favorite kitchen creations.
When and Where to Plant Cabbage
Timing your cabbage planting is key—get it right, and you’ll enjoy crisp, sweet heads all season. For spring crops, sow seeds indoors 6-8 weeks before your area’s average last frost date. Move healthy seedlings outside 2-3 weeks before that last frost, once they’re sturdy and the soil is workable.
In milder climates, you can direct sow seeds outdoors as early as four weeks before the last frost, provided the soil temperature is above 45°F (7°C). Fall cabbage plants thrive when started in midsummer; count backward from your area’s first fall frost so your cabbage matures just as autumn’s cool, steady temperatures arrive.
Wherever you plant, choose a spot with at least 6 hours of direct sunlight daily to encourage robust growth. Too much shade leads to leggy, weak plants and small heads. Cabbage does well in raised beds, traditional garden plots, and even large containers—just make sure pots are at least 12 inches deep and wide for healthy root development.
Soil should be loose, rich in organic matter, and well-draining; cabbage hates soggy feet, so avoid low-lying garden spots that stay wet after rain. In colder regions or if your growing season is short, start seeds indoors in trays or small pots, then harden off seedlings before transplanting outside. This gives them a head start and reduces transplant shock.
In warmer climates, direct sowing can work well, but check that the soil consistently reaches at least 50°F (10°C) for sprouting. Mulching after planting helps keep soil temperatures steady and conserves moisture. By matching your planting dates with your local frost calendar and picking the right plot or pot, you’ll set your cabbage up for a strong, healthy harvest.
How to Start Cabbage: Seeds, Seedlings, and Planting Tips
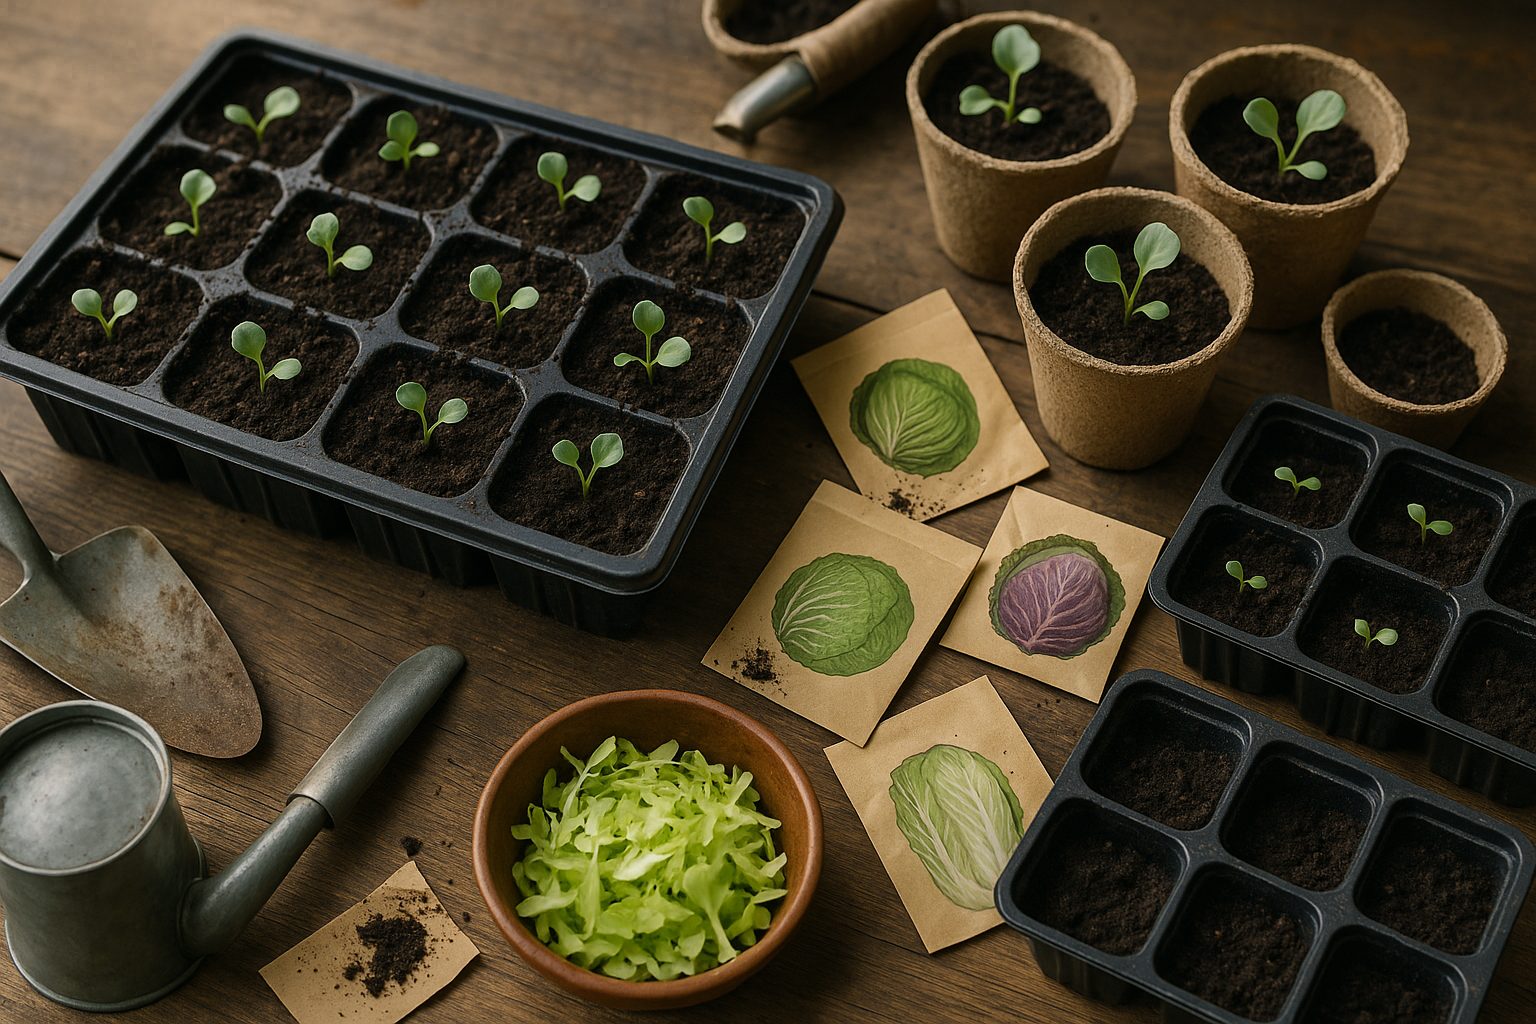
Starting cabbage from seeds is a rewarding way to grow healthy, robust plants. Begin by sowing cabbage seeds indoors 6 to 8 weeks before your last frost date; this head start is crucial, especially in cooler climates.
Use seed trays or small pots filled with a quality seed-starting mix, and plant seeds about a quarter-inch deep. Keep the soil consistently moist and place trays in a bright spot—ideally under grow lights or on a sunny windowsill—to ensure seedlings get 12-16 hours of light daily. Rotate the trays, or use a small fan to encourage sturdy growth and prevent the seedlings from becoming leggy.
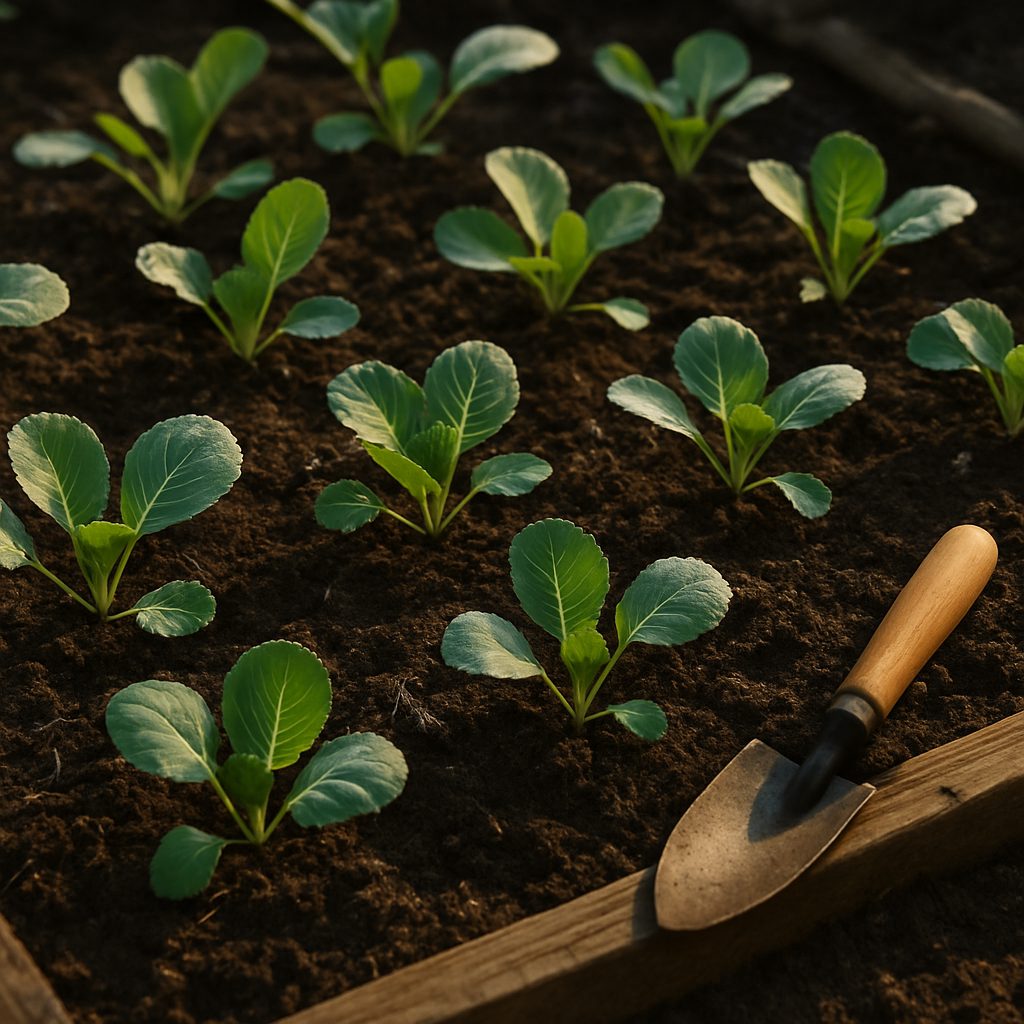
When seedlings have two to three true leaves (about 4 weeks old and 2-4 inches tall), it’s time to prepare for transplanting. Gradually harden off your seedlings by placing them outdoors in a sheltered spot for a few hours a day, increasing the exposure over a week. This acclimates the young plants and reduces transplant shock.
Aim to plant seedlings outside when they are 4-6 weeks old and temperatures stay above 45°F (7°C); seedlings should be sturdy, not spindly, with several healthy leaves. Set them in the garden, spacing each plant 12-18 inches apart in rows that are 18-24 inches apart, giving room for heads to develop and airflow to prevent disease.
For soil preparation, choose a sunny spot and enrich the soil with compost or aged manure—a loose, fertile soil with a neutral to slightly acidic pH (6.5-6.8) supports top growth and tight cabbage heads. Before planting, loosen the soil to 12-15 inches deep and mix in organic matter to improve drainage.
Avoid overcrowding, overwatering, and inconsistent lighting while seedlings are indoors; these are common causes of weak, stretched plants. With care and close attention, you’ll set the stage for strong cabbage plants ready to thrive in the garden.
Essential Growing Conditions: Sunlight, Soil, Water, and Fertilizer
Cabbage thrives when it gets plenty of sunlight, so choose a spot in your garden where your plants will receive at least six hours of direct sun each day—ideally closer to eight for robust heads. If your garden has shaded areas, try positioning cabbages where buildings or taller plants won’t cast shadows during peak daylight hours.
Next, focus on your soil: cabbage grows best in rich, loose, well-draining beds with a slightly acidic to neutral pH (ideally between 6.0 and 7.5). Before planting, work in compost or well-rotted manure to boost fertility, and test your soil with an affordable pH kit. If your soil is too acidic, adding lime can help balance it.
Consistent, even moisture is key for forming healthy cabbage heads. Water at the base of the plants about 1-2 inches per week, depending on rainfall. Use drip irrigation or a soaker hose to keep leaves dry and reduce disease risk. Laying down a layer of organic mulch, like straw or shredded leaves, helps retain soil moisture, keeps weeds in check, and prevents soil from splashing onto leaves, which can spread disease.
Cabbage is a heavy feeder, so start with a balanced fertilizer (such as a 10-10-10 NPK blend) when planting. Then, side-dress with a nitrogen-rich fertilizer about three weeks later, just as heads begin to form. Avoid overdoing nitrogen, as too much can result in lots of foliage but small, loose heads.
Throughout the growing season, keep an eye on weather and soil conditions, adjusting water and fertilizer as needed for sturdy, flavorful cabbages.
Cabbage Care: Protecting Against Pests and Problems
Cabbage can fall prey to several persistent pests, with cabbage worms, aphids, and slugs being the usual suspects. To keep cabbage worms at bay, regularly inspect leaves—especially their undersides—for small green caterpillars, and handpick them or use an organic spray like Bacillus thuringiensis (Bt).
If you spot clusters of aphids, spraying your plants with a strong jet of water or treating them with insecticidal soap helps prevent infestations. For slugs, try placing beer traps or crushed eggshells around your plants to deter them, as slugs dislike rough surfaces.
Beyond pests, adopting a solid disease management plan is vital. Diseases like clubroot and black rot can linger in the soil, so rotating crops each season ensures harmful pathogens don’t have a chance to build up. Avoid planting cabbage-family crops in the same spot more than once every three years.
Physical barriers can be a game-changer: lightweight row covers protect young cabbage plants from both insects and harsh weather, while mulching with straw or grass clippings suppresses weeds and retains moisture without promoting rot.
For organic pest deterrence, consider companion planting—herbs like dill and mint can repel cabbage loopers and attract beneficial insects.
If your cabbage shows problems like splitting heads, try watering more consistently during dry spells, as rapid water intake after drought causes heads to burst. Stunted growth might signal poor soil nutrition or overcrowding, so thin seedlings properly and enrich your garden beds with compost or balanced fertilizer.
Regular inspection, a few commonsense barriers, and a proactive approach to garden hygiene will go a long way toward keeping your cabbage patch healthy and productive.
Harvesting and Storing Your Cabbage
Knowing when your cabbage is ready to harvest is key to getting the best flavor and texture. Most cabbage varieties are ready when the heads feel firm and solid when gently squeezed. If the outer leaves look fresh and the heads have reached their mature size (usually noted on seed packets, around 70–100 days after transplanting), it’s harvest time.
To harvest, use a sharp knife to cut the cabbage head at the lowest possible point, leaving a few outer leaves and the stem base in place. This is important because if harvest is delayed, mature cabbage heads can split from internal pressure—especially after heavy rain or watering. To prevent splitting if you need to leave the heads in the ground longer, try gently twisting the head or cutting a shallow cross into the stem with your knife; this can reduce water uptake and delay splitting.
Short-Term Storage
For short-term storage—up to two weeks—cabbage can be kept in the refrigerator, ideally in a plastic bag or wrapped in paper to keep out moisture and prevent wilting.
Long-Term Storage
If you need to store cabbage for several weeks to months, aim for a cool, humid environment. A root cellar is perfect, or use a cool basement if you have one. Store heads on shelves or hang them upside down by the stem, making sure they’re not touching to prevent rot.
Alternatively, you can remove loose outer leaves, wrap the heads in newspaper, and store them in a cardboard box or crate in the coldest part of your fridge. However you store them, check your cabbage regularly and remove any heads that start to show signs of rot or shriveling.
Properly harvested and stored, cabbage can provide crisp, nutritious leaves well into the winter months—a real bonus for soups, salads, and slaws long after the garden season ends.
Creative Ways to Use, Cook, and Preserve Cabbage
Cabbage is an incredibly versatile veggie that deserves more love in your kitchen. For quick meals, try shredding cabbage into a vibrant slaw with carrots and a zesty vinaigrette—perfect as a side or a topping on tacos.
Stir-fried cabbage with garlic and a splash of soy sauce makes a speedy, flavorful base for eggs or grilled chicken. In cooler months, add chopped cabbage to hearty soups and stews for extra texture and nutrients.
If you want to extend cabbage’s shelf life, fermenting is a classic method: massage shredded cabbage with salt and let it ferment in a jar on your counter for sauerkraut, or add chili, garlic, and green onion for a spicy kimchi. Both are loaded with gut-friendly probiotics.
For easy prep down the line, blanch chopped cabbage for two minutes, cool it quickly in ice water, drain, and then freeze in airtight bags—ideal for tossing into stir-fries or soups straight from the freezer.
Cabbage is also a nutritional powerhouse, packed with vitamin C, vitamin K, and fiber, making it a budget-friendly way to add valuable nutrients to your diet. Its antioxidants and anti-inflammatory compounds support digestive health and help strengthen your immune system, so using cabbage in a variety of ways isn’t just tasty—it’s a smart move for your overall wellness.