Introduction
If you’re new to growing your own food, garlic is one of the easiest and most rewarding crops to start with—just follow a reliable garlic spacing guide, and you’ll be well on your way to a bumper harvest. Garlic’s popularity in kitchens around the world is no surprise; its bold flavor elevates nearly every dish, and its impressive health benefits—from immune support to heart health—make it a garden standout. Even better, it takes little space and effort to succeed.
In this post, we’ll walk you step by step through everything you need to know, from how far apart to plant garlic cloves to nurturing strong, healthy plants, all the way to harvesting and curing your homegrown bulbs for long-term storage. Whether you have a big backyard or just a small raised bed, the right spacing and a few simple techniques can help you enjoy fresh, flavorful garlic all year round.
Choosing the Right Garlic Variety
When it comes to growing your own garlic, choosing between hardneck and softneck varieties is key.
Hardneck garlic tends to have a bolder, more complex flavor and grows best in regions with cold winters, as it needs a chilling period to form big, healthy bulbs. These types also produce flower stalks called scapes, which are edible and tasty, but hardnecks usually have a shorter shelf life (about 3-6 months).
Softneck garlic, on the other hand, is milder in taste, stores longer (sometimes up to a year), and thrives in milder climates where winters aren’t as harsh.
If you live in the northern U.S. or areas with cold seasons, hardneck types like ‘Music’ or ‘German Extra Hardy’ are good bets. For those in southern states or warm coastal areas, try softneck varieties such as ‘California Early’ or ‘Inchelium Red’.
When buying seed garlic, look for reputable suppliers online or at local nurseries, as they sell bulbs specifically grown for planting, ensuring they’re disease-free and adapted to your region. Avoid garlic from the grocery store for planting—it’s often treated with chemicals to prevent sprouting and may not be suited to your local climate, resulting in poor yields.
Starting with quality seed garlic sets you up for a healthy, flavorful harvest and fewer headaches down the road.
Preparing Soil and Site for Garlic
Growing great garlic starts with choosing a spot where it can thrive. Garlic needs full sun—aim for at least six hours a day—and soil that’s both fertile and well-draining to keep bulbs from rotting.
If your soil is heavy clay or tends to hold water, mix in plenty of compost or well-rotted manure to boost fertility and improve texture. Garlic likes a pH between 6.0 and 7.0, so consider picking up a simple soil test kit from a garden center. If your soil is too acidic, add a bit of garden lime; if it’s too alkaline, compost or peat moss can help balance it out.
Rotate your crops whenever possible; avoid planting garlic where onions, leeks, or other alliums grew last year, as this helps prevent soil-borne diseases from building up.
When preparing the bed, clear out weeds and debris, then loosen the soil with a garden fork down to at least 8 inches—garlic bulbs need space to expand, and fluffy soil makes planting and harvesting easier. Rake the surface smooth, and your garlic patch is ready to go.
By tackling these steps ahead of time, you’ll set your garlic up for a healthy and hearty season.
Planting Garlic: Timing, Spacing & Technique

Timing your garlic planting is key to growing large, flavorful bulbs. In most climates—Zones 3-8—autumn planting is best, about 2-4 weeks before the ground freezes, so roots can establish before winter. If you live in a region with mild winters (Zones 9-10), you can plant in late winter or early spring instead, as the cold is less severe but bulbs still need the chill to mature well.
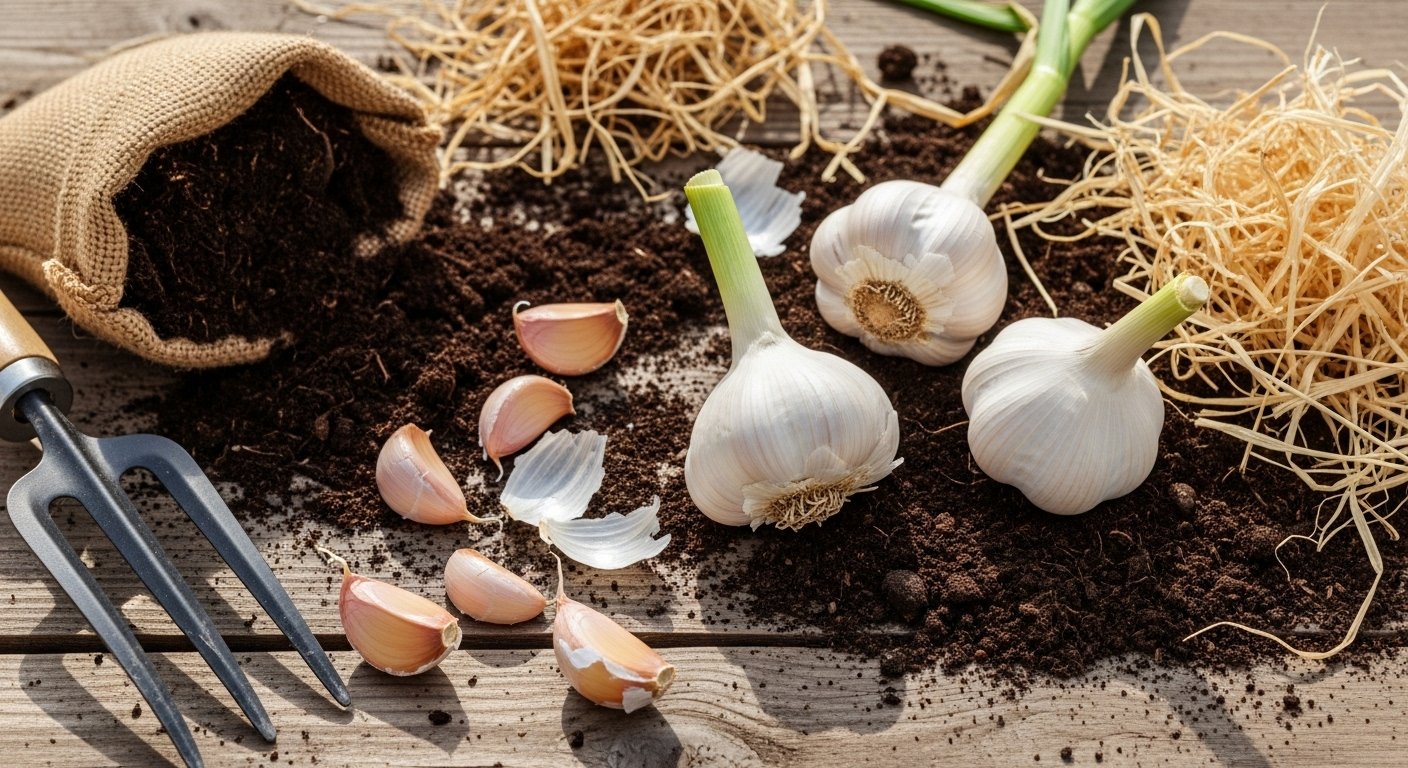
When you’re ready to plant, break apart the garlic bulb into individual cloves, but keep the papery skins on each clove for protection. Pick the fattest cloves for planting, since smaller ones often yield weaker plants. Place each clove with the pointed end facing up and the flat root end down, about 2 inches deep into loose, well-drained soil; this helps protect from frost heave and drying out.
Space each clove 4-6 inches apart in rows at least 12 inches apart to give the bulbs plenty of room to expand. After planting, cover the bed with a few inches of mulch—like straw or shredded leaves—to help insulate the cloves from temperature swings and suppress weeds. This mulch also wards off potential pests and helps retain soil moisture.
In spring, check for sprouting and remove excess mulch to allow the new shoots through. For frost protection in colder climates, keep mulch in place until after the danger of severe frost passes. With these steps, your garlic will have a strong start and reward you with robust bulbs to harvest in midsummer.
Caring for Growing Garlic Plants
For thriving garlic plants, consistent but careful watering is key. As a rule of thumb, water deeply once a week to encourage roots to grow down, but make sure the soil drains well; soggy soil can quickly lead to rot. Check moisture by pressing your finger an inch into the soil—if it’s dry, it’s time to water.
To further protect your young garlic, keep your beds as weed-free as possible. Weeds not only compete for water and nutrients but can also reduce airflow, increasing the risk of fungal issues. Applying a two- to three-inch layer of organic mulch, such as straw or shredded leaves, helps suppress weeds while trapping needed moisture in the soil, which is especially useful during hot, dry spells.
Garlic is a relatively light feeder, but it appreciates a dose of balanced fertilizer or compost in early spring and again just as bulbs begin to swell. Watch for signs of nutrient stress—yellowing leaves may mean your garlic needs a nitrogen boost.
Don’t forget to keep an eye out for trouble signs like yellow or brown streaks (which could indicate garlic rust), stunted growth, or bulb rot. If you spot these, remove affected leaves, avoid overhead watering, and make sure your soil isn’t waterlogged. Pests such as onion maggots can also harm garlic; floating row covers can help if you notice burrowing in the bulbs.
By combining good watering habits with vigilant weeding, mulching, and monitoring for problems, you’ll help your garlic crop grow strong and healthy.
Harvesting, Curing, & Storing Garlic
Knowing when to harvest garlic is key to getting the best flavor and longest storage life. Look for the lower leaves turning yellow or brown while the top leaves remain green, usually in midsummer—this means the bulbs are mature but not splitting. Avoid waiting too long, as overripe bulbs open up and don’t store well.
To harvest, use a garden fork to loosen the soil a few inches from the bulbs—don’t pull by the stalks or you’ll damage them. Gently lift each bulb and brush off excess dirt, but avoid washing them.
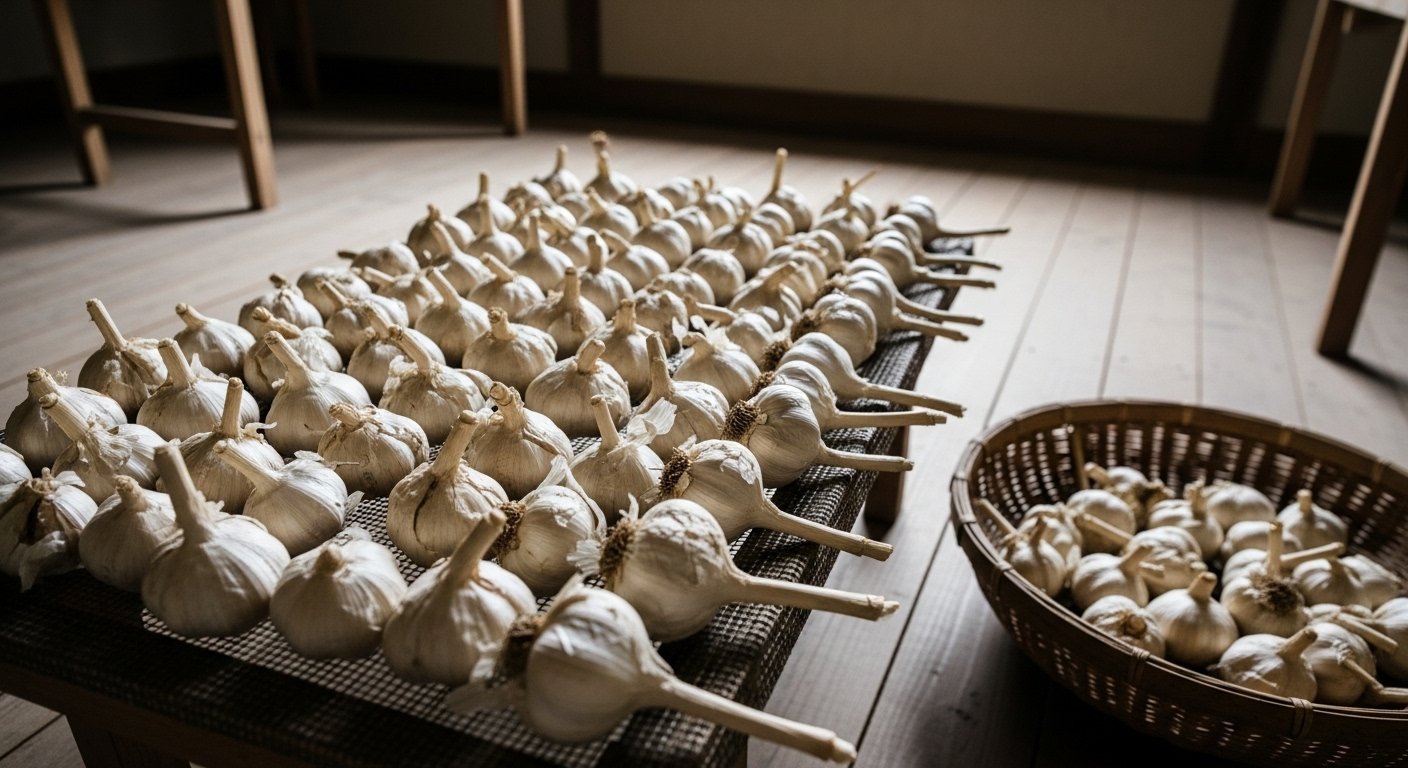
Next, cure your garlic by laying bulbs (with stalks and roots still attached) in a single layer on a rack or screen, out of direct sun, in a dry, airy place for two to three weeks. Flip them occasionally to ensure even drying. Once the skins feel papery and the necks are dry, trim off the roots and cut the stems about an inch above the bulb. Then gently rub off any remaining dirt with your hands.
Store cured garlic in a mesh bag or basket in a cool (around 60°F/16°C), dry, and dark spot with good airflow—like a pantry or basement. Avoid airtight containers and high humidity to prevent mold or sprouting. If a bulb starts to sprout, use it up sooner, as it won’t keep much longer.
Cured and well-stored, your garlic can last for six months or more, delivering fresh flavor into winter and beyond.
Best (and Worst) Garlic Companion Plants
Planting garlic alongside certain vegetables and herbs can boost your garden’s overall health and productivity. Good companions include carrots, which benefit from garlic’s natural pest-repelling properties, and strawberries, which grow better with less fungal disease when garlic is nearby. Lettuce, tomatoes, and cabbage also thrive with garlic, as it helps ward off harmful insects like aphids and spider mites.
Herbs like dill and chamomile are smart partners too, attracting beneficial bugs and enhancing growth. However, avoid planting garlic near beans, peas, or asparagus—these crops may struggle because garlic can stunt their growth by competing for nutrients and space. Also, keep garlic away from other alliums (like onions or leeks) to reduce the risk of shared diseases.
Companion planting like this creates a healthier garden ecosystem by attracting pollinators, naturally deterring pests, and making the most of your available space. For best results, plan your garden layout so companion plants support each other, leading to robust, resilient crops and fewer chemicals needed to keep your plants thriving.
Conclusion & Quick Tips
Growing garlic at home is rewarding, offering fresh, flavorful cloves and a sense of accomplishment for gardeners of all skill levels. You control what goes into your soil—meaning pesticide-free, organic bulbs from your own backyard or even a sunny balcony.
For the best results, remember to prepare loose, well-draining soil, space cloves about six inches apart, and plant in the fall for a summer harvest. Even if you’re short on space, garlic thrives in raised beds, containers, or window boxes with at least six inches of soil and good drainage.
Water regularly, but don’t let the soil get soggy. Don’t be intimidated—garlic is one of the easiest crops for beginners. Give it a try this season and enjoy watching your kitchen garden grow, one clove at a time. The taste of homegrown garlic is truly worth the wait!