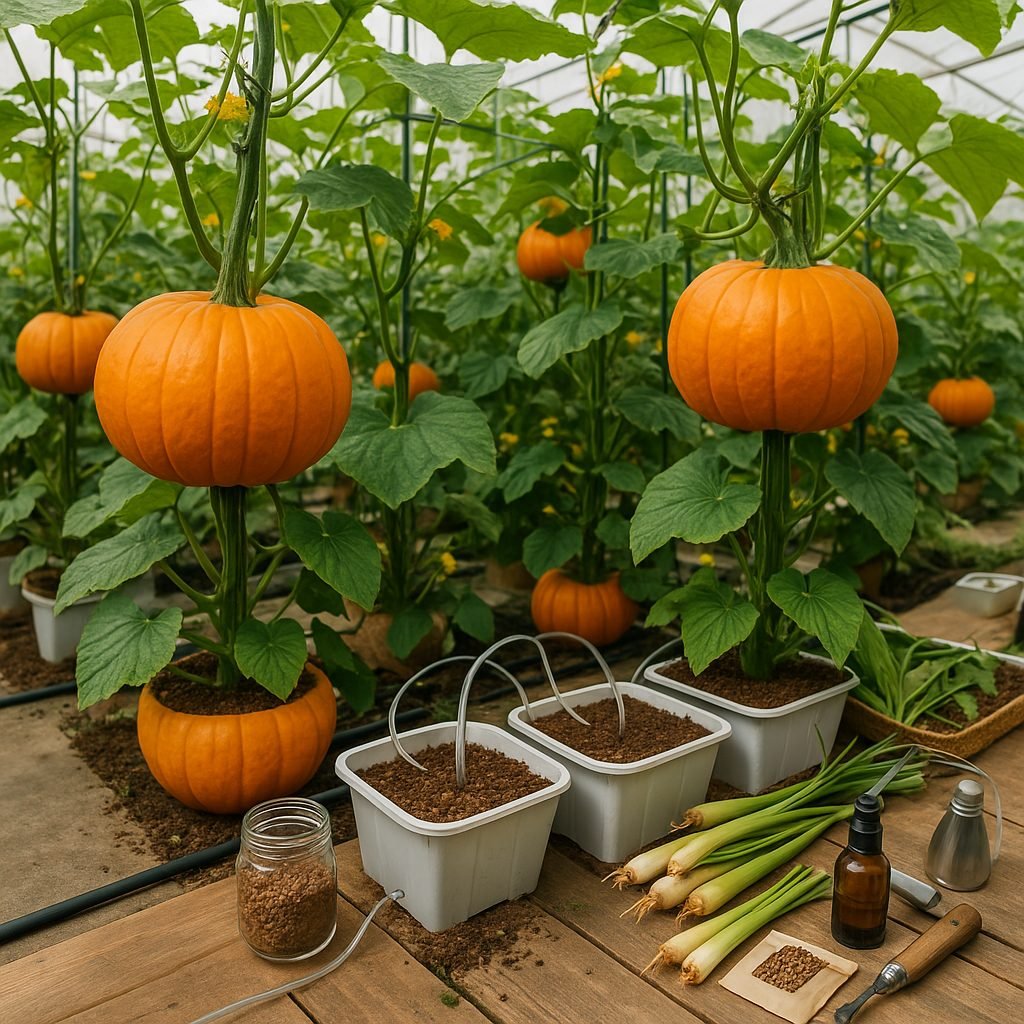
Introduction to Hydroponic Pumpkin Growing
Hydroponic pumpkins are gaining popularity among gardeners looking for a new challenge and a more efficient way to grow this beloved autumn staple. Hydroponics, simply put, is the practice of growing plants without soil—using a nutrient-rich water solution to fuel plant growth. This method might sound high-tech, but it’s surprisingly accessible and can be tailored to spaces big or small, from backyard greenhouses to compact indoor setups.
When it comes to growing pumpkins hydroponically, the benefits are impressive. Space efficiency is a game-changer—no sprawling garden plots required, just cleverly managed supports and containers. Since there’s no dirt, the risk of soil-borne pests and diseases plummets, which means healthier plants and bigger harvests. Even more exciting, hydroponic systems deliver nutrients directly to plant roots, often resulting in faster growth and potentially earlier harvests compared to traditional methods.
Pumpkins, known for their rambling vines and hefty fruits, may not seem like the most obvious hydroponic candidate, but they’re actually a fantastic choice. Their impressive size and vivid colors make them crowd-pleasers for family gardens, school projects, or anyone wanting to turn heads (and spark conversations) with their harvest.
For beginners, hydroponic pumpkins offer the perfect blend of challenge and reward: tending to their rapid growth teaches important gardening skills, while watching a pumpkin thrive in a soilless environment feels downright magical. Whether you’re looking to save space, beat common garden pests, or just try something new, growing hydroponic pumpkins is an engaging adventure.
In this blog post, we’ll walk you through how hydroponic systems work for pumpkins, offer tips for maximum yield, and share some inspiring real-world successes—so you can decide if this fun project is right for your hydroponic garden.
Choosing the Best Hydroponic System for Pumpkins
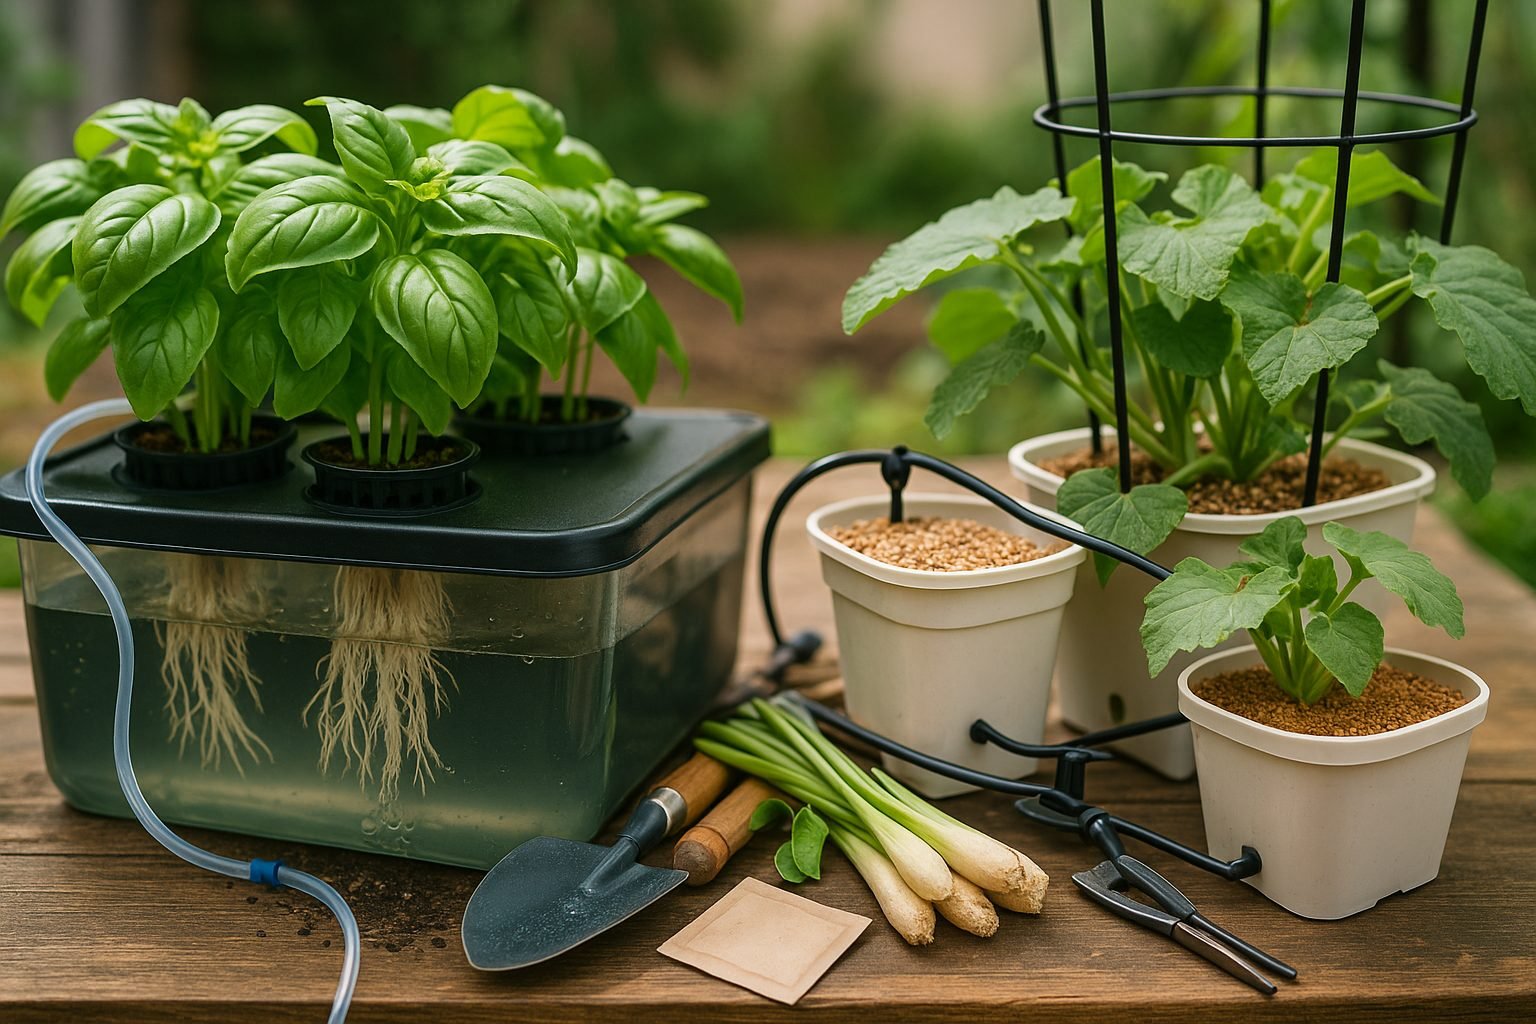
When it comes to growing pumpkins hydroponically, two of the most popular systems are Deep Water Culture (DWC) and Dutch bucket (Bato bucket) systems.
DWC involves suspending plant roots in oxygen-rich, nutrient-laden water, which promotes fast growth. However, this method can be tricky with large, vining pumpkins since their roots and massive size may outgrow containers, and heavy fruits need extra support.
Dutch buckets, on the other hand, are better suited for large, spreading plants because each plant gets its own container filled with an inert medium like perlite or coconut coir, paired with a steady drip of nutrients. This setup makes it easier to manage sprawling vines and accommodate the plant’s substantial weight. However, Dutch buckets require more initial assembly and space planning compared to DWC.
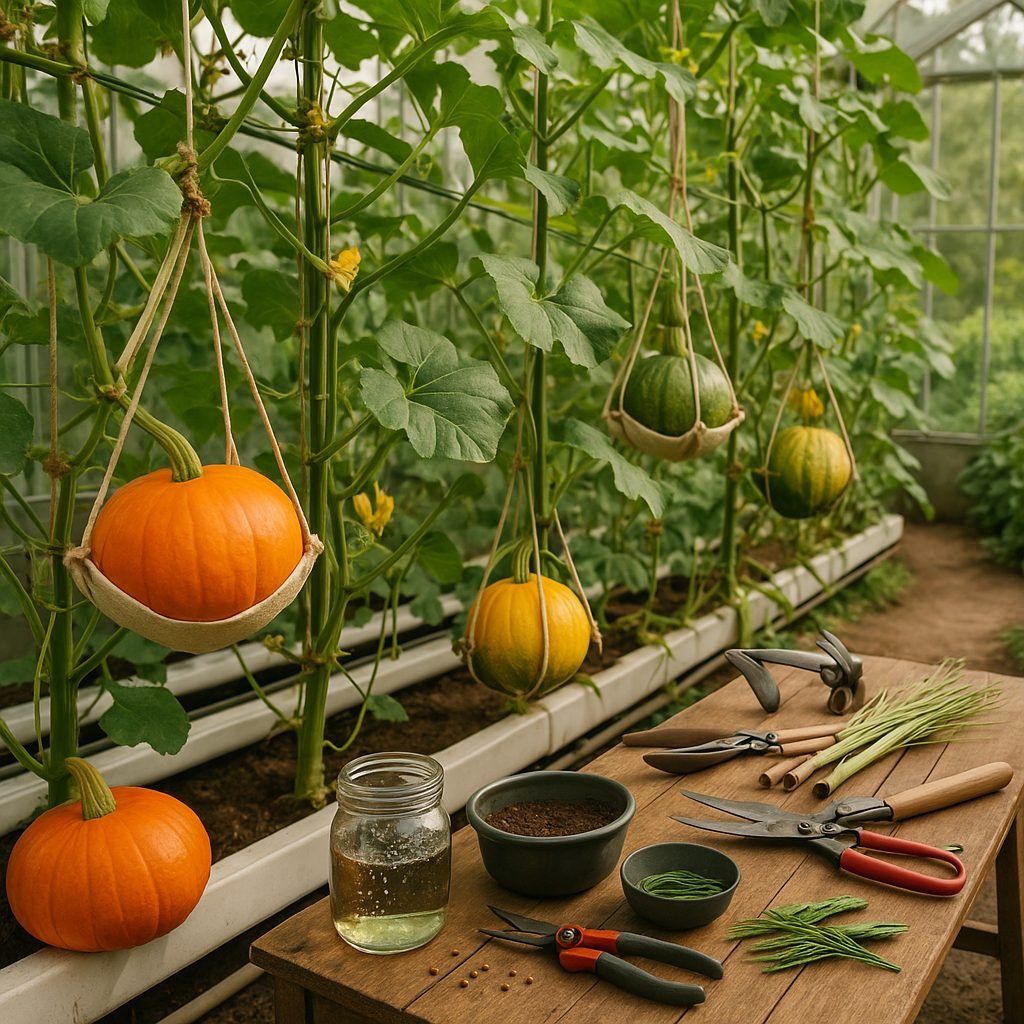
Whichever system you choose, ensure your structure can handle the weight—install sturdy trellises or hammocks beneath developing pumpkins. Use netting or slings to cradle heavy fruit and prevent vines from snapping.
Also, space your buckets or containers generously (at least 3-4 feet apart) to give vines room to spread and ensure adequate airflow, which is essential to prevent disease.
Regularly check the nutrient solution and adjust it as the pumpkins grow; large fruiting plants demand higher potassium and phosphorus levels.
By picking the right system and incorporating robust fruit support, you can successfully grow impressive hydroponic pumpkins without soil.
Starting Your Pumpkins – Seeds or Transplants?
When deciding whether to start pumpkins from seeds or transplants in a hydroponic setup, both options have their perks. Starting from seeds gives you more control over the variety and ensures the plants adapt to your environment right from the start, but it takes time and careful monitoring during germination. Transplants, meanwhile, can speed things up and are convenient, though they often suffer from transplant shock or root disturbance, which can slow growth.
If you choose seeds, begin by soaking them in water for 8–12 hours to soften the hard outer coat. Plant each seed in a moistened starter plug or a small cube of rockwool—make sure the environment is warm (75–85°F) and kept humid, using a plastic dome or a covered tray.
Place the tray under grow lights or in a sunny spot, and check daily for sprouting. Keep the medium moist but not soggy. Once the seedlings have two sets of true leaves, gently transfer the plugs into your hydroponic system.
When handling seedlings, support them by the leaves—not the delicate stems—to avoid breakage. To minimize root shock, transplant during a cooler part of the day and ensure the nutrient solution matches the temperature and pH of their starter environment.
Be patient and gentle—a rushed transition is a common cause of root damage. With proper care, your hydroponic pumpkin plants will reward you with healthy, robust growth.
Nutrients, pH, and Water Requirements
Growing healthy hydroponic pumpkins starts with understanding their changing nutrient needs at each growth stage. Early on, prioritize nitrogen-rich nutrients to help seedlings develop strong stems and lush leaves. As your pumpkins begin to flower and set fruit, shift the focus toward phosphorus and potassium—these minerals fuel vibrant blooms and bigger, sweeter pumpkins. Don’t overlook essential micronutrients like magnesium (vital for photosynthesis), calcium (for strong cell walls and preventing blossom-end rot), and trace elements including iron, manganese, and boron.
For hydroponics, aim for a nutrient solution pH between 5.8 and 6.5; this range helps pumpkin plants absorb nutrients efficiently and prevents toxic buildup. Use a digital pH meter or test strips to monitor regularly, and if you need to adjust, use commercial “pH up” or “pH down” solutions slowly, always retesting after each change. Electrical conductivity (EC), which indicates nutrient concentration, should hover between 2.0 and 3.0 mS/cm for established plants—check this with an EC meter and dilute or enrich your solution as needed.
Watch for warning signs of nutrient imbalances:
- Yellowing leaves can mean nitrogen or iron deficiency.
- Stunted growth often points to insufficient nutrients or poor water quality.
- Curling leaves or burnt tips might signal excess salts or a high EC.
Ensure you’re changing your nutrient solution every couple of weeks and keep water temperatures between 18–22°C (65–72°F) to deter root rot and maintain optimal oxygen levels.
Troubleshooting tip: If leaves look odd or growth stalls, flush your system with clean, pH-balanced water for 24 hours, then carefully reintroduce nutrients at half-strength—observe how your pumpkins respond before resuming normal feeding. This consistent attention to nutrients, pH, and water conditions will give you healthy vines and a bumper pumpkin harvest.
Light, Temperature, and Growing Conditions
Pumpkin vines thrive best with at least 8–10 hours of bright, direct sunlight each day, which is easiest to provide in a sunny outdoor setting or a well-lit greenhouse. If you’re growing hydroponic pumpkins indoors, high-output full-spectrum LED grow lights are a solid choice, as they mimic natural sunlight and support healthy growth. Aim for a light intensity of around 400–600 µmol/m²/s at the plant canopy for vigorous vines and fruiting.
For timing, set your grow lights on a timer to deliver 14–16 hours of light daily, giving plants a long enough “day” for robust fruit development.
Regarding temperature, pumpkins are happiest in warm conditions; keep the daytime temperature between 75–85°F (24–29°C) and avoid letting nighttime temperatures fall below 65°F (18°C), as cooler conditions can slow growth or trigger disease.
Humidity should stay in the 60–70% range—use a quality hygrometer to monitor and a humidifier or dehumidifier to adjust as needed, especially in sealed indoor grows.
To maintain these stable conditions, consider:
- Insulating your grow room or greenhouse
- Using oscillating fans for air movement
- Relying on heaters, cooling systems, or automatic vents to keep temperatures steady
Monitoring systems and smart plug timers can help you automate light, temperature, and humidity adjustments, making it easier to provide pumpkins with the environment they need for impressive yields, even if outdoor weather is unpredictable.
Growth, Training, and Pruning for Maximum Yield
In hydroponic systems, pumpkin vines follow distinct growth stages, each with unique needs and opportunities to optimize yield.
Early on, seedlings focus on root establishment and leaf growth. Ensure stable nutrients and gentle lighting to encourage strong starts.
As vines begin to run, rapid vegetative growth demands space and support—this is the ideal time to implement a sturdy trellis or vertical netting, guiding vines upward and saving valuable space.
Pruning becomes essential: regularly pinch off side shoots (secondary vines) and excess foliage to direct the plant’s energy toward main stems and fruit production. This reduces overcrowding and improves air circulation, minimizing disease risk.
As the plant enters the flowering and fruit-setting phase, select one or two healthy fruits per vine and gently remove smaller or misshapen blossoms. This allows the plant to concentrate resources, increasing the size and quality of the remaining pumpkins.
Rotate or reposition fruits onto slings or supports as they grow to avoid pressure damage. Maintain balanced nutrition, especially with potassium and calcium, during fruit development for robust, flavorful pumpkins.
By monitoring plant growth daily, pruning with care, and training vines thoughtfully, hydroponic gardeners can enjoy impressive yields and healthy, prize-worthy pumpkins—even in limited indoor spaces.
Pests, Disease Prevention, and Harvesting
Hydroponic pumpkins, while less prone to some soil-borne pests and diseases, can still face challenges like aphids, spider mites, powdery mildew, and root rot. Keeping your growing environment clean is key—regularly remove plant debris, prune excess foliage to boost airflow, and ensure your water and nutrient solutions stay fresh.
For pests, try introducing beneficial insects like ladybugs or using an organic neem oil spray as a natural deterrent. If you spot powdery mildew—a white, powdery coating on leaves—remove affected foliage and increase air circulation; homemade solutions like a baking soda and water spray can help with early signs.
Harvesting
When it’s time to harvest, check your pumpkins for a deep, consistent color (orange, for most varieties), a tough outer skin that resists puncture, and a stem that’s starting to dry and brown; these are key signs they’re ripe. Use sharp, clean pruning shears to cut the pumpkin from the vine, leaving a few inches of stem attached to extend shelf life and minimize rot.
After harvest, gently clean pumpkins with a damp cloth and let them cure in a cool, dry place (about 10–14 days) to harden the skin. Store pumpkins off the ground in a single layer, ideally between 50–55°F with moderate humidity—this can keep them fresh for several months. Regularly inspect and remove any pumpkins showing soft spots or mold to protect the rest of your harvest.
Top Tips for Success and Best Pumpkin Varieties for Hydroponics
Growing pumpkins hydroponically can be a rewarding project, but it’s important to start with a clean system and stick to a regular maintenance schedule to avoid issues like root rot or nutrient imbalances. Check water quality often and clean pumps and pipes every few weeks to keep things running smoothly.
As pumpkins grow bigger, you’ll need to support the heavy fruits—try stretchy garden tape, hammocks made from old t-shirts, or sturdy nets to cradle developing pumpkins and keep them from cracking the vine.
For troubleshooting, keep an eye out for leaf discoloration, as this often signals a nutrient or pH problem—adjust your nutrient solution and pH promptly.
Best Pumpkin Varieties for Hydroponics
When it comes to varieties, opt for smaller, bush-type pumpkins like:
- Jack Be Little
- Sugar Pie
- Baby Pam
These tend to have compact vines, making them perfect for limited hydroponic spaces, and many offer improved resistance to common diseases.
Don’t be afraid to experiment with different varieties or tweak your setup as you gain experience—every grower learns along the way. Hydroponics is all about creativity and learning, so celebrate small wins and keep growing; your next harvest could be your best yet!