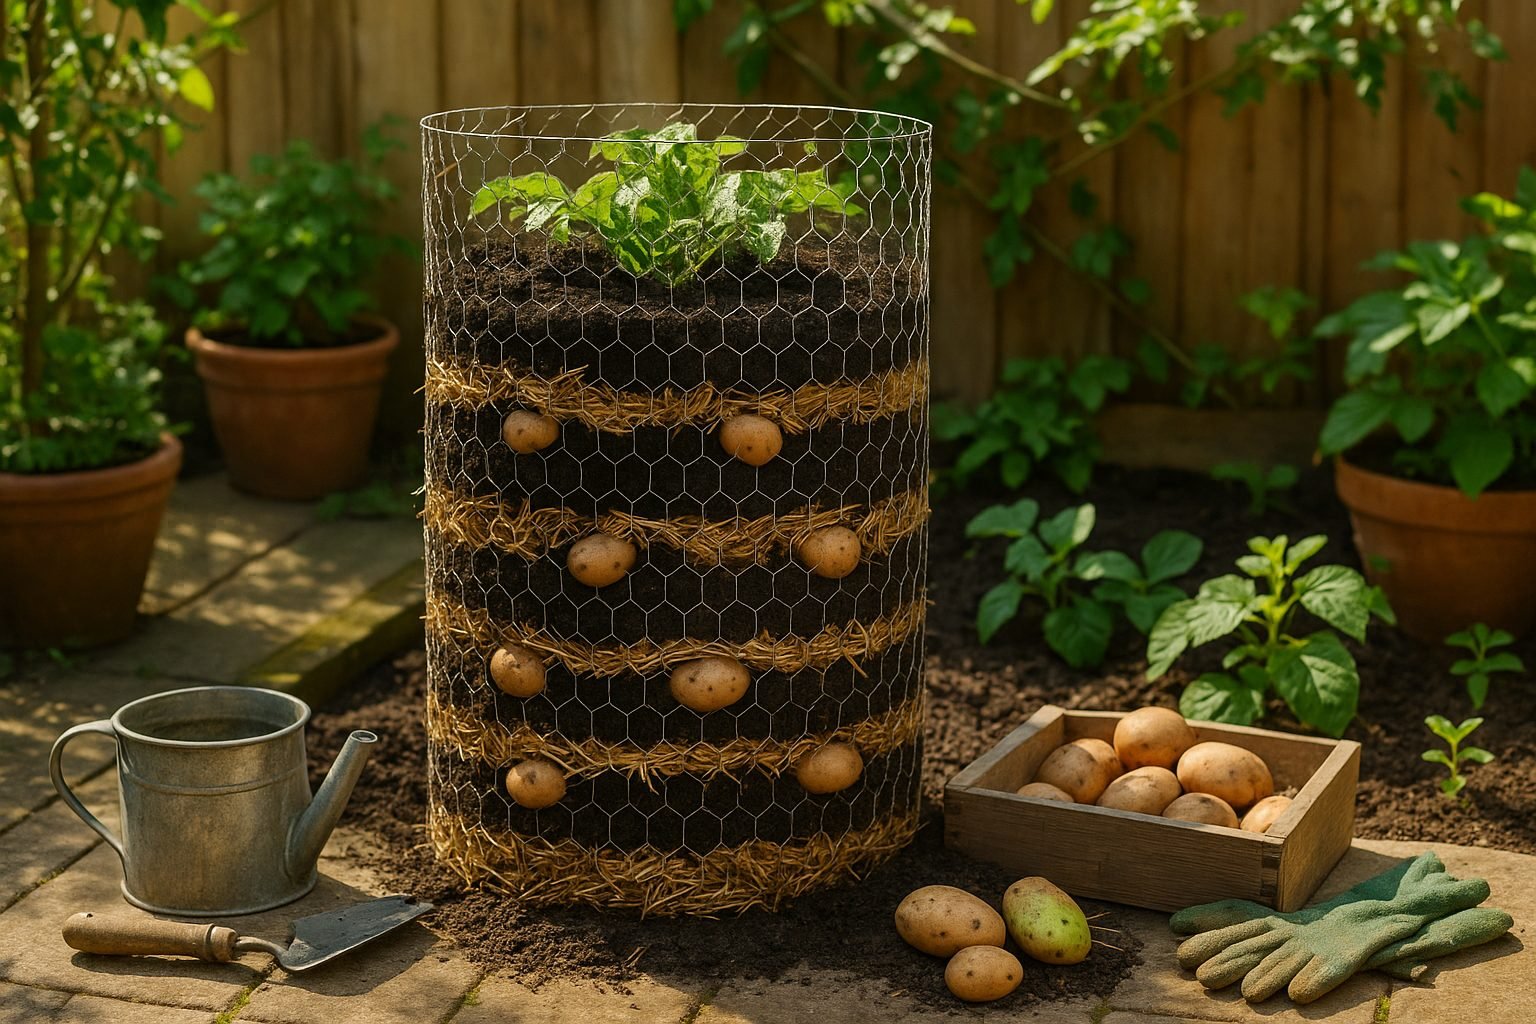
What Is a Potato Tower and Why Try It?
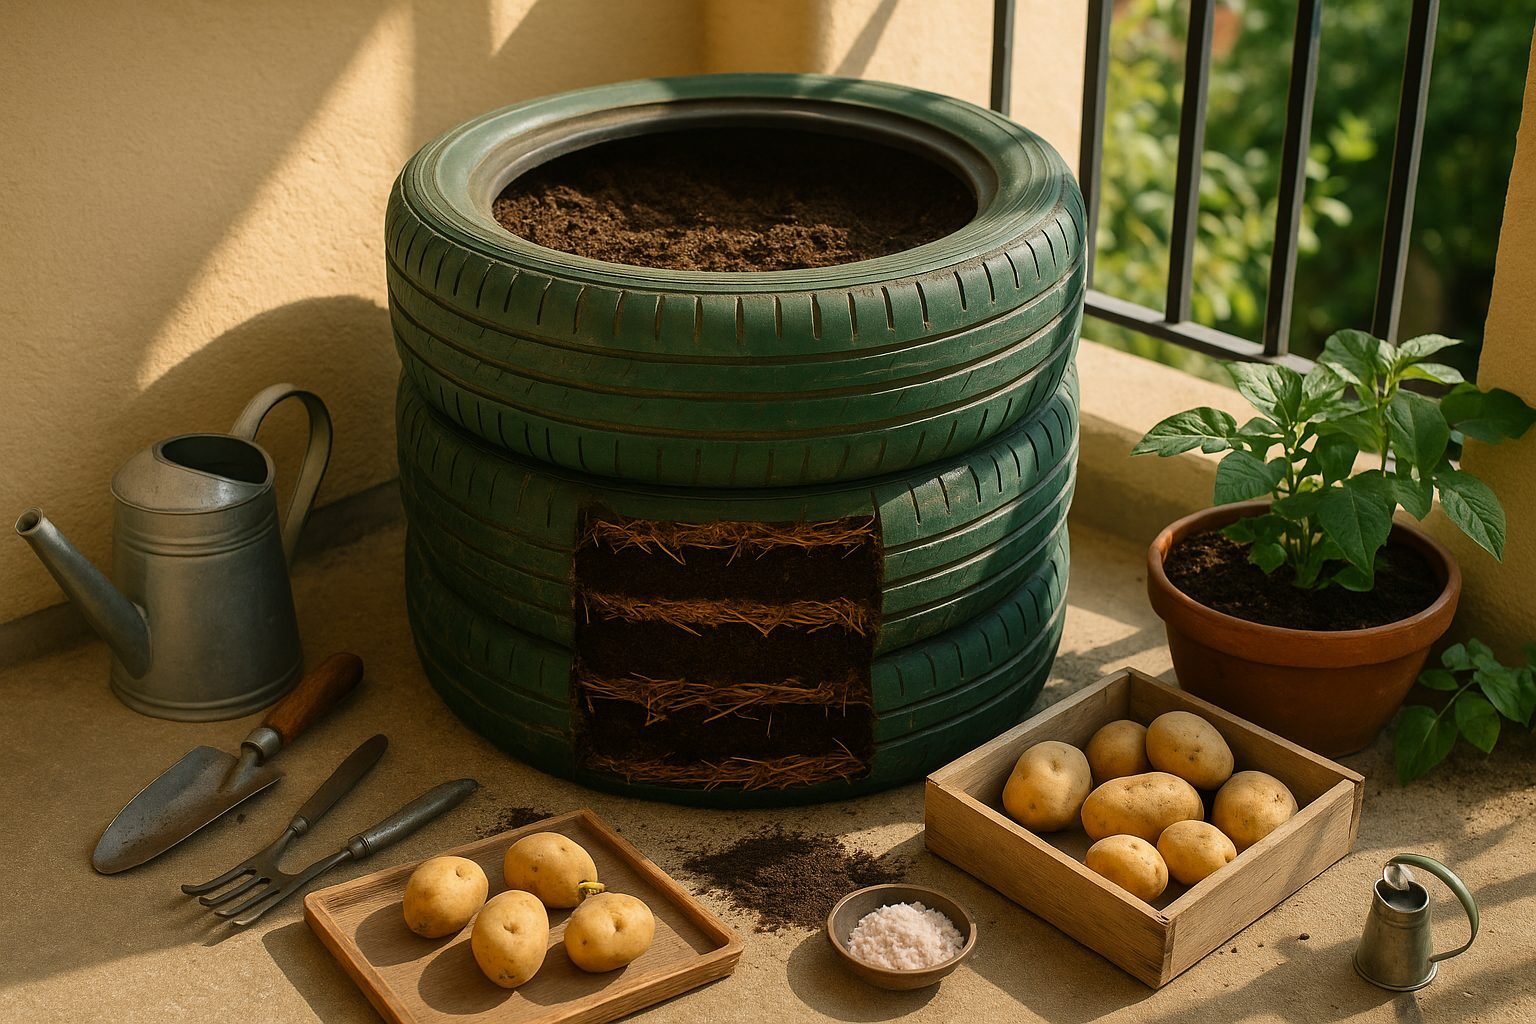
potato tower growing is turning heads among gardeners looking to maximize their harvests in small spaces. If you’ve ever wondered whether you could grow potatoes without digging up a whole patch of your yard, potato towers offer an innovative solution. Essentially, a potato tower is a vertical structure—often made from wire, wood, or even stacked tires—filled with layers of soil and seed potatoes. As the plants grow upward, you continue adding soil, encouraging more tubers to form along the buried stems. This clever setup means you can produce a surprisingly hefty crop from a footprint as small as a laundry basket.
So, why try potato tower growing? First, it’s incredibly space-efficient, making it perfect for balconies, patios, or tiny backyards where traditional rows just aren’t possible. You’ll get more potatoes per square foot, all neatly contained and easy to harvest—no heavy digging required. Additionally, keeping the plants off the ground helps with drainage and reduces pest problems, since there’s less soil contact for bugs and diseases to take hold. Watering and feeding your potatoes become straightforward, and the towers themselves can be built from affordable, recycled materials.
This method is especially appealing for urban gardeners, renters with container gardens, or anyone short on outdoor space. Even beginners find success with potato towers—they’re forgiving, low-maintenance, and can be set up in an afternoon. If digging isn’t your thing or your garden is more concrete than turf, potato tower growing could be your ticket to a thriving, homegrown potato harvest—right outside your back door.
Picking the Right Supplies and Preparing for Planting
To get your potato tower project off to a strong start, it’s essential to gather the right supplies and set up your space carefully. You’ll need sturdy wire mesh (about 3 feet tall works for most towers), straw to line the sides and support the soil, quality seed potatoes, nutrient-rich potting soil, a bit of compost to boost growth, and a reliable water source.
When picking seed potatoes, avoid grocery store spuds that might not sprout well—opt instead for certified seed potatoes from a garden center or farm supply store. Look for ones that are firm, blemish-free, and have visible “eyes” or sprouts forming; small to medium-sized tubers work best, as you can plant them whole.
Next, select a spot that gets at least six hours of sunlight daily for healthy growth—potatoes need sun to thrive! Make sure your staging area has good drainage; avoid low-lying patches where water tends to pool, since soggy conditions can lead to rot.
Also, consider access: you’ll want to be able to reach your potato tower for watering and harvesting, so don’t tuck it behind shrubs or in a corner that’s hard to reach. If space is tight, patios, balconies, or even a sunny driveway corner can work—just ensure the spot is stable enough for a full, heavy tower.
Remember, with a bit of forward planning and the right materials, you’ll set yourself up for an easier, more productive growing season—and tastier potatoes at harvest time.
Step-by-Step Guide: Building Your Potato Tower
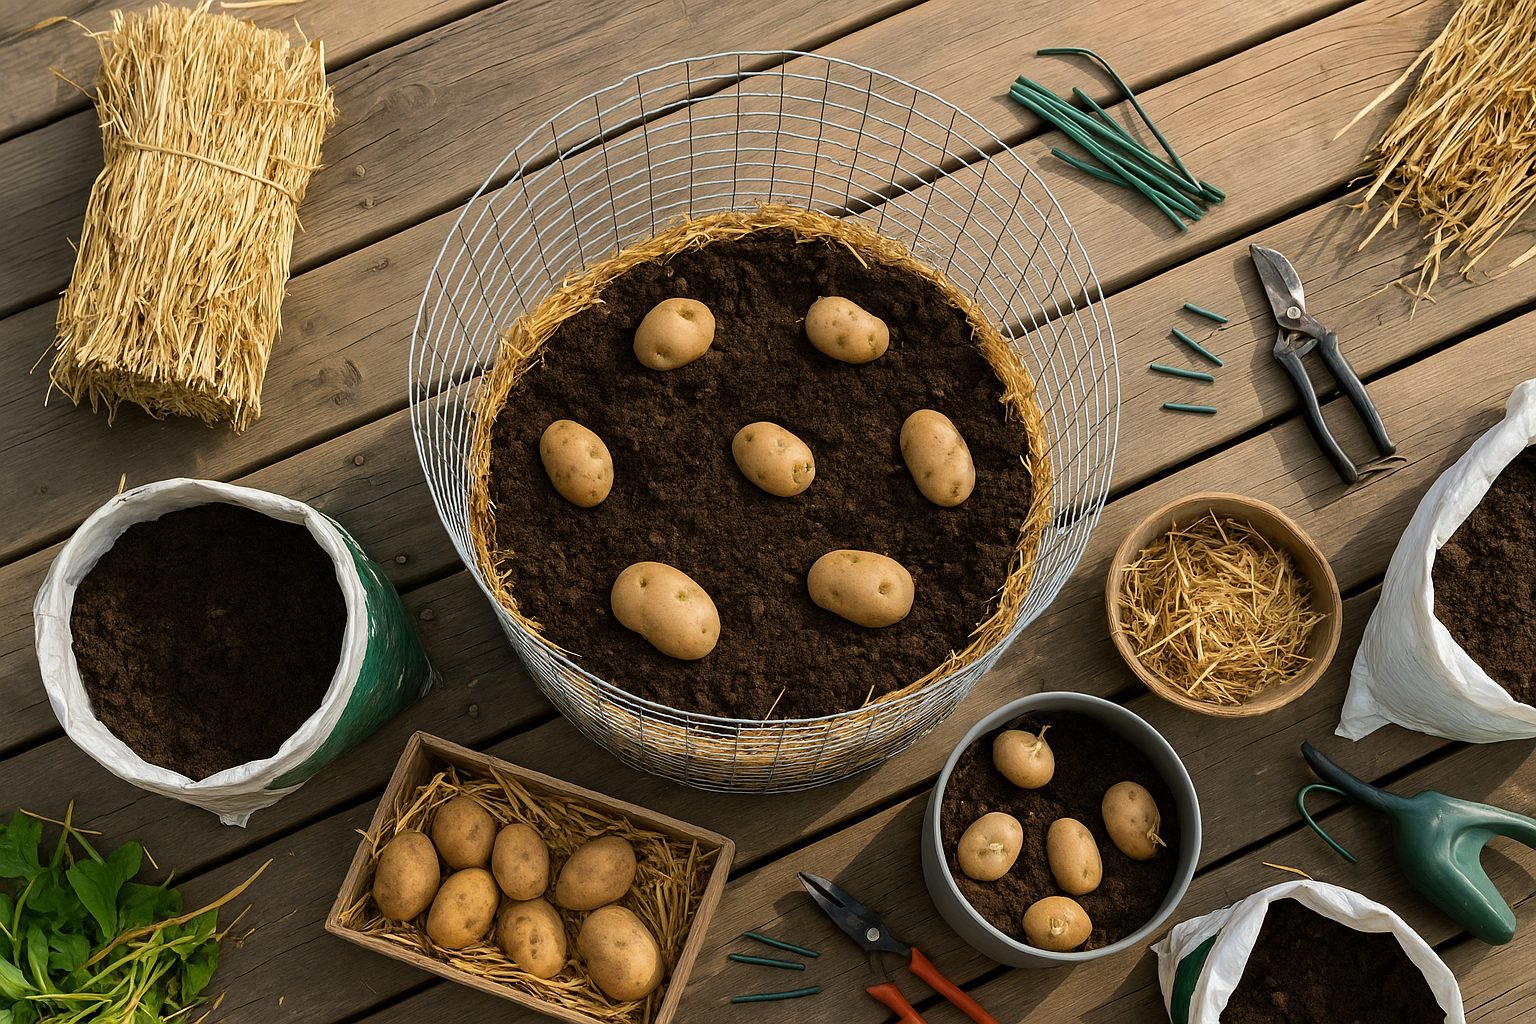
Building a potato tower is a fun and space-saving way to grow your own potatoes, whether you have a small yard or just a sunny balcony. Start by picking a spot that gets at least six hours of sunlight. Use a sturdy wire mesh, like hardware cloth or chicken wire, to form a cylinder about 2-3 feet tall and 1.5-2 feet wide; secure the ends with garden ties or zip ties for stability.
Set your tower upright and line the inside with straw, which helps retain moisture, keeps soil from falling out, and creates good air circulation. Fill the bottom with about six inches of loose, nutrient-rich soil mixed with compost, then nestle seed potatoes evenly apart (don’t overcrowd—about four per layer works well). Cover the potatoes with a few more inches of soil, then add another layer of straw.
Repeat this process, alternating soil, seed potatoes, and straw, until you reach the top. Finish with a final thick layer of straw to retain moisture.
Tips for Stability and Care
To keep your tower stable, press the soil down gently as you build, but don’t compact it too much—roots and tubers need air. Place the finished tower on a level surface, and if you’re in a windy area, stake it or anchor it with bricks around the base.
Make sure you water deeply, as towers can dry out faster than traditional beds, and check periodically that the sides aren’t bulging or collapsing.
Common Mistakes to Avoid
- Packing the soil too tightly
- Using poor-quality or non-composted materials
- Loading too many potatoes per layer
These mistakes can stunt growth and reduce your yield. With regular watering and a bit of patience, you’ll soon have a bounty of homegrown potatoes ready for harvest right from your tower.
Planting and Caring for Potatoes in the Tower
Planting seed potatoes in layers within a potato tower is a smart way to maximize limited garden space and boost your harvest. Start by filling the base of your tower with 6-8 inches of loose, nutrient-rich soil or compost. Place your first layer of seed potatoes evenly spaced about 6 inches apart, making sure the eyes face upwards. Cover them with another 4-6 inches of soil or straw.
Once the sprouts reach about 6 inches tall, add another layer of soil or straw, covering all but the very tops of the plants. Repeat this process, layer by layer, until you reach the top of the tower.
Watering and Fertilizing
For best watering results, keep the soil consistently moist but never soggy. A deep watering every 2-3 days usually works well, unless the weather is particularly hot or dry. If you’re using organic fertilizers, apply compost or diluted fish emulsion every 3-4 weeks. Inorganic options, like a balanced granular fertilizer (10-10-10), can be used according to the package instructions.
Monitoring Growth and Maintenance
Look for healthy, dark green foliage and steady upward growth as signs that your potatoes are thriving. Throughout the growing season, check that the tower doesn’t dry out, and add more soil or straw as needed to keep developing tubers covered—this prevents sunlight from turning them green and inedible. Regularly remove any yellowing or damaged leaves to encourage healthier growth and better air circulation.
With a little patience and attention, your potato tower will soon be lush and productive, providing you with a satisfying and space-saving harvest.
Watering, Fertilizing, and Managing Problems
Establishing a consistent watering routine is key to healthy tuber plants—aim to keep the soil evenly moist, but not soggy. Check the top inch of soil: if it feels dry, it’s time to water. Morning watering is best, as it prevents fungal diseases from lingering on wet foliage overnight. Use a soaker hose or water at the base of the plant to minimize splashing and leaf moisture.
For fertilizing, start with a balanced, all-purpose fertilizer mixed into the soil at planting. Then switch to a low-nitrogen, high-potassium blend (such as 5-10-10) when plants begin forming tubers, usually mid-season. Feed every three to four weeks by lightly working fertilizer into the soil around the base, being careful not to disturb the tubers.
Keep an eye out for common pests like aphids or potato beetles; if spotted, pick them off by hand or use insecticidal soap. Regularly inspect plants for wilting, yellowing, or spots, which can signal disease—remove affected leaves and consider rotating crops yearly to reduce risk.
Good drainage is crucial: if water pools after rain or watering, loosen the soil or raise beds with compost and sand. Mulching with straw or leaves can help retain moisture and suppress weeds, but keep mulch away from stems to avoid rot.
By sticking to a regular care schedule, adjusting for weather conditions, and checking plants weekly for signs of trouble, you can catch and resolve issues early, keeping your crop thriving all season.
Harvesting Your Potatoes and Tips for Success
Knowing when to harvest your tower-grown potatoes is key to getting the best yield, and it all comes down to watching the plants’ foliage. Once the leaves and stems turn yellow and start to die back—usually about two to three weeks after flowering—it’s a sign your potatoes have matured underground and are ready to be dug up.
To harvest, begin by gently removing the layers of soil, straw, or compost from the top of the tower, taking care not to stab or bruise the tubers with your hands or a garden fork. Work your way down, removing each layer and collecting the potatoes as you go. For easy dismantling, if your tower is made of wire mesh or wooden slats, unclip or unscrew the sides to let the soil spill out onto a tarp; this helps you catch every last potato without too much digging.
As you deconstruct, inspect the materials—burlap, mesh, boards, or stakes—and set aside anything still in good condition for next season. Brush dirt off your potatoes but avoid washing them if you plan to store them; excess moisture can lead to rot.
For future success, consider rotating the location of your tower each year to prevent soil-borne diseases, and replenish your soil with compost or aged manure to maintain rich nutrients. Keep notes on how your chosen seed varieties performed and how many layers you built; small tweaks, like starting with certified disease-free seed potatoes or adjusting the tower’s height, can make a big difference in your next harvest’s success.