Understanding Garlic’s Soil Needs
Getting soil prep for garlic right is the first and most crucial step if you want big, flavorful bulbs from your garden. Garlic isn’t fussy about many things, but it is very particular about the soil it grows in. Ideally, garlic thrives in well-drained soil that doesn’t become waterlogged after rain. Soggy conditions can lead to root rot, especially during the colder months, and compacted earth makes it hard for bulbs to grow and develop fully. That’s why loosened, crumbly soil with good air pockets is vital—think sandy loam rather than heavy clay.
Soil pH also makes a difference. Garlic prefers a slightly acidic to neutral pH between 6.0 and 7.0. Too acidic or too alkaline, and the plants might struggle to uptake essential nutrients like nitrogen, phosphorus, and potassium, all of which directly affect bulb size and flavor. Home soil test kits are inexpensive and easy to use; they can help you gauge and adjust your soil’s pH before planting. If your garden soil is too acidic, mixing in a bit of garden lime can help. Conversely, if it’s too alkaline, composted leaves or pine needles can nudge the pH downward.
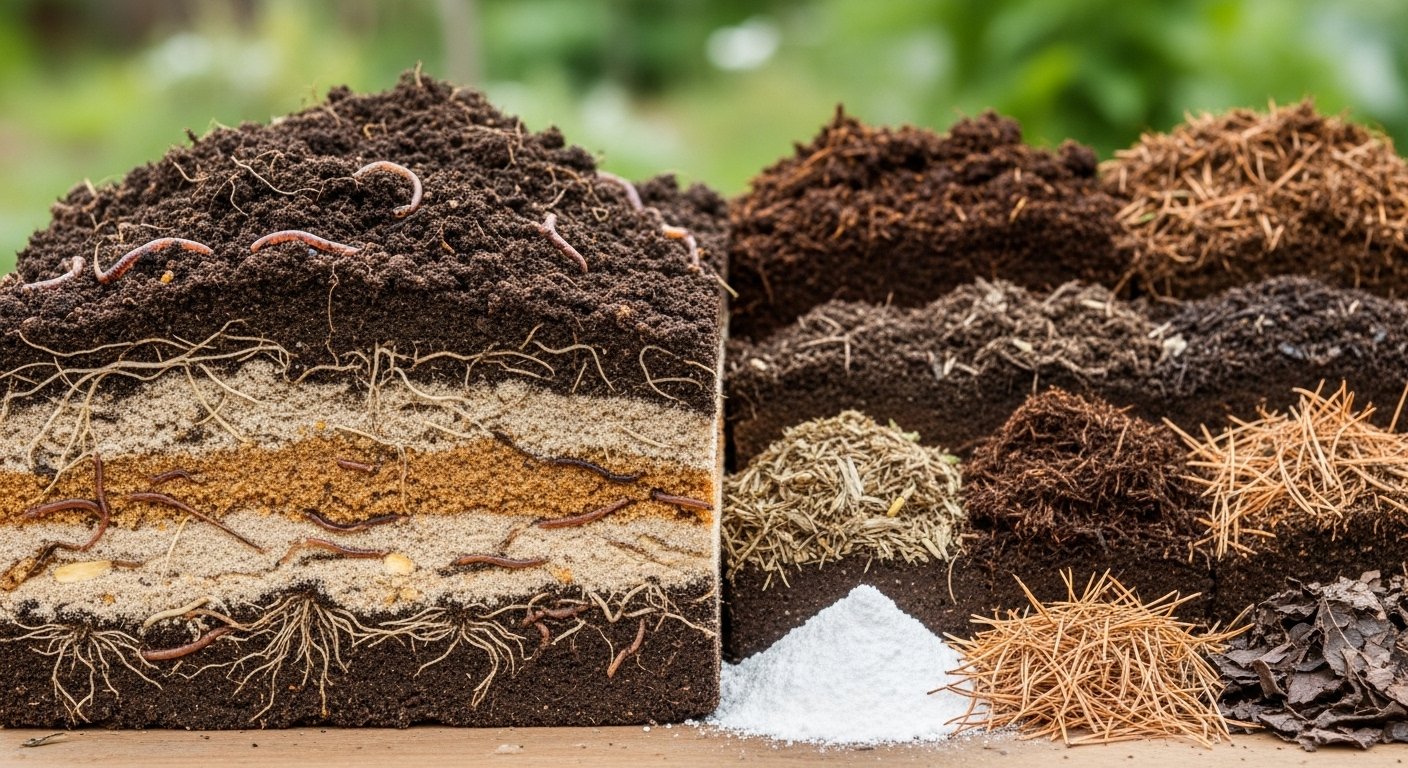
Fertility is another component to keep in mind when tackling soil prep for garlic. Garlic plants are heavy feeders, meaning they need nutrient-rich soil to reach their full potential. Adding organic matter, such as well-rotted manure, compost, or worm castings, boosts both fertility and texture. Well-fed garlic produces larger, juicier bulbs with a more pronounced flavor profile.
Your soil type will influence the end result as well. Sandy soils warm up quickly and drain well, encouraging earlier growth, but may require more frequent watering. Clay soils hold nutrients but need to be heavily amended to avoid compaction and improve drainage. A balanced, loamy soil supports robust bulbs with complex flavor—worth investing a little extra effort. Ultimately, focusing on soil prep for garlic rewards you with a vibrant, tasty harvest that elevates every meal.
Choosing the Right Planting Site & Crop Rotation
When selecting a spot to plant your garlic, look for an area that receives at least six hours of direct sunlight each day and avoids places where water tends to pool after rain. Garlic dislikes soggy roots and heavy shade, which can lead to poor bulb development and an increased risk of rot.
Rotate your garlic crop each season by planting garlic where you previously grew non-allium crops (such as tomatoes, beans, or lettuce), rather than in the same spot as last year’s onions, leeks, or chives. Crop rotation helps break disease cycles—like white rot and nematodes—that build up in the soil when alliums are grown repeatedly in one area. It also reduces the depletion of specific nutrients that garlic needs to thrive.
Companion planting is another simple way to boost your garlic’s health and yield. Consider growing garlic alongside herbs like dill or parsley, which don’t compete for space and can attract beneficial insects that prey on common pests. Marigolds and nasturtiums are great floral companions; their strong scents may deter aphids, beetles, and even rabbits, giving your garlic an added layer of pest protection.
By thoughtfully selecting your planting site, rotating crops, and choosing the right companions, you set your garlic—and your garden—up for a more productive and resilient season.
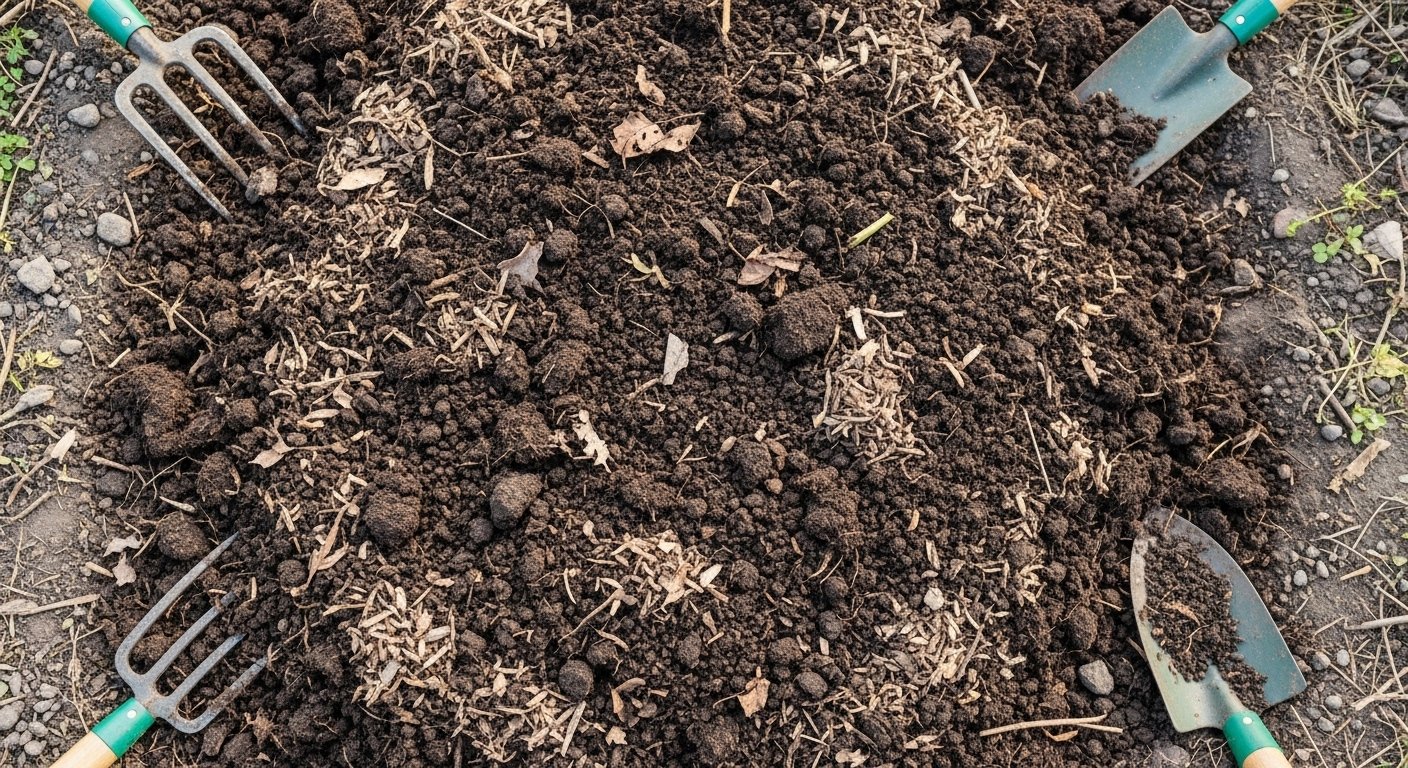
Preparing the Soil for Garlic
Getting your garden soil ready in the fall is one of the most important steps for growing healthy garlic. Start by clearing away any leftover weeds, dead plants, or debris from your planting area; this helps prevent diseases and pests from carrying over to your garlic crop.
Once the area is clean, use a garden fork or shovel to loosen the soil to a depth of at least 8 to 10 inches, allowing garlic roots to develop without obstruction. Work in plenty of organic matter—compost, leaf mold, or decomposed garden waste are excellent choices—to boost soil fertility and improve moisture retention.
If your soil is heavy or clay-like, adding well-rotted manure or some coarse sand can make a real difference. These amendments enhance drainage and texture, preventing your garlic bulbs from rotting.
Take this extra step: do a simple soil test to check for nutrients and pH. Most local garden centers sell easy home testing kits. Garlic prefers a slightly acidic to neutral pH, ideally between 6.0 and 7.0. If your soil is too acidic, add garden lime as directed; for soil that is too alkaline, elemental sulfur can help bring the pH down.
Amending the soil early in the fall gives everything time to settle and improves your odds of a robust garlic harvest next summer.
Planting Garlic Cloves: Depth, Spacing, and Mulching
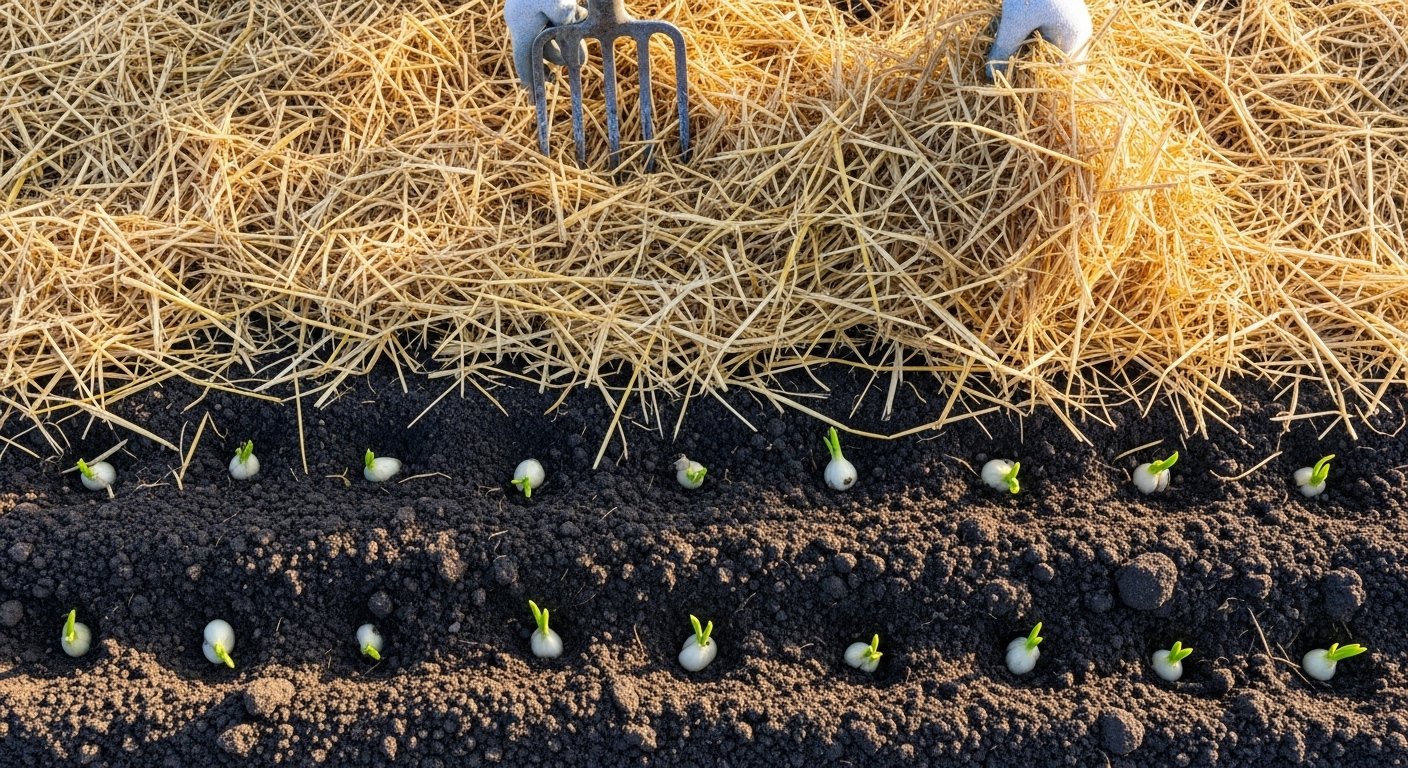
For the best garlic harvest, start by planting each clove pointed side up about 2 inches deep in the soil. This depth provides insulation from temperature swings and encourages strong root growth. Make sure to space each clove at least 4 to 6 inches apart in rows that are a foot apart, as crowded garlic won’t form large, healthy bulbs.
After planting and watering your cloves well, it’s time to add mulch—this is a crucial step. Spread a 3-4 inch layer of straw or shredded leaves over the planting area, covering the soil completely but avoid packing it down too tightly.
Mulching acts like a protective blanket: it keeps weeds at bay so your garlic doesn’t have to compete for nutrients, traps moisture in the soil to reduce the need for frequent watering, and insulates your bulbs during winter freezes. Gardeners in colder regions especially appreciate how straw or leaf mulch helps prevent bulbs from heaving out of the ground after freeze-thaw cycles.
In the spring, your mulch will continue to suppress weeds and maintain even soil moisture, saving you time and effort. If you notice the mulch matting down or decomposing over time, simply add a fresh layer.
By following these planting and mulching tips, your garlic crop will be primed for strong, uniform growth and a bigger, more flavorful harvest.
Managing Soil Health Throughout the Season
Keeping your garden soil healthy all season starts with consistent watering. The goal is to keep the soil evenly moist—never too dry or soggy. You can achieve this by watering deeply but less frequently, allowing moisture to reach the roots without oversaturating the ground. Mornings are best for watering, as the cooler temperatures reduce water evaporation and help prevent fungal growth.
Consider using mulch to retain moisture and keep temperatures stable. When it comes to feeding your plants, choose balanced, organic fertilizers and apply them at crucial growth stages, such as after planting, during flowering, and as fruit begins to form. Compost and well-rotted manure provide a gentle, steady nutrient boost without the risk of burning plant roots.
Always follow label recommendations to avoid over-fertilizing, which can harm both plants and beneficial soil microbes. Regular monitoring is key: inspect leaves and stems weekly for unusual spots, yellowing, or holes—early signs of nutrient deficiency or pest invasion. Watch for wilting, strange growths, or moldy patches along soil surfaces, which can signal the start of soil-borne disease.
Use simple tools like moisture meters and DIY soil test kits to check if your soil stays within the right moisture and nutrient ranges. Taking notes or photos over time helps catch subtle changes early so you can make small adjustments before they become bigger problems. This proactive approach keeps your soil—and your plants—healthy from planting through harvest.
Common Garlic Growing Problems & How to Solve Them
Growing garlic can be highly rewarding, but soil-related issues often stand in the way of a healthy harvest. One common problem is bulb rot, frequently caused by heavy, poorly drained soil that encourages fungal diseases like white rot or fusarium.
To prevent this, plant garlic in raised beds or amend your garden soil with plenty of organic matter such as compost, which improves drainage and soil structure. Avoid overwatering, especially during rainy spells, and always remove any infected bulbs to keep diseases from spreading.
Pests like onion maggots and nematodes can also attack garlic, but rotating your crops—planting garlic in a different spot every year—breaks pest and disease cycles naturally. To further protect your plants, you can add a thick layer of mulch to deter some pests and keep moisture levels steady.
If you notice poor bulb development or smaller bulbs at harvest, it’s often due to inadequate soil fertility or compacted, dense soil. Garlic thrives in loose, nutrient-rich environments, so work in well-rotted manure or compost before planting.
Testing your soil for pH and nutrients is also smart, as garlic prefers slightly acidic to neutral soil (pH 6.0–7.0) with plenty of available nitrogen. Organic fertilizers, such as blood meal or fish emulsion, can provide a boost during the growing season.
In short, healthy soil is the key to robust garlic—focus on building up organic matter, rotating crops, and keeping the area well-drained for the best results.
Harvesting, Curing, and Storing Garlic
Knowing when to harvest garlic is key to getting those big, flavorful bulbs you’ve worked all season to grow. Start checking your plants as midsummer rolls around: the best sign they’re ready is when the lower leaves turn yellow and begin drying out, but the top few leaves are still green. Pulling too early results in tiny bulbs, while waiting too long lets the cloves split apart in the ground.
To avoid damaging the bulbs, use a garden fork to loosen the soil 4–6 inches away from the stalk, then gently lift each plant out rather than yanking. Once harvested, gently brush off excess soil, but don’t wash the bulbs—moisture encourages mold.
For curing, bundle the stalks in small groups or lay bulbs in a single layer on racks somewhere airy, shaded, and dry, such as a covered porch or shed; avoid full sun, which can scorch the garlic. Allow the garlic to cure for two to four weeks, until the skins are papery and the roots feel dry and crisp.
Then, trim the roots and cut the stems an inch above the bulb (unless you want decorative braids for softneck garlic). For the longest shelf life, store the cured garlic in mesh bags or baskets in a cool (60°F or below), dry location with plenty of airflow—basements can work as long as they’re not damp. Avoid the fridge, which can make garlic sprout.
Properly harvested, cured, and stored, your garlic can last for six months or more—so you’ll have those spicy, delicious cloves on hand to flavor meals all year long.
FAQs: Garlic Soil & Planting Questions Answered
When it comes to planting garlic, the right soil is key to healthy, robust bulbs. Garlic thrives in well-draining, loose soil rich in organic matter—think compost or aged manure mixed in before planting.
Aim for a slightly acidic to neutral soil pH, around 6.0 to 7.0. If your soil is too acidic, add a bit of garden lime to raise the pH. Using a soil test kit will give you quick, reliable results.
For fertilizer, choose a balanced organic formula like 10-10-10 NPK. Mix it into the soil at planting, with a light top-up in early spring when shoots appear.
If you accidentally plant cloves upside down, don’t worry—garlic is quite forgiving. Just gently dig them up and replant with the pointy end up for best results.
To prevent diseases like white rot:
- Rotate your garlic beds each year.
- Never plant garlic in the same spot two years running.
Also, avoid overwatering since soggy soil can lead to rot. Mulch with straw or leaves to control weeds, insulate bulbs, and retain moisture.
With these tips, even beginner gardeners can look forward to a healthy garlic harvest.