
Choosing the Right Garlic and Planting Time
Knowing which mulch works best for garlic can make all the difference in your garden’s success, especially when you start with the right garlic variety at the right time. Garlic thrives when planted in the fall, ideally a few weeks before your region’s ground freezes—usually late September through early November, depending on your climate. This timing allows the cloves to establish roots before winter dormancy, leading to healthy, robust bulbs at harvest. Overwintered garlic benefits from mulch’s insulating properties, which regulate soil temperature and moisture while helping prevent early sprouting or frost damage.
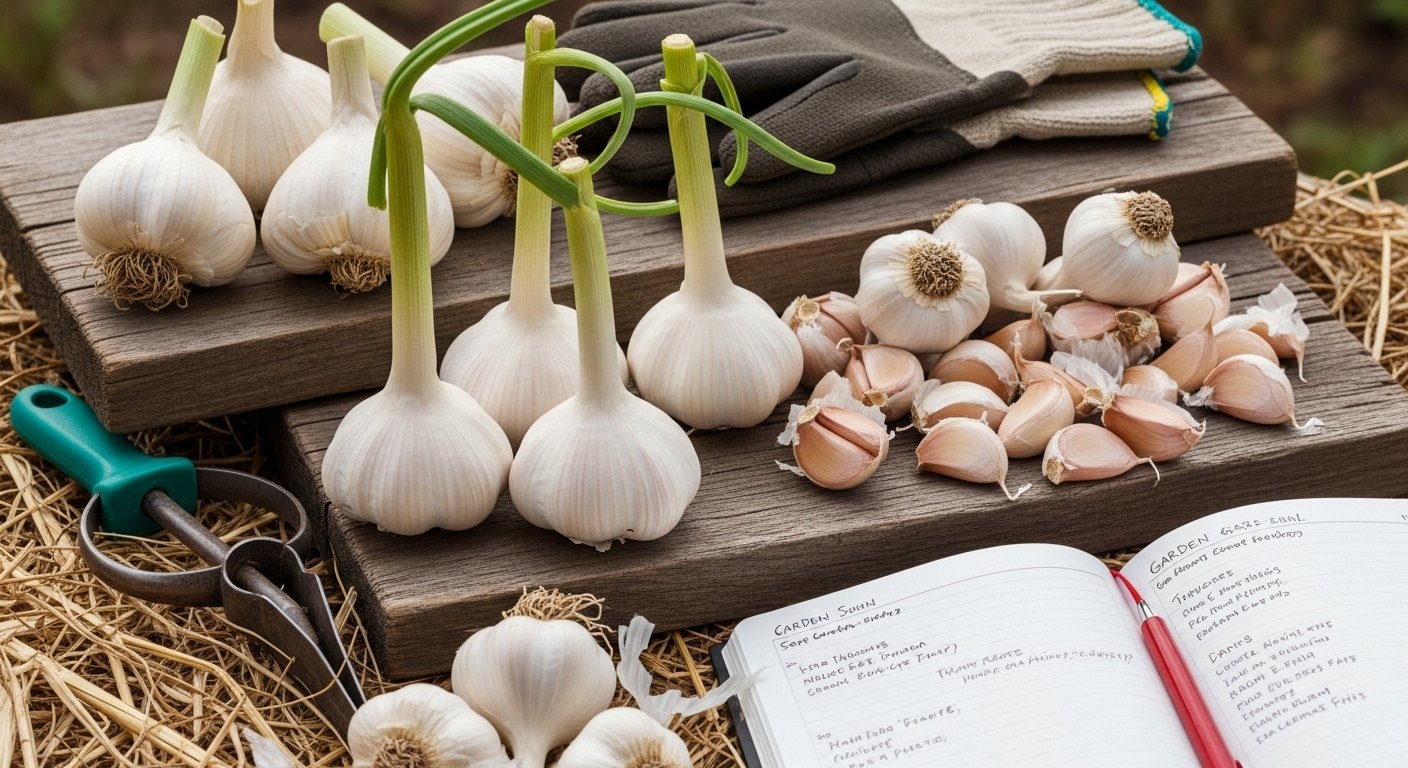
Choosing the Right Variety
When selecting garlic, choosing between hardneck and softneck varieties is a key decision. Hardneck garlic, known for its rich flavor and signature scapes, performs best in colder climates because it requires a winter chill to grow optimally. These varieties tend to have fewer, larger cloves per bulb and a deeper, more complex taste, but they don’t store as long—typically up to six months.
Softneck garlic, on the other hand, thrives in mild winters, produces more cloves, and is prized for its extended storage life, often lasting up to nine months when cured properly. It’s also the classic choice for garlic braids.
The Benefits of Mixing Varieties
Many gardeners plant a mix of both types to experiment with different flavors, textures, and harvest times. This approach not only broadens your culinary options but also increases your resilience against unpredictable weather and pests. By diversifying your garlic bed, you’re more likely to enjoy a successful, flavorful harvest—no matter what the season brings.
Preparing the Soil for Garlic Success
Growing healthy, flavorful garlic starts with preparing the right soil. Garlic thrives in well-draining, loamy soil rich in organic matter—think of a mix that crumbles easily in your hands and doesn’t stay soggy after rain.
A month before planting, clear your garden bed of weeds and debris, then loosen the top 8 to 12 inches of soil with a fork or tiller. Work in compost or well-rotted manure to boost nutrients and improve moisture retention. Garlic especially benefits from organic matter, as it supports root growth and helps fend off common soil-borne diseases.
To further protect your crop, rotate garlic beds each year, avoiding spots where garlic, onions, or other alliums have grown recently. Crop rotation disrupts pest and disease cycles, giving your bulbs a healthier start.
In the off-season, consider planting cover crops like clover or rye. These green manures:
- Suppress weeds
- Break up compacted soil
- Add valuable organic material when tilled under
- Attract beneficial insects
- Reduce the presence of fungal pathogens
Taking the time to prep your soil now will set the stage for strong, robust garlic plants come harvest time.
Planting Garlic Cloves for Strong Growth
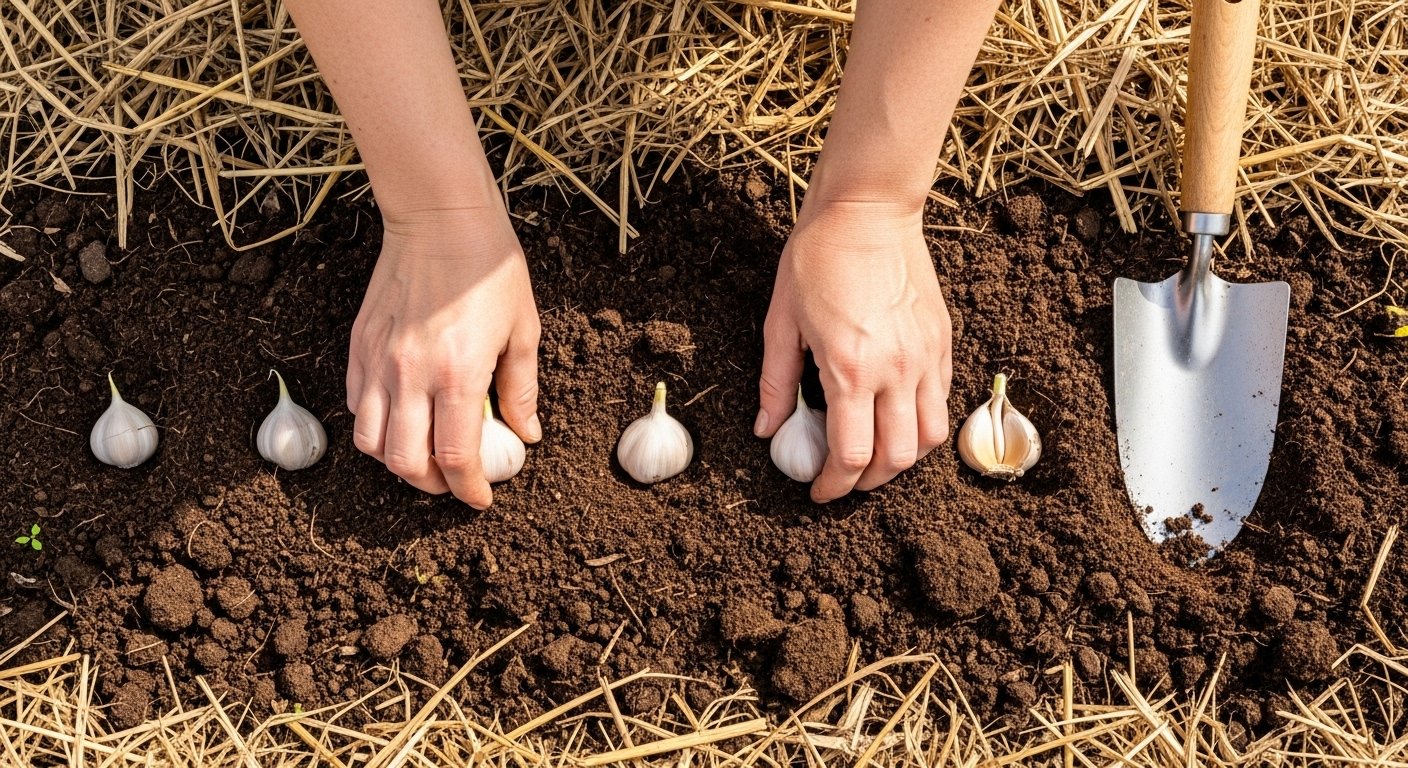
For the best garlic harvest, start by choosing large, healthy cloves from disease-free heads—avoid using small or damaged cloves, as they’ll produce weaker plants. Before planting, gently separate the cloves without removing their papery skins.
Pick a sunny spot in your garden with well-drained soil and prepare it by loosening the top few inches. Plant each clove about 2 inches deep and space them 4 to 6 inches apart so each plant has room to grow.
It’s crucial to place the cloves with the pointed end facing upward and the flat root end down; this orientation helps shoots find their way to the surface quickly and grow stronger. Cover the planted cloves with soil and, if your climate is susceptible to frost, add a light layer of mulch like straw to protect them.
Water just enough to keep the soil moist, but not soggy, as garlic doesn’t like sitting in water. By giving your garlic the right start—choosing robust cloves and planting them at the correct depth and direction—you’ll encourage vigorous root systems and bigger bulbs at harvest time.
Companion Planting and Garden Planning
Companion planting is a smart, natural way to boost your garden’s health by pairing plants that help each other grow. For garlic, surrounding it with the right neighbors not only improves its growth but also strengthens the whole garden’s resilience.
Good companions for garlic include:
- Carrots, which benefit from garlic’s pest-repelling properties
- Lettuce, which receives protection from aphids and other bugs
- Strawberries, tomatoes, and beets, as their growth isn’t hindered and they often face fewer pest issues
On the other hand, garlic doesn’t get along with peas and beans — planting these close together can stunt their growth and make them more susceptible to disease.
Garlic is especially prized because it naturally wards off pests like aphids, spider mites, and Japanese beetles from nearby crops, acting as an organic form of pest control.
To get the most out of companion planting, consider using garden planning tools or apps like GrowVeg or Planter. These digital resources help you visualize your space, organize crop rotation, and avoid bad plant pairings. They can save you from trial and error, making it easy to create a thriving, harmonious garden tailored to your needs.
Winter and Early Spring Care: Mulching, Watering, and Feeding
Mulching is a simple yet essential step for caring for garlic through winter and into early spring. After planting in the fall, cover beds with 3–6 inches of straw, shredded leaves, or a similar material. This blanket protects garlic from harsh temperature swings, keeping the soil consistently cold and preventing premature sprouting. Mulch also blocks sunlight from reaching weed seeds, making it harder for them to break through and steal nutrients from your garlic.
As the weather warms in early spring, start monitoring soil temperature and moisture. If your region experiences prolonged cold or wet conditions, leave the mulch in place a little longer to prevent frost damage. However, gently begin pulling some mulch away once green shoots appear and the threat of deep frost has passed. This allows the soil to warm up faster and helps shoots grow strong.
As garlic awakens, be mindful of watering—garlic likes even moisture but hates soggy feet. Water if rainfall is lacking, aiming for about an inch per week. During periods of soaking rains, hold off on watering to prevent rot.
Early spring is also the ideal time to give garlic a nutritional boost. A top-dressing of compost or a balanced organic fertilizer supports hearty growth and larger bulbs.
Throughout the season, keep an eye on both the weather forecast and your garlic’s appearance. Even small adjustments in mulching, watering, or feeding can make a big difference, especially in years with unusual cold snaps or dry spells.
Managing Pests, Diseases, and Harvest Timing
Garlic can fall victim to pests like onion maggots, thrips, and nematodes, as well as diseases such as white rot, rust, and fusarium. To keep pests at bay, rotate your crops, remove any plant debris, and use floating row covers early in the growing season. For organic treatments, neem oil can deter insects, while diatomaceous earth sprinkled around bulbs is especially effective against maggots.
When it comes to disease prevention, avoid overwatering, ensure good soil drainage, and plant certified disease-free seed stock. Watch for yellowing leaves and soft, discolored bulbs as early signs of problems.
Once it’s time to harvest, usually mid to late summer, check the lower leaves — when several are brown while the top ones stay green, your garlic is likely ready. Scapes (the curly flower stems) appear in hardneck garlic; snap them off once they loop to ensure all energy goes into bulb growth, plus you get bonus edible scapes for the kitchen.
After harvesting, cure your garlic by hanging or spreading bulbs in a well-ventilated, dry area out of direct sun for two to three weeks. This drying process toughens the outer layers, helping bulbs last for months in storage without rotting or sprouting.
Harvest, Cure, and Store for a Year-Round Supply
When harvesting garlic, gently loosen the soil with a garden fork and lift the bulbs by their stems—avoid pulling, as this can damage the heads. Once harvested, brush off any excess dirt but don’t wash the bulbs.
Cure the garlic by laying the bulbs out in a single layer in a dry, well-ventilated area, out of direct sunlight, for two to three weeks. This helps the skins dry and intensifies the flavors.
After curing, trim the roots and tops, then store the cleaned bulbs in mesh bags or baskets in a cool, dark place. Properly handled, your garlic can stay fresh and flavorful for up to a year.