Introduction
If you want to add bold flavor and fiery heat to your home garden, learning how to grow Thai chili peppers is the perfect place to start. These compact pepper plants are famous in kitchens worldwide, especially in Southeast Asian dishes like curries, sauces, and stir-fries, thanks to their vibrant color and unmistakable kick. Thai chili peppers pack a punch even in small doses, making them beloved among adventurous eaters and gardeners who enjoy experimenting with intense flavors.
Whether you’re a seasoned gardener or just starting out with containers on a sunny balcony, Thai chilies are rewarding and surprisingly resilient. In this article, you’ll discover the best ways to start Thai chilies from seed, tips on providing the right soil and sunlight, watering tricks, and natural methods for managing pests. By the end, you’ll have everything you need to harvest your own spicy, homegrown peppers for your favorite recipes.
Understanding Thai Pepper Plants
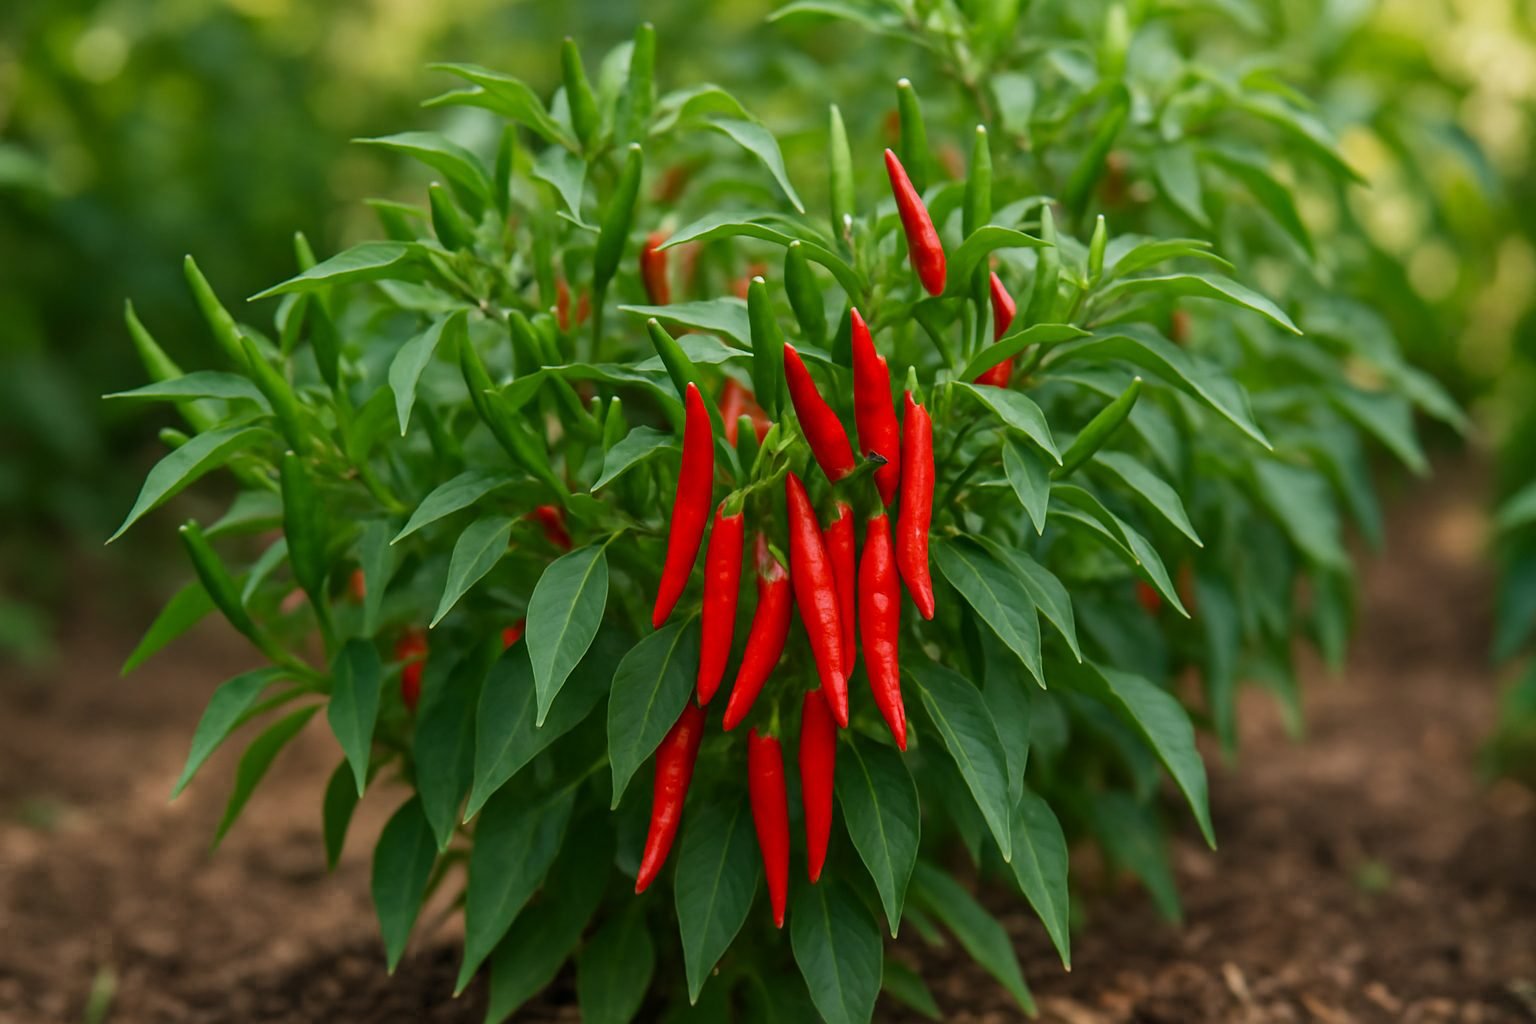
Thai pepper plants, prized for their bold flavor and fiery heat, originate from Southeast Asia and are a staple in many Thai and Asian dishes. These compact, bushy plants typically grow to about 2-3 feet in height and are known for their vibrant green leaves and slender, upright pods that turn from green to vivid red as they ripen.
There are several common varieties that home gardeners enjoy growing, such as the Thai Bird’s Eye chili (prik kee noo), which packs intense heat in small, bullet-shaped peppers, and the Thai Dragon pepper, notable for its longer pods and prolific harvests. Some gardeners also opt for the less spicy Prik Jinda, which still offers the signature Thai flavor but with slightly milder heat.
In terms of taste, Thai peppers have a fruity, grassy undertone that adds complexity to dishes, making them stand out from standard red chilies. When it comes to heat, Thai peppers are generally hotter than jalapeños and serranos—reaching 50,000 to 100,000 Scoville Heat Units (SHU)—but fall short of the blazing intensity of habaneros or ghost peppers.
If you’re sensitive to spice, a good tip is to use gloves while handling these peppers and start by adding small amounts to dishes; a single pod can infuse an entire stir-fry with flavor. Whether you’re a gardener looking for a punchy addition to your vegetable patch or a cook seeking authentic Thai heat, Thai pepper plants are a rewarding and versatile choice.
Starting Thai Peppers from Seeds or Seedlings
Starting Thai peppers from seeds lets you experiment with different varieties but requires patience. Begin by sowing seeds indoors 8-10 weeks before your last frost date. Use a seed-starting mix in small cell trays or pots, pressing seeds lightly into the surface and barely covering them with soil. Keep the soil moist but not soggy, and provide warmth (75-85°F) using a heat mat or a warm windowsill to help seeds germinate in 10-14 days.
Using seedlings simplifies the process—simply buy healthy young plants from a nursery and transplant them. For both seeds and seedlings, use a well-draining potting mix rich in organic matter, and choose containers with drainage holes. A 3-5 gallon pot is ideal for each plant if growing in pots.
Thai peppers thrive in full sun, so indoors, place them near a south-facing window or under grow lights for 12-16 hours daily. Once nighttime temperatures stay above 60°F, you can transition seedlings outdoors. Gradually acclimate them by setting pots outside for a few hours each day, increasing exposure over a week to prevent transplant shock.
Outdoors, pick a sunny spot with loose, well-drained soil, and space plants 18-24 inches apart. Whether you start from seeds or seedlings, consistent moisture and warmth are key to strong, healthy Thai pepper plants.
Planting and Growing Thai Pepper Plants
When it comes to starting Thai pepper plants, you can either transplant seedlings or direct sow seeds outdoors, but timing is key for healthy growth. Wait until all danger of frost has passed and soil temperatures are consistently above 70°F (21°C)—usually a few weeks after your region’s last spring frost date.
If starting with seedlings, harden them off for a week by gradually exposing them to outdoor conditions before transplanting. Space each plant about 12 to 18 inches apart to allow for airflow and room to grow. Thai peppers love sunlight, so pick a spot that gets at least six to eight hours of full sun daily.
Peppers thrive in warm conditions, so avoid planting too early when nights are still cold. Use well-draining soil enriched with compost or a slow-release balanced fertilizer, and aim to keep the soil consistently moist but never soggy. Deep, infrequent watering is best—soak the soil thoroughly when it feels dry about an inch down instead of light, frequent watering, which can stunt root growth.
Growing Thai peppers in pots works well if you’re low on garden space or want to control their environment. Choose containers that are at least 12 inches wide with drainage holes, and use a high-quality potting mix. Potted plants may dry out faster and need more frequent watering and feeding than those in garden beds.
Either way, regularly check moisture levels and add mulch around the plants to help retain water and suppress weeds. This leads to a healthier pepper harvest.
Caring for Thai Pepper Plants
Caring for Thai pepper plants is straightforward when you establish a consistent routine. Water your plants deeply but allow the soil to dry slightly between sessions—about 1–2 inches deep—since overwatering can lead to root rot. Early morning watering helps leaves dry quickly, reducing the risk of fungal diseases.
Every three to four weeks, apply a balanced liquid fertilizer or use compost tea to boost both nutrition and soil health naturally. Mulch around the base with straw or shredded leaves to retain moisture and suppress weeds.
When it comes to pests, watch for aphids, spider mites, and whiteflies—tiny bugs that cluster on leaves and stems. You can dislodge them with a strong spray of water or treat them with insecticidal soap or neem oil. Always apply these treatments in the evening to avoid leaf burn.
Common diseases include powdery mildew and bacterial spot. Improve airflow by spacing plants well and promptly remove any affected leaves.
If leaves turn yellow, check for overwatering, underwatering, or nutrient deficiencies; a soil test can guide your next steps. Stunted growth often indicates compacted soil or root-bound conditions, so consider gently loosening roots or transplanting to a larger pot.
For flowering issues, ensure your peppers get six to eight hours of sunlight daily and avoid high-nitrogen fertilizers, which encourage leafy growth at the expense of blooms.
Regular monitoring and quick action will keep your Thai pepper plants healthy and productive.
Harvesting and Using Thai Peppers
Knowing when to pick Thai peppers can make a big difference in both taste and plant health. Peppers are ready to harvest once they’ve reached their mature color—usually bright red, though some varieties may be orange or yellow—and feel firm to the touch. The skin should look glossy, not dull or wrinkled.
It’s best to use scissors or garden shears to snip the peppers from the stem, leaving a small portion of the stem attached; this helps prevent damaging the plant and encourages it to produce even more fruit. Try harvesting regularly, every few days during peak season, to keep the peppers coming.
Once picked, Thai peppers offer a fiery kick perfect for dishes like stir-fries, curries, and spicy sauces. If you can’t use them all at once, consider these storage options:
- Dry them on a rack in a well-ventilated spot or string them up decoratively.
- Freeze them by washing, drying, and placing the peppers in a sealed bag.
- Pickle them to keep their heat and flavor, ready to add zip to any meal.
Whether fresh, dried, or preserved, Thai peppers bring versatile heat to your kitchen year-round.
Conclusion & Growing Tips
Growing Thai peppers at home is rewarding and straightforward once you know the basics: give them plenty of sun, keep the soil consistently moist but not soggy, and feed monthly with a balanced fertilizer. For a bigger harvest, pinch off early flowers to encourage bushier growth, and harvest peppers regularly to prompt new ones to form.
Try mulching to retain moisture and protect roots, and watch for pests like aphids, removing them promptly. To boost flavor, let peppers ripen fully on the plant before picking.
Once you start harvesting, experiment in the kitchen—Thai peppers add a zesty kick to stir-fries, salsas, and homemade hot sauces. Growing and cooking with your own spicy peppers is truly satisfying!