
Onion Sets vs. Onion Seeds
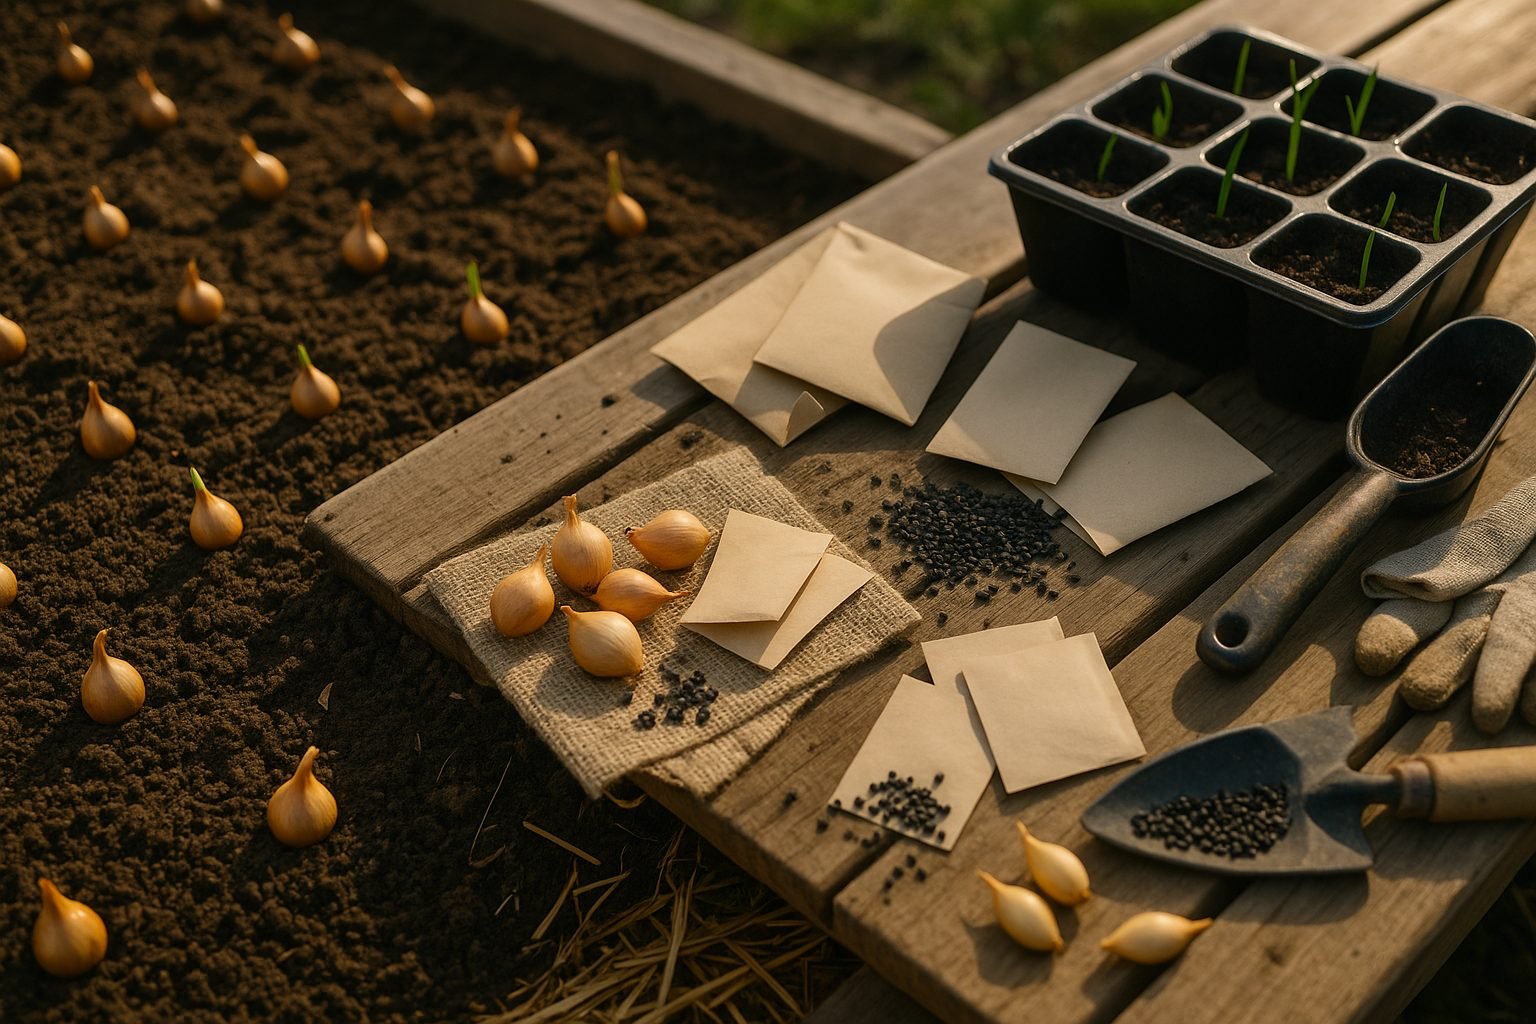
If you’re planning your next onion crop, you’ve likely debated onion sets vs. seeds—two popular but quite different starting points. Onion sets are small, partially grown onion bulbs that have been harvested and dried after their first season. In contrast, onion seeds are exactly what they sound like: tiny black seeds harvested from mature onions that you plant directly into the soil. Don’t confuse onion sets with shallots, though: shallots are a different allium variety entirely, with a milder, sweeter flavor and a cluster-forming growth habit.
Choosing between these options depends on your gardening goals and timing. Onion sets offer a definite ease-of-use advantage. They’re straightforward to plant, sprout quickly, and are less prone to bolting, which is why beginners often gravitate toward sets. You can stick them in the ground early in spring—even when the soil is still a bit chilly—and expect a reliable harvest months sooner than you’d get from seed. However, onions grown from sets can sometimes be more prone to disease and may not store as long as their seed-grown counterparts.
Seeds, meanwhile, offer more variety. If you’re after a specific onion type, especially heirlooms or specialty varieties, seeds provide a wider selection. They also tend to produce onions that store better over winter. But planting from seed takes patience and extra effort. Germination can be tricky, and the seedlings need more attention—often started indoors or under cover long before your last frost date.
All in all, onion sets are the go-to for fast, reliable results and minimal fuss, making them perfect for first-time growers or anyone eager for a low-maintenance crop. If you’re willing to put in the time and want more choices, seeds might be the better route, especially for gardeners looking to experiment or grow onions for long-term storage.
Choosing the Right Onion Sets for Your Garden
Selecting the right onion sets is the first—and one of the most important—steps toward a thriving onion crop. Start by considering variety: onions generally fall into short-day, long-day, and intermediate-day types.
Short-day onions like ‘Texas Super Sweet’ thrive in the southern US, needing less daylight to bulb, while long-day onions such as ‘Walla Walla’ and ‘Yellow Sweet Spanish’ are better suited to northern latitudes, like the US North or much of the UK. Intermediate-day types, like ‘Red Candy Apple’, offer flexibility if you’re in a region with moderately long summers.
Always check what grows best in your climate zone; local extension offices or garden centers can be invaluable for recommendations. Disease resistance is another critical factor—look for varieties bred to withstand common problems like downy mildew or white rot.
Popular, reliable choices for home gardeners include ‘Sturon’ and ‘Rijnsburger’ in the UK, or ‘Candy’ and ‘Red Baron’ in the US. Sourcing quality sets also matters: buy from trusted suppliers or local nurseries with good turnover, so you get fresh, firm bulbs with no sign of mold or sprouting. Avoid sets that feel soft or have dried-out tips.
If you’re gardening in a wetter region or one prone to cold springs, choose early-maturing types and consider starting under cover or selecting varieties labeled “bolt-resistant” to handle the flux. Remember that buying locally often means getting sets adapted to your area’s specific pests and weather challenges.
By choosing the right onion sets tailored to your location and needs, you’ll set yourself up for bigger, healthier bulbs come harvest time.
When and How to Plant Onion Sets
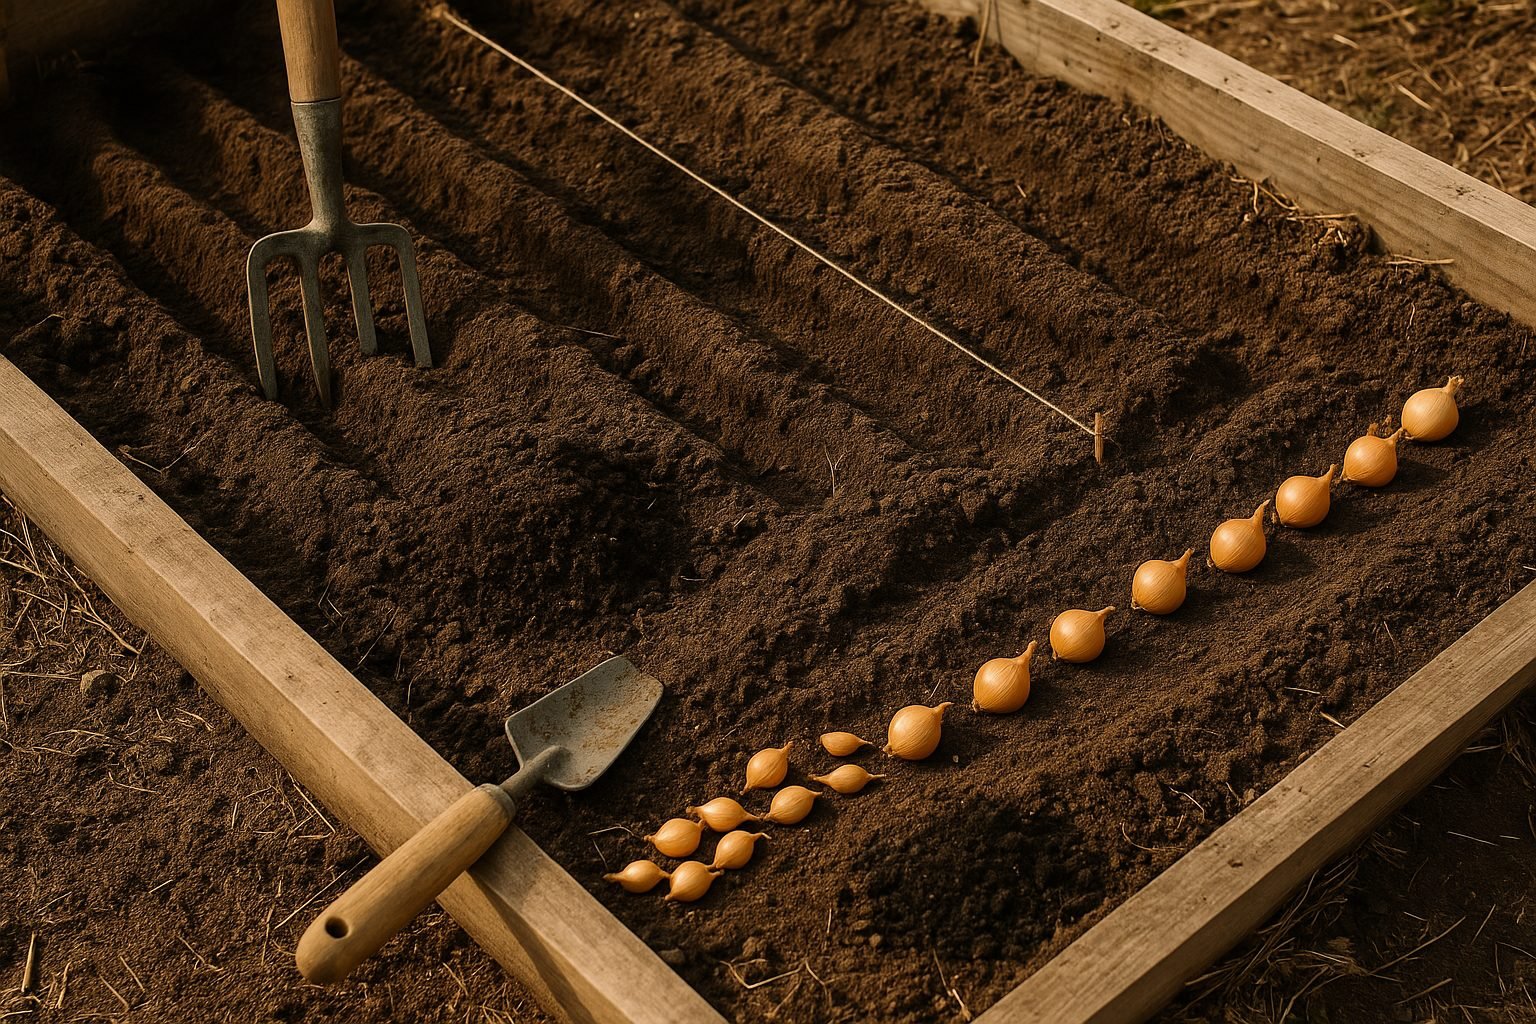
The key to growing healthy onions starts with planting at the right time. In cooler northern regions, plant onion sets in early spring as soon as the soil can be worked—usually after the threat of hard frost has passed and temperatures stay consistently above 50°F (10°C). For milder southern climates, autumn planting works well, giving bulbs a head start to mature before the summer heat arrives.
Choose a sunny spot that receives at least 6 hours of direct sunlight daily; onions thrive in full sun and struggle in shaded areas. Good soil is essential—look for loose, well-draining soil rich in organic matter. Compacted or waterlogged soil can cause rot and poor growth.
To plant, first loosen the soil to a depth of about 6 inches and mix in compost or well-rotted manure. Arrange your rows about 12 inches apart, and set the onion sets—small, dry bulbs—1 to 2 inches deep, spaced about 4 inches apart. Make sure the pointed tip faces up. Once planted, water thoroughly but gently to settle the soil. Onions prefer steady moisture but dislike waterlogged conditions.
Common mistakes to avoid include:
- Overcrowding, which stunts bulb development
- Planting too deeply, which delays or prevents sprouting
- Using fresh manure, which can encourage disease or excessive leaf growth at the expense of bulbs
- Neglecting to weed, since onions don’t compete well with aggressive weeds
By starting with the right timing, location, and planting method, you’ll set your onion crop up for a great season and a flavorful harvest.
Caring for Your Onion Crop
Nurturing healthy onion crops takes some attention to detail, but a few practical steps can make a big difference.
Start by keeping your soil evenly moist; onions have shallow roots and generally need about an inch of water each week, whether from rainfall or careful watering. Avoid saturating the soil, as soggy conditions lead to yellowed leaves, stunted growth, and even bulb rot—classic signs of overwatering.
Mulching with straw or grass clippings is a smart move, as it helps retain moisture, cools the soil, and reduces how often you need to pull weeds. Stay on top of weeds because they compete with your onions for nutrients and space, but always weed gently to avoid disturbing those sensitive onion roots.
Fertilizing is key for strong development: apply a balanced fertilizer or a high-nitrogen option when your onions are 4–6 inches tall, then feed again every two to three weeks until bulbs start to swell. Spread granular fertilizer around the base or use a diluted water-soluble formula when watering, being careful not to let fertilizer touch the plants directly.
Keep an eye out for pale, yellowing leaves or poor growth—these can signal your onions need more nitrogen or other nutrients. On the flip side, if leaves flop over long before harvest time, they might be getting too much water or fertilizer.
To promote big, well-formed bulbs, keep rows spaced so each plant has about four inches to itself, and stop fertilizing once bulbing begins; this helps the plant shift energy into producing plump, flavorful onions. As bulbs swell, gently push any excess soil away from their tops so they can mature in the sun, and ease up on watering in the last few weeks before harvest for the best storage quality.
With a little planning and observation, your onions will thrive from start to finish.
“`html
Onion Pests and Diseases: Prevention & Solutions
Onions can fall victim to several troublesome pests, with the onion fly and thrips being among the most common. Onion flies resemble small houseflies, and their larvae damage onions by tunneling into the bulbs, causing soft, rotting patches. Thrips are tiny, slender insects—often just a millimeter long—that suck sap from leaves, leading to silvery streaks and stunted growth.
Early identification is key: check leaves often for silvery marks or holes, and gently pull up suspect bulbs to spot larvae.
Common Diseases Affecting Onions
Onions are susceptible to fungal issues like downy mildew and white rot, both of which cause yellowing leaves and fluffy or moldy growth near the bulbs. Bacterial soft rot leads to mushy, foul-smelling bulbs.
Organic Solutions and Prevention
For organic solutions, neem oil sprays or introducing beneficial insects like ladybugs can help curb pests. Good airflow, removing infected plants, and using copper-based fungicides can slow the spread of fungal diseases.
Chemical insecticides and fungicides are available but should be used judiciously and according to label instructions to avoid harming pollinators or contaminating soil.
Preventive Measures
- Practice crop rotation by not planting onions in the same spot for at least three years, as many pests and diseases linger in the soil.
- Keep garden beds weed-free and promptly remove dead foliage, as debris can harbor pests and diseases.
- Avoid overwatering and space onions well to promote air circulation.
- Use floating row covers in early spring to physically block flies and other insects from laying eggs on young plants.
By combining these prevention steps with vigilant monitoring, you’ll keep your onions healthier and your harvest more abundant.
“`
Harvesting, Curing, and Storing Onions
Knowing when to harvest onions is essential for getting the best flavor and storage life. Onions signal their readiness when about half the leaves have turned yellow and fallen over naturally—usually in late summer. Avoid bending over green tops by hand, as this stresses the plants and can promote rot.
To harvest, choose a dry day and gently loosen the soil around the bulbs with a garden fork. Then lift them carefully from beneath to avoid bruising or slicing the fleshy layers. After harvesting, shake off loose dirt without washing, since moisture can invite mold during curing.
Lay the onions in a single layer, tops attached, on a dry rack, mesh screen, or newspaper in a warm (75–86°F) and well-ventilated area out of direct sunlight. Let them cure for two to three weeks—turning occasionally—until the outer skins are papery and the necks are dry and tight.
To prepare onions for storage, trim the dried foliage to about an inch above the bulb, and snip off any stringy roots. Store cured onions in mesh bags, baskets, or open crates where air can circulate, keeping them cool (32–40°F) and dry, ideally in a basement or unheated closet.
Never store onions in plastic bags or in the fridge, as poor airflow and moisture cause rot. Regularly check your stored onions and remove any with soft spots or sprouting to prevent problems from spreading. Following these steps helps ensure you have homegrown onions to enjoy all winter long.
Best Onion Varieties to Try (Bonus Tips)
Choosing the right onion variety can make a big difference in both your cooking and gardening success. For beginners, Yellow Sweet Spanish onions are a classic choice—they’re easy to grow, store well, and offer a mild, sweet flavor perfect for salads, burgers, or caramelizing.
Red onions, like the popular Red Baron, add both color and crunch to salads, salsas, and sandwiches, and generally mature quickly in cooler climates.
If you love French cooking, try growing shallots or the Cipollini variety; their delicate flavors shine in sautés or roasted dishes, and their smaller size means they fit easily between other garden plants.
For those in warmer regions, Granex (the variety behind the famous Vidalia onion) thrives in the sun and makes incredibly sweet, juicy slices ideal for eating raw on sandwiches or in dips.
Meanwhile, white onions such as White Lisbon are favorites for their sharp, clean taste in Mexican dishes and quick-pickling recipes.
Don’t be afraid to experiment: plant a few different types side by side to see which grow best in your soil and climate, or try starting some from sets and others from seeds to find your preferred method.
Rotating varieties each year helps you learn which onions store longest and which ones deliver the sweetest or strongest flavors straight from your garden to your table.
As you gain confidence, consider growing specialty onions like Egyptian walking onions, which offer edible greens year-round—a fun twist for adventurous gardeners and cooks alike.