Why Grow Onions from Seed?
If you’ve ever been curious about growing onions from seed, you’re not alone—and there are great reasons to give it a try. While many gardeners reach for onion sets because they’re easy and quick, starting onions from seed opens up a world of advantages.
First, you’ll have access to a much broader variety selection, from sweet, crisp salad onions to unique heirloom types you won’t find in sets. Seeds also tend to produce stronger, healthier plants with robust root systems—meaning your onion crop will be better equipped to thrive and resist tough conditions.
Cost is another big win; a single seed packet often costs less than a small bag of sets and can yield hundreds of onions if started correctly. This makes seeds an economical choice, especially for larger gardens or food plots. Gardeners in regions with long growing seasons—like the southern U.S. or temperate climates—find that seeds give them time to raise onions from baby sprouts to hefty bulbs without rushing or risking a poor harvest. Plus, starting from seed means you avoid the risk of carrying over diseases that sometimes come with commercially grown sets, making your crop healthier overall.
There are other hidden perks, too. For example, if you like to experiment with storage onions that last all winter, seeds will give you access to late-maturing varieties designed just for that purpose. Feeling adventurous? Try unusual colors and flavors, or grow onions suited to your unique soil and climate.
But it’s only fair to mention that growing onions from seed requires a bit more patience and dedication. Unlike sets, which are partially grown and mature quickly, seeds need to be started indoors a couple of months before the last frost. This means extra planning, attention to temperatures, and care for tiny seedlings. Onions from seed take longer to reach harvest size and may need thinning and careful watering early on.
For busy gardeners or those in regions with very short growing seasons, sets might still be a better fit. However, if you have a window of time and want to grow stronger, more diverse onions for less money, starting from seed is definitely worth the effort.
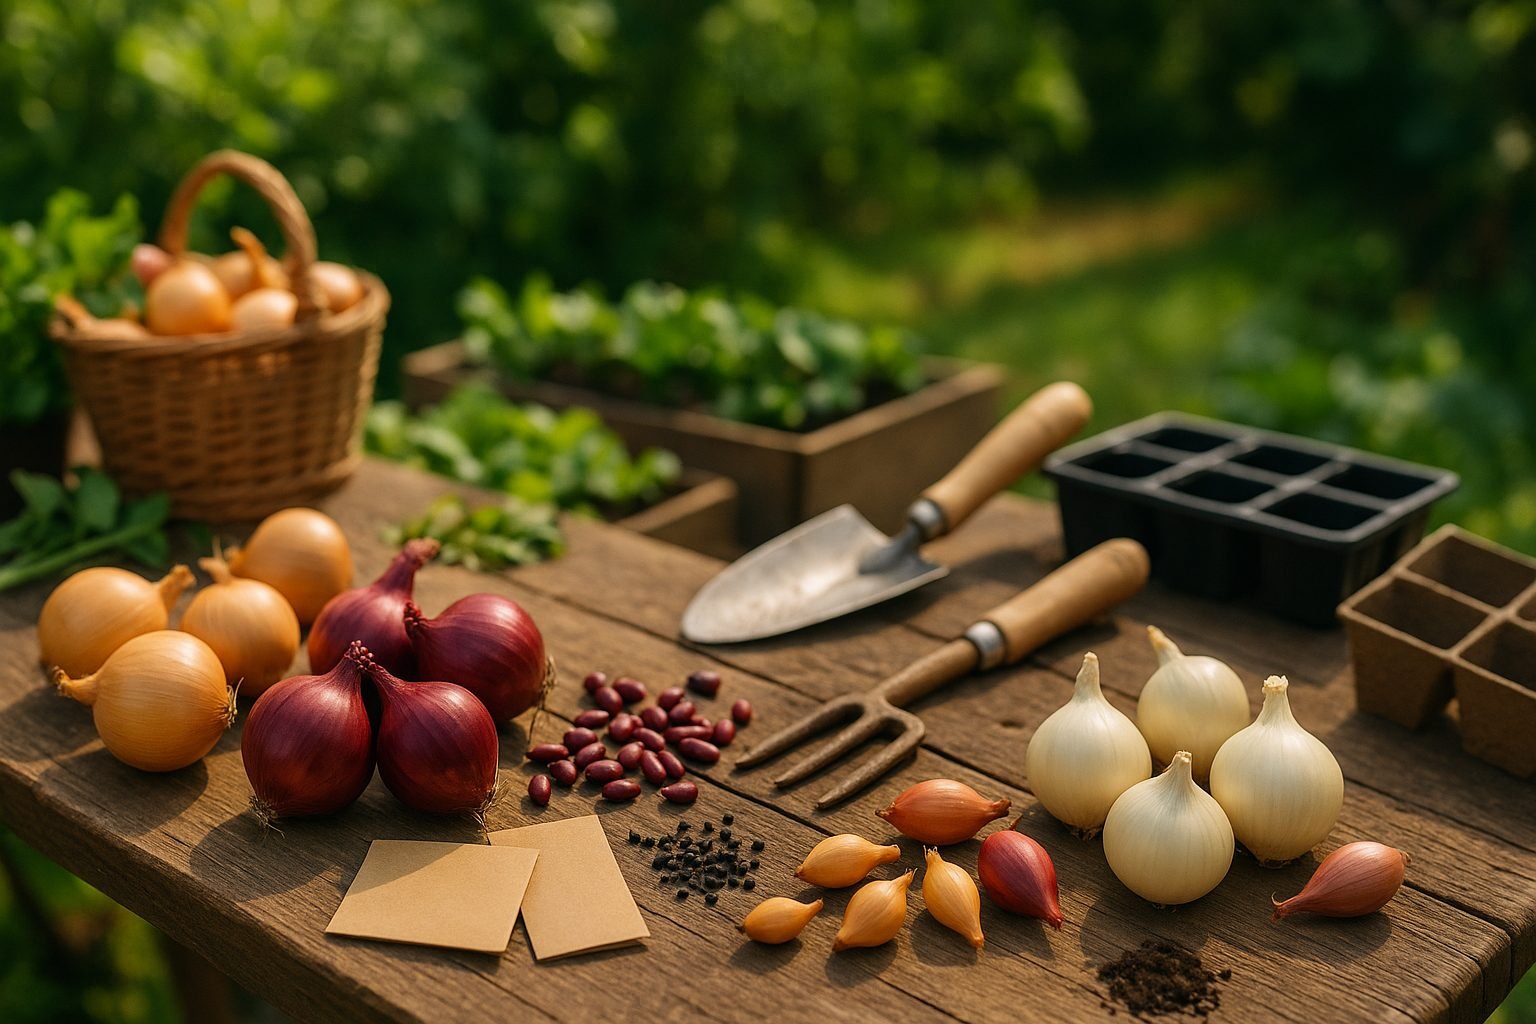
Selecting the Right Onion Variety
Choosing the right onion variety starts with understanding the three main day-length types—long-day, short-day, and intermediate-day onions—since this determines how well your crop grows in your region. Long-day onions need 14-16 hours of daylight to form bulbs, making them perfect for northern areas with extended summer days (think upper Midwest or New England in the U.S.).
Short-day onions, on the other hand, require only 10-12 hours of daylight, so they thrive in southern regions where summers are shorter and milder. Intermediate-day varieties land in the middle, making them flexible picks for gardeners in central zones.
Once you nail down the day-length, consider factors like flavor: some onions are mild and sweet for fresh eating (like ‘Walla Walla’ or ‘Texas 1015’), while others are pungent and robust, perfect for cooking or long-term storage. Bulb color adds further choice—white, yellow, red, and even deep purple onions each have unique uses and tastes.
Storage ability is key if you want onions to last through winter; varieties like ‘Copra’ or ‘Redwing’ are bred for excellent shelf life, while sweet onions are best enjoyed soon after harvest. Days to maturity can range from early (as little as 90 days) to late-season varieties, so check seed packet info to match your growing window.
As for seeds, you’ll find both heirloom and hybrid types; heirlooms, like ‘Yellow Globe Danvers,’ offer old-fashioned flavors and seed-saving potential, while hybrids often provide better disease resistance and consistent results.
When sourcing seeds, buy from reputable companies with good reviews and detailed product information—look for seed suppliers who test for high germination rates and offer region-specific advice. Shopping early in the season increases your chances of finding the freshest, best-stocked options, setting you up for a successful onion harvest.
Sowing Onion Seeds: Preparation and Timing
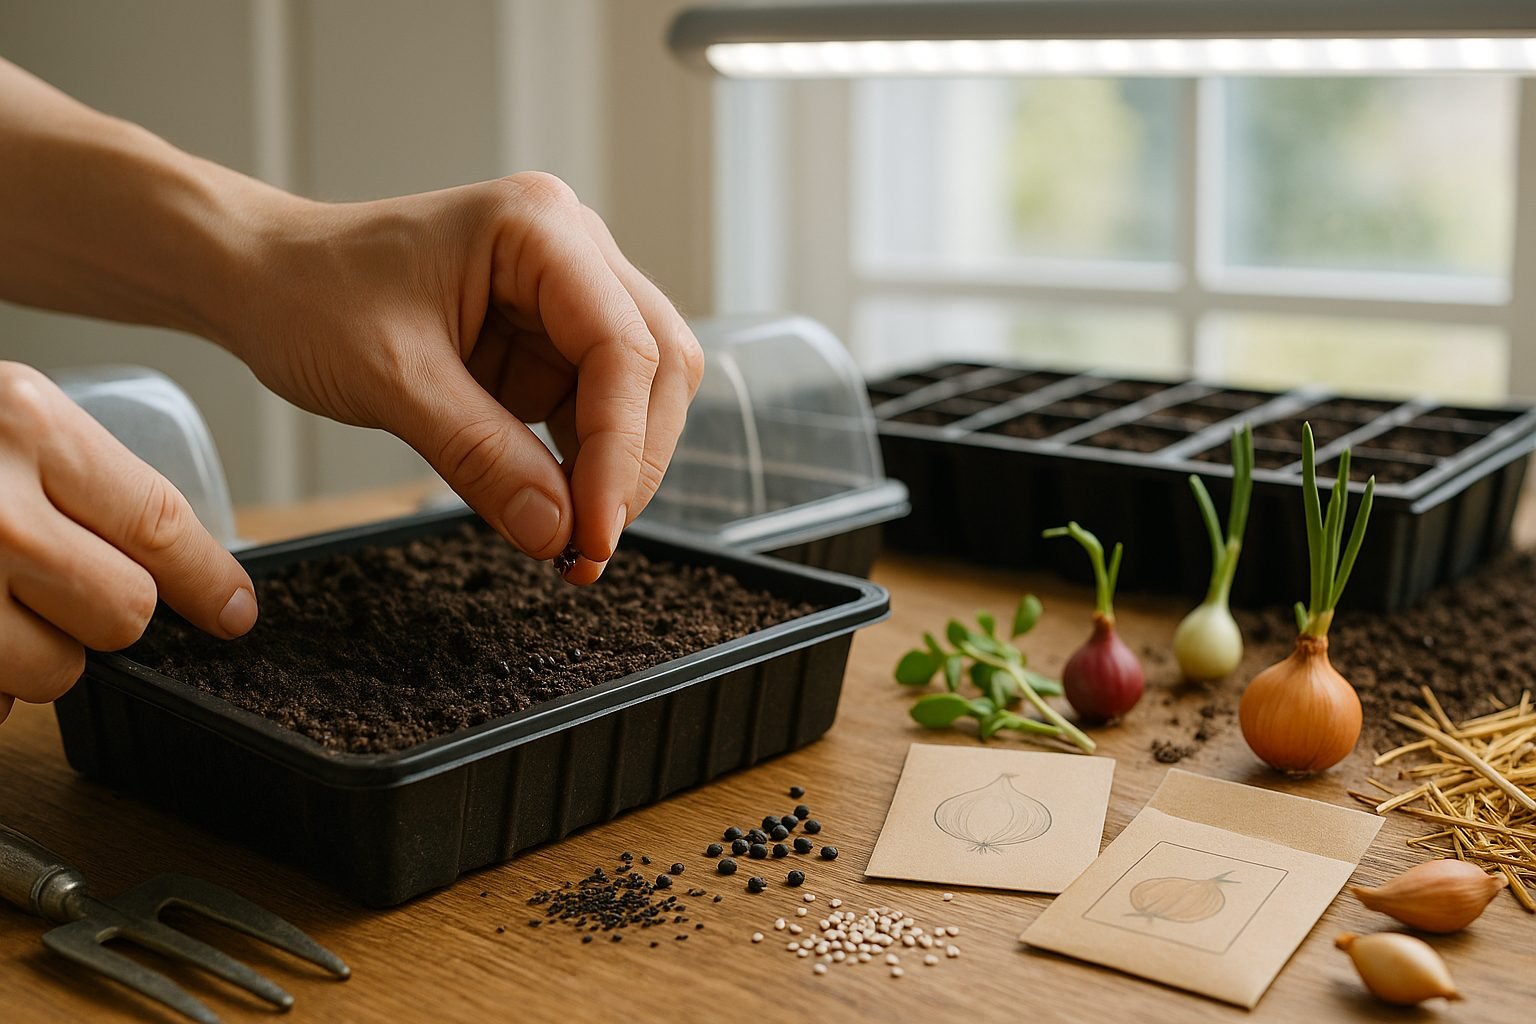
When sowing onion seeds, timing is everything for a successful crop. In most regions, the best time to start onion seeds indoors is 10–12 weeks before your area’s average last frost date—this gives seedlings enough time to develop before transplanting outdoors. If you prefer direct outdoor sowing, wait until the soil is workable, usually 4–6 weeks before the last frost. Check your local frost schedule online or ask a nearby gardening center for specific guidance.
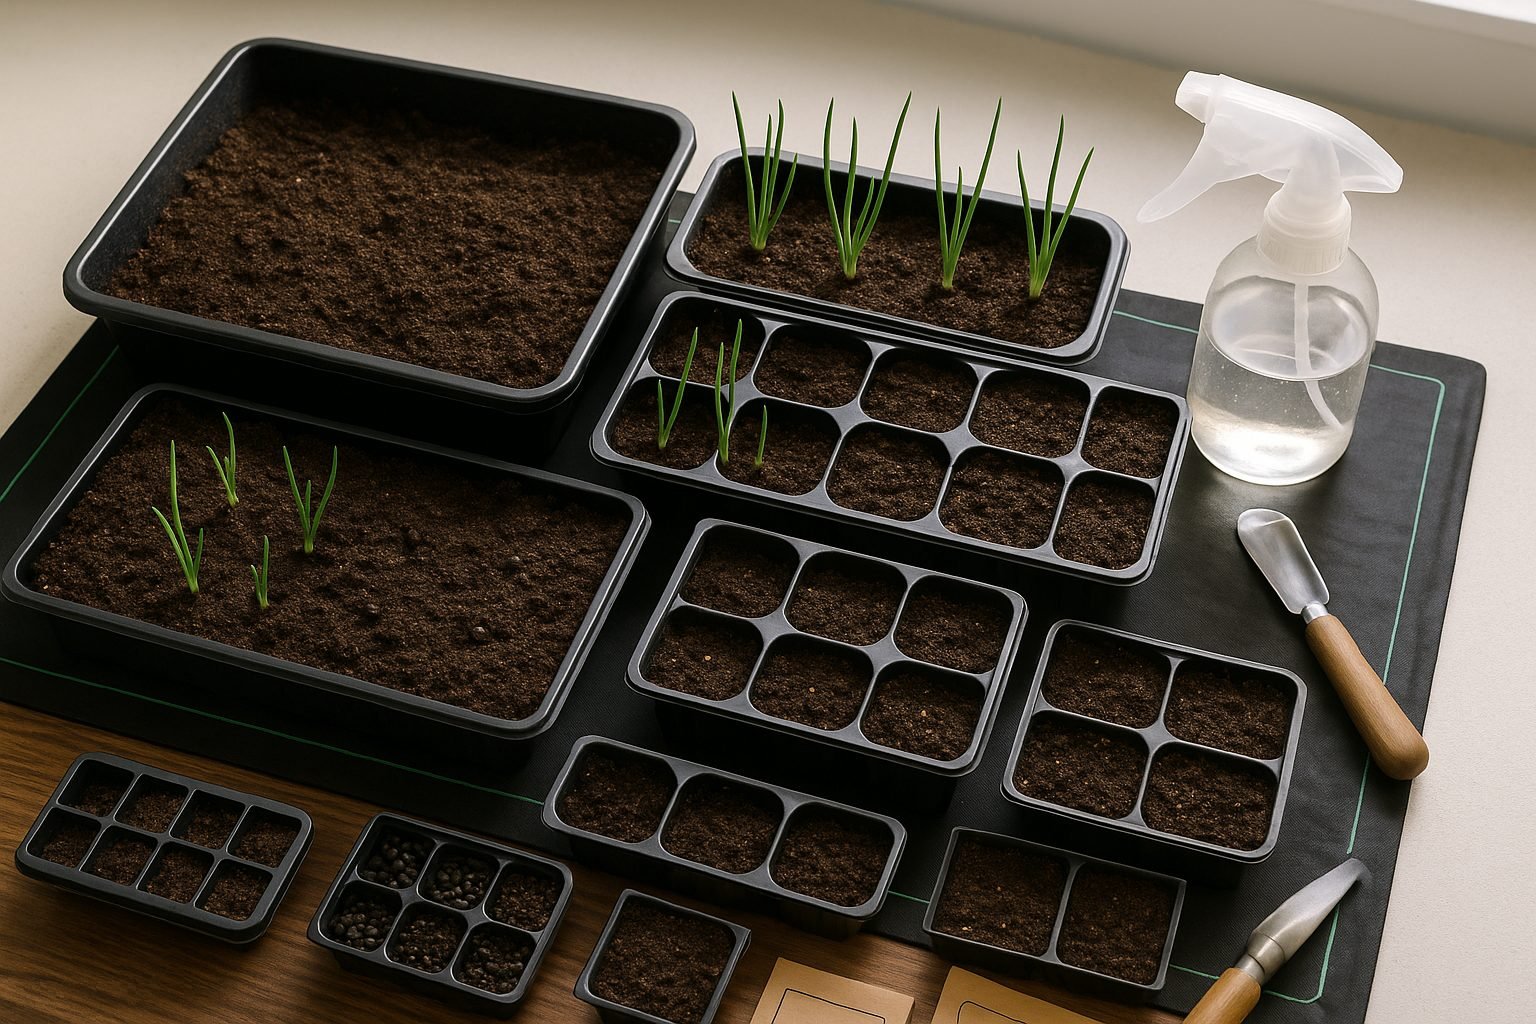
Indoors, use a shallow tray or cell packs filled with a high-quality seed-starting mix—one that’s loose, well-draining, and sterile to prevent disease. Moisten the mix before sowing, ensuring it’s damp but not soggy. Sow seeds about ¼ inch deep, lightly covering them with soil, and space seeds roughly ½ inch apart to avoid crowding. Once sown, gently firm the soil to ensure good seed-to-soil contact. Cover your containers with a humidity dome or plastic wrap to retain moisture until germination, then remove the cover to improve airflow as sprouts appear.
Onions need consistent moisture, so mist or water gently when the surface begins to dry, but don’t let the mix become waterlogged. To encourage even germination—usually in 7 to 10 days—keep the soil temperature between 65 and 75°F (18–24°C). A seedling heat mat placed under trays can provide bottom heat if your space is chilly.
After seeds sprout, place them in a bright windowsill or under grow lights for 12–14 hours a day to prevent leggy growth. If using artificial lights, position them just a few inches above the seedlings and raise them as the onions grow. Rotate containers if necessary for uniform exposure. As the seedlings develop, maintain consistent moisture and clip the tops back to about three inches tall with scissors to promote sturdy, compact growth.
When seedlings become crowded, thin them gently to one per cell or about one inch apart—this lets each plant grow strong without competition. Once outdoor temperatures warm and seedlings reach pencil thickness, harden them off by gradually exposing them to outdoor conditions before transplanting.
With these careful preparations and ongoing care, you’ll be well on your way to a robust onion harvest, whether you’re gardening in a backyard bed or on a sunny balcony.
Transplanting and Planting Out Onions
Knowing when your onion seedlings are ready to move from trays to the garden is key for a successful crop. Wait until seedlings have at least three true leaves and are about 5–6 inches tall; this usually takes 8–10 weeks from sowing.
About a week before transplanting, start hardening off your young plants by gradually introducing them to outdoor conditions. Set trays outside in a sheltered spot for a few hours a day, increasing exposure daily so the seedlings adjust to real sunlight and fluctuating temperatures.
Meanwhile, prep your garden bed by working in plenty of well-aged compost and a balanced organic fertilizer to provide nutrients onions need for strong bulb development. It’s also important to clear the bed of weeds both before planting and throughout the growing season, since onions don’t like competition. Because they have shallow roots, hand-pulling weeds is safer than hoeing.
When planting, space seedlings or direct-sown seeds 4–6 inches apart in rows 12–18 inches apart; this gives each plant room to expand and helps airflow, reducing disease.
To plant transplants, poke holes at the proper spacing, set seedlings at the same depth they grew in trays, then gently firm soil around each one. Water well after planting.
Direct sowing requires less labor and eliminates transplant shock, but germination can be patchy if spring is cool or the soil crusts over. You’ll also need to thin seedlings to the right spacing later. Transplanting gives you a head start, especially in short-season areas, but it takes more prep and care.
Both methods work, but transplants usually yield bigger bulbs since they spend more of the season actively growing. Whichever approach you choose, a well-prepared bed and careful spacing set your onions up for a healthy, bountiful harvest.
Caring for Growing Onions
Onions are relatively low-maintenance, but consistent care helps them thrive and develop large, flavorful bulbs. Water onions regularly to keep the soil evenly moist, especially during dry spells. Aim for about one inch of water per week, and always water at the base to avoid wetting the leaves, which can invite disease.
Keep onion beds weed-free since weeds compete for nutrients and water. Hand-pulling is effective, but you can also plant low-growing companions like lettuce or carrots to naturally shade the soil and suppress weeds. Mulching with straw or grass clippings is another great strategy; mulch holds moisture, cools the soil, and reduces weed growth.
For feeding, onions appreciate a steady supply of nutrients, especially nitrogen early in growth, and phosphorus and potassium as bulbs swell. Apply a balanced granular fertilizer at planting, then side-dress with a high-nitrogen feed every three weeks until bulbs start forming. Banding—placing fertilizer in a narrow line beside the rows—delivers nutrients right where roots can access them.
Stay alert for common pests like onion maggots and thrips, which chew on roots or leaves. Cover young plants with row covers, rotate crops yearly, and encourage beneficial insects to help manage pests. Diseases like downy mildew and onion white rot can strike, especially in damp conditions, so space plants well for airflow and avoid overhead irrigation.
Watch for signs of stress such as yellowing tips (often from overwatering, underwatering, or nitrogen deficiency) and bolting, where plants send up a flower stalk prematurely—usually triggered by fluctuating temperatures or inconsistent care. If you spot problems, adjust watering, check soil nutrients, and remove any stressed or bolting plants quickly to keep your onion patch productive and healthy.
Harvesting, Curing, and Storing Your Onions
Knowing exactly when to harvest your onions is crucial for maximizing their flavor and storage life. Look for two main visual clues: the leaves will begin to flop over naturally at the “neck” (where they meet the bulb), and the necks will feel soft or loose rather than firm. Once half to three-quarters of the tops have toppled, it’s time to start harvesting.
Choose a dry day and use a fork or your hands to gently lift each bulb from the soil, taking care not to bruise or puncture them, since damaged onions can rot in storage. Shake off loose dirt, but avoid washing with water, as moisture can promote disease. If the weather is dry, let your onions sit on the garden surface for a day or two to dry further, but bring them under cover if rain threatens.
Next comes curing: lay your onions out in a single layer in a warm, airy, shaded spot—such as a covered porch, shed, or garage—with good ventilation. Allow them to cure for two to three weeks. The goal is for the necks to dry completely and the outer skins to become papery.
Once fully cured, trim off the roots and tops, leaving about an inch of stem, and gently brush off any remaining dirt. For long-term storage, choose only firm, blemish-free bulbs; any damaged onions should be used up first.
Store your onions in mesh bags, old pantyhose, or shallow bins in a cool (32-40°F), dry, and well-ventilated place, like a basement or unheated closet. Keep them away from apples or potatoes, which release gases or moisture that can cause sprouting or rotting.
Check your stored onions every few weeks and remove any soft or sprouting bulbs promptly, as one bad onion can spoil the rest. If you notice signs of sprouting, use those onions soon in cooked dishes where texture is less important.
Properly cured and stored onions can last three to six months or even longer. They work beautifully in soups, stews, stir-fries, or roasted alongside other root vegetables throughout the winter, helping you enjoy the flavor of your garden long after harvest season ends.