Introduction to Growing Kale
Raised bed kale is quickly becoming a favorite among home gardeners, and it’s easy to see why. Kale, a leafy green related to cabbage and broccoli, thrives in cool weather and packs a nutritional punch—loaded with vitamins A, C, and K, plus fiber and antioxidants, it’s a superfood staple anyone can grow.
Whether you’re a seasoned gardener or just starting out, kale is one of the most forgiving crops: it tolerates a bit of neglect, bounces back from light frosts, and provides a steady harvest for months. If your yard’s soil isn’t ideal or you’re working with limited space, raised beds make growing kale even easier, offering improved drainage, warmer soil, and fewer weeds.
These beds can be built from wood, recycled materials, or purchased pre-made, and they let you control the soil mix—perfect for nutrient-hungry kale. Don’t have a big yard? Kale also does surprisingly well in large pots or containers on patios, balconies, and even sunny apartment rooftops, making it ideal for urban gardeners or anyone with small-space limitations.
In addition to its health benefits and easygoing nature, kale shines in the kitchen: enjoy tender baby leaves raw in salads, sauté mature leaves with garlic, or toss chips into the oven for a crunchier snack. If you’re interested in a reliable, nutritious, and versatile addition to your home garden, raised bed kale is a choice you’ll appreciate all season long.
With just a bit of setup, you’ll be harvesting your own bowls of fresh greens, adding a healthy boost to daily meals, and making the most of every inch of growing space you have.
Choosing the Right Kale Variety & Where to Plant
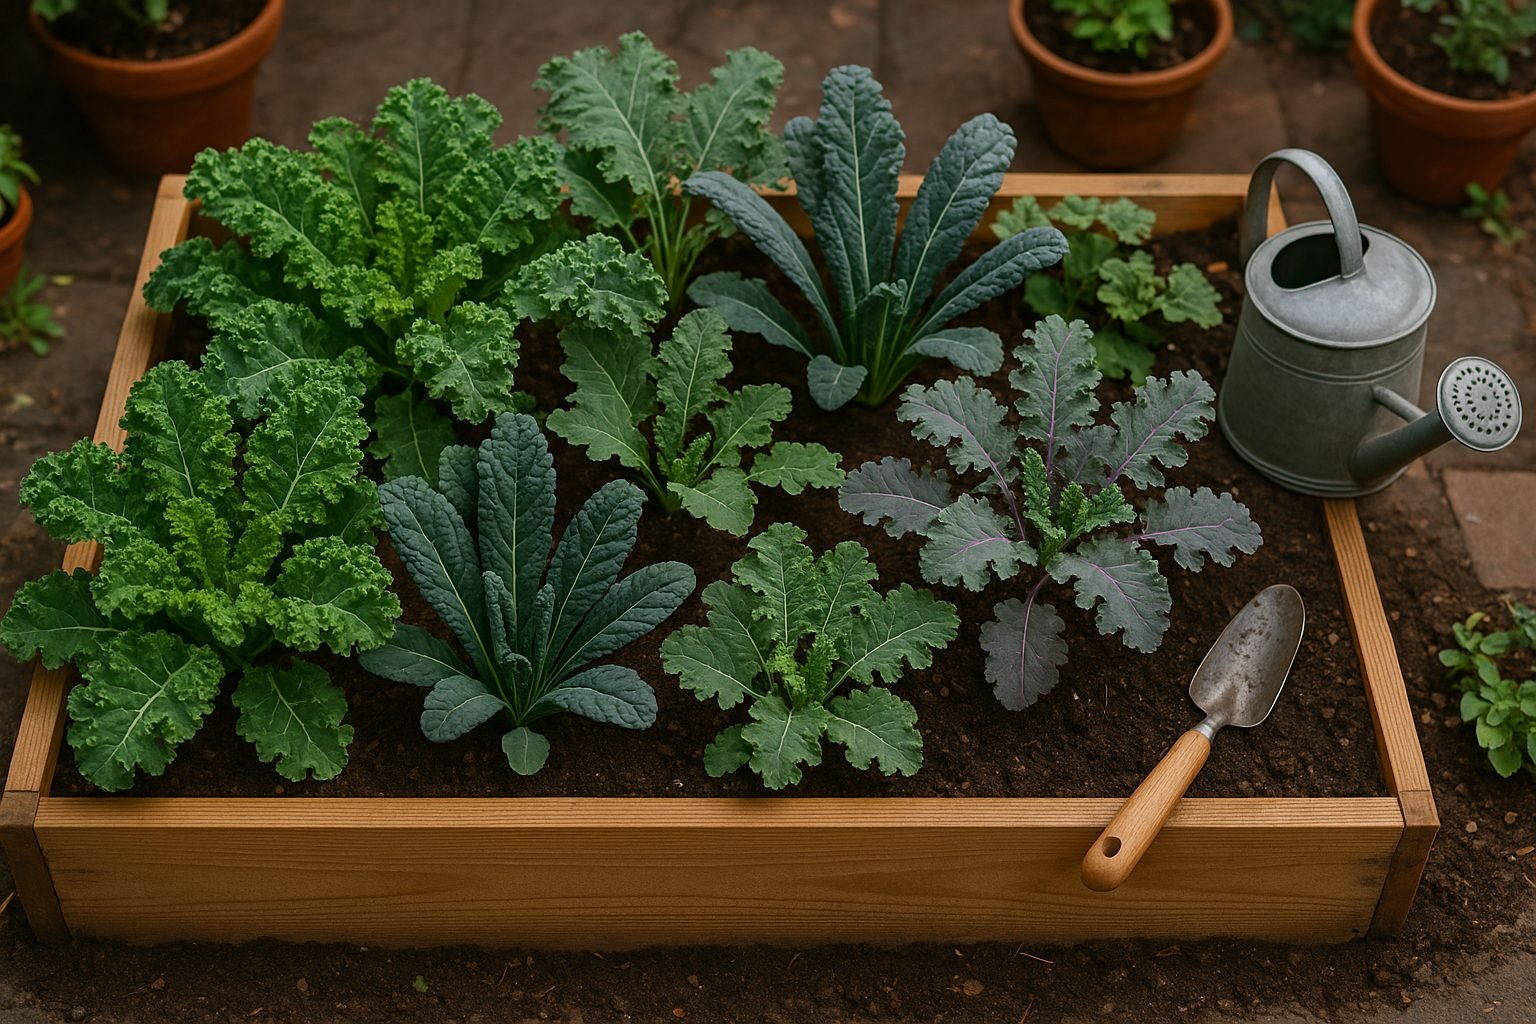
When it comes to growing kale, choosing the right variety can make all the difference in taste, productivity, and how well the plants fit into your garden space. Three popular types stand out:
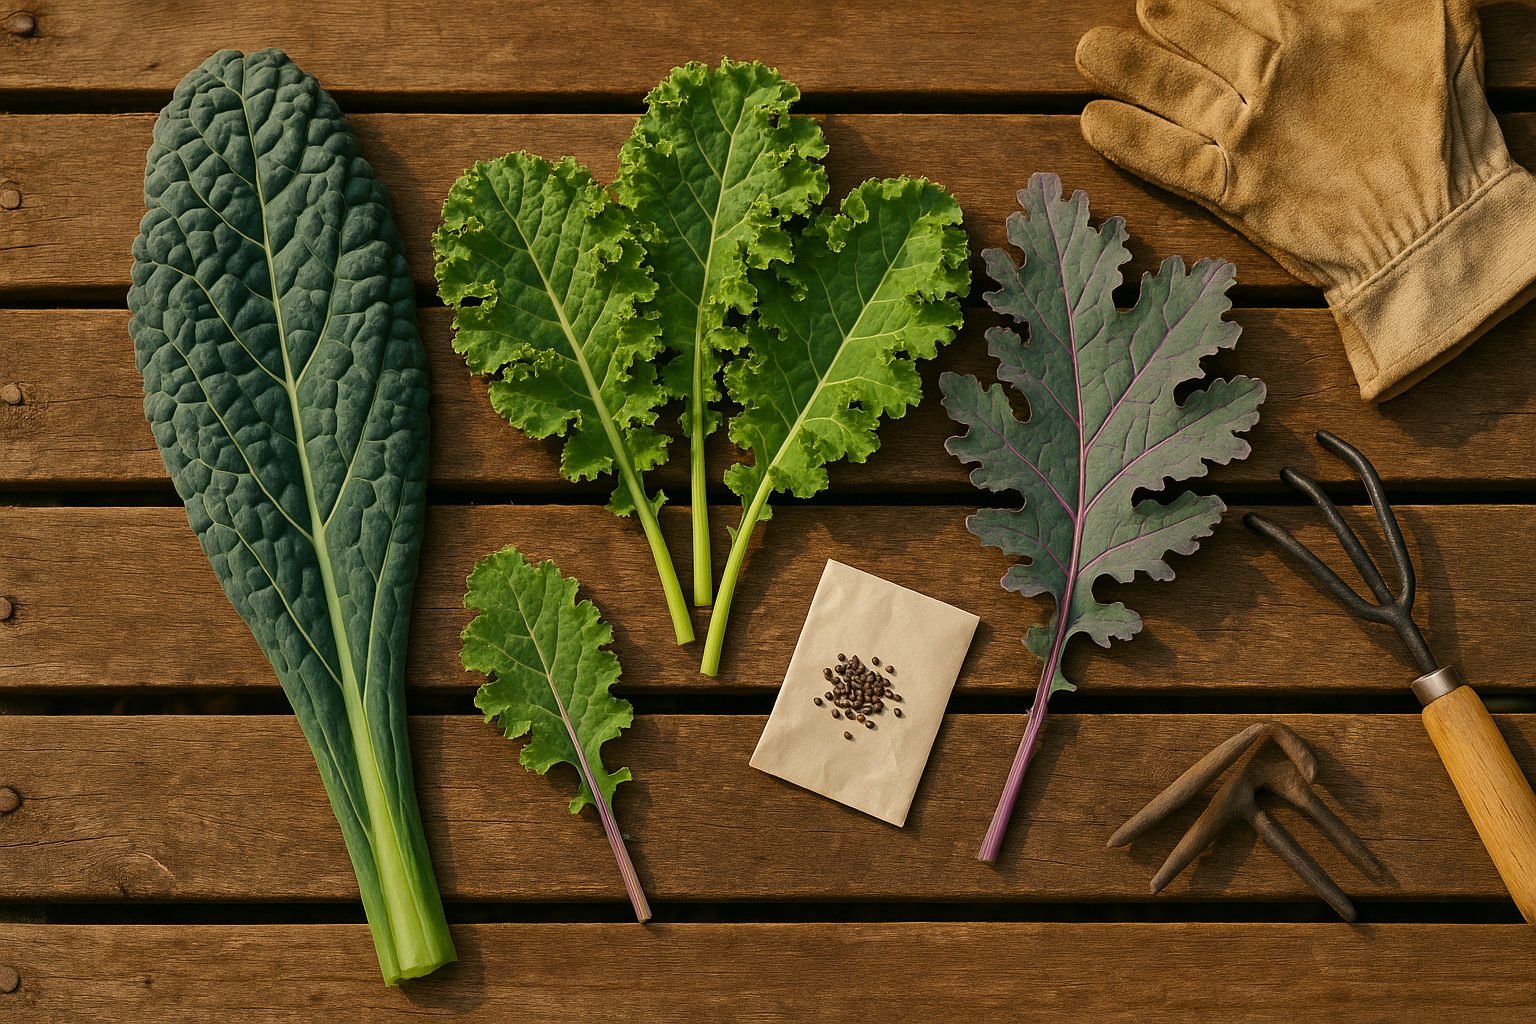
- Curly kale features tightly ruffled leaves and a bright green color. It’s known for its robust, peppery flavor and classic look—perfect for salads or chips.
- Lacinato kale, also called Dinosaur or Tuscan kale, sports long, deep green, textured leaves and offers a sweeter, earthier taste, making it a favorite for sautés and soups.
- Red Russian kale has flat, fringed leaves tinged with purple-red veins and is slightly sweeter and more tender—great for raw dishes.
When choosing which to grow, consider your local climate and available space. Curly kale is hardy and tolerates cold, making it ideal for cooler regions, while Lacinato thrives in warmer, milder climates but can also handle light frosts. If you’re short on garden space, all three varieties perform well in raised beds or large containers; Red Russian, in particular, is compact enough for apartment balconies.
For seeds or seedlings, check local nurseries, farmers’ markets, or reputable online retailers. Look for healthy, disease-free starts—avoid any with yellowing leaves or weak stems. For first-timers, seedlings may be easier to handle, while experienced gardeners might prefer starting from seed to maximize variety choice.
Wherever you plant, choose a location with at least 6 hours of sunlight daily—kale loves the sun for best growth, though a little afternoon shade helps in very hot climates. Ensure the spot has good air movement but is sheltered from strong winds, which can dry out or damage young plants.
To deter pests like pigeons or cabbage worms, use row covers, bird netting, or companion plant with herbs such as sage or dill that help repel unwanted visitors.
With the right variety and spot, your kale patch can flourish even if you’re working with a small patio, turning every bite into a garden-fresh delight.
Preparing the Soil & Planting Kale
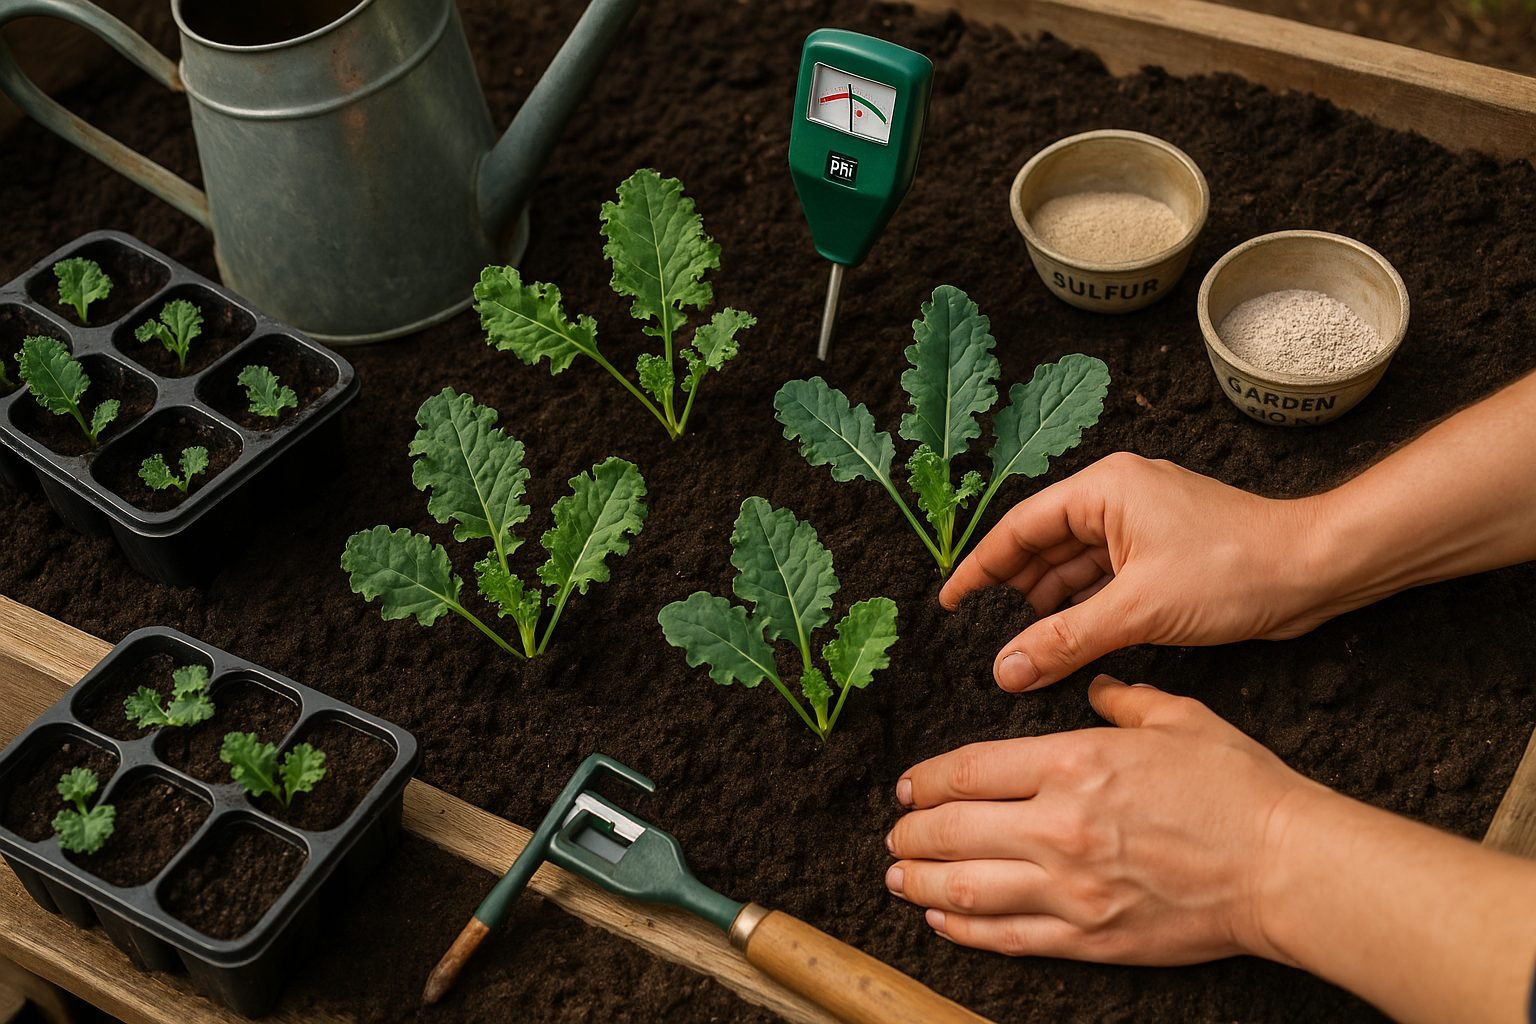
Getting your soil ready is one of the most important steps for growing healthy kale. Kale thrives in well-drained, loamy soil with a pH between 6.0 and 7.0, so start by testing your soil with an at-home kit—most garden centers carry them. If the pH is too low (acidic), mix in a little garden lime; if it’s too high, try adding sulfur. Enrich the soil with a generous layer of compost or well-rotted manure before planting to boost nutrients and encourage strong root development. Make sure the area doesn’t get waterlogged after heavy rain, as soggy soil can lead to root rot. If drainage is an issue, consider creating raised beds or planting in mounds.
You have two main options for starting kale: sowing seeds directly in the garden or starting them indoors as seedlings. For direct sowing, plant seeds about ½ inch deep and 3 inches apart as soon as the soil can be worked in early spring—kale is quite cold-tolerant and can handle a light frost. For a fall crop, sow seeds directly 8-10 weeks before your first expected frost date. If you prefer to start seedlings indoors, sow seeds in trays about 4-6 weeks before your last frost, keeping them near a sunny window or under grow lights. This gives you a jump on the season and helps avoid early pest problems.
When it comes to spacing, kale needs room to grow. Thin or transplant plants so they end up about 12-18 inches apart; this allows good airflow and plenty of sunlight, reducing disease risk and encouraging strong leaves. If you’re using square foot gardening, place two kale plants per square foot as long as you harvest the leaves young, or just one per square if you prefer full-sized bunches. Row gardeners should aim for rows 18-24 inches apart.
If you’ve started kale indoors, don’t rush them outside. About a week before transplanting, begin hardening off by taking the seedlings outdoors for a few hours each day, gradually increasing their time outside to adjust them to sunlight and wind. Transplant your seedlings into the garden when they’re about 4 inches tall and after your last major frost. Kale can handle a little chill, but small seedlings do best with some protection. Water the plants well after transplanting, and keep an eye out for droopy leaves, which often perk up in a day or two. With the right care at the start, you’ll be enjoying fresh kale leaves for months to come.
Caring for Kale Plants
Proper care is key to a thriving kale harvest, and a good watering routine keeps your plants healthy. Kale prefers consistently moist soil, so aim to water deeply at the base 1–2 times a week, increasing frequency in hot or dry weather. Avoid frequent, shallow watering, which encourages weak roots.
To help conserve soil moisture and cut down on weeds, spread a layer of organic mulch (like straw, shredded leaves, or grass clippings) around your plants, renewing it as it breaks down. Feed kale every 4–6 weeks with a balanced organic fertilizer, compost tea, or well-rotted manure, as steady nutrition fuels lush, productive leaves. Yellowing leaves often signal a nitrogen deficiency—add a nitrogen-rich amendment like blood meal if you see this.
Weeding is essential since weeds compete for nutrients and moisture; pull weeds by hand or use a hoe carefully around the shallow-rooted kale. While kale usually doesn’t need staking, taller varieties may benefit from gentle support, especially in windy areas or when nearing maturity.
To keep leaf production high, harvest outer leaves regularly, which encourages new growth at the plant’s center. Stay vigilant against pests—inspect leaves twice a week, especially underneath, for caterpillars or aphids, and remove them by hand or spray with a mild soapy water solution. For persistent pests, consider floating row covers early in the season or use organic controls like neem oil.
Pigeons can be deterred by netting or shiny tape placed above plants. Nurturing your kale also means catching nutrient issues before they escalate:
- Pale leaves normally mean low nitrogen.
- Purple-tinged leaves can indicate a phosphorus shortage.
- Stunted growth may signal a lack of potassium.
Address deficiencies quickly with organic feeding, and ensure your mulch isn’t too thick to block water or air. By following these straightforward care steps, your kale should stay vibrant, vigorous, and ready for repeat harvests.
Troubleshooting: Pests, Diseases & Difficulties
Growing kale can be rewarding, but it comes with its share of garden challenges, mainly from pests and diseases. Common pests like cabbage worms, flea beetles, aphids, and pigeons are notorious for targeting kale.
Cabbage worms leave ragged holes in the leaves, and you might spot small green caterpillars or their dark droppings. Flea beetles create lots of tiny round holes, while aphids cluster on the undersides of leaves, sucking sap and leaving behind a sticky residue. Pigeons can strip a plant bare nearly overnight if you aren’t vigilant.
Preventing pest infestations starts with physical barriers—floating row covers are a gardener’s best friend and keep most insects and birds at bay. Regularly inspect your kale for pests, removing any you find by hand. For aphids, a strong blast of water can help dislodge them, or you can introduce beneficial insects like ladybugs. Sprinkling food-grade diatomaceous earth around plants discourages crawling pests, and neem oil spray works against both aphids and caterpillars while being friendly to beneficial insects when used correctly.
Diseases can also sideline healthy kale crops, especially downy mildew and clubroot. Downy mildew appears as yellow patches on leaves, often with a fluffy white growth underneath in damp conditions. Clubroot causes swelling and distortion of roots, leading to wilting and stunted growth.
To prevent these issues, practice crop rotation by not planting brassicas in the same spot each year, and improve soil drainage by planting in raised beds or adding compost. Remove any infected plants promptly to avoid spreading disease. Water early in the day, allowing leaves to dry quickly and minimizing humidity around the plant, which helps prevent fungal problems.
Besides pests and diseases, kale sometimes faces issues like premature bolting and yellowing leaves. Bolting (early flowering) usually happens in response to stress, such as sudden heat or transplant shock. Avoid planting too early in the spring and mulch around plants to keep their roots cool, which helps delay bolting.
Yellowing leaves can be a sign of nutrient deficiencies—kale is a heavy feeder and often needs supplemental feeding. Try side-dressing with compost or a balanced organic fertilizer, and remove any old or yellowing leaves to direct energy to new growth.
With regular observation and a few preventative steps, you can tackle most kale troubles before they get out of hand, keeping your greens healthy and productive.
Harvesting & Storing Kale
Harvesting kale at the right time ensures you get tender, flavorful leaves while keeping your plants productive. The best time to start picking is when the leaves are about the size of your hand—usually around 50-70 days after planting.
For continuous growth, use the “cut-and-come-again” method: pick the outermost, oldest leaves first, snipping them close to the stem while leaving the central bud and small inner leaves untouched. Aim to harvest every week or as needed, but never take more than one-third of the plant at a time. This allows kale to keep producing fresh growth for months—even until winter in mild climates.
Once picked, rinse the leaves, pat them dry, and store them unwashed or wrapped in paper towels in a loose bag in the fridge crisper drawer; they’ll stay fresh for up to a week.
If you have a bumper crop, blanch kale leaves for two minutes, then freeze them in airtight bags for soups and stews. Dehydrating is another great option—simply wash, dry, and spread leaves on dehydrator trays until crisp for homemade kale chips or smoothie add-ins.
Kale’s mild, earthy flavor makes it versatile: use freshly picked leaves tossed raw in salads, blend them into green smoothies for a nutrient boost, or sauté, steam, or add to soups and casseroles.
With these harvesting and storing techniques, you’ll enjoy kale’s taste and nutrition long after the growing season ends.
Frequently Asked Questions
Kale often confuses beginners with its growing habits, but getting started is easier than it seems. Typically, kale is a cool-weather crop, thriving best in spring and fall. It tolerates light frosts and can sometimes overwinter in milder climates.
One common question is whether kale regrows after cutting — yes, it does! Harvesting the outer leaves allows the plant to keep producing, sometimes for several months. While most kale varieties are biennial (completing their life cycle in two years), they’re usually grown as annuals for the best-tasting leaves.
Growing Kale in Containers
Curious about growing kale in pots? It’s totally doable — even a deep window box works. Just use a container at least 12 inches deep and wide, fill it with rich, well-draining soil, and give each plant plenty of space for airflow. Water consistently, but avoid soggy soil, and place your pot where it gets 4-6 hours of sunlight daily.
Dealing with Pests
Novices often struggle with pests like aphids or cabbage worms; deter them by:
- Checking leaves regularly
- Using insecticidal soap
- Planting aromatic herbs like mint nearby
Tips for Small Spaces
If you’re working with tight spaces, opt for compact dwarf or baby kale varieties, which adapt well to balcony or patio gardens. You can also stagger plantings every few weeks to make the most of your harvest window and ensure a steady supply of fresh leaves.
With a bit of attention and the right setup, even first-time gardeners can grow hardy, nutritious kale almost anywhere.