Introduction
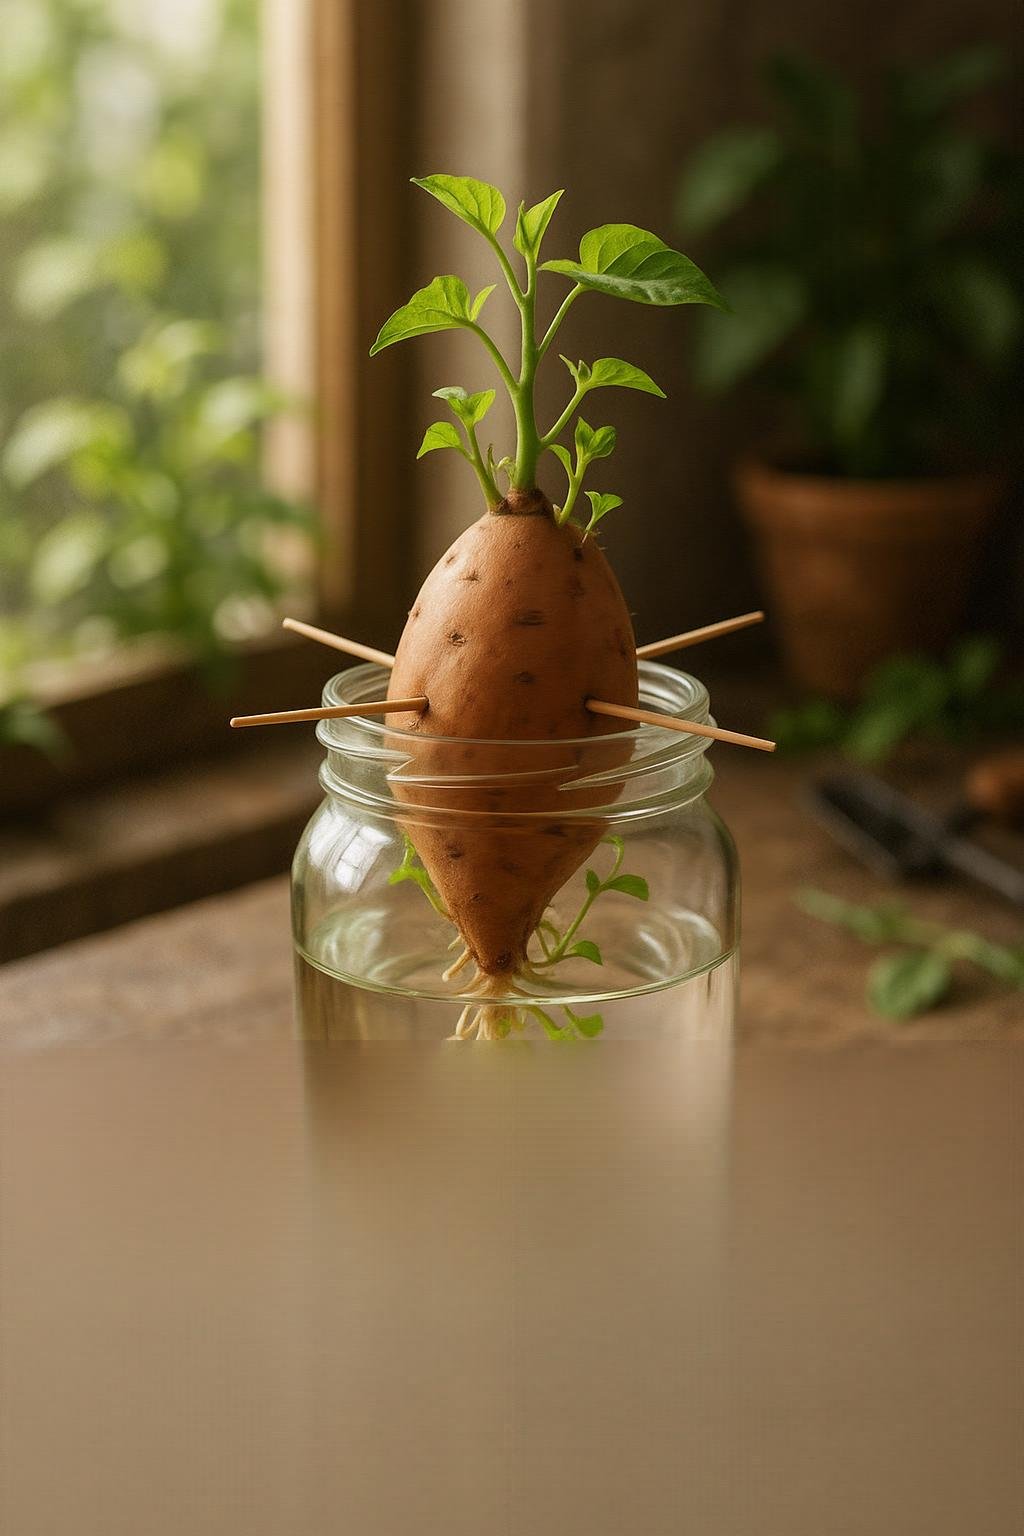
If you’ve ever wondered about growing sweet potatoes in water, you’re in for a treat. The process starts with sweet potato slips—these are the sprouts that grow from a mature sweet potato and serve as the starting point for new plants. For home gardeners, cultivating slips in water is an easy and effective method, especially if you lack outdoor space or simply want to jumpstart your garden indoors.
It requires little more than a sweet potato, some water, and a sunny windowsill. This approach not only lets you watch the roots and shoots develop up close, but it also avoids the mess of soil and minimizes pests. In this guide, you’ll discover the step-by-step method for producing healthy sweet potato slips in water, learn the best tips for success, and find out how to transition your slips to the garden for a bountiful harvest.
What Are Sweet Potato Slips?
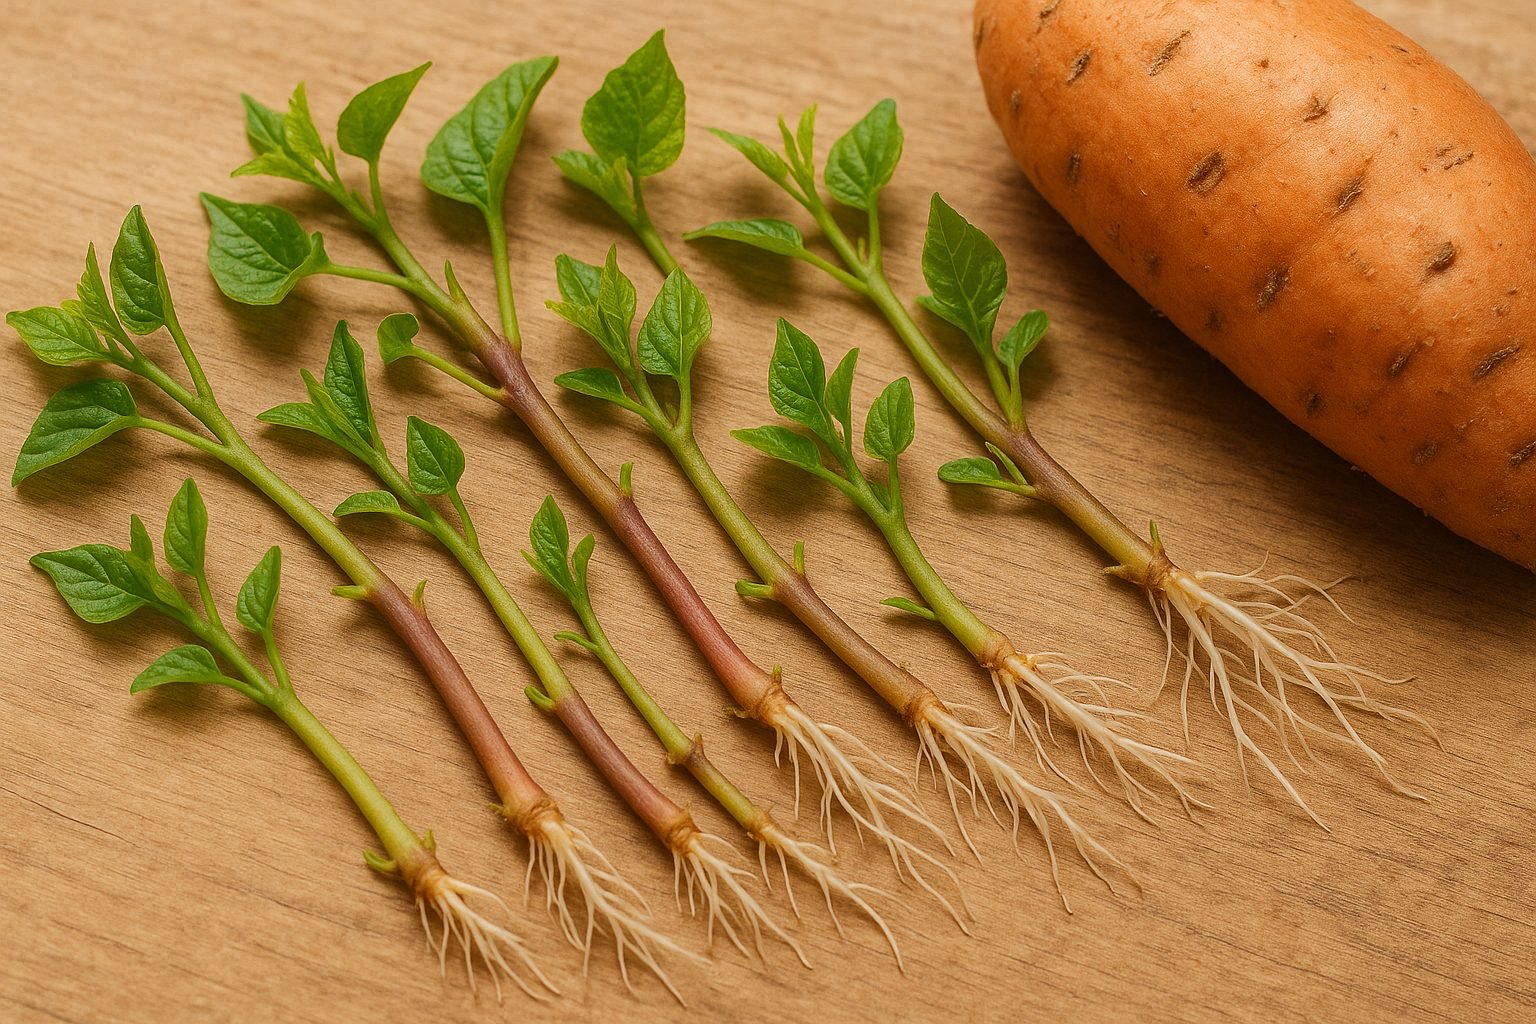
Sweet potato slips are young, leafy shoots that sprout from mature sweet potato tubers. They’re the most reliable way to start a new sweet potato crop. Unlike seeds—which are rarely used because sweet potatoes seldom produce viable seeds—or cuttings like those taken from other plants, slips grow from the actual storage root of the sweet potato itself.
Each slip, when carefully separated and rooted, contains all the genetic material needed to develop a healthy plant that will, in turn, produce new tubers. This method is essential because sweet potatoes don’t come true from seed, and slips ensure that the desirable characteristics of your chosen variety (like flavor or shape) are preserved.
If you want to grow your own sweet potatoes at home, your first goal is to develop or purchase vigorous, disease-free slips. Growers typically start slips by placing a sweet potato in a shallow tray of water or soil and keeping it warm and humid until shoots appear. Once these shoots reach six to eight inches, you can twist them off and root them in water or directly in the soil.
Growing from slips is the surest way to guarantee a successful sweet potato harvest tailored to your garden’s conditions.
Preparing Sweet Potatoes for Slip Production
Selecting the right sweet potatoes is key to successful slip production. Always choose healthy, organic sweet potatoes, as conventional ones are often treated with sprout inhibitors that prevent slips from forming. Look for firm, unblemished tubers without cuts, soft spots, or signs of rot—these factors can hinder sprouting and even spread disease to your new plants.
If possible, seek varieties known for vigorous slip growth, such as ‘Beauregard,’ ‘Georgia Jet,’ or ‘Centennial.’ While store-bought sweet potatoes can work, they may sometimes be treated with chemicals, so opt for certified seed potatoes from garden centers for the best results.
Before starting your slips, give each tuber a good rinse under cool running water, gently scrubbing away any soil or residue with a soft brush. It’s helpful to let them air-dry completely to avoid excess moisture, which can cause mold. If you notice any rough spots or scars, cut them away with a clean knife.
Once prepped, you’re ready to begin rooting the sweet potatoes, typically by suspending them in water with toothpicks or placing them horizontally on damp soil. Prepping thoroughly ensures you give your slips the healthiest start possible, leading to stronger vines and a better sweet potato harvest.
Step-by-Step: Growing Slips in Water
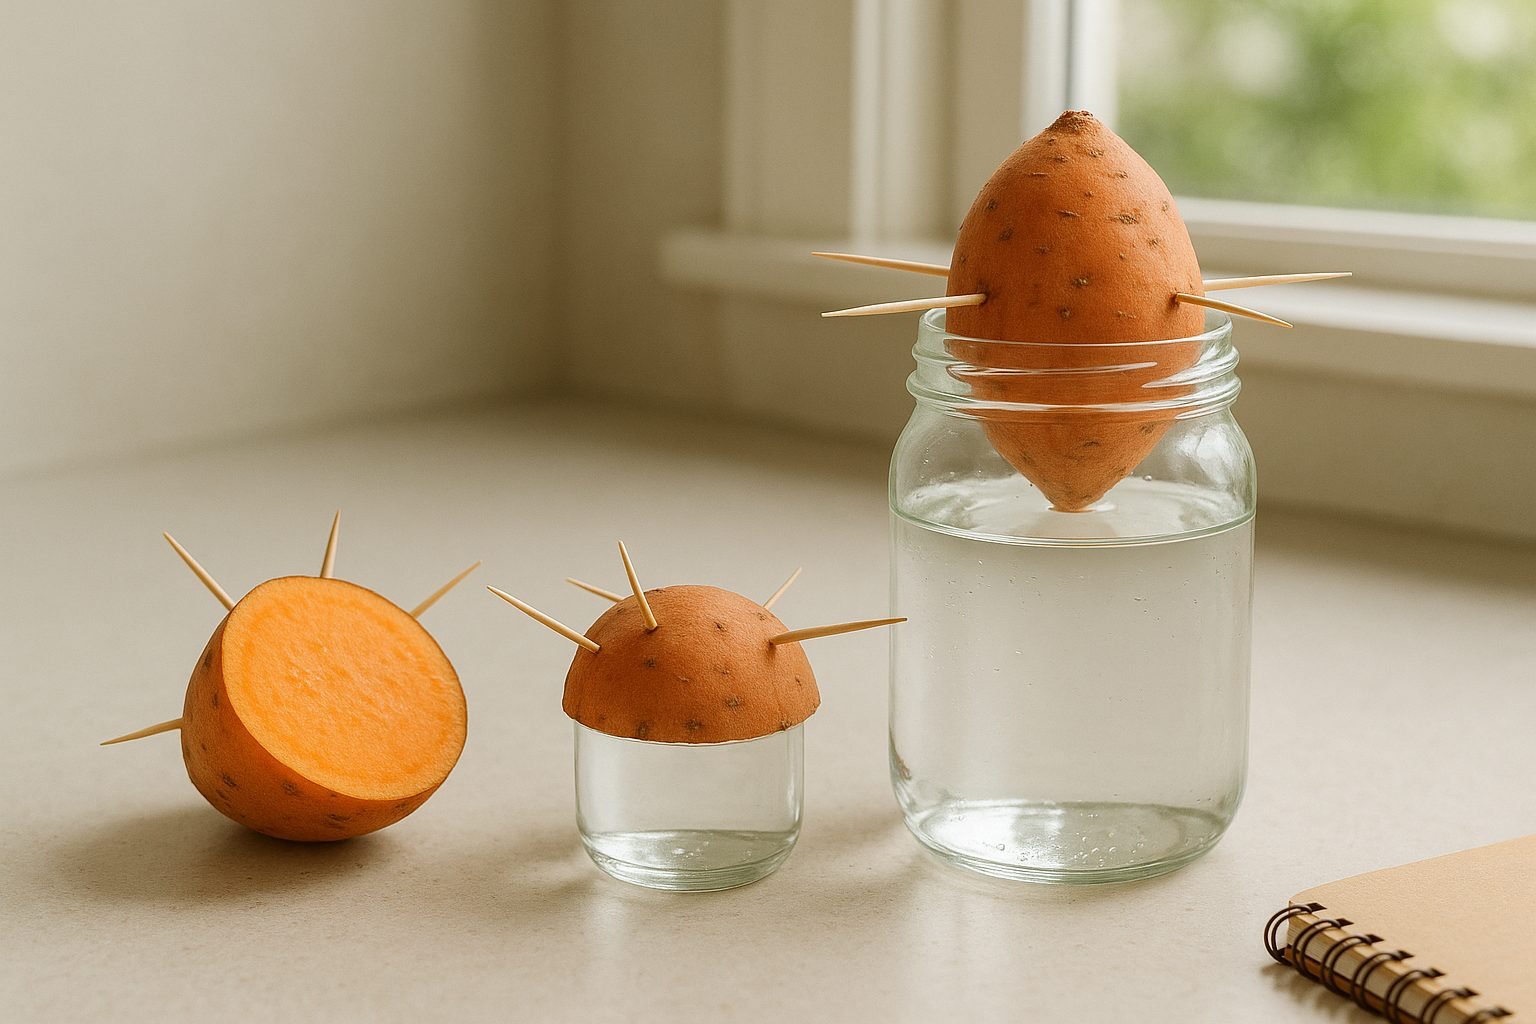
Growing sweet potato slips in water is a fun and easy way to kick off your garden season. You only need a few simple materials: a clean glass jar, a handful of toothpicks, some tap or filtered water, and healthy sweet potatoes (organic if possible, since some conventional ones are treated to prevent sprouting).
Start by washing the potato thoroughly and cutting it in half across the shortest side—it doesn’t matter which end you use. Stick 3–4 toothpicks around the middle of each potato half and balance it on the rim of the jar, so that about a third of the potato sits underwater. Fill the jar with water so that the bottom remains submerged while the upper part stays dry.
Place the jar in a warm area with plenty of indirect sunlight; a windowsill that gets bright morning light works well. The ideal temperature is between 70–80°F, which encourages quick root and slip formation. Remember to change the water every few days to keep it fresh and oxygenated, helping to prevent mold or bacterial growth.
If you notice mold or the water turning cloudy, gently rinse the potato and replace the water immediately. If the potato starts to rot and turns mushy, discard it and start with a fresh one.
Sprouting usually starts within 2–4 weeks, but if nothing happens, try moving the jar to a warmer spot or switch to a different potato. Be patient—some sweet potatoes just take their time!
As slips begin to grow (they’ll look like leafy sprouts), make sure they get enough light. Once they reach about 5–6 inches in length, you can gently twist them off and root them in water or plant them directly in soil. This method helps ensure healthy, vigorous slips for transplanting into your garden.
Caring for Slips & When to Transfer
Keeping your slips healthy as they grow is all about maintaining clean water and monitoring their progress. Make sure to change the water every few days to prevent bacteria build-up and keep your slips thriving; rinsing the container each time can further reduce the risk of mold or sliminess. Use room-temperature water, and if you notice murkiness or an odd smell, don’t wait—change it immediately.
As slips begin to sprout, keep an eye on their length and root development. Slips are typically ready to transfer when they reach about 6 to 8 inches tall and have developed a good cluster of roots, usually visible within two weeks.
To separate, gently wiggle each slip free from the root potato—don’t yank, as this can damage delicate stems. Handle slips by the base, avoiding excessive squeezing. If you plan to delay planting, place the separated slips in fresh water to prevent wilting or drying out, ideally planting them within a day or two for the best results.
For extra sanitation, you can give slips a quick rinse before transferring them to the soil, helping deter pests or lingering bacteria. This careful approach to slip care will give your plants a healthy head start in the garden, encouraging strong growth and plentiful yields.
Planting Slips in Soil & Early Care
When you’re ready to move your slips—those young plant shoots—from water to soil, timing and gentleness are everything. Start by placing slips in a shallow tray of moist potting mix for a few days to allow roots to adjust from water to soil conditions. Keep them somewhere bright but out of direct sun, and mist the slips daily to maintain humidity.
After about a week, once you notice vigorous new growth, transplant each slip into a small pot filled with loose, well-draining soil rich in compost. Sweet potatoes thrive in soil that’s slightly acidic (pH 5.5–6.5) and fluffy enough for delicate roots to spread.
Before planting outdoors, “harden off” your slips by gradually introducing them to outdoor conditions—set them outside in partial shade for a few hours each day, increasing exposure to sun and wind over 7–10 days. This helps young plants adapt and reduces transplant shock.
Water slips regularly, keeping soil evenly moist but never soggy; yellowing leaves can indicate overwatering, while wilting suggests too little. Young slips need plenty of indirect light (12–16 hours under grow lights or in a bright window) until nighttime temperatures stay above 55°F and you’re ready to move them outside.
By easing slips into their new environment and monitoring their daily needs, you’ll set the foundation for healthy, vigorous plants ready to thrive all season long.
Common Questions & Troubleshooting
Many gardeners wonder why their sweet potato slips aren’t sprouting—often, it’s due to low temperatures or insufficient moisture. Sweet potatoes prefer warmth; keep your starter potatoes in a spot with temperatures around 75–80°F and lightly mist them to maintain humidity.
Using store-bought potatoes is possible, but keep in mind that many are treated with sprout inhibitors. If you’re set on store-bought, look for organic or untreated potatoes, or rinse them thoroughly and allow some time for the inhibitor to wear off.
Another common question is how many slips to expect from each potato; typically, a medium to large potato can produce 6–10 healthy slips if cared for properly. If your slips look weak or leggy, ensure they get enough sunlight and aren’t overcrowded.
For issues with rot, double-check that the base of the potato isn’t sitting in water—just moist, not soggy soil or water is ideal. Pesky pests like gnats can be deterred by letting the soil dry slightly between waterings or placing a small fan nearby to improve airflow.
With a little extra attention to warmth, moisture, and cleanliness, most slip-growing problems are easy to fix!
Conclusion
Growing sweet potato slips in water is a simple, space-saving method that sets you up for a bountiful harvest. You don’t need a green thumb—just a few healthy sweet potatoes, some jars, and a bit of patience. Watching roots and sprouts grow can be surprisingly fun, especially for kids or new gardeners.
Once your slips are ready, transplant them into well-draining soil with plenty of sunlight, and keep them watered as they settle in. Give this method a try, and you’ll be enjoying homegrown sweet potatoes right from your backyard or even a container garden in no time.