Choosing the Right Kale Variety
Wondering about the best soil for kale? You’re not alone—this leafy green is taking over backyards, patios, and even sunny windowsills everywhere. Rich in vitamins, easy to grow, and resilient, kale has become a top pick for home gardeners looking for a reliable crop. But did you know your success with kale starts not just with soil but also with the variety you choose?
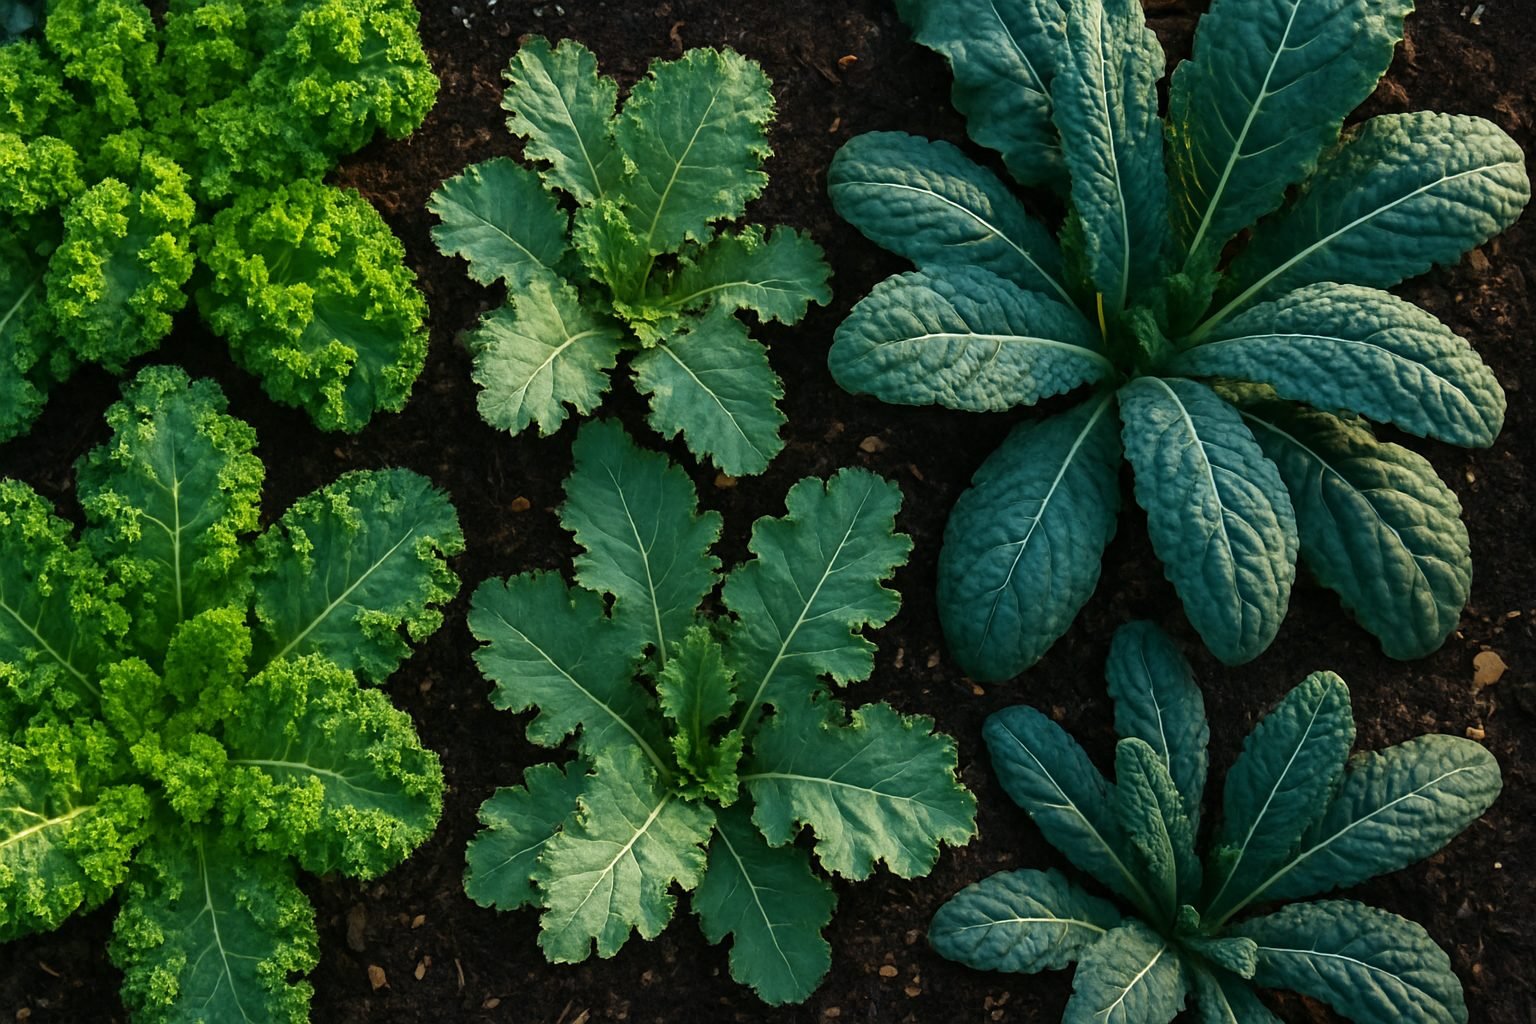
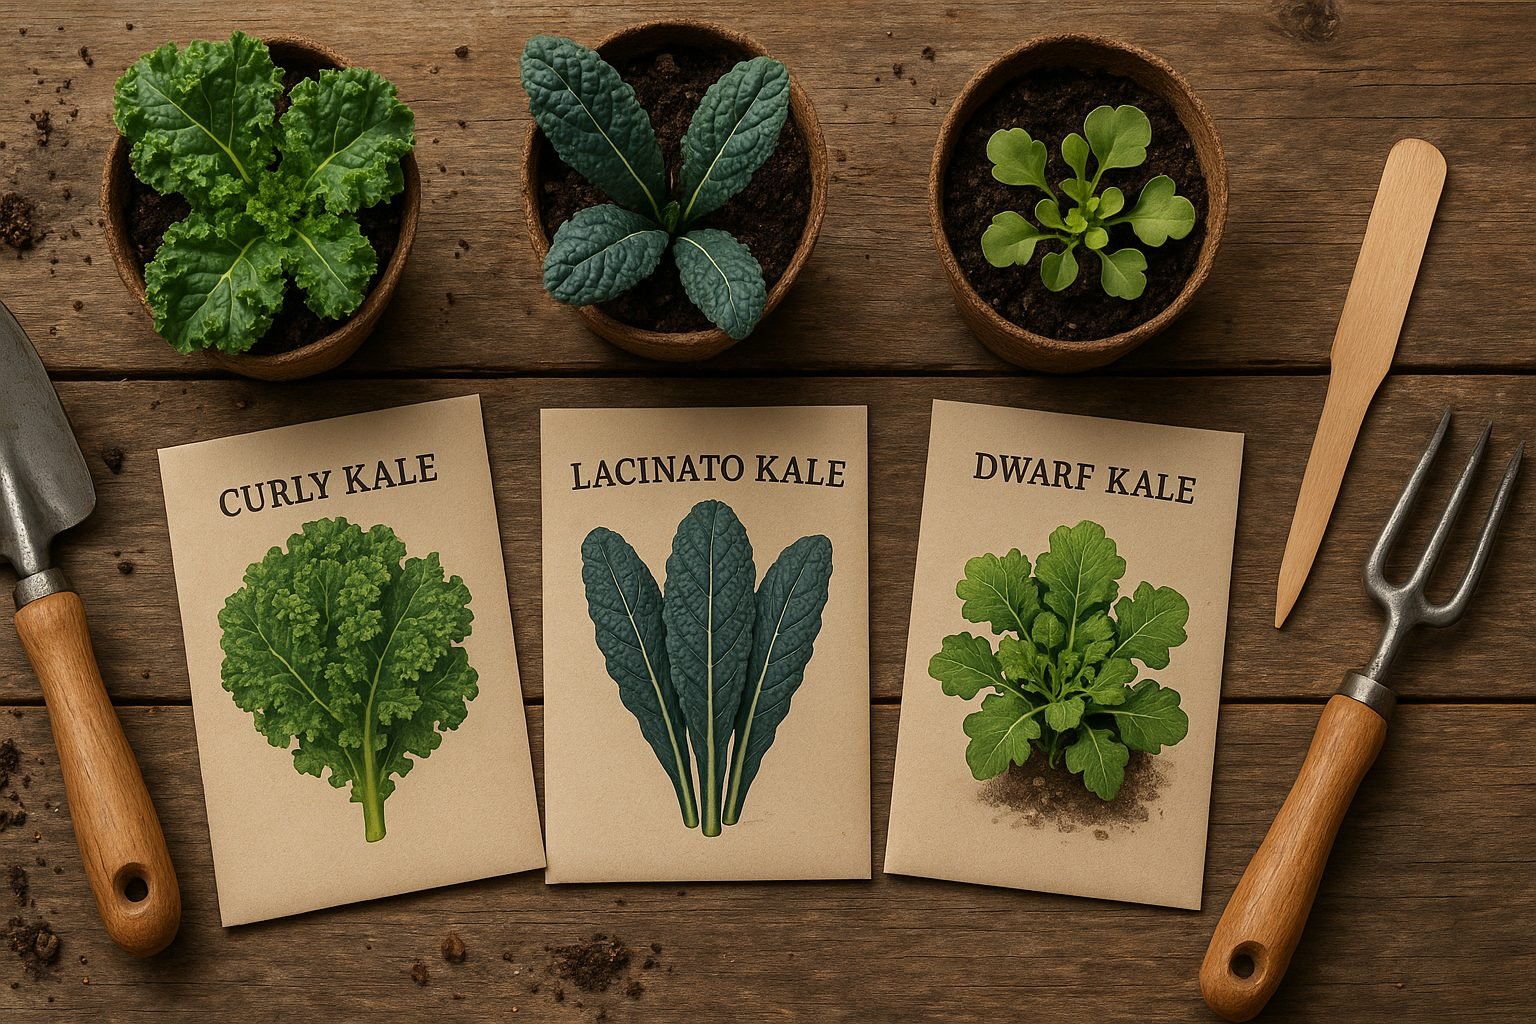
Curly kale is famous for its frilly leaves and bold flavor, perfect tossed into salads or sautéed with garlic. Lacinato (aka Dinosaur kale) tempts gardeners with its dark, crinkled leaves and earthy-sweet taste, ideal for soups and chips. If your climate is on the colder side, Siberian kale’s tender leaves thrive in chillier temps, even after a frost. For those short on space, dwarf kale varieties flourish in containers, making them perfect for balconies, small gardens, or even a sunny kitchen corner.
Think about your growing space and climate before picking a kale variety. Have room in the garden and enjoy robust, peppery flavors? Go for classic Curly kale. Balconies bathed in sun, or just a small planter box? Dwarf kales are your best friend and surprisingly forgiving. If soups and smoothies are more your style, Lacinato’s milder taste fits the bill. Don’t overlook microclimates—Siberian kale can handle the biting cold if you’re in the North.
For best results, pair your chosen variety with the best soil for kale: loamy, well-draining, and rich in organic matter. This combo sets you up for lush, healthy greens from spring through fall. No matter your space or palate, there’s a kale out there that’ll thrive right alongside you.
Where and How to Grow Kale: Garden Beds, Pots, or Indoors
Kale is one of the most adaptable greens you can grow, thriving in a surprising range of settings including traditional garden beds, raised beds, containers on patios, and even indoors on a sunny windowsill. Each method has its perks and challenges.
Garden beds give kale plenty of root space and the chance to soak up full sunlight, producing robust plants. However, you’ll need well-drained soil and a location that gets at least 6 hours of sun daily.
Raised beds share these sunlight benefits and often provide better drainage and control over soil quality, making them great for areas with heavy or clay soil.
Limited on space? Containers or pots work well as long as they’re at least 12 inches deep and wide, allowing roots to spread and preventing overcrowding—just remember that pots can dry out faster, so check moisture regularly.
When growing indoors, a south-facing window is key to ensuring enough light, or you can supplement with a grow light if daylight is scarce. Cooler temperatures (60–75°F) suit kale best, especially if you want sweeter leaves.
Pay special attention to drainage no matter where you plant—soggy roots can stunt growth or lead to disease.
If choosing a garden site, pick a spot away from large trees or walls that block sunlight. For containers, choose pots with drainage holes and use a high-quality potting mix rich in organic matter. If space is tight indoors, opt for compact kale varieties like ‘Dwarf Blue Curled’ or ‘Red Russian.’
By tailoring your setup to your available space and light, you can enjoy fresh kale almost anywhere, whether you have a sprawling backyard or just a bright windowsill.
Preparing Your Soil or Potting Mix
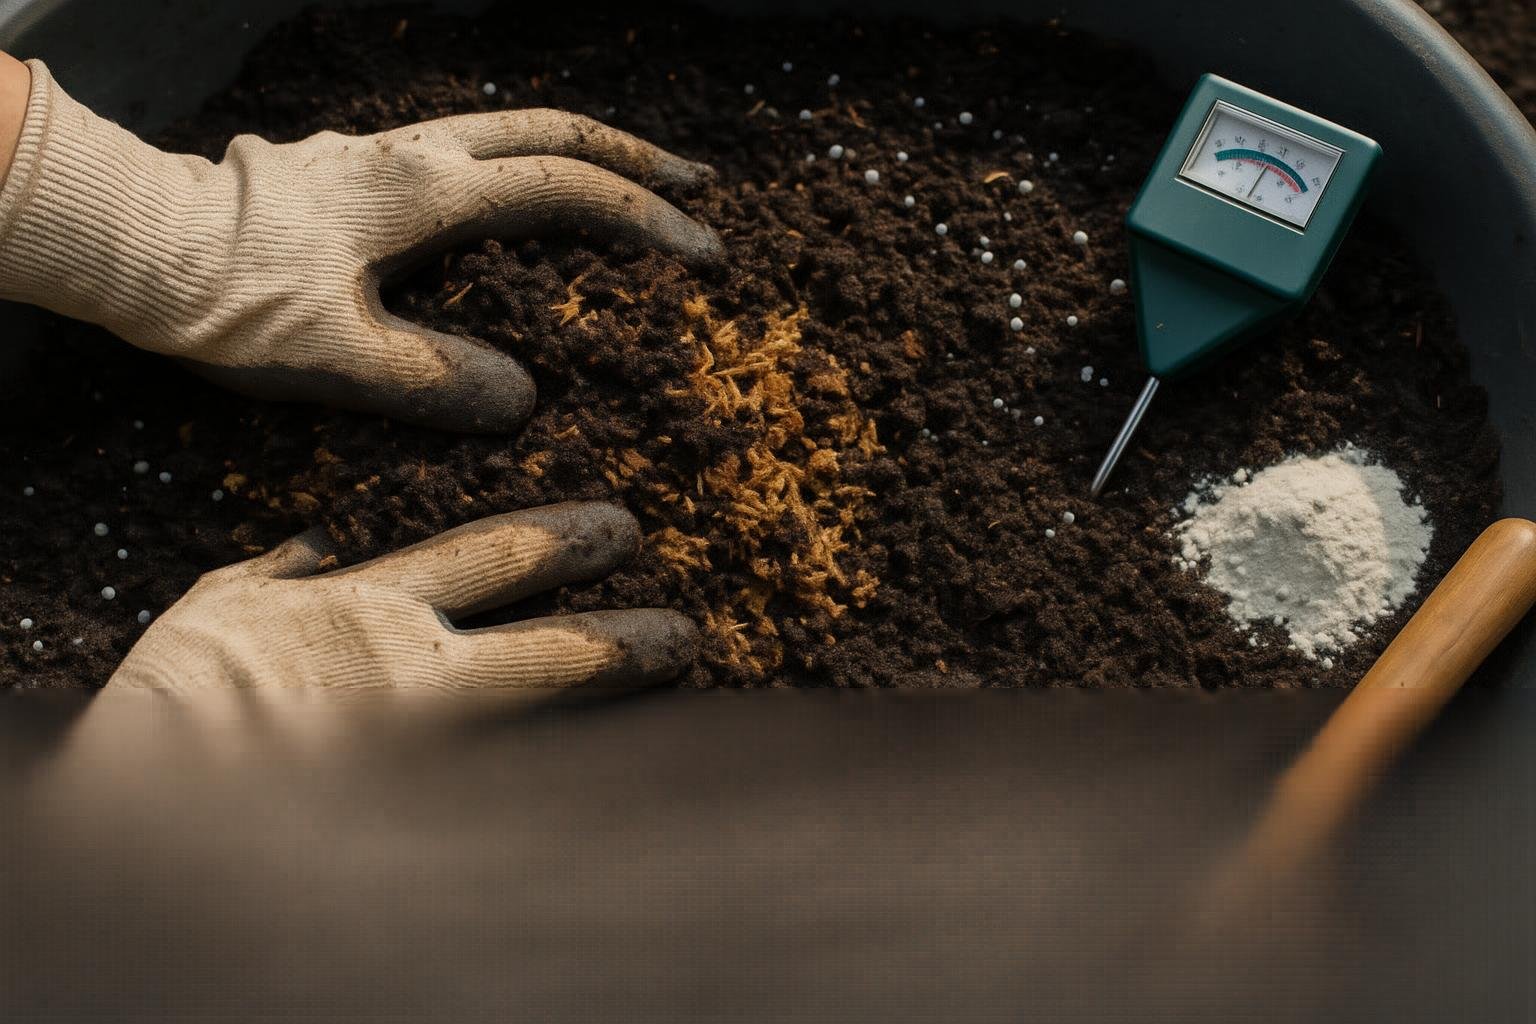
To grow healthy, productive kale, start with soil or potting mix that drains well, is rich in nutrients, and has a slightly acidic to neutral pH (between 6.0 and 7.0). Begin by loosening your garden soil to a depth of about 12 inches, breaking up clumps to allow roots to spread easily. For containers, choose a high-quality potting mix designed for vegetables.
To boost fertility and improve texture, work in at least two inches of organic matter such as compost, well-rotted manure, or worm castings. These not only add nutrients but also help hold just the right amount of moisture without causing sogginess. If your soil tends to be heavy and clay-like, mix in sand or perlite to improve drainage.
Use a simple soil test kit to check the pH; if it’s too low, add a handful of garden lime per square foot, mixing it in thoroughly before planting. Avoid using fresh manure, which can burn tender kale roots and introduce weeds.
Taking the time to prepare your soil or potting mix before planting pays off with robust, deeply colored kale leaves. Think of it as setting the foundation for your crop, making sure the plants have everything they need right from the start. Whether you’re gardening in the ground or in pots, healthy, well-prepared soil is the backbone of a thriving kale harvest.
Sowing Seeds and Planting Seedlings
Sowing kale seeds can be done directly outdoors or indoors, depending on your climate and gardening goals. For spring harvests, start seeds indoors about 6-8 weeks before your last expected frost, using seed trays or small pots filled with seed-starting mix.
Sow seeds about 1/4 to 1/2 inch deep, cover lightly with soil, and keep them consistently moist until they sprout. If you prefer direct sowing, wait until soil temperatures reach at least 45°F (7°C). Space seeds about 1 inch apart in rows spaced 12-18 inches from each other so young plants have room to grow.
Once seedlings develop their first true leaves, thin them to 12-18 inches apart for bushy, robust plants—don’t skip thinning, as crowded kale is more vulnerable to pests and diseases.
If starting indoors, harden off seedlings a week before transplanting by gradually exposing them to outdoor temperatures and sunlight—start with an hour in a sheltered spot, then increase outdoor time daily. Transplant seedlings on a cloudy day or late afternoon to reduce stress, placing them at the same soil depth as their containers and gently firming the soil around the roots.
Pick a location with full sun (though kale tolerates light shade) and well-drained, fertile soil for the healthiest growth. Mulch around plants to keep soil moist and cool, and water consistently, especially during dry periods.
With these simple practices, your kale will establish strong roots and deliver a steady harvest of nutritious greens throughout the season.
Caring for Your Kale: Watering, Feeding, and Protection
Keeping your kale healthy comes down to consistent care, especially with watering, feeding, and protecting it from pests.
Aim to water your kale thoroughly, about 1 to 1.5 inches per week, either from rainfall or supplemental watering. Use a soaker hose or water at the soil line early in the morning to prevent leaf diseases. The soil should stay moist but never soggy; stick your finger in the dirt, and if the top inch feels dry, it’s time to water. Overwatering is as harmful as drought, so ensure proper drainage.
For richer, fuller leaves, fertilize your kale at planting with a balanced, slow-release fertilizer or mix in plenty of compost. Midway through the growing season, side-dress with an all-purpose organic fertilizer that focuses on nitrogen, which encourages leafy growth. Fish emulsion or a diluted seaweed solution work well every 3–4 weeks.
When it comes to pests, vigilance pays off.
- Check the underside of leaves regularly for aphids or the tiny eggs of cabbage worms, and remove them by hand or spray with a gentle blast of water.
- If you spot clusters of white butterflies (the adult cabbage worm), use floating row covers early in the season to keep them away.
- For a low-chemical fix, introduce beneficial insects like ladybugs or lacewings that naturally control aphids.
- If pigeons or other birds are an issue, netting or garden fleece can protect your crop; be sure to secure the edges to keep out persistent birds.
Rotate your kale beds each year, clear debris to reduce overwintering pests, and give your plants plenty of space for airflow, which boosts their resilience against disease and infestations.
With a little attention to these details, you’ll enjoy hearty, beautiful kale all season long.
Harvesting and Storing Kale
Harvesting kale at the right time is key to keeping your plants productive throughout the season. Start picking outer leaves when they reach about the size of your hand, leaving the inner leaves and central bud intact—this allows the plant to keep growing and producing new foliage.
Always use clean, sharp scissors or garden shears to cut leaves about an inch above the stalk to avoid damaging the plant. For the best flavor and texture, harvest in the morning after the dew has dried but before the sun gets strong, as cooler leaves are sweeter and less bitter. Avoid picking wilted or yellowing leaves, as these are past their prime.
For short-term storage, unwashed kale can be placed in a plastic bag with a paper towel and kept in the refrigerator’s crisper drawer—this usually keeps it fresh for up to a week. If you have an overabundance, washing, chopping, and blanching the leaves for two minutes before freezing is an excellent preservation method. Frozen kale is great for smoothies, soups, and sautés later on.
Alternatively, try dehydrating kale to make chips, or simply store dried leaves in airtight containers to add greens to dishes year-round. These simple steps help you enjoy a continuous supply of fresh, flavorful kale from your garden while minimizing waste.
Troubleshooting Common Problems
Growing kale can be hugely rewarding, but even experienced gardeners run into problems like pests, disease, and environmental stress. Here are some common issues and how to tackle them.
Pests
The most frequent pest is the cabbage worm. Look for small green caterpillars or telltale holes in the leaves. You can handpick them or spray your plants with an organic control like neem oil or a solution of Bacillus thuringiensis (Bt).
Aphids are another common nuisance. They cluster on the undersides of leaves, but a strong blast from your hose or a soap spray can keep them in check.
Diseases
Watch out for yellowing, wilting, or brown spots—these are signs of fungal issues like powdery mildew or downy mildew. To prevent disease, improve air circulation by spacing your plants properly, water at the base to keep leaves dry, and remove seriously infected leaves quickly.
Environmental Stress
Kale can “bolt” (flower early) in hot weather, which produces tough, bitter leaves. Prevent this by planting kale in cooler months or providing afternoon shade in hot regions.
Drought and poor soil quality can also stress your plants. Mulch your beds to retain moisture and feed the soil regularly with compost.
Act fast if you notice wilting, stunted growth, or leaf discoloration—these are cries for help! The sooner you respond, the more likely you’ll rescue your crop and enjoy a healthy harvest.