Understanding Cucumber Seed Saving Basics
cucumber seed saving is both a rewarding and practical approach for gardeners who want to preserve their favorite varieties for future seasons. By saving seeds from your best cucumbers, you can ensure the continuation of heirloom strains, save money on yearly seed purchases, and encourage your plants to adapt to your unique garden environment over time.
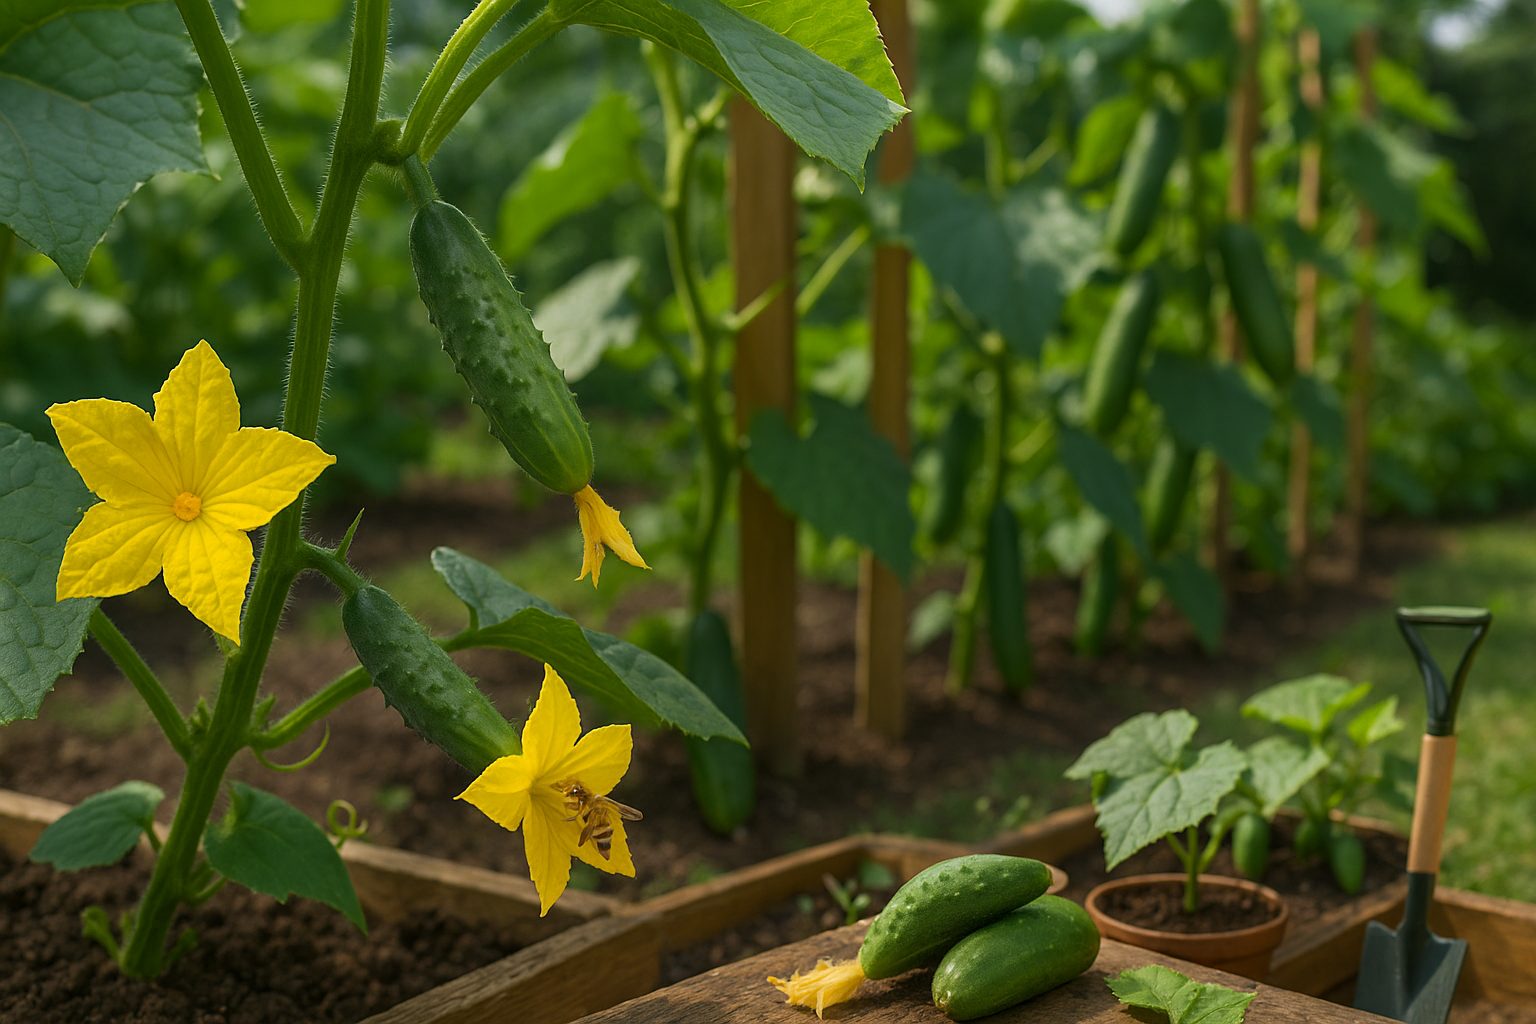
Cucumbers are annual plants, completing their life cycle in a single season, from seed to mature fruit. Each cucumber plant produces male and female flowers, often attracting bees and other pollinators that enable pollination—a necessary step for fruit and seed development.
However, it’s essential to understand that cucumbers can easily cross-pollinate with other cucumber varieties growing nearby. This means that if you’re saving seeds for next year, the resulting plants may not be true to the parent variety unless you take precautions.
To maintain seed purity, it’s best to grow only one cucumber variety at a time or use garden techniques such as physical isolation or hand pollination. By controlling pollination and careful planning, you can confidently save seeds and enjoy the same high-quality cucumbers season after season.
Choosing the Right Cucumbers and Preparing for Seed Saving
When it comes to saving cucumber seeds, start by selecting healthy, disease-free plants to ensure strong, viable seeds for the future. Look for plants with vigorous growth, deep green leaves, and no signs of pests, wilting, or yellowing.
If possible, grow at least five to ten cucumber plants—this improves genetic diversity, making your future crops more resilient to disease and environmental stress. Not all cucumbers are created equal when it comes to seed readiness; you’ll want to let a few fruits stay on the vine well past their prime eating stage.
Ripe cucumbers for seed saving usually turn from green to golden yellow or even orange, and the skin will toughen considerably. Leave these on the plant until fully mature so the seeds inside develop completely.
For gardeners working with limited space, consider hand pollinating your cucumber flowers. This simple method—using a small paintbrush or even your fingertip to transfer pollen from a male to a female flower—helps prevent accidental cross-pollination with nearby varieties and ensures the purity of your saved seeds.
By following these steps, you set yourself up for successful seed saving and strong cucumber crops season after season.
Harvesting and Extracting Cucumber Seeds
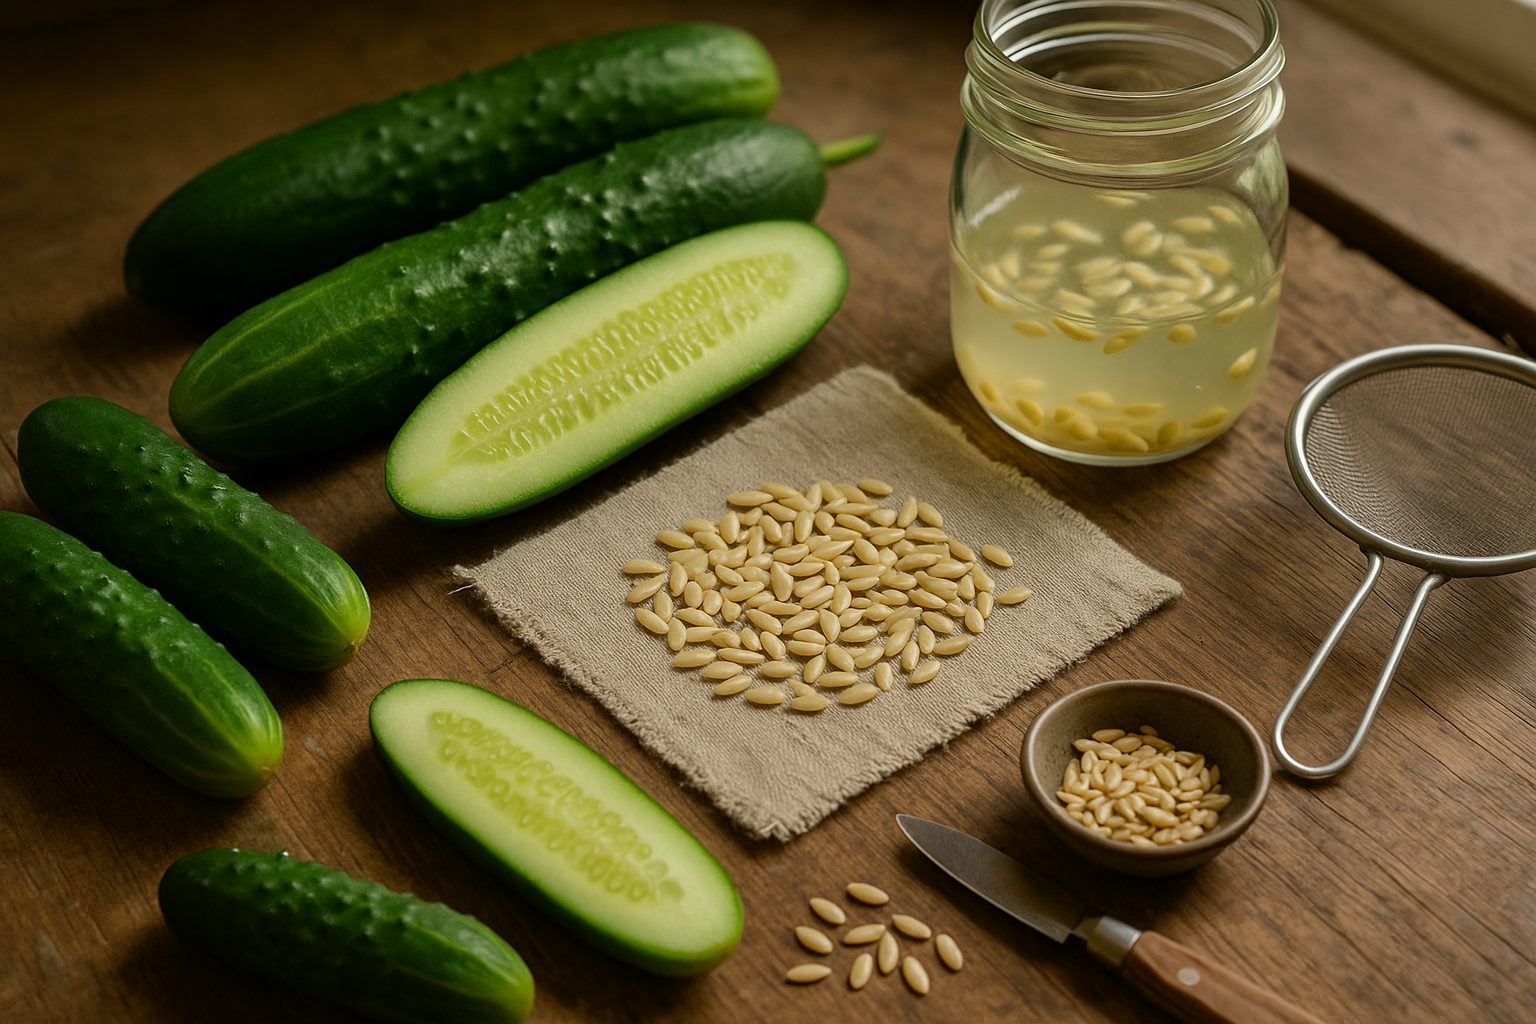
For successful cucumber seed collection, timing is everything. Unlike harvesting cucumbers for eating, you need to let the fruit ripen well past its prime—look for cucumbers that have turned yellow, orange, or even golden-brown, becoming swollen and tough. These color changes signal maturity and ensure viable seeds.
Once picked, wash and dry the cucumber’s exterior, then slice it lengthwise. Using a sturdy spoon, scoop the gel-like pulp containing the seeds into a clean bowl. To separate the seeds from the sticky pulp, add a bit of water and let the mixture sit at room temperature for two to three days, stirring occasionally. This slight fermentation loosens the seeds and causes viable ones to sink, making harvesting easier.
When ready, pour off the floating debris and rinse the seeds under running water using a fine mesh strainer. For particularly stubborn pulp, gently rub the seeds between your fingers, but don’t use force, as crushing can damage them.
Spread the cleaned seeds on a paper towel or plate in a single layer to dry for a week, avoiding direct sunlight. To reduce seed loss, always use bowls and strainers with fine mesh so seeds can’t escape, and work over clean surfaces to catch any accidental spills.
Fermenting and Cleaning the Seeds
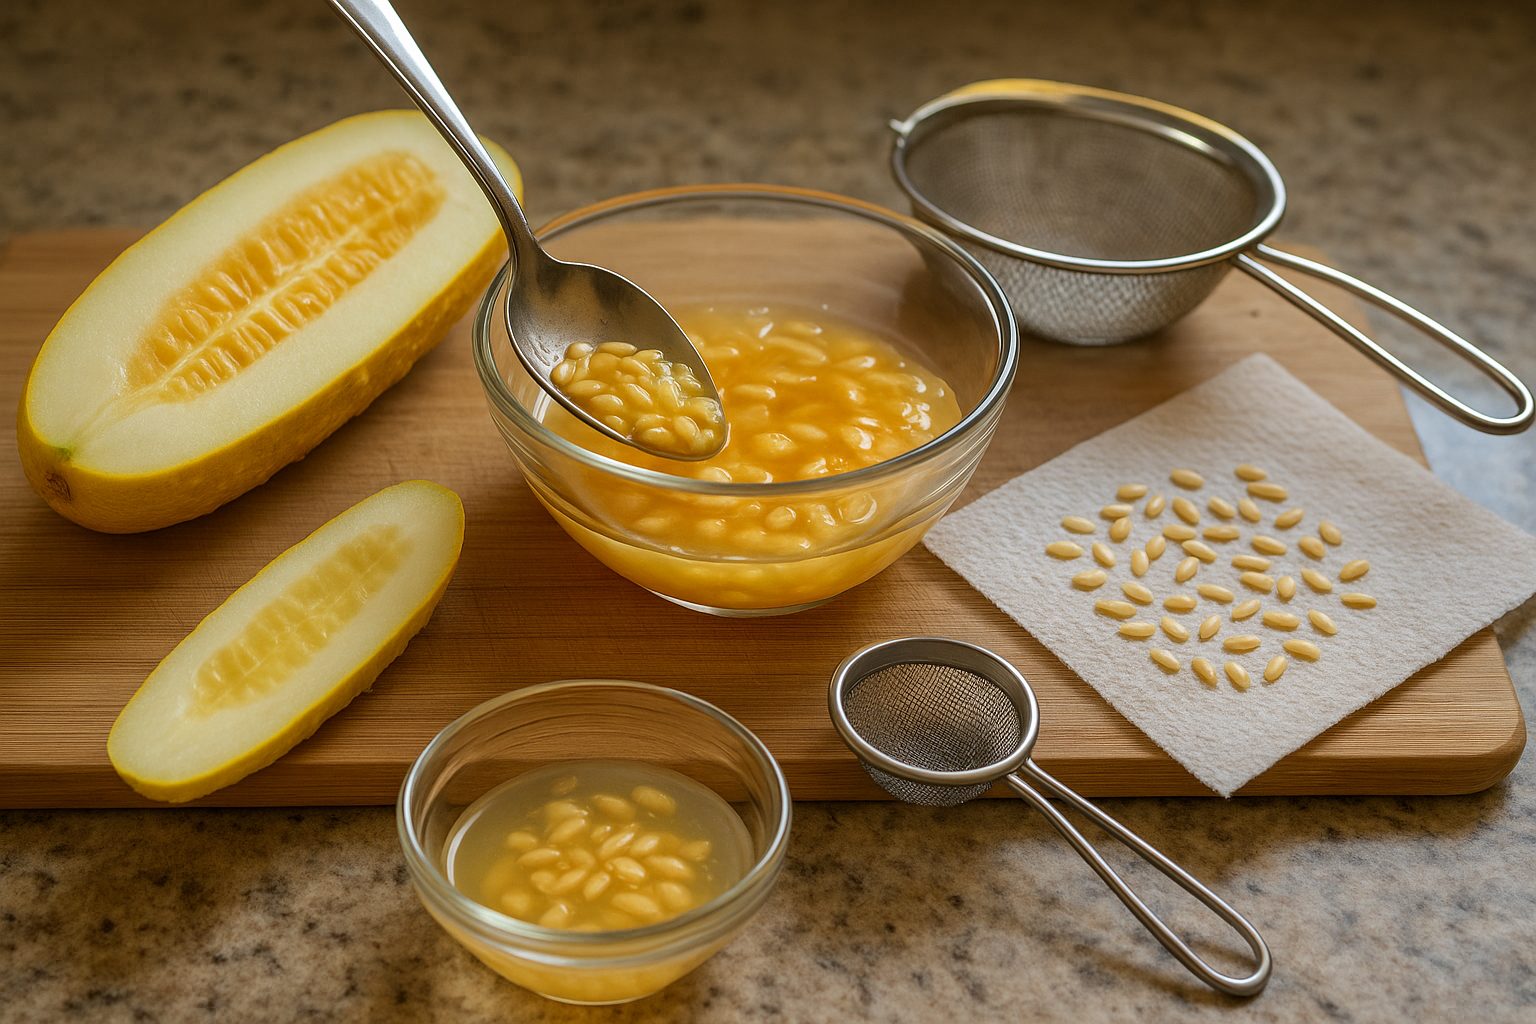
Fermentation is a crucial step in saving seeds, especially for crops like tomatoes, cucumbers, and squash. It helps break down the slimy seed coatings and removes unwanted debris or pathogens.
To ferment your seeds, simply scoop them out of the fruit along with any pulp and place them in a glass jar or bowl. Add enough water to cover the seeds, then loosely cover the container to allow air in while keeping dust out. Let the mixture sit at room temperature for 2 to 4 days, stirring daily.
You’ll know fermentation is complete when you see a layer of mold forming on the surface and the seeds sink to the bottom. Once you spot these signs, pour off the floating pulp and mold, then rinse the seeds thoroughly under running water using a fine mesh sieve. Rub them gently to remove any lingering residue.
After thorough cleaning, spread the seeds in a single layer on a paper towel or mesh screen to dry completely before storage.
Drying Cucumber Seeds for Storage
To safely dry cucumber seeds for storage, start by spreading them out in a single layer on paper towels or a clean tray. Avoid clumping, as this traps moisture and encourages mold.
Choose a spot with plenty of air circulation—near an open window or a fan works well—but keep the seeds out of direct sunlight, which can damage their viability. Stir the seeds gently once a day to ensure all sides dry evenly. This process usually takes about one to two weeks.
To check if your seeds are ready, try the “snap test”: pick up a seed and bend it—if it snaps cleanly instead of bending or feeling rubbery, it’s thoroughly dry and ready for storage.
Store the seeds in a labeled, airtight container in a cool, dark place.
Storing Seeds and Ensuring Longevity
To keep your seeds viable for as long as possible, always store them in a cool, dry, and dark place, such as a closet or a refrigerator’s crisper drawer. Use paper envelopes labeled with the seed type and collection date for small quantities, or airtight glass jars for larger amounts to protect seeds from moisture.
Cucumber seeds stored this way can last about 5 to 10 years, depending on storage conditions. To further extend seed life, add a food-safe silica gel packet to absorb excess moisture and avoid temperature fluctuations by keeping seeds away from heating vents or direct sunlight.
Be sure to periodically check seeds for mold or decay, and always reseal containers tightly after each use to maintain a stable environment and ensure your seeds stay ready for the next growing season.
Troubleshooting and Extra Tips for Successful Seed Saving
When saving seeds, you might run into issues like mold developing during drying, seeds that just won’t sprout, or surprise plant crosses that don’t resemble the parent. To avoid mold, dry seeds on paper towels in a well-ventilated area and stir them daily.
Improve germination by collecting fully mature seeds and storing them in airtight containers in a cool, dry place. To reduce accidental cross-pollination, separate similar plants or try hand-pollinating.
Remember, every seed-saving attempt is a learning experience—don’t be discouraged by setbacks. Experimenting will build your skills, and even mistakes often lead to the most memorable garden stories.