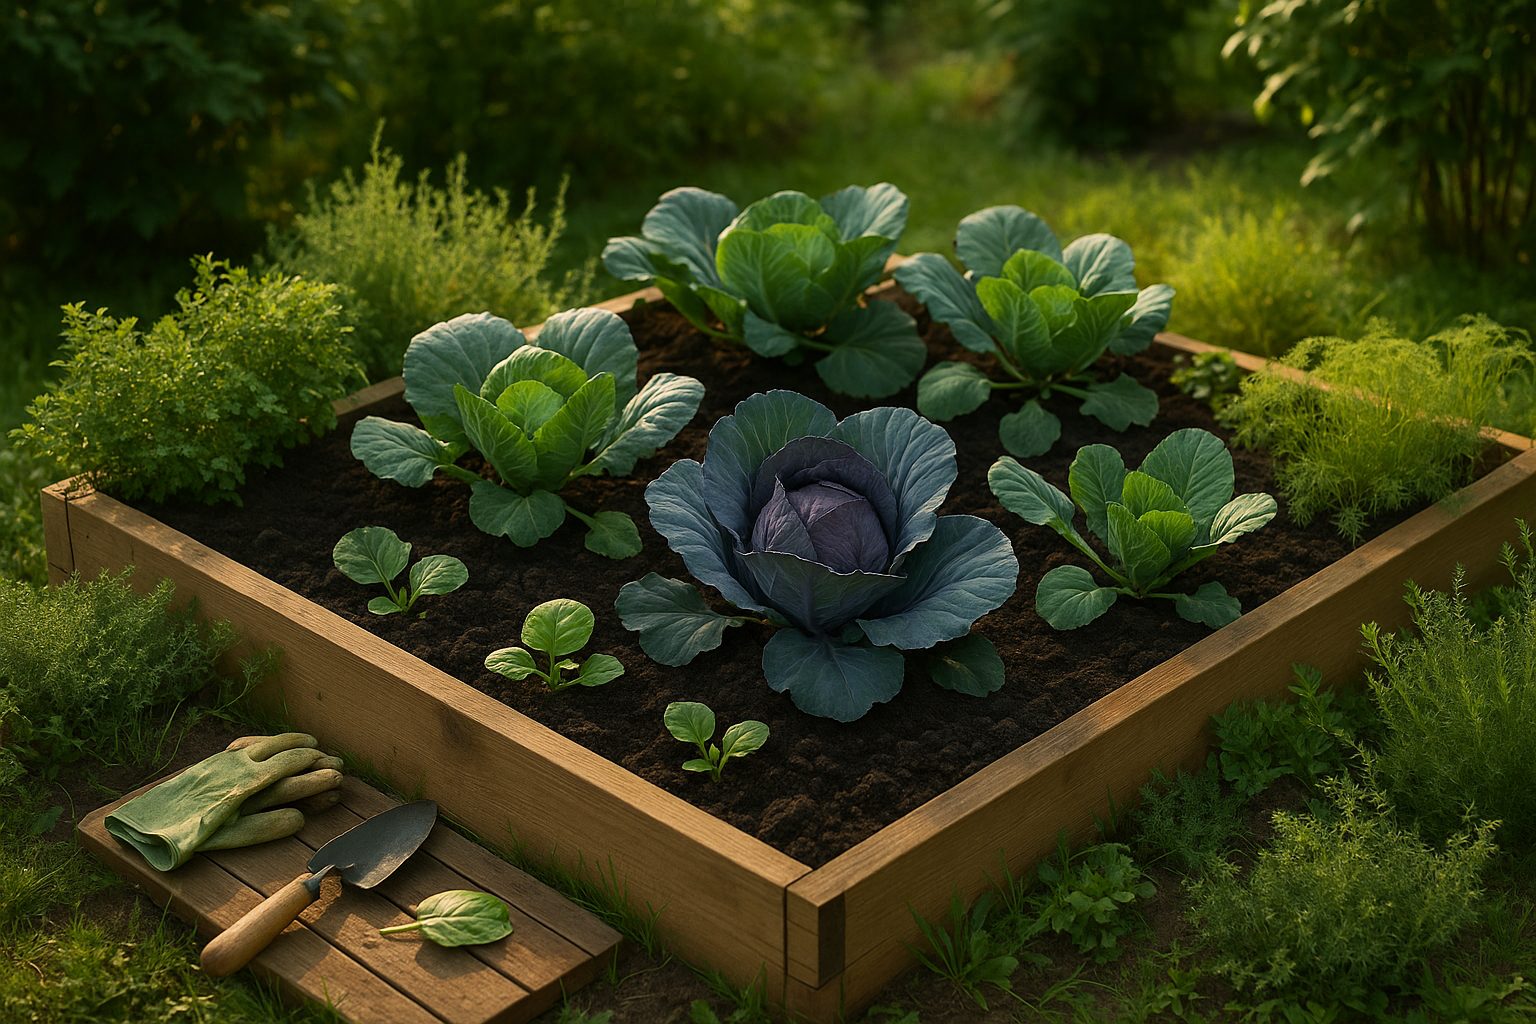
Why Grow Cabbage in Raised Beds?
Choosing the right cabbage bed layout is the first step to growing healthy, thriving cabbages in your own backyard. If you’ve ever struggled with soggy soil, pests, or compacted earth, a DIY raised bed might be the solution you need.
Raised beds for cabbage offer improved soil control, allowing you to tailor the soil mix specifically for cabbages—rich, loose, and packed with nutrients. Better drainage prevents root rot, and their elevated structure makes planting, harvesting, and tending to your cabbage crop much easier on your back and knees.
There are three standout reasons gardeners love growing their own cabbage:
- Incredible freshness straight from the garden
- The ability to experiment with unique varieties rarely seen in stores
- Noticeable cost savings at harvest time
Nothing beats the taste and crunch of homegrown cabbage, and you get to pick from vibrant red cabbages, crinkly savoys, or compact early heads just right for your patch.
While cabbage is famous for its long growing season that often extends from early spring to late fall, the consistent soil warmth and drainage of raised beds help prevent common setbacks like stunted growth or disease, especially during unpredictable seasons.
With a well-planned cabbage bed layout, you’ll have more control over plant spacing, companion planting, and row orientation—giving your cabbages the best start and supporting their steady growth through all stages.
Whether you’re a beginner or a seasoned gardener, setting up your own raised bed layout for cabbage isn’t just about better yields; it’s about enjoying the process, maximizing your garden space, and savoring the satisfaction of healthy food right outside your door.
Planning Your Raised Bed for Cabbage
When planning a raised bed for cabbage, start by picking a spot that gets at least six hours of direct sunlight each day—cabbage thrives in full sun, making light exposure key to healthy heads. If you can, choose a location that’s also sheltered from strong winds, which can stress the plants or topple young seedlings; a fence, hedge, or even neighboring tall crops can act as a natural windbreak.
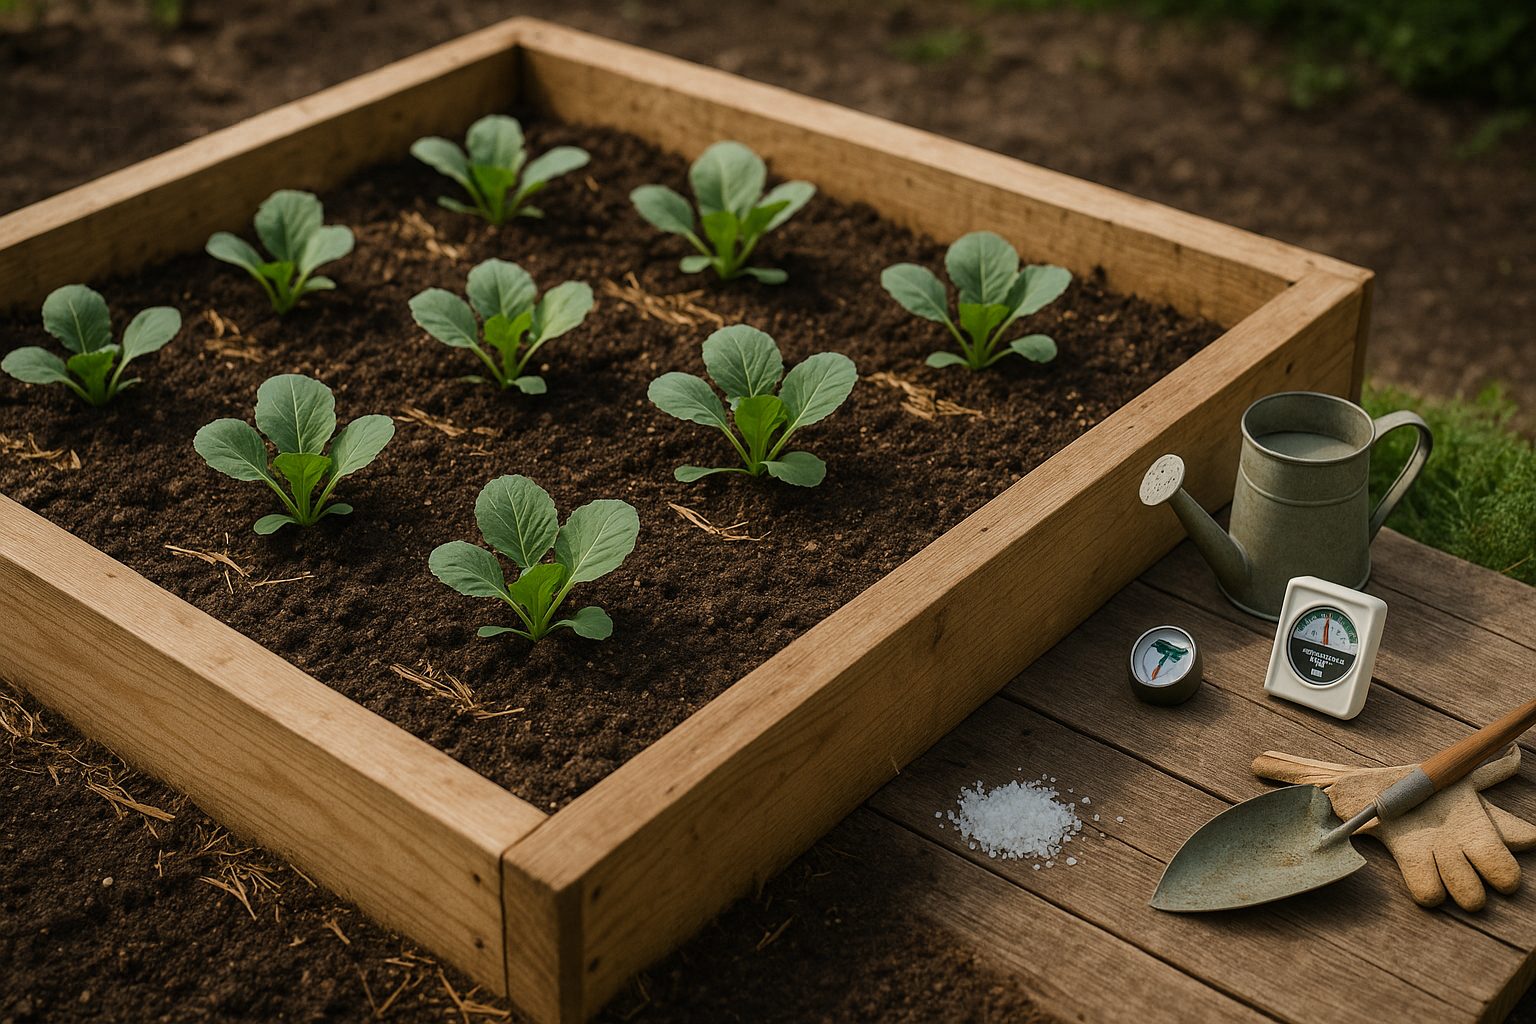
Space is another big factor—cabbages need room to expand, so aim to allow about 18 to 24 inches between each plant. For most home gardeners, a raised bed measuring 4 feet wide by 8 feet long is both manageable to tend and spacious enough to grow a dozen or more cabbage plants.
Ensure your bed is at least 12 inches deep, which gives the roots ample soil to anchor and absorb nutrients. Before planting, focus on building rich, well-draining soil by blending in plenty of compost or well-rotted manure, which boosts fertility and improves structure.
Cabbage prefers soil with a pH between 6.5 and 6.8; if your soil is on the acidic side, add garden lime according to the package directions to raise the pH. Avoid soil that tends to compact or hold water, as soggy roots can lead to disease. A simple way to check readiness: if a handful of soil crumbles after you squeeze it, you’re good to go.
By taking these steps in site selection and soil prep, you’re setting your cabbage up for a bountiful harvest and fewer headaches along the way.
How to Grow Cabbage from Seed or Transplants
When deciding between starting cabbage from seeds indoors or buying transplants, consider your growing season and garden goals. Starting seeds indoors gives you access to more varieties and helps you get a jump on the season, which is essential in regions with short springs. For most gardeners, cabbage seeds should be sown indoors about 6–8 weeks before your last expected frost. Buying transplants from a garden center is quicker and lets you skip the most delicate seedling stage, but offers less choice in varieties. Whichever method you choose, timing is key—transplants are typically set out in the garden 2–3 weeks before the last frost date because cabbage thrives in cooler temperatures and needs time to mature before peak summer heat.
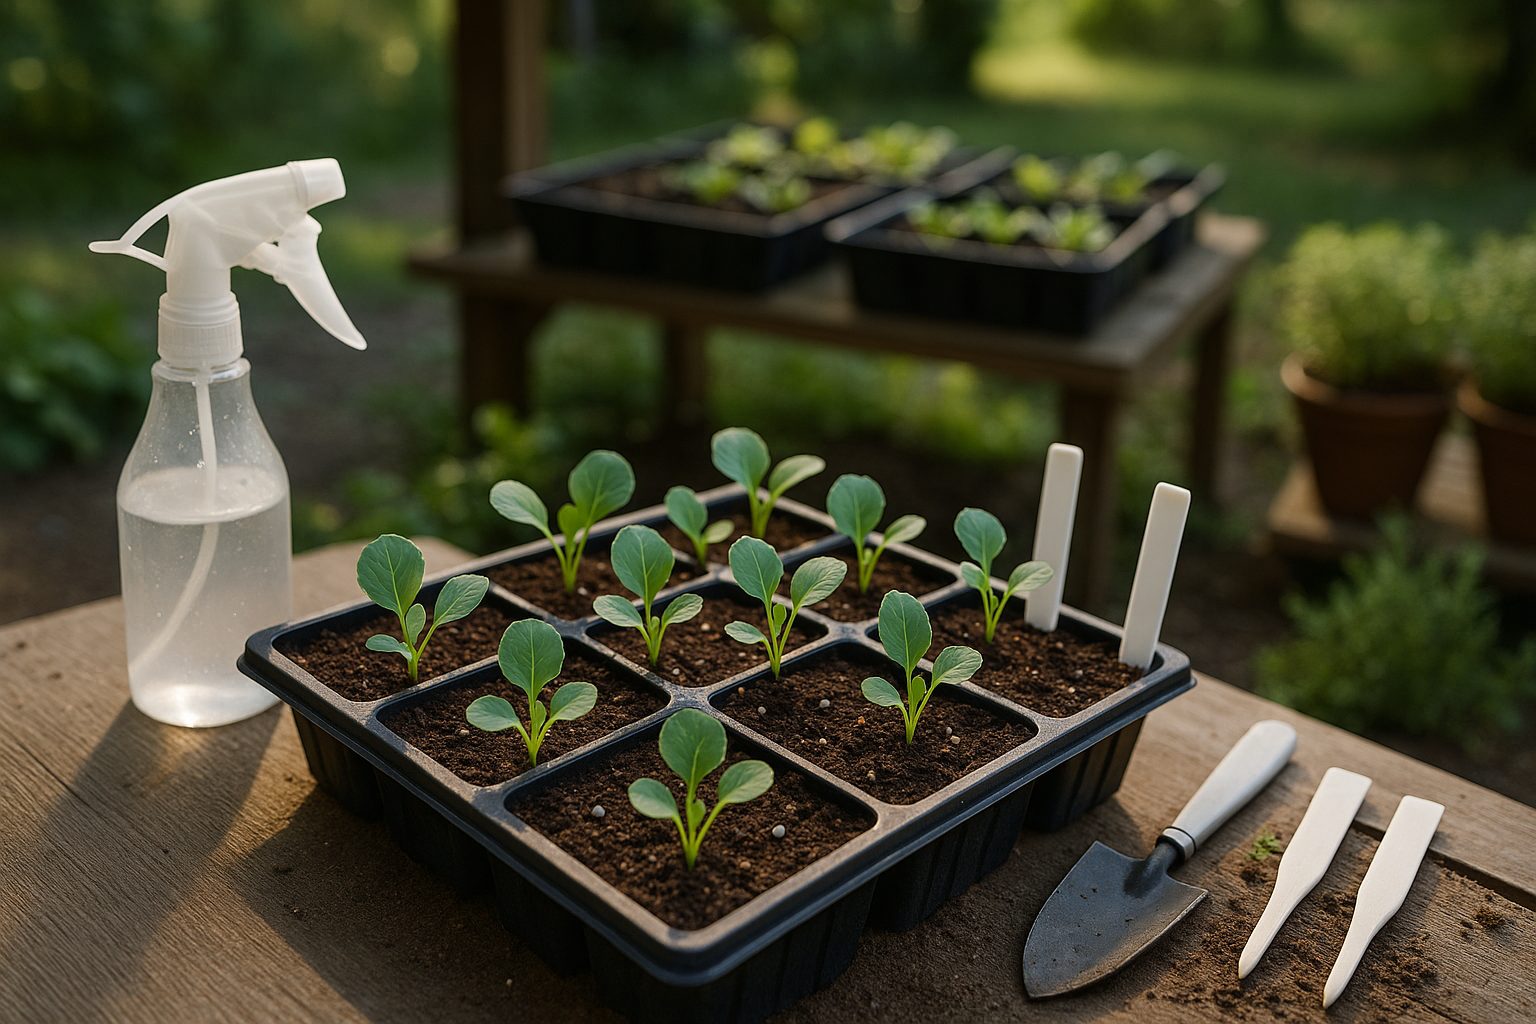
Sowing Seeds
For seed sowing, fill trays or small pots with seed-starting mix and plant cabbage seeds about ¼ inch deep. Mist lightly and keep the soil consistently moist but not soggy. Once seedlings emerge and have two true leaves, thin them so they’re 2 inches apart to prevent crowding. When plants are 4–6 inches tall and have at least four true leaves, it’s time to prepare them for life outdoors.
Hardening Off Seedlings
Hardening off is critical—begin by setting trays outside in partial shade for a few hours each day, gradually increasing their time outside and exposure to sunlight over a week. This toughens up the seedlings and prevents transplant shock.
Transplanting
When transplanting, dig holes about 12–18 inches apart in rows spaced 24–36 inches apart, giving cabbage heads plenty of room to grow. Gently lift seedlings by their leaves (not stems) and set them slightly deeper than they grew indoors, up to the first set of leaves, to encourage a strong root system.
After planting, water thoroughly to settle the soil around roots, and keep the soil evenly moist—cabbage loves consistent water but doesn’t do well in soggy conditions, so avoid overwatering. Mulching with straw or shredded leaves helps retain moisture and suppress weeds. A regular watering routine, providing around 1–1.5 inches of water per week, will ensure robust growth and prevent heads from splitting.
By carefully timing your start, following these steps, and giving your plants the right care, you’ll set yourself up for a healthy, productive cabbage crop.
Companion Planting and Layout Tips for Cabbage Beds
Companion planting is a smart gardening technique where you grow certain plants together to boost growth, deter pests, and improve flavor. For cabbage, this strategy can mean healthier heads and fewer pest issues.
Some of the best companions for cabbage are aromatic herbs like dill, oregano, and thyme; these herbs release scents that confuse common pests such as cabbage worms and aphids. Root crops like carrots and beets also make excellent neighbors—since they grow underground, they won’t compete much with cabbage for sunlight, and they help break up the soil for better cabbage root growth. Alliums like onions and garlic are superb at repelling pests due to their strong smell, offering another natural shield.
Avoid planting cabbage near other brassicas like broccoli, cauliflower, or kale, as they attract the same pests and diseases, leading to overcrowding of threats in one spot. Beans and tomatoes are poor companions too; beans can hinder cabbage growth, and tomatoes can compete for key nutrients.
Planning Your Cabbage Bed
Try alternating rows of cabbage with onions or herbs. You can border the bed with marigolds or nasturtiums—both flowers attract beneficial insects and act as pest decoys. Think about staggering your plantings by a couple of weeks to create a succession of cabbage ready for harvest at different times, which helps prevent gluts and gaps in production.
Crop Rotation
Make sure to practice crop rotation every season—don’t plant cabbage or other brassicas in the same spot yearly. Instead, follow cabbage with legumes or root vegetables the next season to restore soil nutrients and disrupt pest cycles.
With mindful layout and companion choices, your cabbage patch will be healthier, more productive, and easier to manage throughout the season.
Caring for Cabbage in Raised Beds
Caring for cabbage in raised beds is straightforward, but a bit of attention goes a long way toward a bountiful harvest. Water your cabbage consistently, aiming for about 1 to 1.5 inches of water per week, either from rainfall or deep, even watering. Try to avoid getting the leaves wet, as this can help prevent disease.
Adding a layer of organic mulch, like straw or chopped leaves, helps the soil retain moisture and keeps weeds at bay. For fertilizer, start with a balanced slow-release product when planting, then side-dress with a nitrogen-rich fertilizer once the plants start forming heads to support steady growth. Avoid over-fertilizing, which can cause leafy growth at the expense of solid heads.
Always keep an eye out for pests like cabbage worms and aphids—look for holes in leaves or clusters of tiny insects under the leaves. If you spot these, handpick worms and rinse away aphids with a strong spray of water or use natural predators like ladybugs and lacewings. Row covers are a great preventative, and neem oil spray can help without harming beneficial bugs.
If your cabbage starts “bolting” (sending up a flower stalk early) or forming loose, poorly developed heads, check for temperature stress—cabbage prefers cooler weather. Make sure it’s getting even moisture and thin seedlings properly to give each plant space.
Regularly remove yellowing lower leaves to improve airflow and reduce disease risk, but avoid heavy pruning, as cabbage needs its outer leaves to produce a good head. With these steps, you’ll keep your raised bed cabbages healthy and productive all season.
Harvesting, Storing, and Using Your Garden Cabbage
Knowing just when to harvest your garden cabbage is key to getting the best flavor and crunch. Keep an eye on the head as it matures—the leaves will form a tight, firm ball about the size of a softball or larger, depending on the variety. Give the head a gentle squeeze; if it feels solid and dense, it’s ready. Avoid waiting too long, as overripe cabbage heads can split or become tough.
For harvesting, use a sharp knife to cut the head at the base, leaving a few outer leaves attached to help protect the cabbage during storage. Shake off any loose dirt and avoid washing the heads right away if you plan to store them.
For short-term storage, keep cabbage in the refrigerator’s crisper drawer in a loosely closed plastic bag—it’ll stay fresh for two to three weeks. If you’re lucky enough to have a root cellar, unwashed heads can last up to a couple of months when kept in a cool, humid place (32–40°F with high humidity).
For a longer shelf life, consider fermenting cabbage into sauerkraut or kimchi—a simple way to preserve your harvest that also boosts its nutritional value. Just shred the cabbage, add salt, and pack it tightly into a jar or crock. Ferment at room temperature (65–72°F) for a week or two, tasting along the way to find your preferred tanginess.
When you’re ready to eat, homegrown cabbage is delicious raw and crunchy in salads or slaws, but it also shines when lightly sautéed, roasted, or added to soups and stews. A quick tip: try sautéing thin strips with a little garlic and olive oil for an easy side dish, or stuff whole cabbage leaves for homemade cabbage rolls.
With a few simple steps, your garden cabbage will stay fresh and tasty, ready for any meal.
Maximizing Raised Bed Productivity: Advanced Tips
To truly maximize the productivity of your raised beds, it’s essential to use advanced strategies that optimize every square inch. Start by going vertical—install trellises, cages, or netting to support crops like cucumbers, pole beans, and certain varieties of squash and tomatoes. This vertical approach frees up valuable ground space for shorter crops such as lettuces or root vegetables.
Staggered planting is another savvy trick; instead of sowing all your radishes or carrots at once, plant small batches every couple of weeks. This ensures a continuous harvest and helps you avoid the all-at-once glut that often leads to wasted produce. Succession cropping, where you immediately replant a new, fast-maturing crop after harvesting the first, is especially useful in raised beds since the soil warms up quickly and drains well. For example, follow early lettuce with bush beans, or sow quick radishes after pulling garlic.
Crop Rotation for Soil Health
Crop rotation is key for long-term soil health and yield, and cabbage plays a valuable role here. Rotating cabbage and other brassicas with legumes, root veggies, and fruiting plants helps break pest and disease cycles—particularly important because cabbage is prone to issues like clubroot and cabbage worms. If you grew cabbage this season, plant an unrelated crop like beans next season, which also naturally fix nitrogen and boost soil fertility for your next cabbage planting.
Mapping your beds and keeping simple records minimizes confusion year to year, and small colored plant markers serve as easy reminders of what was grown where.
Planning for Year-Round Harvests
Planning for year-round harvests is possible, even in limited space. Interplanting—tucking fast-growing crops like radishes or spinach between slower, larger crops like broccoli—ensures you’re never wasting bed real estate. Use cold frames, mini hoop houses, or row covers to extend your spring and fall growing seasons.
Integrate a variety of vegetables, mixing leafy greens, root crops, and herbs in the same bed to promote biodiversity, repel pests, and make the most of microclimates within your small space. Remember, diversity and constant turnover are your friends: after cabbage, for instance, consider slipping in bush beans or a late crop of beets.
Bringing It All Together
Ultimately, maximizing your raised bed productivity is about layering smart techniques—vertical growing, succession and staggered plantings, crop rotation, and thoughtful bed planning. Each step supports the next, creating a resilient, high-yield, and enjoyable garden experience.
For more in-depth guidance, check out resources from the University of California Integrated Pest Management, the Old Farmer’s Almanac guide to succession planting, and the Royal Horticultural Society’s crop rotation tips. With a bit of strategic planning, your raised bed can produce abundant, healthy harvests all season—and even year—long.