Choosing the Right Chili Pepper Variety
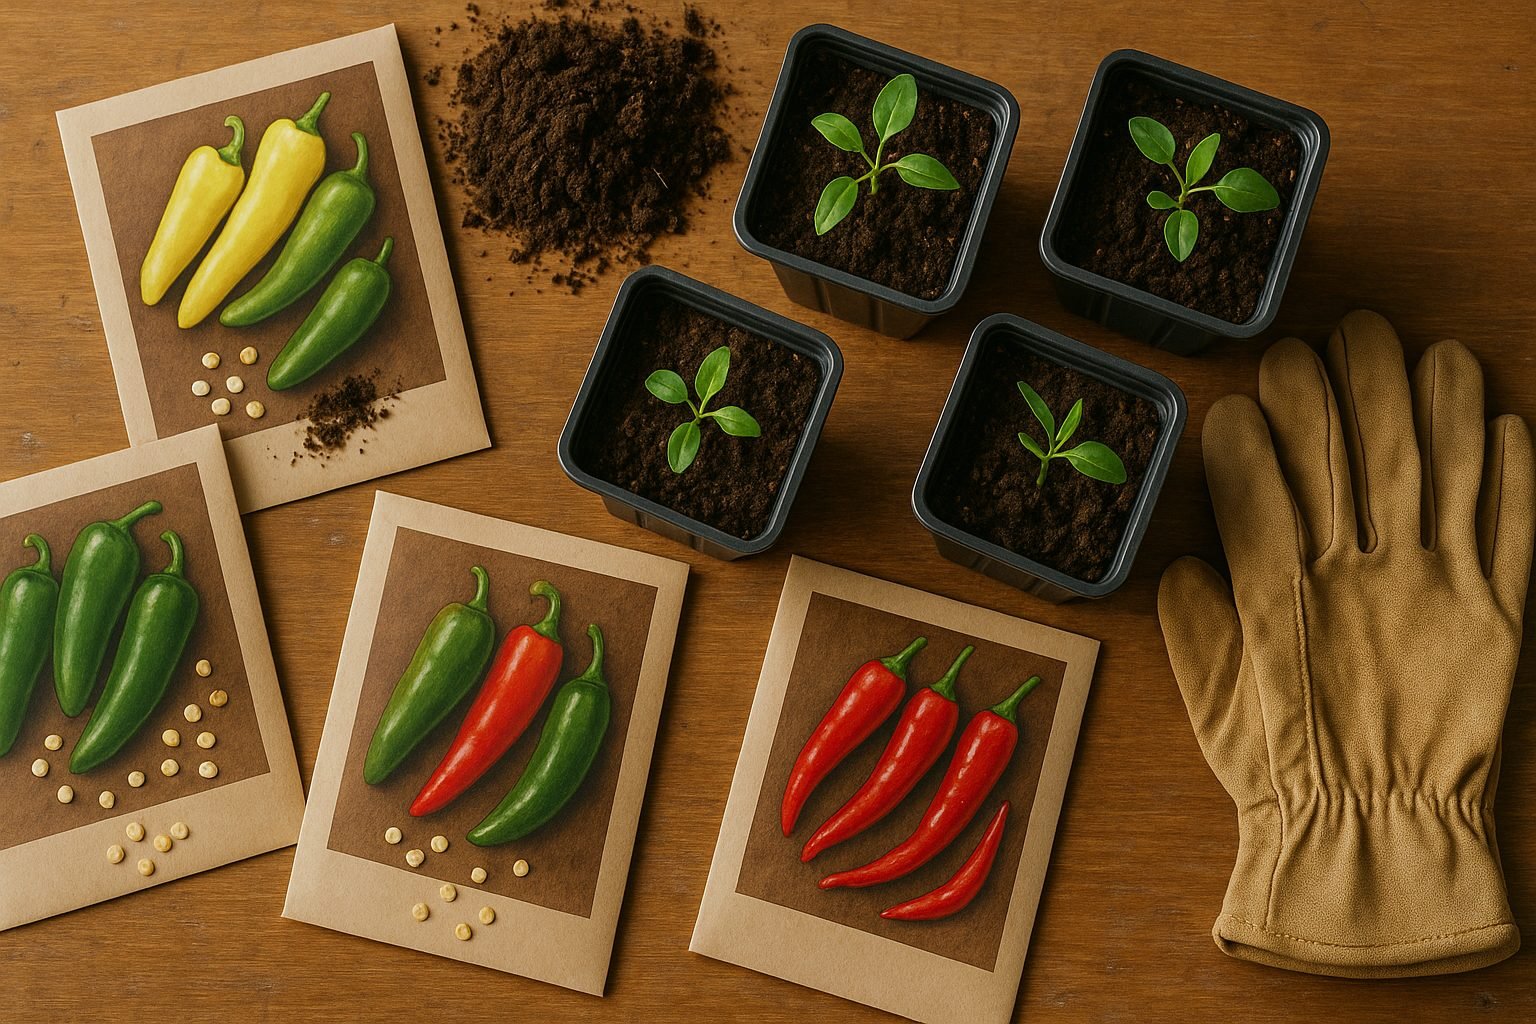
If you’re thinking about growing hot peppers in containers, choosing the right chili pepper variety is your first—and perhaps most exciting—step. Whether you want to spice up home-cooked meals or experiment with flavors right from your balcony garden, there’s a chili pepper out there just waiting for a spot in your pot. Chili peppers come in a rainbow of varieties, ranging from mild and sweet to fiery super-hots, so it helps to know which types suit container gardening and meet your specific needs.
When sorting through options, consider your climate, available garden space, and how much heat you can handle.
- Mild varieties, like Banana peppers or Hungarian Wax, offer gentle warmth and are great for those who want flavor without excessive fire.
- Moderate spice lovers can try jalapeños or Fresno peppers—classic choices that thrive in pots and deliver manageable heat perfect for most palates.
- For intense heat, cayenne and Thai peppers pack a punch yet remain manageable in size—both the plant and the fruit—making them ideal for container growing.
Ready to test your heat tolerance? Super-hot varieties, such as the notorious Carolina Reaper or Ghost Pepper, can also be grown in larger containers—just be prepared for serious spice and ensure they have warm, sunny conditions to thrive. Regardless of heat level, look for compact or determinate growth habits since these adapt best to the limited space and soil of containers.
For beginners, starting with cherry peppers, jalapeños, or ornamental varieties like Numex Twilight is a smart choice—they’re hardy, attractive, and flourish even in smaller pots. Local garden centers and online seed suppliers often highlight varieties bred specifically for container culture, so don’t hesitate to ask for advice based on your climate zone. By matching the right pepper to your home and heat preference, you’ll be well on your way to a vibrant, productive, and tasty container garden.
Starting Chili Peppers from Seed
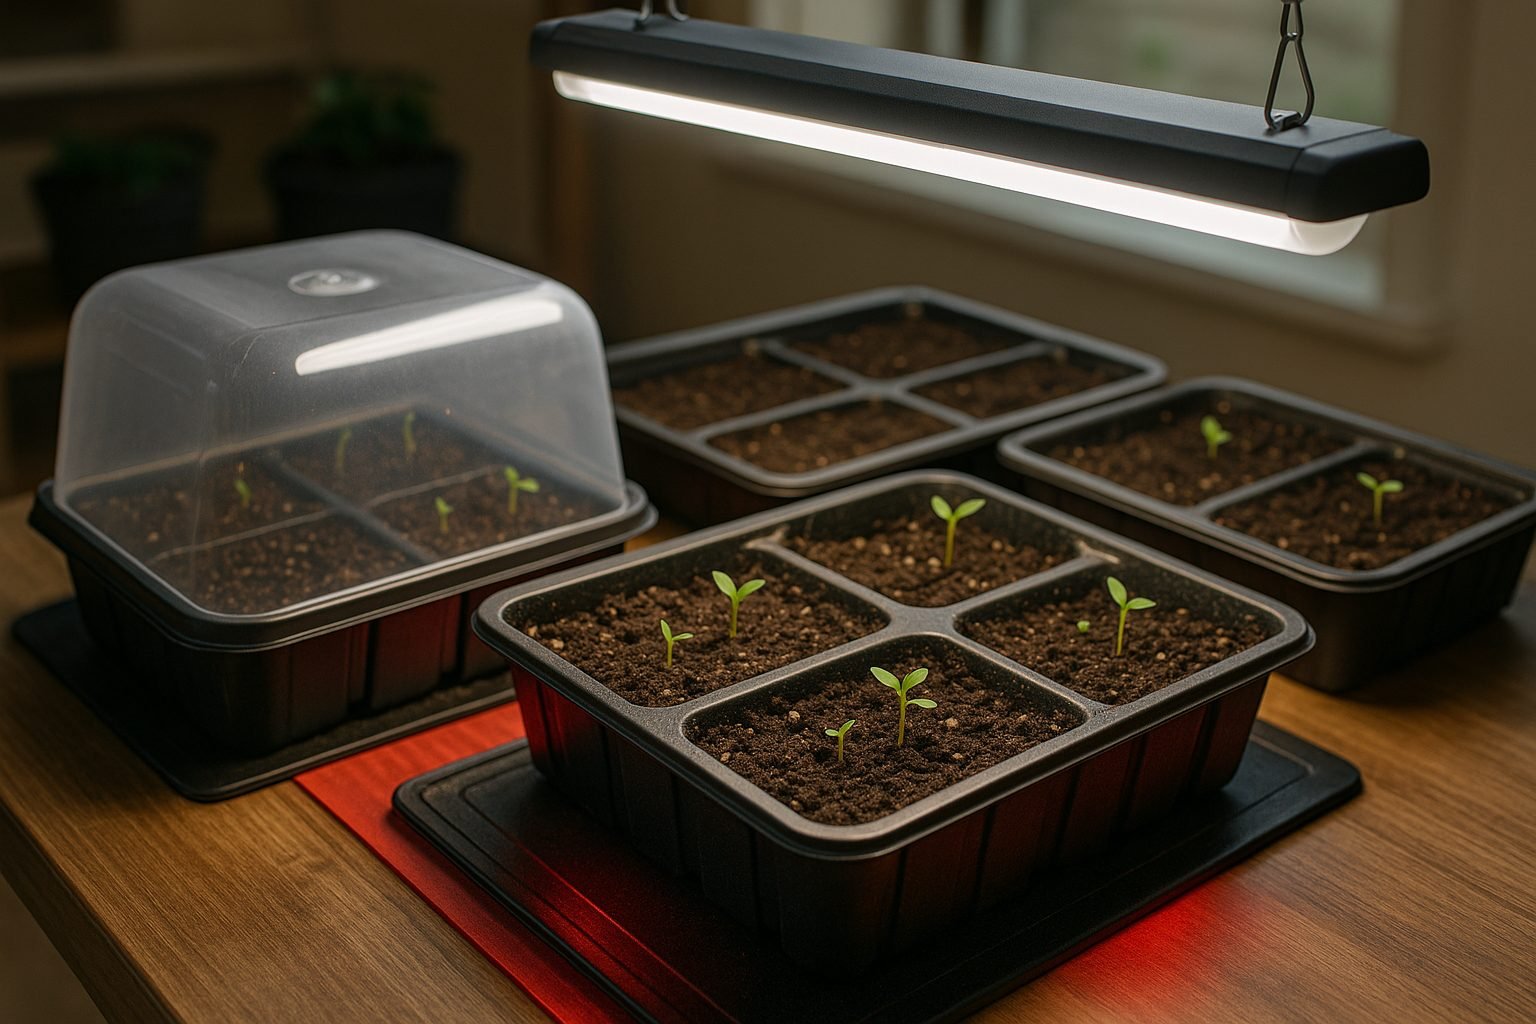
Starting chili peppers from seed can be immensely rewarding, and getting it right from the beginning sets the stage for healthy, productive plants. Begin by sowing seeds indoors 8–10 weeks before your area’s last expected frost date; peppers need a head start, as they are slow to mature.
Aim for daytime temperatures of 75–85°F (24–29°C) to encourage quick, even germination—placing pots on a seedling heat mat can help maintain this warmth, especially in cooler homes. Use a light, seed-starting mix rather than garden soil; these mixes are sterile and fluffy, allowing delicate roots to grow without resistance or the risk of disease.
Sow each seed about ¼ inch deep in small pots or cell trays with drainage holes, gently moisten the soil (but don’t soak it), and cover with a humidity dome or plastic bag until sprouts appear. Once seedlings emerge, move them under a bright LED grow light or fluorescent fixture, keeping the light 2–4 inches above the plants for 12–16 hours daily to prevent leggy, weak growth.
Common Problems and Solutions
- If seedlings lean or are pale, they need more light.
- If they wilt or their leaves turn dark and mushy, ease up on watering to avoid “damping off” disease.
Using a small fan for air movement can also help keep seedlings sturdy and disease-free.
Transplanting and Feeding
As your chili pepper seedlings grow their first true leaves, gently transplant them to slightly larger pots with a loose, well-draining potting mix. Start applying a diluted liquid fertilizer every two weeks.
With a careful start, you’ll be rewarded with vigorous young plants, ready to thrive when the weather warms up.
Transplanting and Planting Outdoors
Timing is everything when transplanting seedlings outdoors or into larger pots. Wait until the danger of frost has passed and your plants have developed at least two true leaves—usually after four to six weeks indoors.
Before planting outside, gradually acclimate seedlings to outdoor conditions through a process called hardening off. Start by placing them outside for an hour in a sheltered spot, then slowly increase their exposure to sun and wind over 7–10 days. This reduces transplant shock and toughens up your plants.
When selecting a planting location, look for well-drained, loose soil and a spot that receives the right amount of sunlight for your crop; most vegetables thrive with at least six hours of direct sun. Spacing also matters—crowding can lead to disease and stunted growth, so always follow the recommendations on your seed packet.
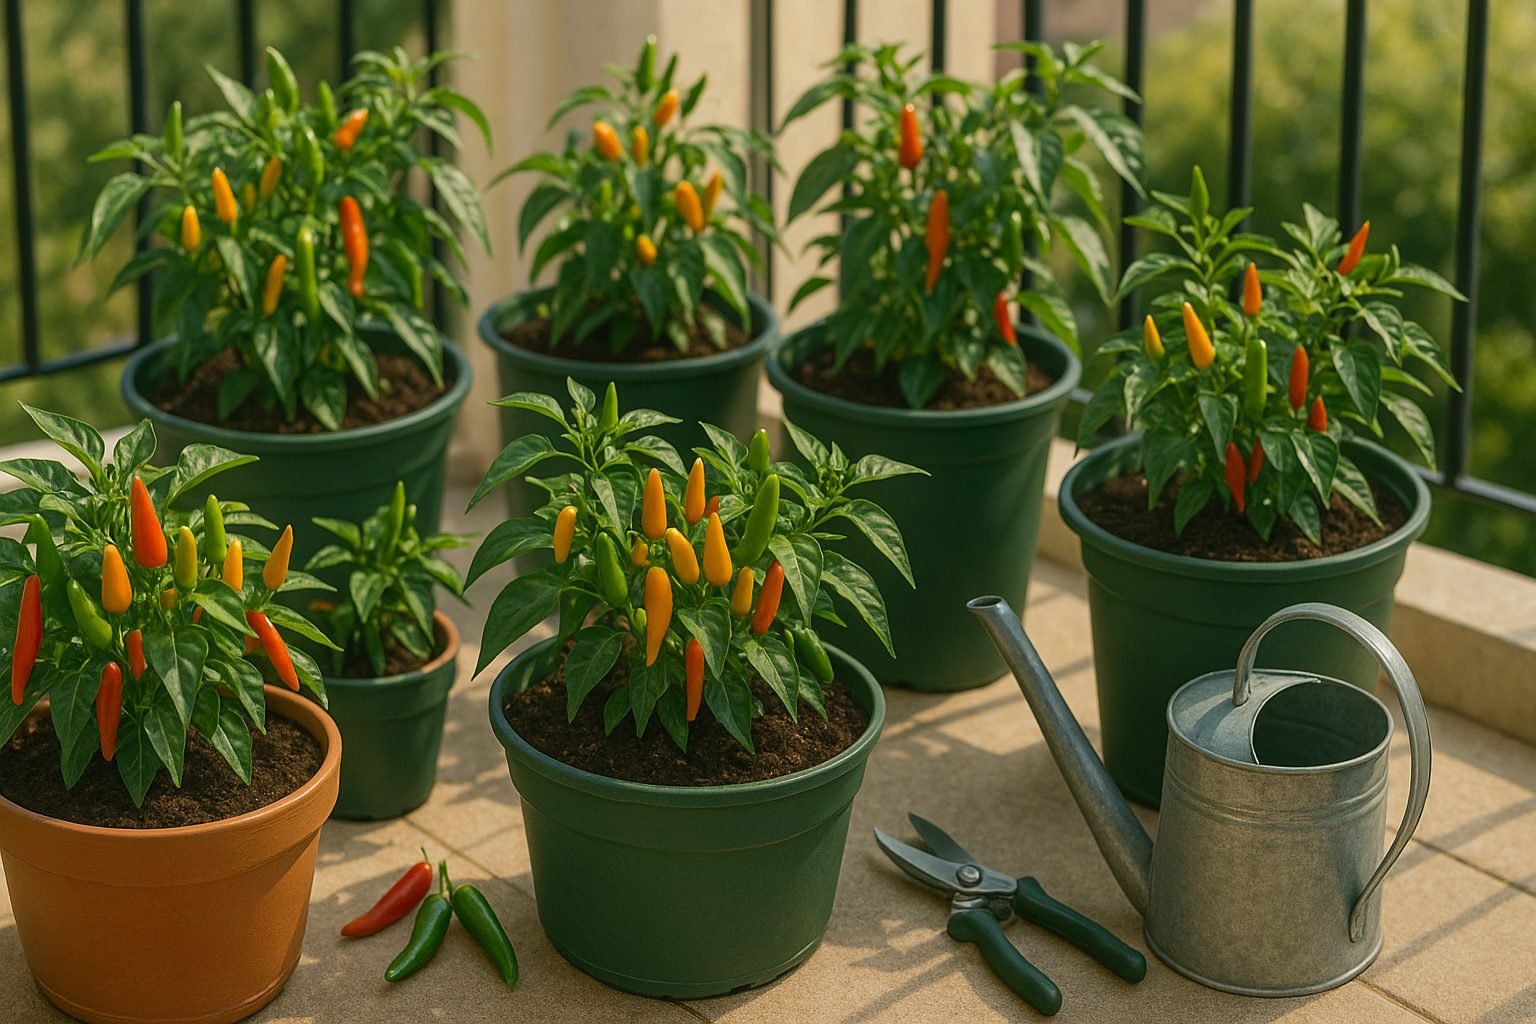
For urban gardeners or those with limited space, container gardening is an excellent alternative to ground planting. Use high-quality potting mix in containers with drainage holes, and choose pots large enough to accommodate your plants’ mature size.
While in-ground planting allows roots more room to spread, containers offer mobility and control over soil conditions, plus they’re ideal for patios, rooftops, or balconies.
Whether you’re transplanting into a backyard plot or an urban balcony planter, giving your seedlings a little extra care during the move sets them up for a strong and productive growing season.
Caring for Chili Pepper Plants: Water, Fertilizer, and Pruning
Chili pepper plants thrive when their basic care needs are met, starting with watering. Aim to keep the soil consistently moist but never soggy—overwatering can quickly lead to root rot, one of the most common problems for chili growers. Use your finger to check soil moisture; if the top inch feels dry, it’s time to water. Early morning or late afternoon is ideal for watering, allowing the plants to absorb moisture before the sun’s peak.
For fertilizer, start with a balanced, slow-release formula when transplanting. Then switch to a high-potassium fertilizer as flowers bloom to encourage fruiting. Reapply every two to three weeks, following the package instructions carefully to avoid fertilizer burn.
Supporting your chili plants is especially important as they bear heavy fruit; bamboo stakes or tomato cages help prevent stems from snapping. Regular pruning and pinching also make a significant difference—pinch back the main stem when the plant is about six inches tall to encourage bushier growth, and remove lower leaves and any weak, spindly branches. This not only improves air circulation and reduces disease risk but also redirects the plant’s energy into developing bigger, healthier fruit.
With steady attention to these basics, your chili peppers will reward you with a robust harvest and fewer headaches throughout the growing season.
Managing Pests and Diseases
Chili plants are prone to a variety of pests and diseases, but with proactive care, you can keep your crop healthy and thriving. Common pests like aphids and spider mites often appear on the undersides of leaves, sucking sap and causing yellowing or distorted growth.
On the disease front, fungal issues such as powdery mildew and bacterial problems like leaf spot can spread quickly, especially in warm, humid conditions.
One of the simplest organic prevention methods is to inspect your chili plants regularly—at least once a week—to catch issues early.
If you spot aphids, spraying plants with a homemade solution of water and a few drops of mild liquid soap can be surprisingly effective; repeat every few days as needed. For spider mites, a light misting with neem oil, diluted according to instructions, helps control infestations without harming beneficial insects.
To ward off fungal diseases, make sure your plants have good airflow, avoid overhead watering, and remove any affected leaves right away. A DIY spray using baking soda (1 teaspoon per liter of water plus a drop of soap) can help control powdery mildew.
Remember, early intervention is key—small problems can escalate quickly, especially with pests and diseases. By staying vigilant and using gentle, organic remedies, you’ll set your chili plants up for a healthy, productive season.
Harvesting and Storing Chili Peppers
Knowing when to harvest chili peppers can make all the difference in flavor and heat. Most peppers are ready to pick when they reach their full size and develop a rich, glossy color—this could be red, yellow, orange, or even purple, depending on the variety. For the hottest taste, let the peppers stay on the plant until they’re fully ripe, as heat levels often increase over time.
Check if the skin feels firm and slightly waxy; a soft or wrinkled pepper may be overripe. Morning is the best time to harvest, as plants are well-hydrated and less stressed. Use sharp, clean garden scissors or pruners to snip the peppers off with a small piece of stem attached, being careful not to tug or twist. This prevents damage to the plant and encourages it to produce more fruit.
If you plan to harvest regularly, wear gloves—especially when working with hot varieties—to protect your skin from irritating oils.
Storing Fresh Chili Peppers
Fresh chili peppers keep well for up to two weeks in the fridge if you place them in a paper bag or a perforated container. This allows airflow while preventing moisture buildup.
Freezing Chili Peppers
To freeze, simply wash and dry the peppers, chop if desired, and store them in airtight bags—there’s no need to blanch.
Drying Chili Peppers
For drying, string whole peppers together using needle and thread, and hang them in a warm, dry spot with good ventilation, or use a dehydrator for faster results. Once dried, store them in airtight jars away from light to lock in their flavor and spice for months.
Whichever method you choose, proper handling preserves both the distinctive zest and heat of your chili harvest.
Bonus: Tips for a Great Harvest Year After Year
Consistently enjoying a bountiful harvest starts with smart planning and a bit of forward-thinking care. Crop rotation is one of the most effective techniques to keep your soil healthy and your plants thriving. By changing the location of plant families each year, you help disrupt pest cycles and reduce soil-borne diseases.
For example, avoid planting tomatoes in the same bed two years in a row—rotate with beans or leafy greens to naturally replenish nutrients. Enriching your soil after harvest is another vital step: add compost, well-rotted manure, or cover crops like clover to nourish the earth and prevent erosion over winter.
Seed-saving is also key for sustainable gardens. Carefully collect seeds from your healthiest plants, dry them thoroughly, and store them in a cool, dry place. This not only ensures you’ll have seeds for next year but also encourages varieties adapted to your unique microclimate.
At season’s end, remove any diseased plant material to prevent lingering issues, and cut back perennial herbs like thyme or mint to encourage vigorous regrowth. Mulch exposed soil to insulate roots and suppress weeds.
If you battle issues like poor sprouting or yellow leaves, examine soil drainage and test for nutrient deficiencies—sometimes a quick soil amendment or adjusting your watering habits can make a world of difference.
By combining these practical steps with a close eye on changing conditions in your garden, you’ll set yourself up for healthy, abundant yields year after year.