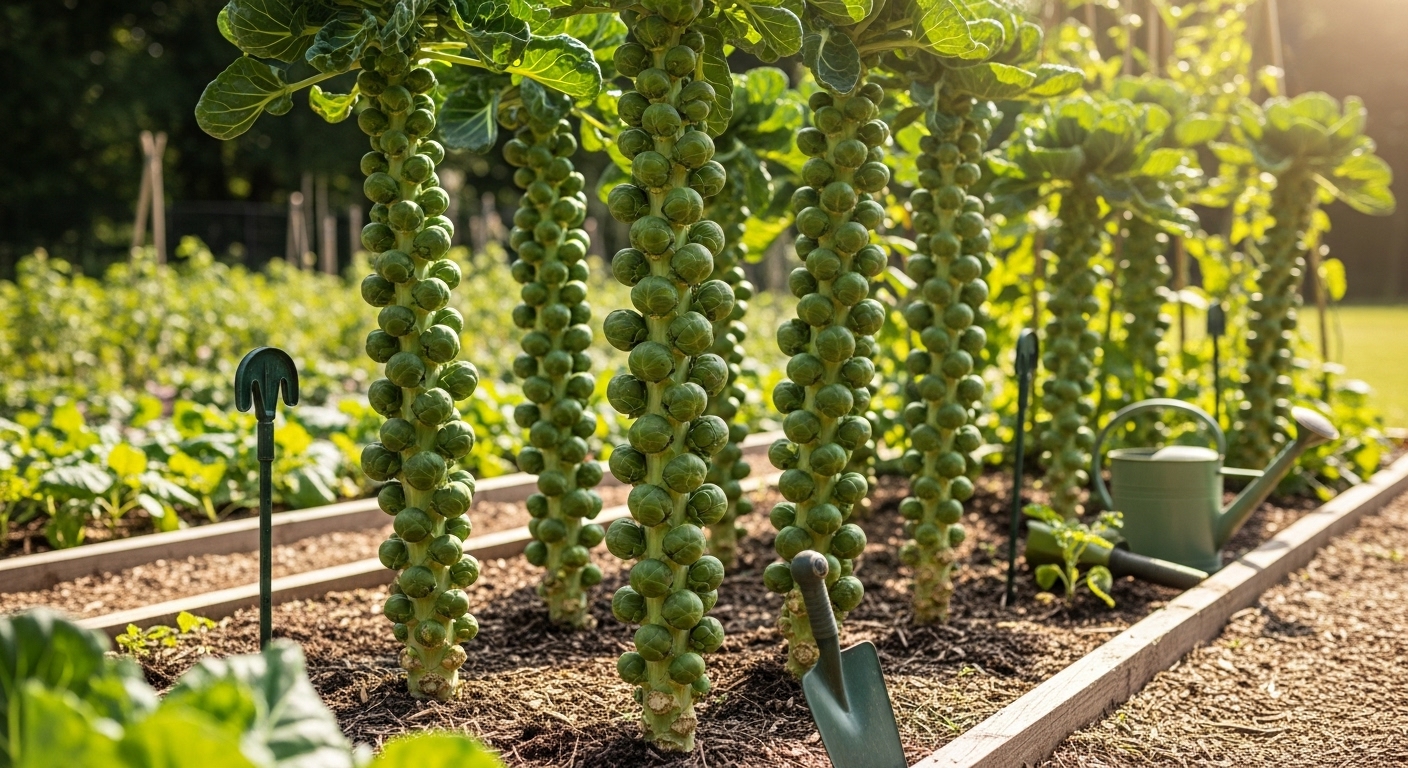
Choosing the Best Brussels Sprouts Varieties
When it comes to watering brussels sprouts, the variety you choose can directly influence how much care your plants will need throughout the growing season. Brussels sprouts come in three main categories: early, mid, and late-season types. Early varieties mature quickly—sometimes in as little as 80 to 90 days—making them ideal if your growing season is short or your local climate warms up fast. Mid-season varieties strike a balance, while late-season types usually provide the biggest harvests and the sweetest, most developed flavor, perfect for those willing to wait a bit longer for a bigger reward.
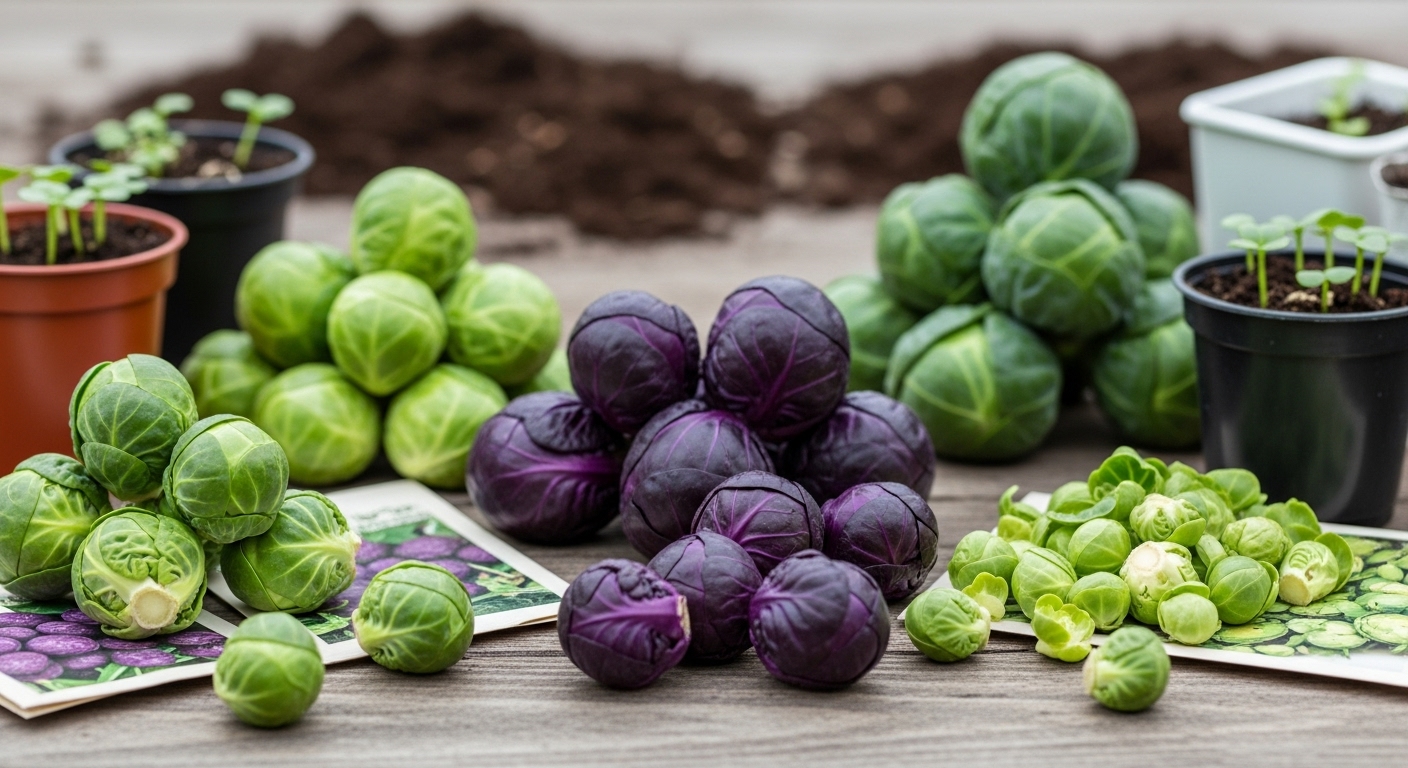
Selecting the Best Varieties
Choosing the best Brussels sprouts variety starts with your goals and local conditions. If you prioritize yield, look for hybrids like ‘Jade Cross’ or ‘Long Island Improved’, known for dense, uniform sprouts and abundant harvests. For home cooks who love sweet, nutty flavors, ‘Diablo’ and ‘Bitesize’ are tasty choices often praised for their tenderness and rich taste, especially after the first autumn frost.
Disease resistance is another crucial consideration. If clubroot or powdery mildew is a problem in your garden, choose varieties bred for resistance, such as ‘Gustus’ or ‘Dolores’. Climate adaptability should also guide your choices: ‘Franklin’ performs well in hot weather, while ‘Redarling’ tolerates chilly northern climates and offers unique purple sprouts.
Recommendations for Home Gardeners
For most home gardeners, starting with popular and reliable varieties like ‘Jade Cross’ (ideal for compact spaces), ‘Long Island Improved’ (for traditional taste and high yields), or ‘Churchill’ (an early producer with good disease resistance) is a safe bet.
Pair your chosen variety with consistent, adequate moisture—watering Brussels sprouts deeply once or twice a week, depending on soil and weather conditions—to prepare for a productive harvest season. Whether you prefer sweet or savory, early or late, there’s a Brussels sprout variety ready to thrive in your garden.
Preparing and Planting Brussels Sprouts
To grow strong, healthy Brussels sprouts, start by choosing a spot that gets full sunlight for at least six hours a day—these veggies love the sun and won’t produce well in the shade. Look for soil that is rich, well-draining, and slightly acidic to neutral (pH 6.5–7.0). Avoid planting in heavy clay or soggy spots, as Brussels sprouts dislike wet feet.
Space is another factor: these robust plants can reach two to three feet tall, so allow at least 18–24 inches between each plant and about two to three feet between rows.
Before planting, invest time in prepping the soil. Mix in a good amount of compost or well-rotted manure a couple of weeks before planting to boost fertility and improve drainage. If your soil is dense, double-digging or raising your beds can help keep excess water away from roots.
When it comes to sowing, starting seeds indoors four to six weeks before your last expected frost is the most reliable method, especially in cooler climates or shorter growing seasons—it gives you a head start and sturdier transplants. Direct seeding works in milder regions where spring stays cool, but expect slower, less predictable germination.
When seedlings are three to four inches tall with several true leaves and outdoor temps settle above 50°F, it’s time to transplant. Handle them gently, set them deep so the lowest leaves are just above the soil, and be sure to maintain the recommended spacing. Water thoroughly after planting and consider applying a balanced liquid fertilizer to help reduce transplant shock.
Mulching can help lock in moisture and keep weeds at bay. Keeping a close eye during the first few weeks ensures your Brussels sprouts get the solid start they need for a long, productive season.
Caring for Your Brussels Sprouts During the Season
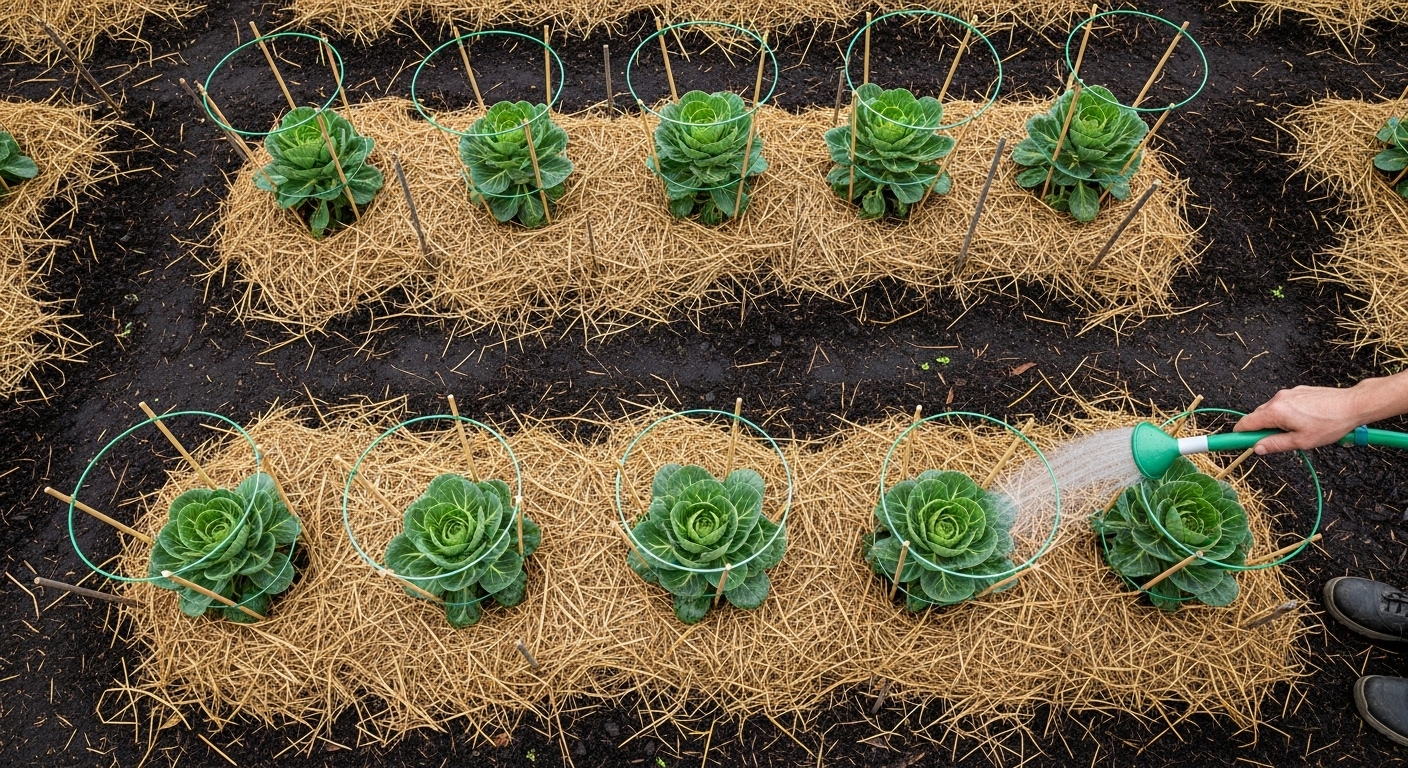
Caring for your Brussels sprouts throughout the growing season ensures a healthy crop and an abundant harvest. First, maintain consistent watering—aim for about one to one and a half inches per week, since irregular moisture can cause the sprouts to become bitter or the plants to bolt.
Using mulch, such as straw or shredded leaves, helps retain soil moisture, suppress weeds, and keep the root zone cool—especially during hot summer spells. Fertilize your plants with a balanced vegetable fertilizer every three to four weeks, providing the nutrients Brussels sprouts need for strong stalks and large sprouts. For a simple option, side-dress with compost or an organic fertilizer.
As plants mature and reach two to three feet tall, their top-heavy stalks may need extra support. Use garden stakes or tomato cages to prevent wind damage and support the weight of developing sprouts.
Stay vigilant with weeding; competing weeds can quickly drain nutrients and water from your growing Brussels sprouts. Tackle them weekly, or more often if you spot fast growers.
When summer temperatures rise, shield your plants from heat stress by watering early in the day, increasing mulch coverage, or adding a shade cloth during heatwaves.
Promote vigorous growth by removing yellowing lower leaves, which improves airflow and discourages pests and disease.
By focusing on these care essentials—watering, mulching, feeding, staking, weeding, and smart summer strategies—you’ll give your Brussels sprouts the best chance for a successful, flavorful harvest.
Preventing & Managing Problems: Pests and Diseases
When growing a vegetable garden, staying vigilant against pests and diseases can make all the difference between a thriving patch and a disappointing harvest. Common garden pests like aphids and cabbage worms often show up as tiny clusters of insects on leaves or as ragged holes in foliage.
Aphids leave behind sticky residue and can cause curling or yellowing leaves, while cabbage worms chew large, irregular holes in cabbage family crops. Keep an eye out for these symptoms during your regular garden walkthroughs.
Diseases such as clubroot, which causes swollen, deformed roots and stunted growth in brassicas, and downy mildew, easily spotted by yellow or pale spots on upper leaf surfaces and fuzzy gray mold underneath, can spread if left unmanaged.
Prevention Tips
- Practice crop rotation annually.
- Avoid overhead watering.
- Provide good air circulation by spacing plants adequately.
Organic Control Methods
- Introduce beneficial insects like ladybugs to control aphids.
- Hand-pick cabbage worms.
- Use floating row covers to protect young plants.
- Apply neem oil or insecticidal soap to target soft-bodied pests without harming pollinators.
Disease Management
Remove infected plant material immediately and dispose of it away from your compost pile to prevent the spread of diseases.
If prevention and gentle interventions aren’t enough, escalate treatment only as needed. Sometimes a targeted organic spray or increasing beneficial insect populations is sufficient.
Intervention becomes necessary when you notice pest populations or disease symptoms spreading quickly, threatening plant health or your overall yield. Staying proactive with regular monitoring and organic practices often prevents small problems from turning into major setbacks.
Harvesting and Storing Brussels Sprouts
Knowing when to harvest Brussels sprouts is key for the best flavor and texture. Look for firm, bright green sprouts about an inch in diameter—smaller than a golf ball. They start maturing from the bottom of the stalk, so begin harvesting there and work your way up as new sprouts plump up over several weeks.
For the best taste, pick them after a light frost if possible; the cold boosts their sweetness. To harvest, gently twist each sprout downward or use a small knife to cut it free—avoid yanking, as this can damage the stalk or nearby sprouts that are still developing.
Check your plants every week or two, and pick only the mature sprouts to encourage further growth up the stalk. Handle the main stalk gently and keep the leaves intact to protect younger sprouts.
Short-Term Storage
For short-term storage, keep unwashed sprouts in a perforated bag in your fridge’s crisper drawer; they’ll stay fresh for about a week.
Long-Term Storage
For longer storage, blanch the cleaned sprouts in boiling water for three minutes, then quickly chill them in an ice bath. Once dry, spread them on a baking sheet to freeze individually before transferring to airtight freezer bags—this way they won’t stick together and should keep well for up to a year.
This simple method ensures you have homegrown Brussels sprouts ready for meals throughout the seasons.
Nutrition, Yield, and Frequently Asked Questions
Brussels sprouts are a powerhouse of nutrition, packed with vitamins C and K, fiber, and antioxidants that support your immune system, bone health, and digestion. Just half a cup provides more than your daily need for vitamin K and nearly all your vitamin C, making them a smart addition to any meal.
For home gardeners, a single Brussels sprout plant can yield about 2 to 3 pounds of sprouts under good conditions, often producing from late summer through early winter.
New growers often wonder about spacing—each plant needs about 18–24 inches of room to grow, as crowding reduces yield and airflow. If you’re short on space, Brussels sprouts can thrive in large containers (at least 5-gallon pots), provided they get full sun and regular watering.
To bring out their best flavor, wait to harvest until after a light frost; the cold helps convert some of the plant’s starches into sugars, resulting in sweeter, tastier sprouts.
Troubleshooting Common Growing Issues
Growing Brussels sprouts can be rewarding, but several common issues can pop up along the way. If your sprouts are loose or “blown” instead of tight and firm, it often means the plants were either exposed to too much warm weather or grew too quickly. Planting in early spring or late summer for a cool-season harvest can help develop firmer sprouts.
Poor growth or stunted plants may signal a lack of nutrients or compacted soil—try enriching your beds with compost and ensure good drainage before planting.
If you notice your sprouts going to seed (bolting) prematurely, it’s usually a stress response from sudden temperature swings or drought; mulching and steady watering can help keep things steady.
Even with these tips, remember every garden is different—experiment with planting times, spacing, or varieties to see what works best in your space. Above all, enjoy the process: gardening is as much about learning and adapting as it is about harvesting the perfect crop.