Grow Sweet Potatoes at Home
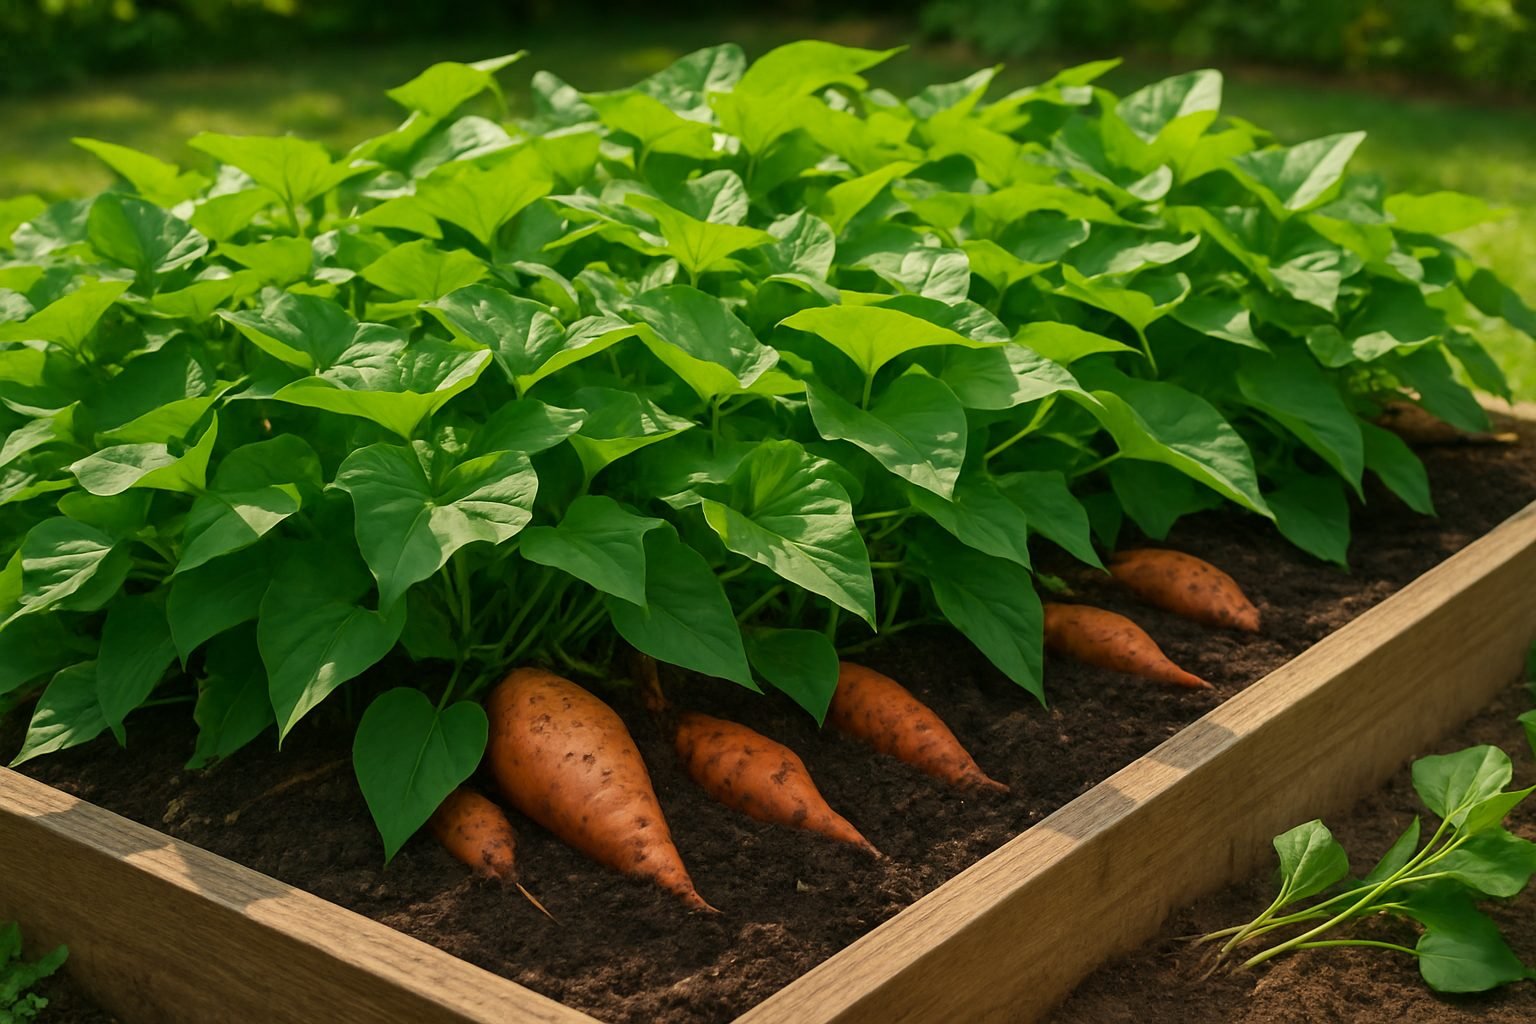
Raised bed sweet potatoes are a game changer for any home gardener looking to harvest a nutritious, flavorful, and versatile crop right in their own backyard. Many believe sweet potatoes are tricky to grow or require special skills— but the truth is, with the right setup, these resilient root veggies thrive in raised beds with little fuss.
Have you wondered if your space or soil is good enough for this southern favorite? Or worried the process is too complicated? You’re not alone, but you’ll be surprised at how simple and rewarding it can be.
In this guide, you’ll discover how to pick the best slips, prepare your raised beds for optimal growth, and prevent common pitfalls, so you can enjoy baskets of homegrown sweet potatoes by summer’s end.
Whether you’re an experienced gardener itching for a new project or a first-timer looking for reliable, tasty vegetables, this article gives you real, practical steps to growing delicious sweet potatoes with less effort than you think.
Ready to dig in? Let’s make your raised bed the star of your next meal.
Why Grow Sweet Potatoes? Health and Culinary Benefits
Sweet potatoes are nutritional powerhouses, packed with vitamins A and C, manganese, and plenty of fiber to support digestion and immunity. Their high antioxidant content helps protect cells from damage, making them an excellent choice for a healthy diet.
What makes sweet potatoes even more appealing is their natural sweetness and creamy texture, which blend well with both savory and sweet dishes. Around the world, sweet potatoes appear in a variety of flavors and cuisines—think Japanese tempura, Caribbean stews, or the classic American sweet potato pie.
They roast beautifully, mash smoothly, and even make delicious fries or breakfast toasts. If you love experimenting in the kitchen, growing your own sweet potatoes gives you a chance to enjoy unique varieties that might never appear in supermarkets.
Many gardeners find that freshly dug, homegrown sweet potatoes taste richer and sweeter than those bought at the store, likely because they can be harvested at peak ripeness and enjoyed right away. Plus, when you grow them yourself, you skip the waxy coatings or long storage times that can dull their vibrant flavor.
Understanding Sweet Potato Basics (Slips, Varieties & Origins)
Sweet potato gardening starts with a term that might be new to some: “slips.” Unlike regular potatoes, which you plant using tuber pieces with “eyes,” sweet potatoes are grown from slips—small, leafy sprouts that grow from a mature sweet potato root. You can easily produce slips at home by placing a sweet potato half-submerged in water. Within weeks, green shoots appear, and these become your planting starters.
This difference stems from the fact that sweet potatoes (Ipomoea batatas) aren’t actually related to regular potatoes (Solanum tuberosum). Sweet potatoes belong to the morning glory family and thrive in warm, frost-free climates, whereas regular potatoes come from the nightshade family and prefer cooler seasons, often sprouting from a tuber chunk right in the soil.
Origins and Varieties
Tracing back the sweet potato’s origins, these versatile roots were first domesticated thousands of years ago in Central and South America. From there, they spread around the world via trade routes. Christopher Columbus reportedly brought sweet potatoes back to Europe after his voyages, and from the 16th century onwards, they became a global staple.
Today, you’ll find unique varieties rooted in diverse cuisines:
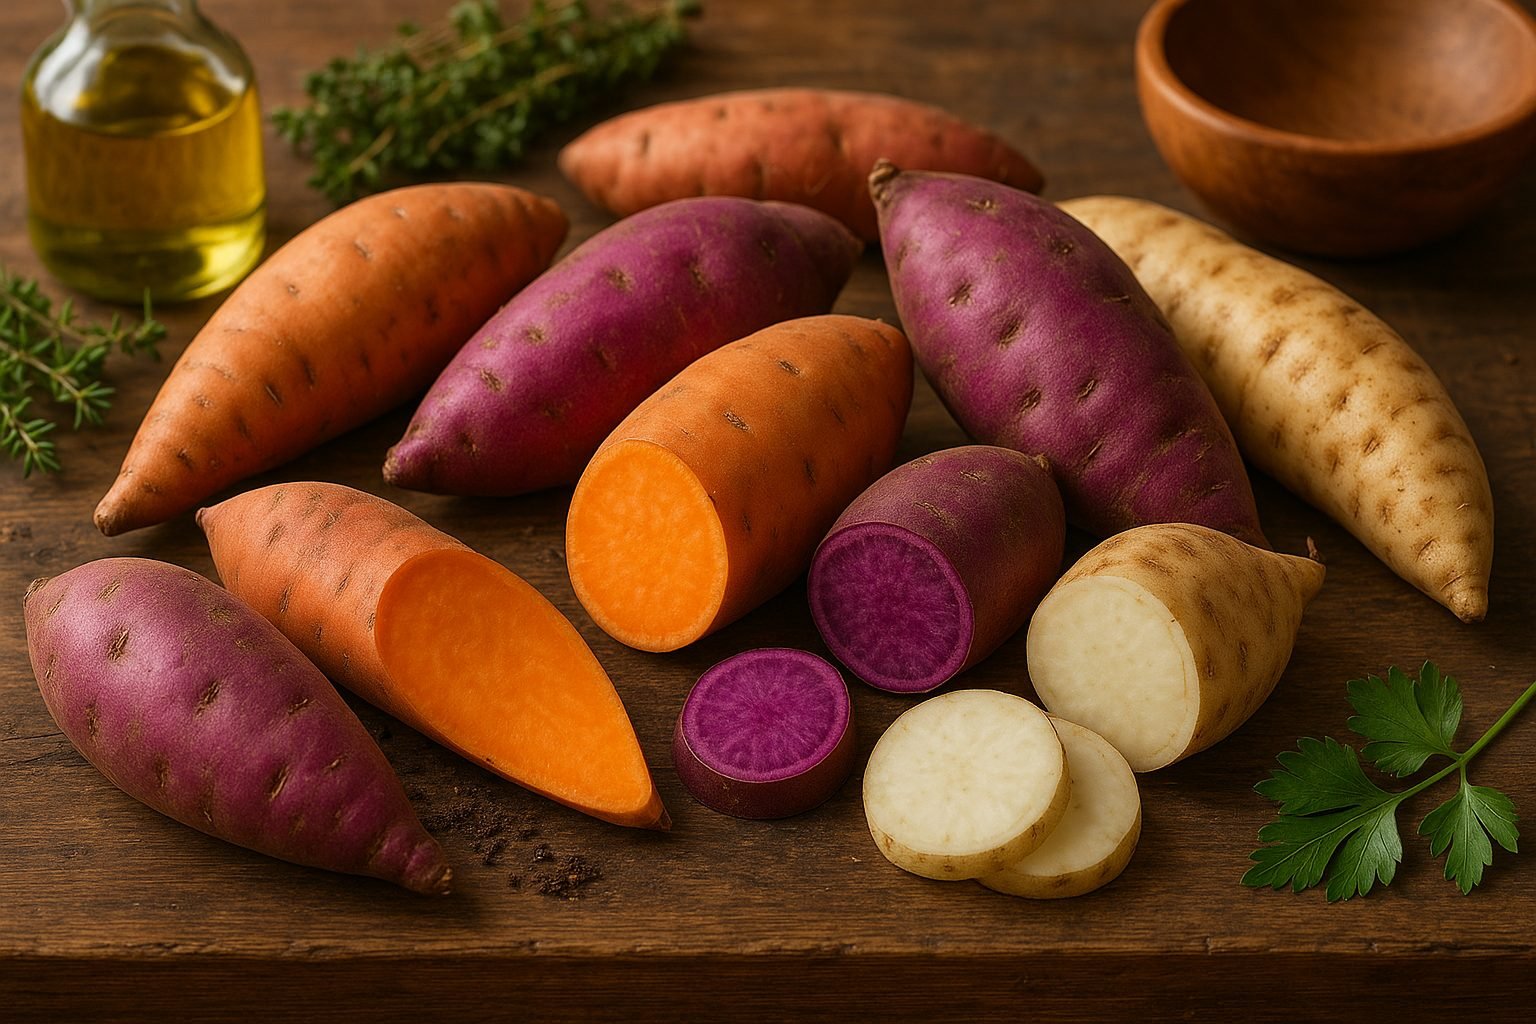
- The elegantly orange “Beauregard,” common in the United States, perfect for baking and mashing;
- “Japanese” or “Murasaki” sweet potatoes, with purple skin and a sweet, nutty flavor;
- In Africa, white-fleshed sweet potatoes popular for savory stews;
- And in the Caribbean, the white or light yellow “Boniato,” often seen in fries and desserts.
These variations show that no matter where you are—from North Carolina markets to Peruvian street stalls—there’s a sweet potato to suit every dish.
Sweet Potatoes vs. Regular Potatoes
Comparing sweet potatoes and regular potatoes goes beyond color or taste. Sweet potatoes generally have higher fiber and vitamin A content, giving them an edge in nutrition, especially for those looking for a healthy boost.
In the kitchen, regular potatoes are starchy and ideal for classic fries or creamy mashed potatoes, whereas sweet potatoes bring a natural sweetness and velvety texture. Try them roasted, in pies, or even as spiralized “noodles.”
For new gardeners, starting with sweet potato slips may seem tricky at first, but the wide array of varieties and their resilience to drought make them an excellent and rewarding crop to try.
Selecting the Best Site & Planting Methods
Sweet potatoes thrive when you give them what they crave: warmth, full sun, and well-draining, loose soil. These tropical plants love soil that stays consistently warm (above 60°F) and receives at least six to eight hours of direct sunlight per day.
When deciding where to grow your sweet potatoes, consider your available space and soil quality. In-ground planting is ideal if you have a sunny yard with loose, sandy, or loamy soil—this lets their roots spread out and form plump tubers. If your garden soil is heavy clay or tends to stay wet, consider raised beds: fill them with a mix of compost, sand, and topsoil about 12 inches deep so roots don’t get waterlogged. Raised beds also warm up faster in spring, giving sweet potatoes a growing head start.
For small spaces or patios, large grow bags or containers (at least 15–20 gallons) are surprisingly effective. Choose light, fluffy potting mix and keep your bags in the sunniest spot you have.
A real-world tip: when prepping any site, remove stones and break up clumps to make it easy for the tubers to expand. If you’re short on garden space, even a single grow bag can yield several sweet potatoes with regular watering and feeding.
Whichever method you choose, focus on sunlight, warmth, and soil quality—these factors will make all the difference for your sweet potato harvest.
How to Start Sweet Potato Slips (Step-by-Step)
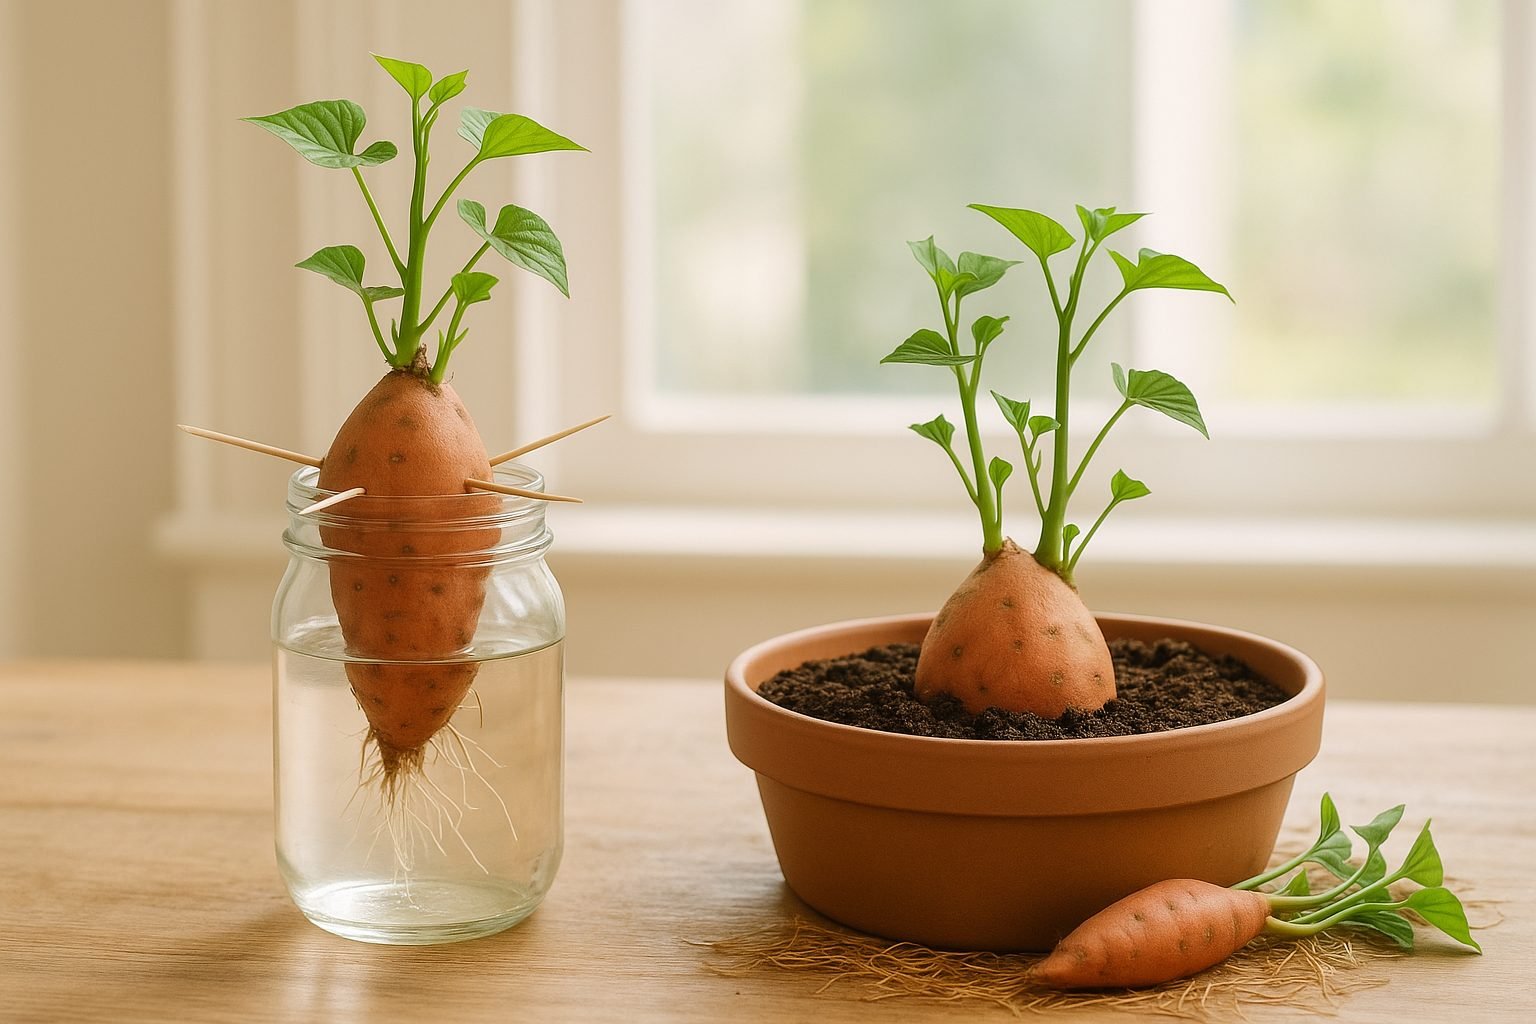
Starting sweet potato slips at home is straightforward, and you have two reliable options: using potting soil or just water.
Potting Soil Method
Bury half of a healthy, organic sweet potato lengthwise in a shallow container filled with moist potting soil, leaving the top half exposed. Keep it in a warm, sunny spot—near a bright window works well. Mist occasionally to keep the soil consistently damp but not soggy. In about two to four weeks, leafy shoots (called slips) will sprout from the top.
Water Method
Use toothpicks to suspend a sweet potato horizontally with its pointed end down in a jar, so the bottom half sits in water. Place the jar in a warm, sunny location, and change the water every few days to keep it fresh and prevent rot. Shoots should emerge within roughly the same timeline.
Timing and Care
Whichever method you choose, timing is key: start about six to eight weeks before your outdoor planting date, which is after the last expected frost. To encourage sturdy slip growth, ensure they get at least six hours of light daily and stay warm—sweet potatoes love heat.
Harvesting Slips
When slips are 6–8 inches long and have several leaves, gently twist or snip them off the sweet potato. If you started your slips in soil, ease them out with minimal root disturbance. If in water, move them to a new jar of water for a few days to encourage root growth before transplanting.
Planting Slips Outdoors
Wait until soil temperatures are consistently above 60°F (about 16°C). Harden off the slips for a week by gradually exposing them to outdoor conditions. Plant slips about 12 inches apart in loose, well-draining soil, burying the stem up to the first leaves. Water thoroughly and mulch to conserve moisture.
With a bit of patience and these simple steps, you’ll soon have vigorous sweet potato vines ready to fill your summer garden.
Planting & Caring for Sweet Potato Vines
Sweet potato vines thrive when planted in well-prepared, loose soil with plenty of drainage. Start by digging holes about 4-6 inches deep, spacing slips (the rooted cuttings) roughly 12-18 inches apart in rows three feet apart—this gives vines space to sprawl and roots plenty of room to develop.
After planting, give each slip a good soak and ensure the beds stay consistently moist but not soggy, especially during the first few weeks as the plants establish. For a boost in yield, side-dress plants with a balanced, low-nitrogen fertilizer every 4-6 weeks; too much nitrogen encourages leafy growth at the expense of tasty tubers.
Regularly add organic mulch, such as straw or chopped leaves, to conserve soil moisture, discourage weeds, and keep roots cool. If weeds do sneak in, hand-pull them early to prevent competition, being careful not to disturb the developing roots.
Prune back vines lightly if they begin to encroach on pathways, but avoid excessive trimming, as leaves are crucial for photosynthesis and tuber growth.
Pest and Disease Management
Keep an eye out for pests like sweet potato weevils, flea beetles, and whiteflies—use floating row covers early in the season, and attract beneficial insects with flowers like marigolds or dill.
For fungal issues such as root rot or leaf blight, ensure good airflow by spacing plants properly and avoid overhead watering. Rotate crops each year to prevent soilborne disease buildup.
Additional Care Tips
To encourage strong, healthy vines all summer, water in the morning and watch for signs of wilting during hot spells. Gently train runners to grow in your preferred direction.
With these mindful steps, you’ll set your sweet potato crop up for a healthy, abundant harvest.
Harvesting, Curing, and Storing Sweet Potatoes
Knowing when to harvest sweet potatoes is key to getting the best flavor and texture. Most varieties are ready to dig up about 90 to 120 days after planting, once the leaves begin to yellow and die back in the fall—just before the first frost hits.
To harvest, use a garden fork or spade to gently loosen the soil around the plant, starting at least 12 inches away from the main stem to avoid accidentally stabbing the tubers. Carefully lift the entire plant and shake off excess dirt by hand; never wash sweet potatoes right after harvesting, as moisture can cause rot. Take extra care not to bruise, cut, or scrape the tender skins, as any injury shortens storage life.
Next comes curing, a process that toughens skin and converts starches to sugars, improving taste and storage. Lay unwashed sweet potatoes in a single layer in a warm, humid area (ideally 80–85°F with 85–90% humidity) for 7 to 10 days—think heated garage, sunroom, or even a warm bathroom with a space heater and humidifier. Curing is crucial; skip this step and your sweet potatoes will taste bland and won’t store well.
After curing, brush off any lingering soil and store the potatoes in a cool, dark spot with good air circulation. The ideal temperature is around 55–60°F, such as a basement or root cellar. Never refrigerate, as cold temperatures will ruin the texture.
- Place sweet potatoes loosely in crates, boxes, or baskets lined with newspaper or straw to prevent them from touching and reduce the chance of mold or rot.
- Check on your stored crop occasionally and remove any soft or sprouting roots right away.
With careful harvesting, proper curing, and the right storage conditions, homegrown sweet potatoes can stay fresh and flavorful for up to six months.
Enjoying Your Sweet Potato Harvest
Harvesting homegrown sweet potatoes is just the start of a tasty adventure in your kitchen. These versatile tubers shine in a variety of dishes—try roasting bite-sized chunks with olive oil and your favorite herbs for a simple side, or mash them with a touch of butter and maple syrup for comfort food that’s both sweet and savory.
Homegrown sweet potatoes are perfect for hearty soups, stews, or as the star of a creamy curry. For storage-friendly recipes, consider slicing and dehydrating sweet potatoes to make healthy chips, or bake a sweet potato casserole, which freezes well and makes for an easy, nourishing meal later.
Don’t overlook the edible sweet potato leaves; toss these tender greens into stir-fries, salads, or soups, much like you would use spinach or kale—they’re packed with nutrients and add a fresh, mild taste.
If you have a favorite family recipe, like sweet potato pie or gnocchi, try substituting your own harvest for a delicious twist. Get the whole family involved and see who can come up with the most creative sweet potato dish—kids might love sweet potato pancakes or fries!
As you experiment and store your harvest, jot down what works best and share your culinary successes (and surprises) with friends or gardening communities so everyone can discover new ways to enjoy these delicious veggies year after year.
Don’t be afraid to keep trying new recipes or even growing different sweet potato varieties each season; the possibilities are endless in both your garden and your kitchen.