Introduction to Growing Onions from Seed
Starting your own cheap onion bed from seed isn’t just a money-saving project—it’s a deeply rewarding gardening experience that gives you ultimate control over the varieties you grow. Unlike simply planting onion sets from the garden center, growing onions from seed lets you explore unique cultivars, improve your soil’s health, and nurture your crop right from the beginning. Many gardeners don’t realize that buying a packet of seeds is often much cheaper than purchasing multiple sets or transplants, especially when planning a larger onion bed. Plus, the satisfaction of watching delicate seedlings transform into sturdy bulbs is unbeatable!
If you’re new to the process, don’t worry—you don’t need fancy tools or expensive equipment. With a bit of planning and some resourceful upcycling, you can construct a cheap onion bed in just a weekend, even if you’re working with a tight budget. In this post, we’ll walk you through the basics: the pros and cons of starting onions from seed, simple step-by-step instructions for building your own garden bed on the cheap, and essential seed-starting tips for beginners. You’ll also get practical advice on soil preparation, watering, and keeping your onion patch healthy. Ready to grow flavor and savings? Let’s get started!
Choosing Onion Varieties and Understanding Seeds

When it comes to growing onions, picking the right variety is crucial for success, as onions are sensitive to day length. Long-day onions form bulbs when they get 14–16 hours of daylight, making them ideal for northern gardeners with long summer days. Short-day onions, on the other hand, need only 10–12 hours of sunlight to bulb, thriving best in southern regions where winters are mild and days are shorter. Day-neutral, or intermediate-day, onions are versatile and can adapt to a broad range of daylight lengths, making them a safe bet in many areas.
For storage, look for pungent varieties like ‘Copra’ or ‘Red River’; their tighter skins and higher sulfur content allow them to keep for months. Sweet types like ‘Walla Walla’ or ‘Vidalia’ are better for fresh eating, but they don’t store as well, so plan to use them quickly.
When sourcing seeds, buy from reputable suppliers such as Johnny’s Selected Seeds, Baker Creek Heirloom Seeds, or your local cooperative extension. High-quality seeds lead to healthier plants and better yields, so avoid big-box store clearance racks where seeds might be old or stored improperly. Also, be sure to check that the seed variety is suited to your region—many catalogs and online seed shops offer guidance or even region-specific collections to simplify selection.
Smart variety and source selection will set your onion crop up for a tasty, bountiful harvest.
Preparing the Soil and Onion Bed

Getting your soil and onion bed ready is the first key step toward a bountiful onion harvest. Onions thrive best in loose, well-draining soil because standing water can rot their sensitive bulbs. Aim for a sandy loam rich in organic matter—avoid heavy clay unless you mix in plenty of compost or well-rotted manure to lighten it up.
Test the soil’s pH using an inexpensive soil test kit, aiming for a slightly acidic to neutral range (pH 6.0–7.0). Before planting, clear any weeds and loosen the soil with a fork or tiller to at least 8 inches deep. Mix in 2–4 inches of compost to boost fertility and improve texture; you can also add a balanced fertilizer if your soil is low in nutrients.
If you’re growing onions in containers, choose a pot at least 8 inches deep, filled with high-quality potting mix blended with compost. For both beds and containers, pick a spot that gets at least 6 hours of direct sun daily, as onions crave sunlight for good bulb development.
Practicing crop rotation by not planting onions or other allium family crops (like garlic or leeks) in the same spot for at least two to three years can help reduce problems with soil-borne diseases and pests. A little care in these early steps pays off, ensuring your onions get the healthy, vigorous start they need for robust growth all season long.
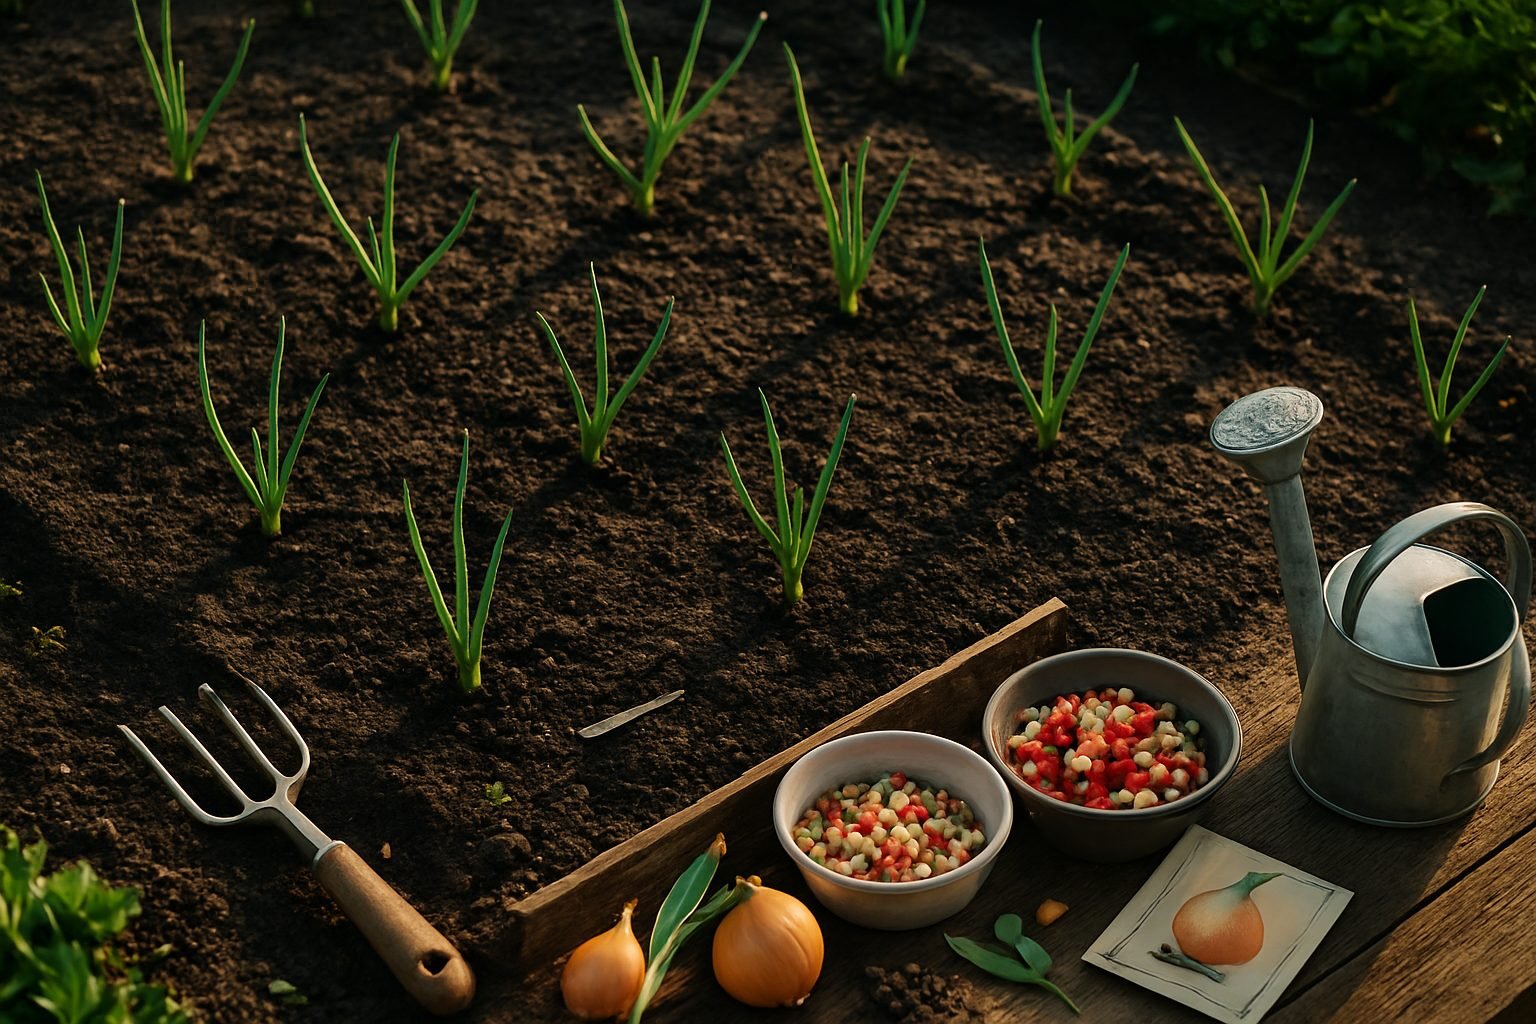
Sowing Onion Seeds: Timing and Technique
Getting the timing right when sowing onion seeds makes all the difference for a successful harvest. In cooler climates, it’s best to start seeds indoors about 8–10 weeks before your last expected frost, giving young onions a jumpstart on the season. For southern or milder zones, you can often sow seeds outdoors in early spring or, for overwintering varieties, in late summer or fall.
The type of onion matters too: long-day onions need longer daylight and are suited to northern regions, while short-day onions thrive further south.
When starting seeds indoors, use seed trays or modules filled with good-quality seed compost. Sow the seeds shallowly—just beneath the surface—and keep the soil moist but not soggy. A warm windowsill or a heated propagator (around 68°F/20°C) encourages quick, reliable germination, which usually takes 7–14 days.
Once seedlings reach about 3 inches tall and have at least two leaves, thin them carefully or prick them out into separate pots to avoid overcrowding.
If you prefer to direct sow outdoors, wait until soil temperatures reach at least 50°F (10°C) and sow thinly in rows; once the seedlings appear, thin them out so each plant has room to develop bulbs—typically leaving 3–4 inches between them.
Whether transplanting or thinning, handle onion seedlings gently to avoid damaging their delicate roots. With a bit of planning and these easy techniques, you’ll set your onions up for a bumper crop.
Caring for Growing Onion Plants
Caring for growing onion plants is straightforward with a few simple practices. Onions love consistent moisture, so water them regularly—about one inch per week is ideal, especially during dry spells. Use a soaker hose or drip irrigation system to avoid wetting the leaves, which can invite disease.
Mulching is a game-changer for onions; apply a two-inch layer of straw or shredded leaves around the bulbs to help the soil retain moisture, keep weeds down, and stabilize soil temperature.
When it comes to fertilizer, onions are heavy feeders. Start with a balanced fertilizer at planting time, then side-dress with a nitrogen-rich fertilizer every few weeks until bulbs begin to swell.
Pull weeds by hand or use a hoe carefully to avoid disturbing shallow onion roots, as competition can stunt growth.
Consistent moisture is essential, particularly as the bulbs develop—too much can cause rot, and too little leads to smaller bulbs.
Watch closely for pests like onion maggots and thrips; sticky traps and row covers help deter them, while rotating crops yearly reduces disease build-up.
Also, check leaves for yellowing or moldy spots, early signs of common onion diseases—remove and discard affected plants promptly.
Ultimately, a little regular attention goes a long way toward healthy, robust onion harvests.
Harvesting and Storing Homegrown Onions
Knowing when to harvest your homegrown onions is essential for the best flavor and shelf life. Onions are ready when their green tops start to yellow and naturally flop over. To harvest, gently loosen the soil with a garden fork and carefully lift the bulbs to avoid bruising. Shake off any excess dirt and lay the onions out in a single layer on a dry, ventilated surface, like a porch or garage. This begins the curing process—a crucial step for successful storage.
Allow the onions to cure for two to three weeks; their outer skins should become dry and papery, and the necks should fully dry out. Check for any soft spots and use those onions right away. Once cured, trim the roots and cut the tops back to about an inch above the bulb.
Store your onions in mesh bags, baskets, or even old pantyhose, and hang them in a cool, dark, and dry place—think basement or pantry. Avoid plastic containers, which trap moisture and cause rot. Well-cured and properly stored onions can last for several months, giving you a steady supply of homegrown flavor long after the harvest season ends.
Common Problems and Easy Solutions
Growing onions can be rewarding, but gardeners often run into a few common issues like bolting, poor bulb formation, and pesky insects.
Bolting, when onion plants start flowering too early, usually happens because of sudden cold or stress. To avoid this, choose bolt-resistant varieties and plant at the right time for your climate.
Poor bulb formation is often caused by overcrowding, inconsistent watering, or too much nitrogen. Make sure to space your onions properly, water them evenly (about one inch per week), and use a balanced fertilizer.
Pests such as onion maggots and thrips can also cause trouble. To manage these, rotate your crops each year, remove any plant debris, and consider using lightweight row covers as a barrier. If you spot pests, try natural solutions like neem oil or insecticidal soap.
Keep your garden beds weed-free since weeds compete with onions for nutrients and water.
By catching issues early and practicing these simple prevention techniques, you’ll set the stage for robust, healthy crops and a satisfying harvest. A little proactive care goes a long way in keeping onion problems at bay!