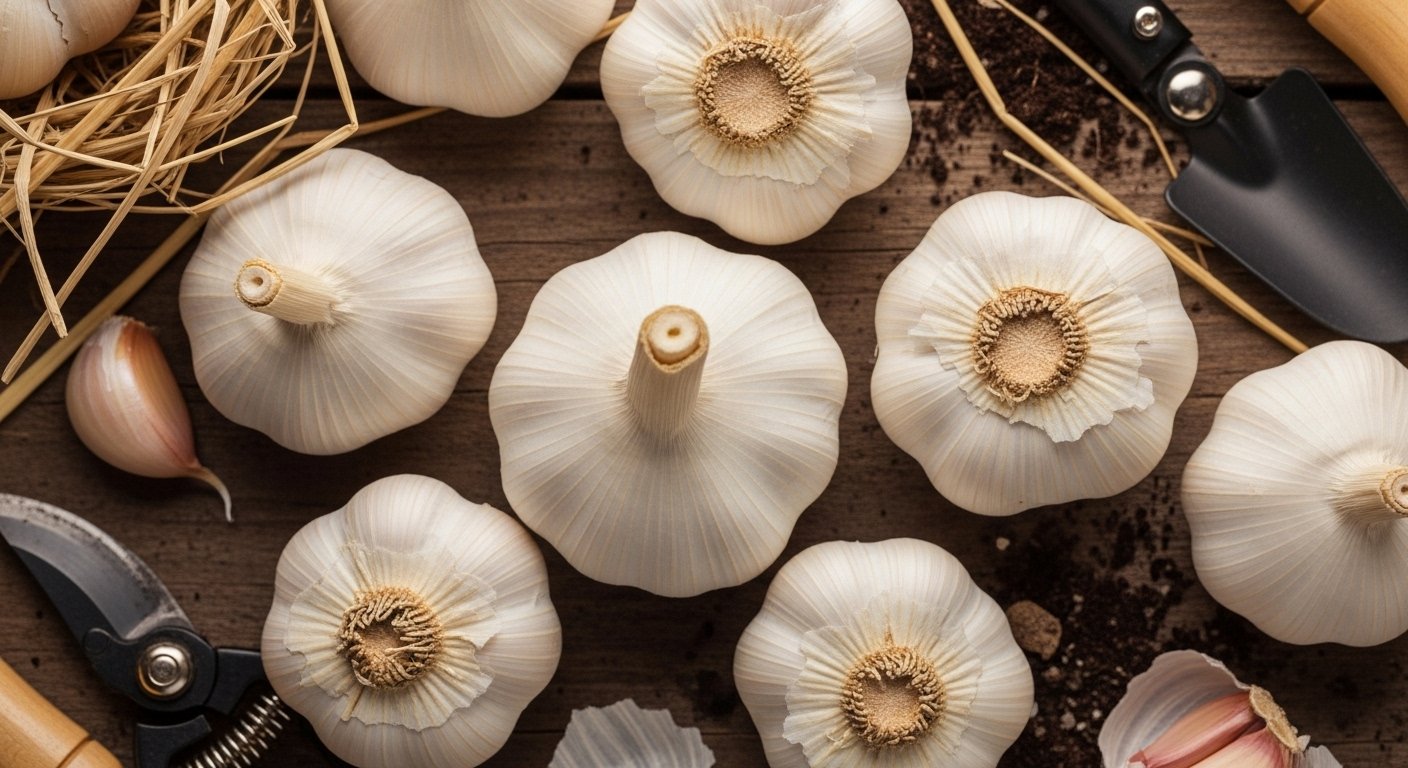
Hardneck vs. Softneck Garlic Varieties
If you’re exploring hot weather garlic growing, understanding the differences between hardneck and softneck garlic varieties can make or break your harvest. When you walk through a garden or browse a farmer’s market, those neat heads of garlic might seem similar, but they’re actually two distinct types: hardneck, with a stiff central stem and an orderly circle of larger cloves, and softneck, with flexible, leafy tops and layers of smaller, tightly packed cloves.
Flavor-wise, hardnecks are prized for their bold, complex, sometimes spicy taste—think of the aromatic garlic in gourmet recipes—while softnecks tend to be milder and more familiar, like what you find in most supermarkets.
However, climate can play a huge role in their success. Hardneck varieties prefer a long, cold winter to develop properly, often struggling in sunny, steamy places. In contrast, softneck garlic is remarkably resilient in hot climates, thriving where winter is short and mild.
For gardeners in warmer regions, this distinction is key: softnecks typically store much longer, sometimes up to nine months, and are less prone to sprouting or rotting in the heat. Hardnecks, while delicious, just can’t compete with the easygoing nature of softnecks when it comes to hot weather garlic growing.
Choosing the right variety isn’t just about flavor or tradition—it’s about ensuring a rewarding gardening experience. The right match means healthier plants, bigger bulbs, and garlic that lasts through the off-season. When you know the physical traits, flavor, and climate preferences of hardneck and softneck garlic, you set yourself up for success, no matter how high the thermometer climbs.
Popular Garlic Families and Varieties
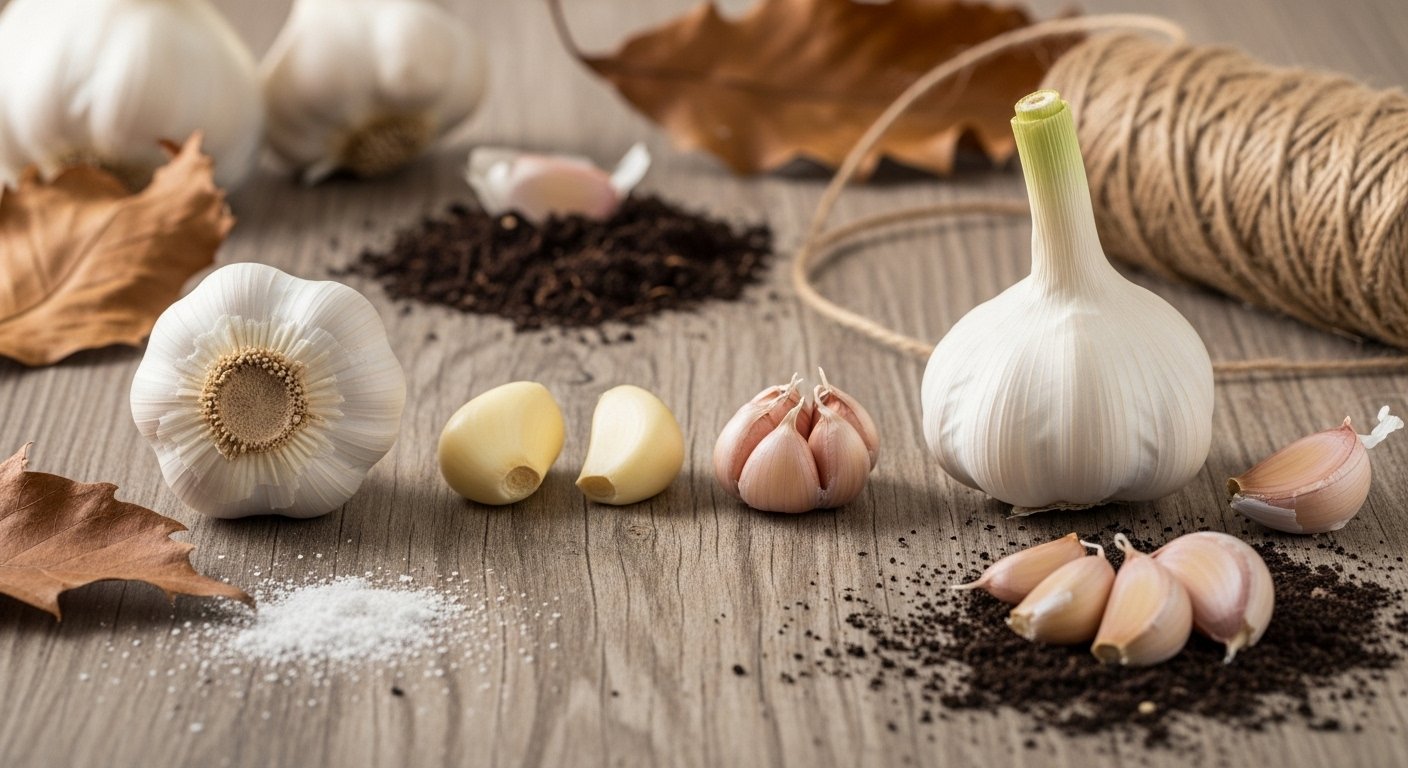
Garlic is generally divided into two main families: softneck and hardneck, each with unique characteristics and several popular varieties.
Softneck garlic (Allium sativum ssp. sativum) includes familiar supermarket staples like ‘California Early’, ‘Silverskin’, and ‘Artichoke’ types. These varieties are known for their mild, approachable flavor, excellent storage life (up to nine months), and adaptability to milder climates—ideal if you want bulbs that last through the winter.
Hardneck garlic (Allium sativum ssp. ophioscorodon) produces varieties like ‘Rocambole’, ‘Purple Stripe’, and ‘Porcelain’, which tend to offer bolder, spicier, or more complex flavors highly prized by chefs. However, these bulbs store for a shorter period (about four to six months) and grow best in regions with cold winters.
If you love intense, robust flavor or want to harvest garlic scapes for cooking, hardneck types are perfect. For warmer areas with mild winters, stick to softneck garlic for better reliability.
When purchasing seed garlic, look for firm, plump bulbs with tightly attached, unbroken skins. Avoid any bulbs showing signs of mold, sprouting, or softness, as these indicate poor quality or disease. Buy only from reputable seed suppliers—grocery store garlic may be treated to prevent sprouting and isn’t optimal for planting.
Always choose varieties suited to your local climate to ensure a healthy crop and a great-tasting harvest.
Planting Garlic: Step-by-Step Instructions
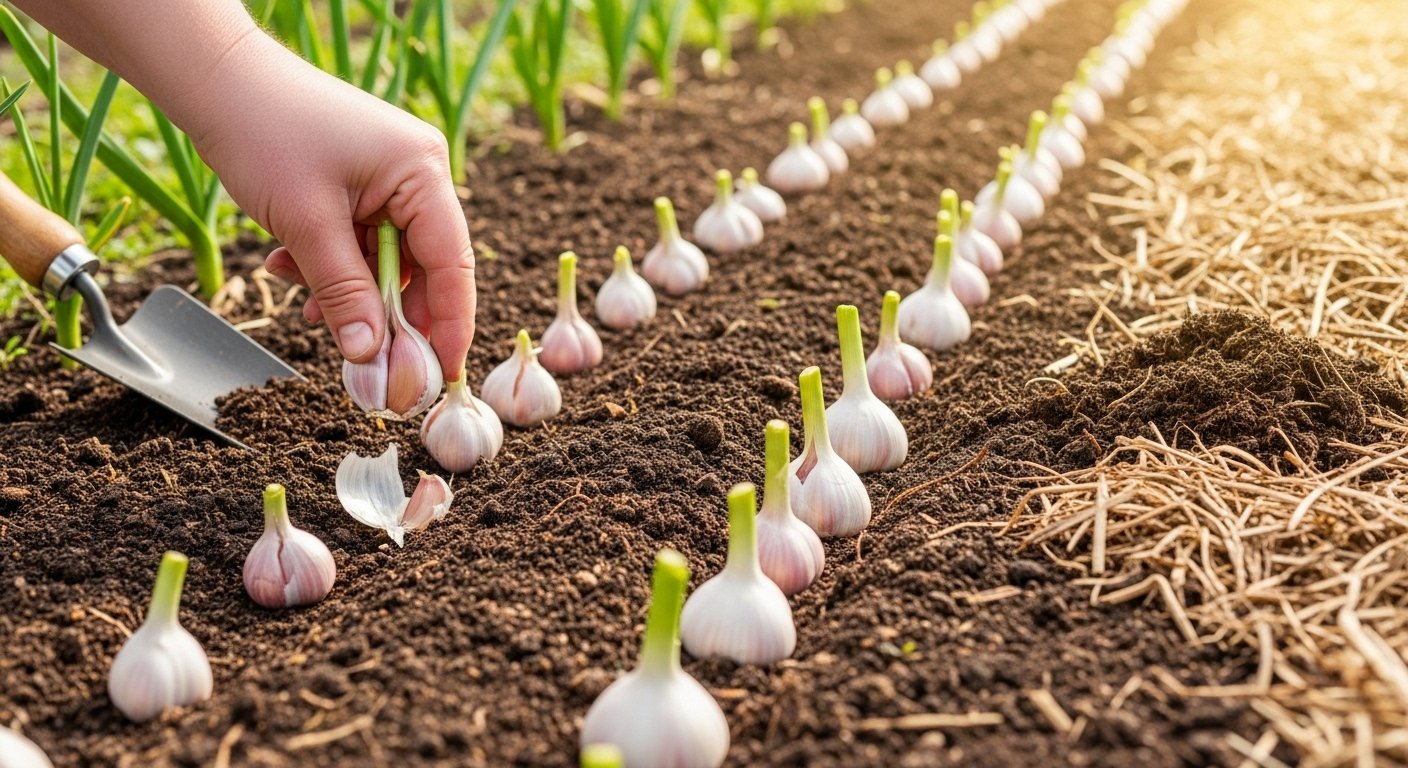
For the best garlic harvest, timing is key—plant garlic cloves in the fall, a few weeks before the ground freezes. This usually means between late September and early November, depending on your climate.
Start by choosing a sunny spot with loose, well-draining soil. Mix in compost or well-rotted manure to boost fertility. Break garlic bulbs into individual cloves, keeping the papery skin intact.
Plant each clove upright, pointed end up, about two inches deep and four to six inches apart. Space rows about one foot apart to give them plenty of room to grow.
Once planted, sprinkle a balanced fertilizer, such as 10-10-10, over the bed and water thoroughly to settle the soil. Keep the soil consistently moist but not soggy as shoots emerge in early spring. Adding a layer of mulch helps retain moisture and suppress weeds.
Follow these steps, and your garlic will get a strong start for robust bulbs come summer.
“`html
Caring for Garlic as It Grows
Taking care of garlic as it grows is mostly about consistency and prevention. Start by watering your garlic lightly but often, keeping the soil moist but never soggy—too much water can cause the bulbs to rot, especially in heavy soils.
Mulching with straw or shredded leaves is a gardener’s secret weapon: it helps the soil retain moisture, keeps temperatures steady, and suppresses weeds that compete for nutrients.
Stay vigilant about weeds since garlic doesn’t like competition; hand-pulling is safest to avoid damaging the shallow roots.
Watch for common pests like onion maggots or fungal diseases such as white rot. Choosing disease-free seed garlic, rotating your planting spots, and using floating row covers can help keep these issues at bay without chemicals.
For organic pest control, introduce beneficial insects like ladybugs or sprinkle diatomaceous earth around plants to deter invaders.
In areas with cold winters, a thick layer of mulch will protect your bulbs from freeze-thaw cycles, while in hot, dry climates, watering early in the day and providing partial afternoon shade can reduce stress on your crop.
No matter your conditions, ensure your garlic gets enough sunlight, avoid over-fertilizing with nitrogen as the bulbs mature, and loosen soil around the stems in late spring to encourage larger bulbs.
With a little care and attention to these details, you’ll enjoy a healthy garlic harvest no matter where you grow.
“`
Harvesting, Curing, and Storing Garlic
Knowing when to harvest garlic is key to getting plump, flavorful bulbs that store well through the seasons. Watch for signs: the lower leaves will turn brown and dry, while a few upper leaves stay green—usually in midsummer. Try not to wait until all the leaves are dry, as this can cause bulbs to split.
To harvest, gently loosen the soil with a fork or small spade a few inches from the plants to avoid damaging the bulbs. Lift each head carefully, shaking off excess soil but keeping the outer skins intact. Never yank garlic by the stems, as this can break or bruise the bulbs and reduce their storage life.
Curing Garlic
Once harvested, the curing process is essential. Curing allows the garlic skins to fully dry and protects the bulbs from mold, making them last longer in storage. Bundle garlic in bunches of 6–10 plants, or lay them in single layers on racks or screens.
Place them in a well-ventilated, dry, and shaded spot—like a covered porch, shed, or garage—for about 2–4 weeks. Good airflow is crucial; avoid direct sun, as it can cook the bulbs, and make sure rain or high humidity won’t delay drying. After curing, trim off roots and cut stems to about an inch above the bulb, but don’t remove too many papery skins.
Storing Garlic
For the best long-term storage, keep cured garlic in a cool (32–50°F), dry, and dark place with good air circulation, such as a mesh bag or open basket in a pantry or cellar. Never store garlic in sealed plastic or airtight containers; trapped moisture can lead to rot.
Hardneck varieties tend to store for 3–6 months, while softneck types often last 9 months or more with proper care. Check bulbs every few weeks and remove any that feel soft or show signs of mold.
Following these steps ensures you’ll have homegrown garlic ready for your kitchen right through the winter.
Troubleshooting and Season-Long Tips
Garlic growers commonly face issues like yellowing leaves, small bulb development, and premature bolting, but these problems often have straightforward fixes.
If you notice yellow leaves, check for water stress or nutrient deficiencies; garlic prefers moist but well-drained soil and benefits from a mid-season boost of balanced fertilizer.
Small bulbs may result from overcrowding or late planting, so ensure each clove gets plenty of space (about 4-6 inches apart) and plant in the fall for bigger, healthier bulbs.
Bolting, when garlic suddenly sends up a flower stalk, usually happens in response to temperature swings or planting the wrong variety for your zone. Snip off scapes as soon as they appear, and choose hardneck types for cold climates or softneck for milder areas.
To keep your crop thriving, test your soil each season, adding organic matter for better structure and drainage. Mulching helps moderate soil temperature and retain moisture, but keep an eye out for excessive wetness, which can lead to fungal diseases.
Adapt your watering habits as the season changes, giving more water during dry spells and reducing it as bulbs mature.
Above all, make a habit of walking through your garlic bed every week, noting changes in leaf color, stem size, or signs of pests—quick intervention makes a big difference.
Track what works and don’t be afraid to tweak planting times, spacing, or varieties each year—these small experiments often lead to big improvements for next season’s harvest.
Consistent observation and open-minded adjustments are the keys to enjoying bigger, healthier garlic bulbs year after year.