Getting Started with Growing Garlic
Watering garlic is one of the most important steps to master if you’re hoping to grow healthy, flavorful bulbs in your home garden. Garlic is an easy and rewarding crop for both beginner and seasoned gardeners—it takes up little space, has minimal pest issues, and fresh homegrown garlic always tastes better than store-bought. But getting a great harvest starts with understanding a few basics, like when and where to plant, as well as picking the right variety for your region.
Garlic thrives in temperate climates where winters are cool but not severe, making it a favorite in gardens across North America, Europe, and beyond. While spring planting is possible in some areas, autumn is generally the best time to plant garlic. Planting in the fall gives the cloves a jump start, allowing roots to develop before the soil freezes. This results in larger, more robust bulbs at summer harvest.
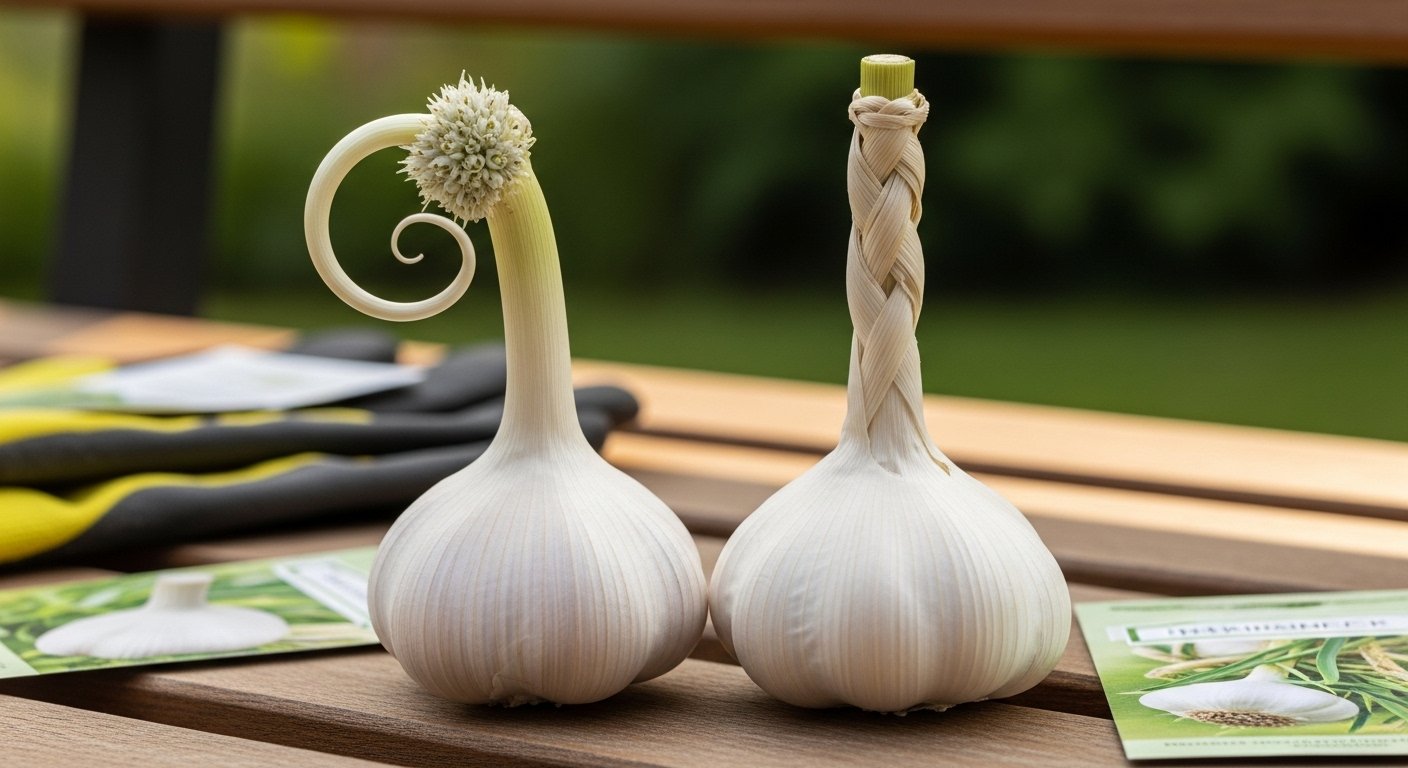
When it comes to choosing what type of garlic to grow, you’ll likely see two main categories: hardneck and softneck. If you live in a colder climate with longer, harsher winters, hardneck garlic tends to perform better—it can survive chilly conditions and even rewards you with delicious scapes in the spring. Gardeners in milder, southern regions should opt for softneck varieties, which store longer and produce the classic braided bulbs often seen in kitchens. Whichever type you choose, start with high-quality seed garlic from a reputable supplier.
Once you’re set up with the right variety and planting time, dialing in how often to water your garlic is the next step to success. With just a little preparation and attention, enjoying your own harvest of fresh, fragrant garlic is closer than you think.
Preparing Your Planting Site
Garlic thrives best in loose, well-draining soil with a neutral to slightly acidic pH—ideally between 6.0 and 7.0. Avoid areas where water pools after rain, as soggy soil promotes rot and poor bulb development. To check soil drainage, dig a small hole and fill it with water; if it drains within an hour, the site is suitable for planting.
Garlic loves nutrient-rich, fertile soil, so plan to enrich your bed with compost or well-rotted manure before planting. Spread a two-inch layer of organic matter over the area and work it into the top six inches of soil to boost fertility and improve soil structure. If your soil is heavy clay or sandy, mix in amendments like peat moss for aeration or organic compost to enhance water-holding capacity.
A home soil test kit can help you adjust the pH if needed—lime will raise the pH, while sulfur lowers it. For ideal bulb growth, choose a spot that gets full sun for at least six hours a day since garlic needs plenty of light to mature properly.
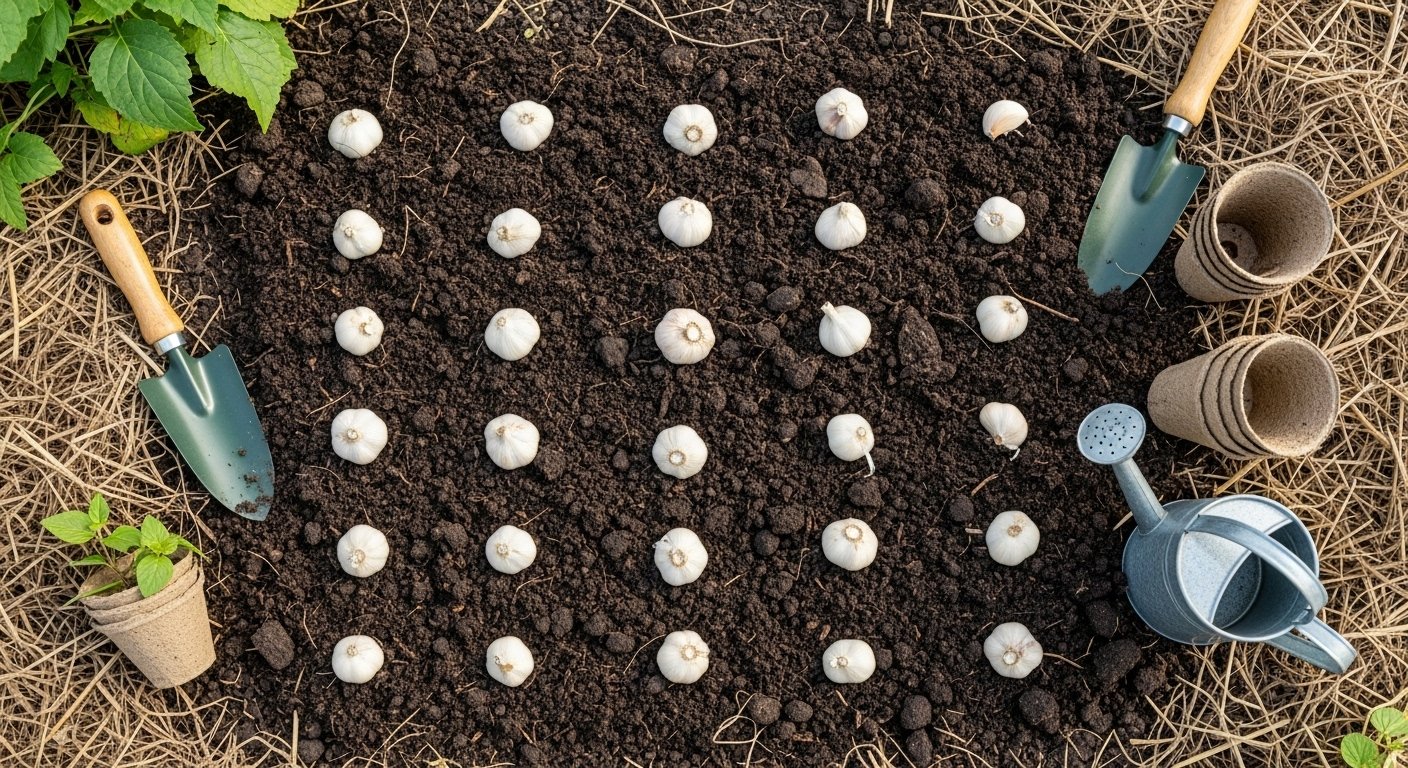
When planning your layout, space cloves about four to six inches apart in rows, with a foot between each row. This gives each bulb enough room to expand and helps avoid fungal issues caused by overcrowding. Also, avoid planting garlic where onions or other alliums were recently grown, as they attract similar pests and diseases.
By carefully preparing your soil and choosing the right site, you’ll set the stage for healthy garlic that’s easy to harvest and packed with flavor.
Planting Garlic: Step-by-Step Guide
The best time to plant garlic largely depends on your local climate, but as a rule of thumb, fall planting produces the biggest, healthiest bulbs. In colder northern regions, aim to plant garlic about four to six weeks before the ground freezes—typically from late September to early November. In milder southern climates, you can often wait until late fall or even early winter, ensuring your cloves avoid long periods in hot soil.
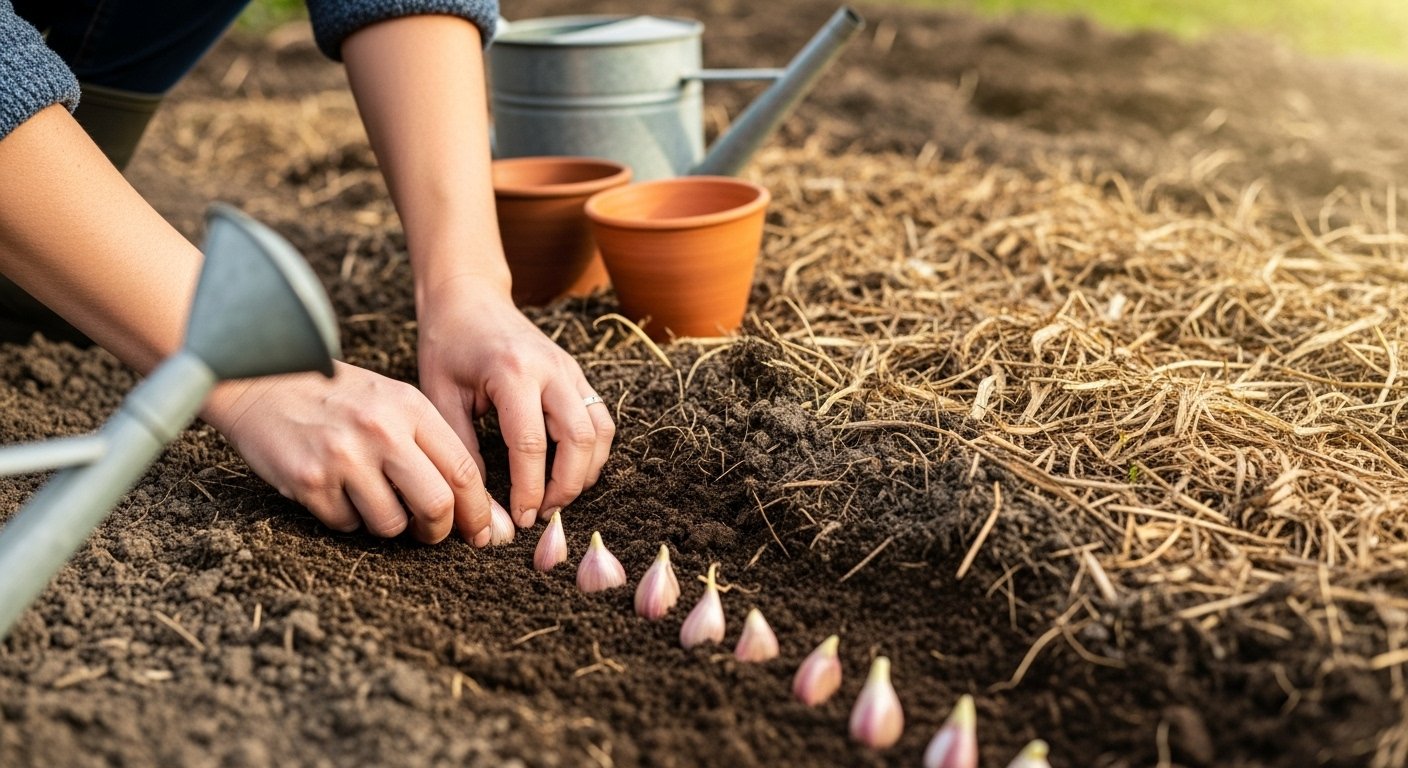
Before planting, separate the garlic bulb into individual cloves, keeping the papery skins intact on each clove for protection. Choose the largest cloves for planting, since they’ll yield the biggest heads. To boost germination and reduce the risk of diseases, some gardeners recommend soaking cloves for a few hours in room-temperature water or a diluted baking soda solution before planting. Another option is a brief soak in a mild hydrogen peroxide mixture to ward off fungal pathogens.
When you’re ready to plant, place cloves pointy end up, about 2 inches deep and 4-6 inches apart, with rows spaced at least a foot apart to allow plenty of room for growth and airflow. Cover the planted area with a few inches of mulch—such as shredded leaves or straw—to insulate the cloves through winter and help control weeds.
For gardeners with limited outdoor space, garlic thrives in containers too. Choose a pot at least 8-10 inches deep with good drainage, fill it with quality potting soil, and space cloves about 4 inches apart. Be sure to water regularly without letting the soil get soggy, and position your container in a spot that gets at least six hours of sun daily.
With these steps, you’ll set your garlic up for a robust harvest next summer, whether you grow it in a raised bed, backyard plot, or even a sunny balcony container.
Garlic Plant Care Throughout the Season
Caring for garlic throughout the growing season doesn’t have to be complicated, but paying attention to a few key details will help you harvest large, flavorful bulbs.
Watering
Garlic likes consistent moisture, aiming for about one inch of water per week, including rainfall. In dry spells, soak the soil with a thorough watering once weekly rather than frequent light sprinkles, as deep watering encourages stronger root growth. If you’ve had heavy rain, skip watering until the top few inches of soil start to dry out—garlic does not like soggy soil and may rot if overwatered.
Mulching
To help retain moisture and keep weeds at bay, spread a two- to three-inch layer of organic mulch, such as straw, shredded leaves, or grass clippings, over your garlic bed after planting in the fall. Mulch not only locks in soil moisture but also suppresses weeds, so you spend less time pulling intruders that compete for nutrients. As garlic begins to grow in spring, remove or thin mulch if the soil stays too damp, but keep it in place during hot, dry spells to conserve water.
Fertilizing
For robust garlic, fertilize lightly with a balanced fertilizer (such as 10-10-10) or a nitrogen-rich meal (like blood meal) when green shoots first emerge and again in early spring, when the plants reach about six inches tall. Be cautious not to overfertilize later in the season, as excess nitrogen can produce lush tops but smaller bulbs.
Scape Removal
Regularly removing the central flower stalk, known as a scape, once it forms in late spring or early summer is another simple task that pays off. Snap the curly scape off just above the leaves when it begins to curl, which directs the plant’s energy toward developing a bigger bulb instead of producing flowers and seeds.
Bonus tip: Garlic scapes are tasty and can be used in pesto, stir-fries, or salads.
Summary
Consistent care through smart watering, mulching, timely feeding, and scape removal will reward you with a harvest of healthy, well-formed garlic bulbs in midsummer.
Common Pests, Diseases, and Troubleshooting
Garlic is a hardy plant, but it isn’t immune to a few pests and diseases that can challenge even experienced gardeners. Onion maggots are one of the most common garlic pests; these small white grubs tunnel into bulbs and can ruin your harvest. To prevent them, rotate your garlic crops each year and avoid planting in areas where onions or garlic previously grew. Floating row covers can keep adult flies from laying eggs, while sprinkling diatomaceous earth around plants creates a barrier for crawling pests. Another troublesome pest is the stem and bulb nematode, microscopic worms that cause distorted bulbs and yellow streaks in the leaves. Purchasing certified disease-free seed garlic and removing debris at season’s end are effective organic strategies to keep nematode populations in check.
Diseases can also strike garlic, with white rot and rust being the most notorious. White rot shows up as yellowing leaves and white, fluffy growth on the roots or base—a serious issue since infected soil can remain dangerous for years. Prevent this by only planting healthy cloves and rotating crops; if white rot appears, remove and destroy affected plants quickly. Garlic rust is another problem, identified by orange or yellowish spots on leaves that can weaken the plant and reduce yield. Improve air circulation by spacing plants well, water early in the day so foliage dries quickly, and remove affected leaves if you spot rust early.
If you’re noticing poor growth, yellowing leaves, or small garlic bulbs, you’re not alone—these problems often stem from soil or watering issues. Garlic prefers loose, well-draining soil high in organic matter; if you have heavy or clay soil, amend it with compost before planting. Consistent moisture is crucial, especially as bulbs develop, but avoid soggy conditions that can lead to rot. If leaves turn yellow too early, it might signal a nitrogen deficiency or overly wet soil. Applying a balanced organic fertilizer in spring can help, as can adjusting your watering routines. With close observation and a few preventive habits, you’ll be much better prepared to grow healthy, robust garlic every season.
Harvesting and Curing Garlic
Knowing when to harvest garlic is key to getting flavorful, long-lasting bulbs. Look for visual cues: mature garlic is ready to harvest when about half to two-thirds of the lower leaves have turned brown and dry, while the upper leaves are still green. This usually happens in mid to late summer, depending on your climate and planting time.
To harvest, choose a dry day and gently loosen the soil around the bulbs with a garden fork, being careful not to damage them. Grasp each plant low on the stem and lift it out of the ground. Brush off excess dirt—avoid washing the bulbs at this stage, as moisture can encourage rot.
Next, tie the stalks in small bunches or lay the bulbs in a single layer on a screen or rack. Make sure they’re kept out of direct sunlight but in a space with good airflow, such as a shed, porch, or garage. Allow the garlic to cure for two to four weeks; during this time, the outer skins will dry and become papery, and the necks and roots will shrivel.
After curing, trim the roots close to the bulb and cut back the stems to about an inch, or braid softneck garlic if you like. Gently peel away the dirtiest outer layers of skin, but don’t remove too much—those layers help protect the bulbs in storage.
Store cured garlic in a cool, dry, and dark place, and avoid sealed containers that can trap moisture. Properly cured garlic can last for several months, keeping you supplied with fresh flavor all through the winter.
Storing and Using Homegrown Garlic
Once you’ve harvested your garlic, storing it properly is key to enjoying its fresh flavor for months. An age-old method is braiding softneck varieties while the stems are still pliable, then hanging the braids in a cool, dry, well-ventilated space—think pantry, basement, or even a shaded porch out of direct sunlight.
For hardneck garlic, which doesn’t braid well, simply bundle the bulbs with twine or place them in mesh bags that allow air to circulate and hang them up. Avoid plastic bags or closed containers, as these trap moisture and promote rot.
The ideal storage conditions are between 55–65°F (13–18°C) with low humidity. Shelf life depends on the variety: softneck garlic can last up to nine months, while hardneck types keep for about five. To prevent sprouting or decay, resist storing garlic in the fridge, and check your stash periodically, removing any bulbs that show soft spots or green shoots.
Once you’re ready to use your garlic, the options are endless—roast whole heads for a creamy spread, mince into stir-fries, or chop into fresh salsa for a spicy kick. For longer preservation, try drying slices in a food dehydrator or infusing olive oil (just be sure to refrigerate the oil to avoid the risk of botulism).
If you find yourself with an abundance, bundle a few bulbs with dried herbs or a pretty ribbon for a thoughtful, easy homemade gift. With a little care and creativity, your homegrown garlic can enhance your cooking and brighten someone’s day long after the harvest.