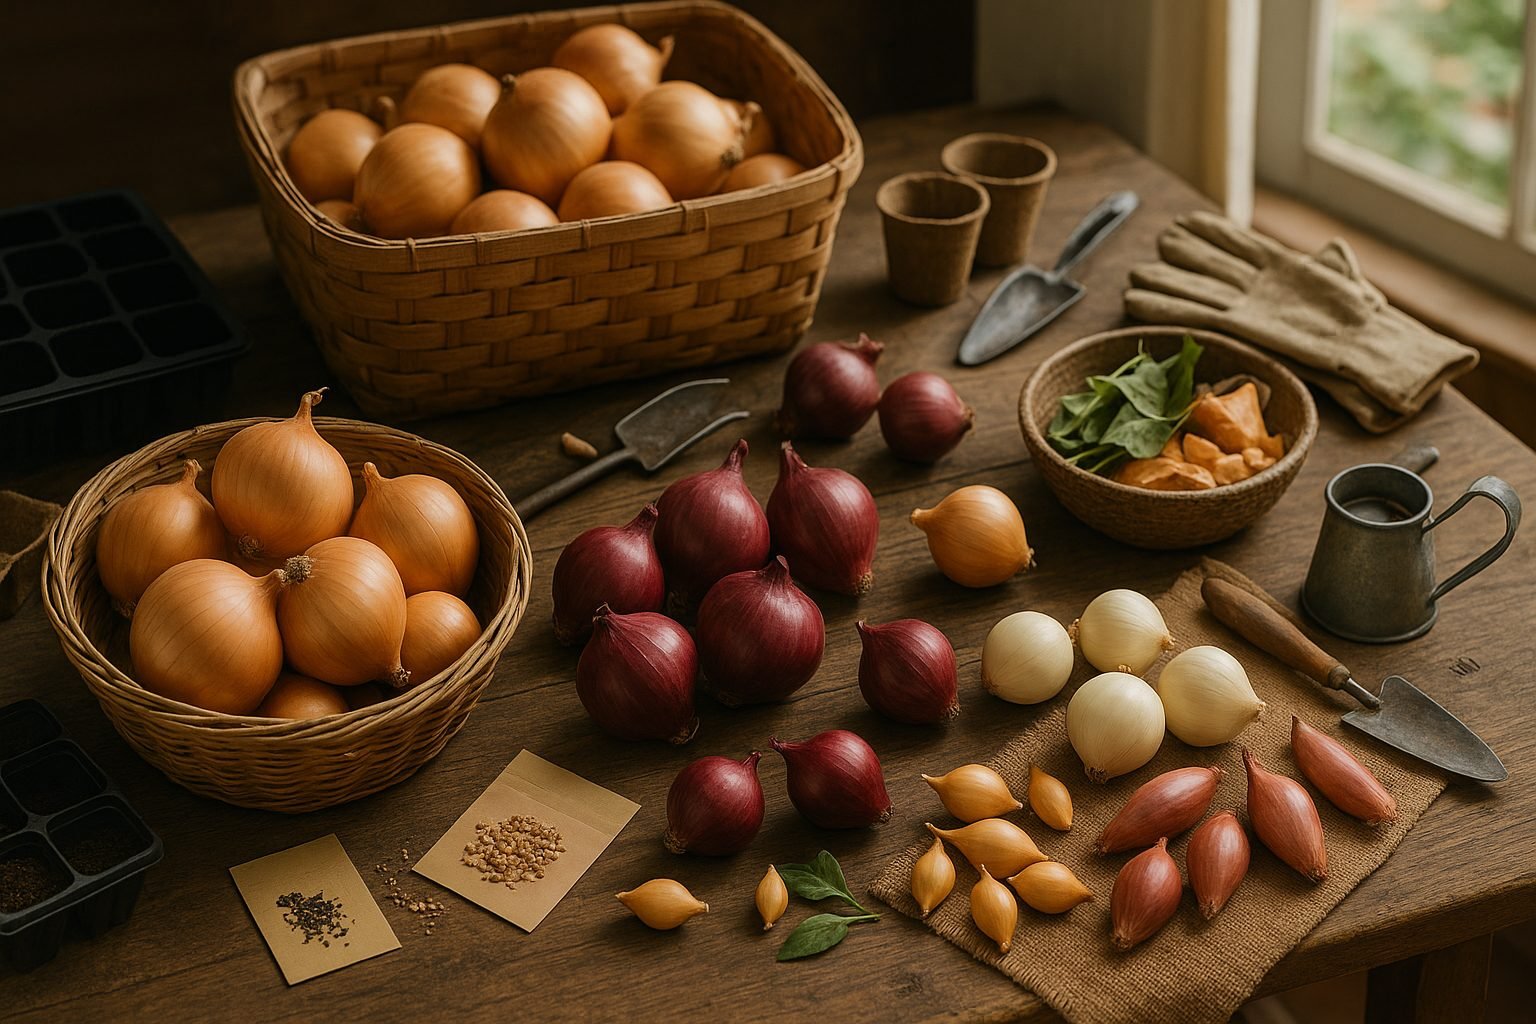
Choosing the Right Onion Types and Varieties
If you’re thinking about starting onion seeds indoors this season, understanding which onion type and variety to choose is just as important as sowing the seeds themselves. Onion plants are broadly classified into three main types—short-day, long-day, and intermediate-day onions—each thriving in different climates depending on daylight hours.
Short-day onions grow best where winters are mild and days are shorter (usually in southern regions); they need about 10-12 hours of daylight to form bulbs. Long-day onions, on the other hand, flourish in northern areas with longer summer days, needing 14-16 hours of light to produce sizeable bulbs. If your region falls somewhere in between, intermediate-day onions might be your best bet, as they reliably bulb with 12-14 hours of daylight.
Varieties by Color
Within these types, you’ll find countless varieties divided by color: yellow, white, and red.
- Yellow onions: Popular picks include ‘Walla Walla’ (sweet and mild), ‘Granex’ (famous for sweet Vidalia flavor), and ‘Yellow Spanish’ (top-notch storage potential).
- White onions: Varieties like ‘White Lisbon’ offer a sharp flavor, perfect for salsas, while ‘Southport White Globe’ stands out for classic onion crunch.
- Red onions: If vibrant color matters to you, ‘Red Burgundy’ and ‘Red Creole’ provide a mild taste and beautiful presentation in salads.
Choosing Based on Climate and Use
Select your onion variety not only based on climate and day length but also your desired storage life, flavor profile, and kitchen needs. If you love sweet, mild onions for fresh eating, focus on varieties like ‘Walla Walla’ or ‘Granex’—just note these won’t store for long.
For cooking and long storage, choose hardier options like ‘Yellow Spanish’ or ‘Southport White Globe’. Red onions bring versatility, lending both color and subtle sweetness to dishes from burgers to salads.
By choosing the right fit for your climate and cooking preferences, starting onion seeds indoors becomes the first simple step to a delicious, rewarding harvest.
Getting Started: Onion Seeds vs. Sets vs. Transplants
Choosing how to start your onion crop can make a big difference in your harvest, as each method—seeds, sets, or transplants—comes with its own pros and cons.
Onion sets, which are tiny pre-grown bulbs, are the quickest way to get a head start on the season and are great for beginners since they’re easy to handle and unlikely to fail. However, sets often produce onions that bolt (flower) early, which affects size and storage life, and they tend to offer only a few common varieties.
Transplants—young onion seedlings you buy or grow indoors and then move into your garden—strike a balance between convenience and variety. They generally result in decent bulb quality, good uniformity, and a wider selection of types than sets. However, transplants can be pricier and more vulnerable to transplant shock if not handled carefully.
Starting onions from seed takes the most time and patience, but the rewards are great: seeds are the least expensive way to grow many plants, offer a huge range of varieties (including those bred for longer storage or disease resistance), and often produce the best quality bulbs with less chance of bolting. Seeds also reduce the risk of introducing diseases into your garden, a problem sometimes seen with sets.
If you want to grow onions for long-term storage or are interested in unusual or specialty types, seeds are your best bet—though you’ll need to start them indoors well before your last frost.
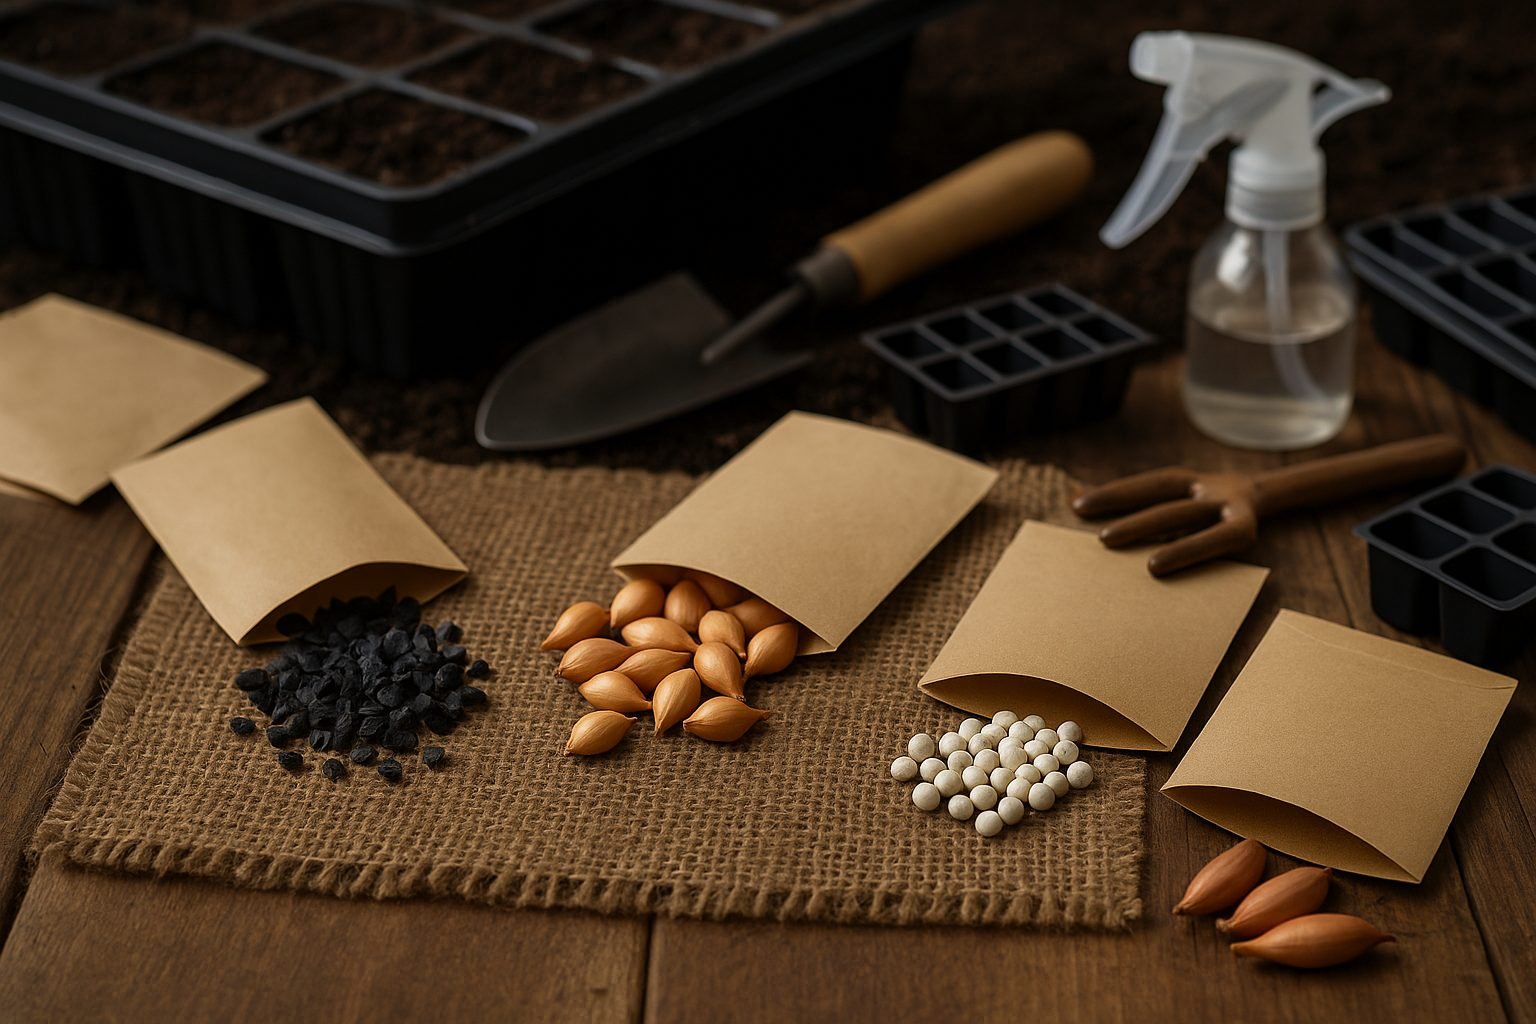
When planting from seed, you’ll likely choose between regular onion seeds and pelleted seeds, which are coated for easier handling. Pelleted seeds make it much simpler to space seeds evenly, especially for tiny onion seeds or gardeners with dexterity issues. However, the coating makes them more expensive and they require more consistent moisture to sprout. Regular seeds require more care to sow thinly but are cheaper and remain viable for a couple of years if stored properly.
Choose the starting method that fits your gardening goals and resources—the extra planning can lead to bigger, healthier onions and less waste at harvest time.
Sowing Onion Seeds Indoors
Starting onion seeds indoors gives you a head start on the growing season and can lead to larger, healthier bulbs at harvest. Aim to sow onion seeds about 8–12 weeks before your last expected spring frost, typically from late winter to early spring.
Begin by choosing shallow containers or seed trays with drainage holes, as onions only need a few inches of soil depth to start. Fill them with a sterile, fine-textured seed-starting mix instead of garden soil. This reduces the risk of disease and provides the right texture for delicate roots.
Gently scatter seeds over the surface, spacing them about ¼ inch apart, and cover lightly with a thin layer of soil—onions prefer shallow planting. For moisture, use a spray bottle or a bottom-watering method to avoid disturbing the seeds. Keep the mix consistently damp but not soggy.
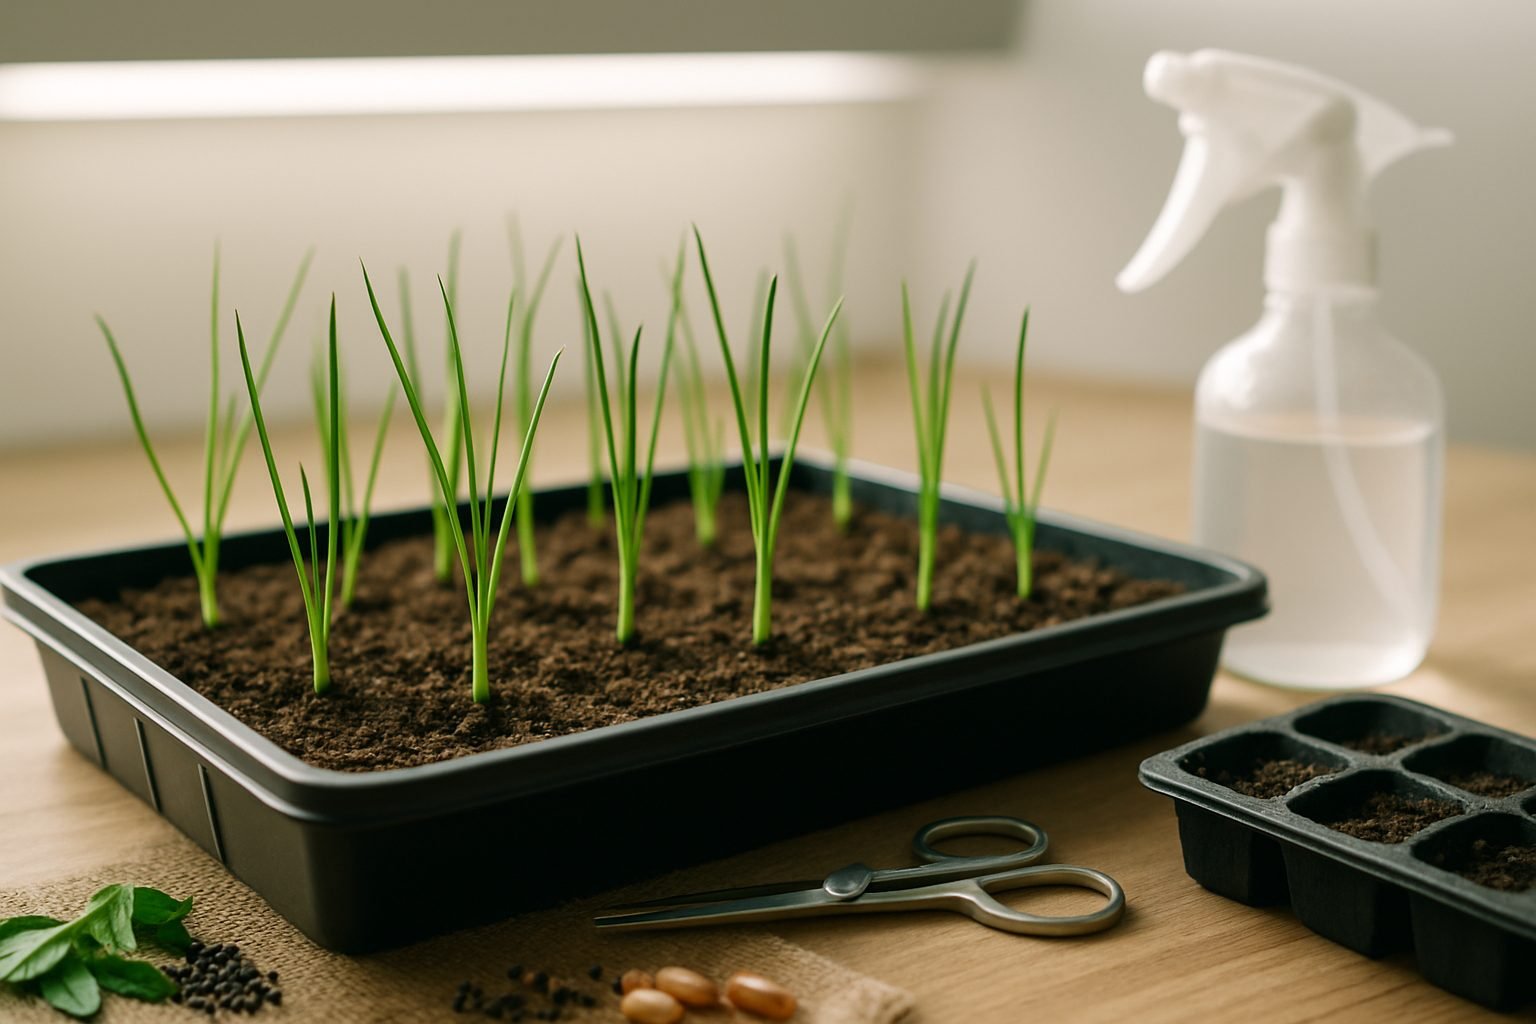
Place containers in a bright spot—under grow lights or near a south-facing window—to provide at least 12–14 hours of light daily, which helps prevent seedlings from becoming leggy. Maintain a room temperature of 65–70°F (18–21°C) during germination; onions germinate best in warmth but avoid overheating.
Once the seedlings reach a few inches tall, gently thin them to about ½–1 inch apart by snipping extras at the soil line. This minimizes root disturbance and gives remaining plants more room to grow robustly. To encourage strong growth, fertilize weekly with half-strength liquid fertilizer.
As seedlings grow taller, trim the tops gently with scissors to about 3 inches high to prevent tangling and promote sturdier stems. With regular watering, good airflow, and attentive lighting, you’ll create sturdy onion starts ready for transplanting when outdoor conditions warm up.
Transplanting and Direct Sowing in the Garden
Successfully starting your garden means knowing when to transplant seedlings and when to sow seeds directly in the soil.
Transplanting Seedlings
Begin by “hardening off” your indoor-grown seedlings about a week before planting them outdoors. Gradually expose them to outdoor conditions by setting them outside in partial shade for a few hours each day, slowly increasing the time and sun exposure. When nighttime temperatures stay above 50°F (10°C) and all risk of frost has passed, it’s time to transplant. Choose a cloudy day or late afternoon to reduce transplant shock.
Make holes large enough for each root ball and gently firm soil around each plant, watering thoroughly.
Direct Sowing
Reference your seed packets for timing—most cool-season crops like lettuce or peas can be sown before the last frost, while heat-lovers like beans or squash need warmer soil. Sow seeds in rows or clusters, keeping the recommended spacing to avoid overcrowding. This improves air flow and reduces disease risk.
Use a hand trowel or your finger to plant seeds at the correct depth, then cover lightly with soil and water gently but thoroughly to promote germination. Consistent moisture is key; aim for soil that stays damp but not soggy, using mulch to help retain water if needed.
Preparing Your Soil
Before planting anything, prepare your soil by removing weeds, breaking up clumps, and mixing in compost or aged manure to boost fertility. Test your garden bed for drainage, especially if you’re planting in a low-lying area—puddled water spells trouble for most vegetables.
For best results, position your garden where it will receive at least 6 to 8 hours of sun per day. If your soil is heavy clay or too sandy, mix in organic material to improve structure and hold moisture while preventing compaction.
Taking the time to lay this foundation supports strong roots and healthy growth, giving your plants the best chance for a productive season.
Caring for Onion Plants Throughout the Season
Caring for onion plants throughout the season doesn’t have to be complicated, but consistency is key for healthy, flavorful bulbs. Start by watering your onions regularly—about one inch per week works well, but check the soil moisture often, especially during dry spells. Onions have shallow roots, so an even, gentle soak is better than heavy, infrequent watering.
Mulching with straw or chopped leaves is a great way to keep soil moisture consistent, block weeds, and lower the risk of fungal diseases by keeping mud from splashing onto the leaves. Keep your onion beds weed-free, as weeds steal nutrients and can crowd your onions; a quick hand-weeding every week is usually enough. Just be gentle to avoid damaging the shallow roots.
Fertilize onions early in the season with a balanced or nitrogen-rich fertilizer to encourage leafy growth, but reduce feeding as bulbs start to swell to avoid soft or split bulbs.
Pest and Disease Management
Onions can be targets for pests like thrips, which cause silvery streaks or spots on leaves. Inspect plants regularly and dislodge minor infestations with a blast of water or use insecticidal soap if needed.
Prevent rot and fungal diseases (like downy mildew) by planting onions in well-draining soil, avoiding overhead watering, and ensuring good airflow between plants. Rotate crops each season and remove and destroy any diseased plants immediately to stop the spread.
Harvesting and Storage
As the season progresses, watch your onions for signs of maturity: the tops will begin to yellow and flop over, usually in mid to late summer. When most of the tops have fallen, that’s your cue to stop watering entirely—this encourages the bulbs to cure and develop papery skins, which are essential for long-term storage.
Avoid harvesting too early or watering at this stage, as excess moisture can lead to rot. With these simple but effective care steps, you’ll set your onions up for a hardy harvest and flavorful meals ahead.
Harvesting, Curing, and Storing Onions
Knowing when to harvest your onions is key to enjoying fresh, flavorful bulbs that will store well through the seasons. Onions are ready to pull when their tops start to yellow and flop over naturally—don’t rush this stage, as the bulbs need time to form their protective skins.
Once about half the crop’s tops have bent over, gently loosen the soil with a fork and pull the bulbs by hand, taking care not to bruise them. Shake off excess dirt, but avoid washing the onions, as moisture can lead to premature rot during curing.
Lay the freshly harvested bulbs out in a single layer, ideally on a screen or rack that allows good airflow, and keep them in a warm, dry, and well-ventilated area shaded from direct sunlight. A covered porch, open garage, or even a shed with screens can work well.
Allow onions to cure for two to three weeks—test readiness by checking that the outer skins are papery and the necks are fully dry and tight.
When it’s time to store, trim the roots and clip tops to about an inch or braid and hang them if you prefer a rustic look. Store cured onions in mesh bags, baskets, or crates that allow for ventilation and keep them in a cool, dry, and dark spot, ideally around 35–50°F.
Avoid storing onions near potatoes, as each crop gives off gases and moisture that can encourage sprouting or spoilage.
Check your stored onions regularly, promptly remove any that show signs of soft spots or sprouting, and use those first—healthy bulbs should last for several months. Remember, thick-necked or damaged onions should be eaten sooner rather than stored, as they’re more likely to spoil quickly.
With these steps, you’ll enjoy your homegrown onions well into the winter months.