Introduction to Kale & Why Grow It
If you’re looking to add a resilient, nutrient-dense vegetable to your garden this season, learning how to direct sow kale is a fantastic place to start. Kale, a hardy leafy green, has earned its spot as a garden essential thanks to its impressive nutrition—packed with vitamins A, C, and K, plus a healthy dose of fiber and antioxidants.
Its versatility in the kitchen is another bonus: enjoy it raw in salads, blended into smoothies, sautéed in stir-fries, or crisped up as homemade kale chips. Gardeners love direct sowing kale because it’s a low-maintenance, fast-growing crop that thrives in both spring and fall weather.
Unlike fussier vegetables, kale can withstand cool temperatures and even tastes sweeter after a light frost. Whether you’re a first-time gardener or a seasoned pro, growing kale from seed offers the reward of continuous harvests for weeks or even months.
Plus, the satisfaction of watching your own leafy greens go from seed to table is hard to beat. With a little know-how, you’ll find that direct sowing kale is not only simple but highly rewarding, giving you fresh and flavorful greens to enjoy all season long.
Choosing the Right Kale Variety
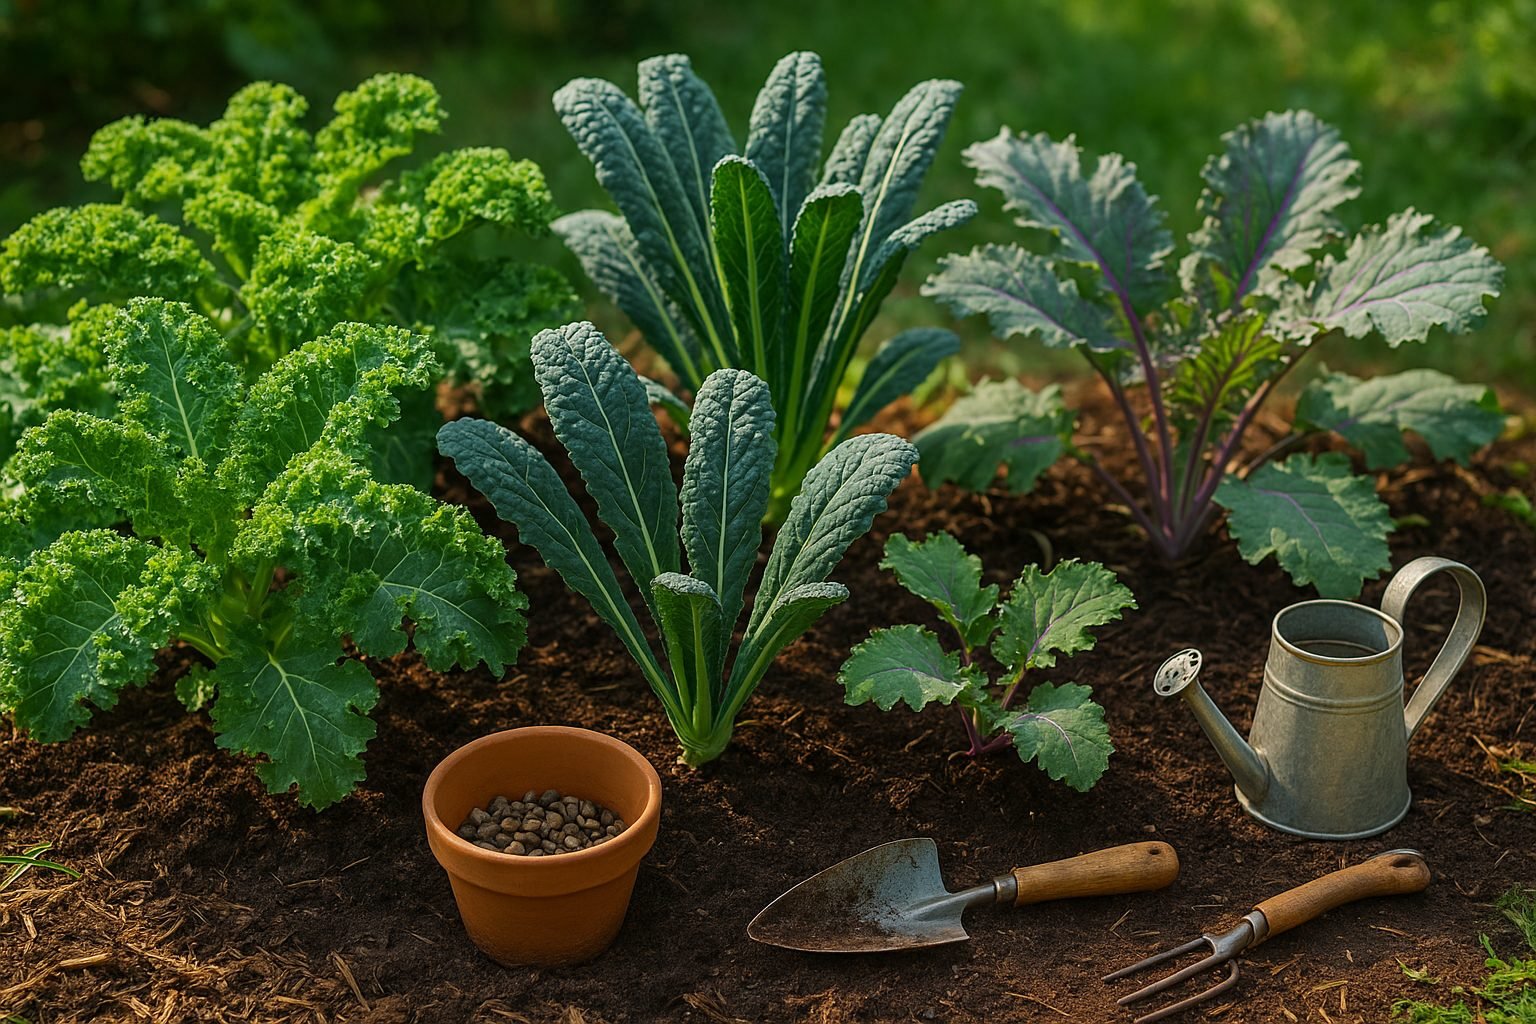
When it comes to growing kale, choosing the right variety can make all the difference in your garden’s success and your dining experience. The most widely grown types include curly kale, dinosaur kale (also known as Lacinato or Tuscan kale), and Red Russian kale.
Curly kale is probably what you picture when you think of kale—bright green, frilly leaves with a peppery, robust flavor. It’s hardy and does well in cooler climates, making it a strong choice for fall or early spring gardens.
Dinosaur kale features long, dark blue-green leaves with a pebbled texture and a slightly sweeter, more delicate taste, ideal for salads or sautéing. It tends to be more heat-tolerant than curly kale, so it’s great if you’re gardening in a warmer area.
Red Russian kale, with its flat, fringed leaves tinged with purple or red, is known for its tender texture and mild, almost sweet flavor, making it perfect for raw dishes.
For small spaces or container gardens, seek out compact varieties or baby kale mixes; dinosaur kale’s upright growth also adapts well to tighter beds.
When picking your variety, match your choice to your climate (curly for cold, dinosaur for heat), your cooking plans (tender for raw, robust for stews), and your space (upright or compact types for containers).
To set yourself up for success, purchase seeds or seedlings from established seed companies or local nurseries, as this ensures healthy, disease-free plants and good germination rates. Don’t be shy about asking staff for recommendations—they often know which varieties perform best in your region.
Taking a few minutes to pick the right kale can lead to months of delicious, homegrown greens perfectly suited to your tastes and garden.
Preparing for Planting
Timing is everything when it comes to planting, especially for cool-season crops like lettuce, spinach, and peas. Aim to sow seeds in early spring, a few weeks before the last expected frost, or again in late summer for a fall harvest. Cooler temperatures help these vegetables thrive and reduce pest challenges.
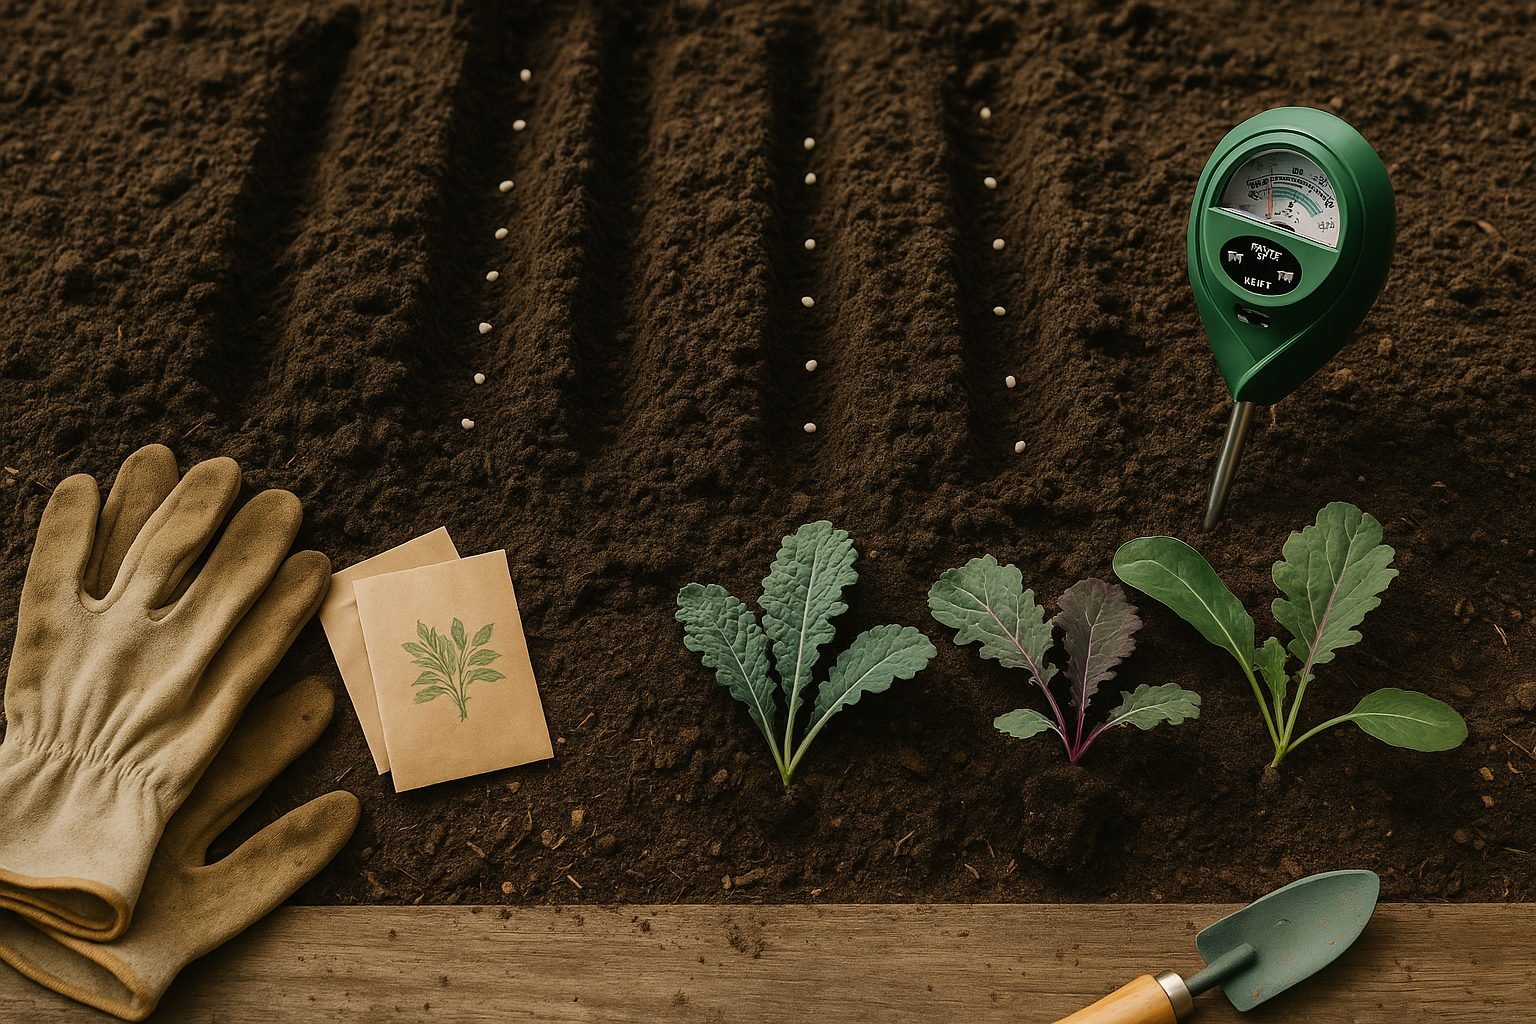
Choose a location that receives at least 6 hours of direct sunlight each day, as most vegetables need plenty of light to grow healthy and strong. Good drainage is just as vital—avoid low spots where water tends to pool after rain, which can lead to root rot.
Test your soil’s pH and aim for a range between 6.0 and 7.0, as most crops grow best in slightly acidic to neutral soils. Simple kits from garden centers can help you check this quickly.
Before planting, clear the area of weeds and debris, then loosen the top 8-12 inches of soil with a garden fork or tiller to encourage root growth. Mix in 2-3 inches of compost to boost organic matter, which improves both fertility and moisture retention.
For extra nourishment, use a balanced slow-release granular fertilizer according to the package instructions. If space or soil quality is a concern, consider raised beds or large containers filled with high-quality potting mix and compost. These offer better control over soil conditions and are perfect for patios or small yards.
By taking the time to plan your planting with these key factors in mind, you’ll give your garden the strongest possible start for a productive season.
Sowing, Transplanting, and Spacing
When it comes to growing healthy plants, choosing between direct sowing and starting seeds indoors is an important decision. Direct sowing means planting seeds straight into the garden soil, which generally works best for crops with robust seeds like beans, peas, and carrots. This method is simple and less labor-intensive and avoids transplant shock since seedlings never have to be moved. However, direct sowing can make young plants vulnerable to unpredictable weather, pests, or uneven germination, and some seeds may struggle to sprout in cool or heavy soils.
Starting seeds indoors lets you get a jump on the season, especially in colder climates, and gives delicate seeds—like tomatoes, peppers, or many flowers—a controlled environment to sprout. You’ll have more uniform germination and healthier young plants, but it does come with downsides: you’ll need time, space, and supplies (like trays and lights), and the process of moving seedlings can cause transplant shock if not done carefully.
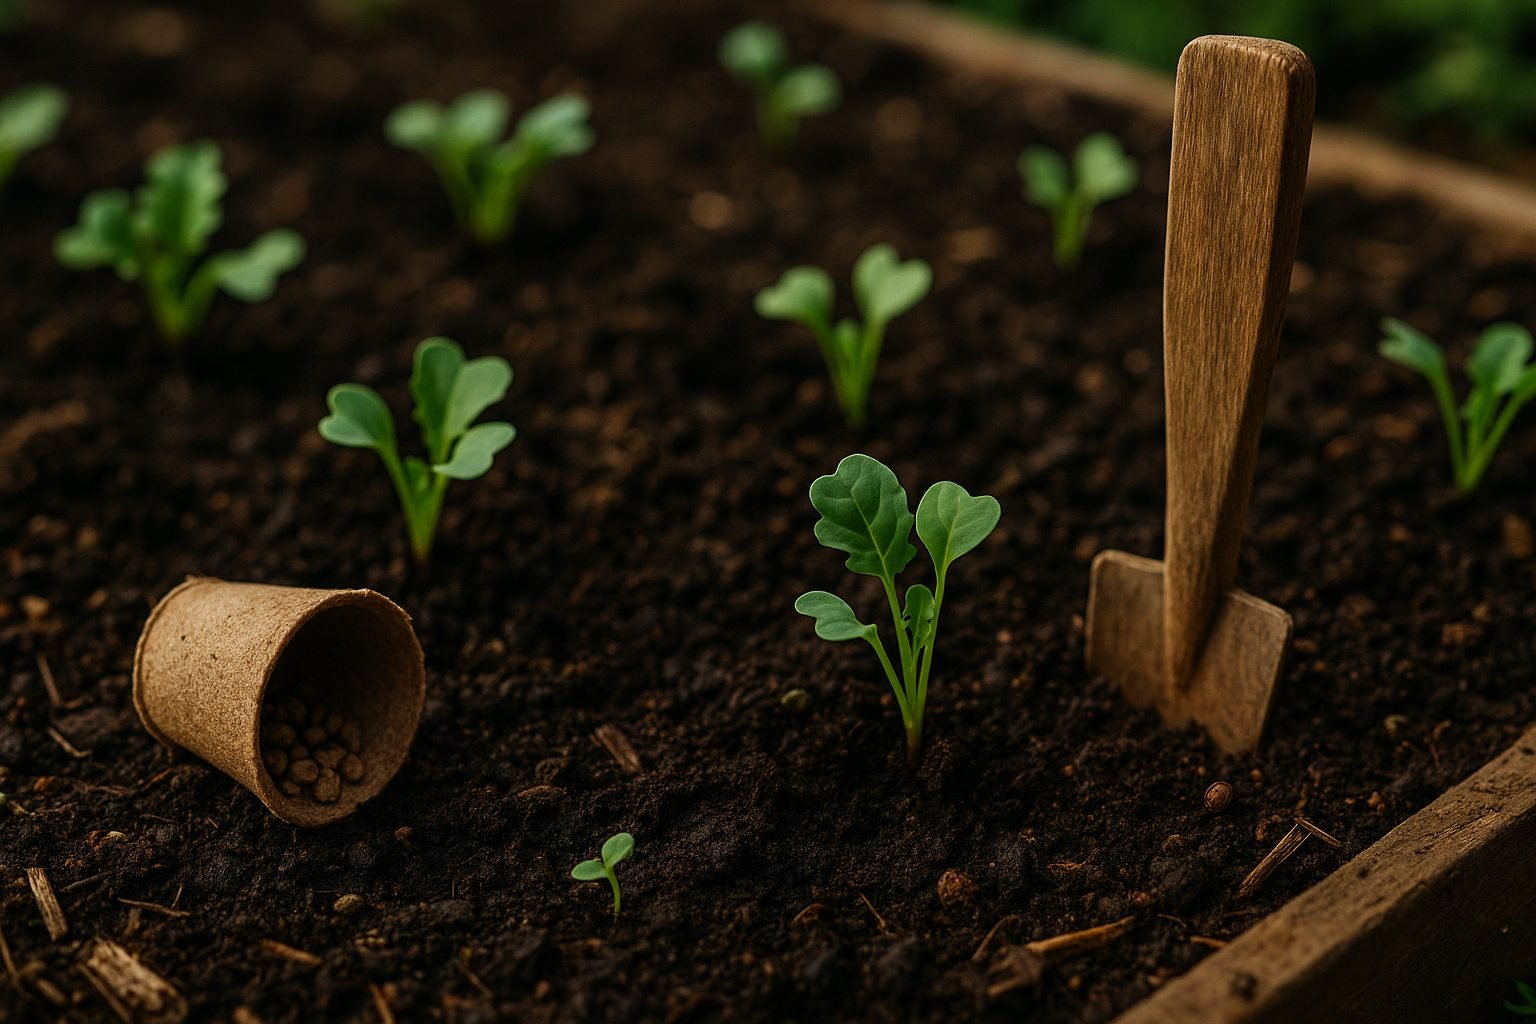
No matter your approach, proper sowing depth and spacing are key. Check your seed packet for depth instructions, but a general rule is to plant seeds at a depth about two to three times their diameter—shallow for tiny seeds, deeper for larger ones. Planting too deep can slow or prevent germination, while planting too shallow risks the seed drying out.
As seedlings grow, thinning them out—removing extra plants so the healthiest remain—ensures each plant has the space and nutrients it needs. For instance, carrots should be thinned to about two inches apart; leafy greens like lettuce often need six to eight inches between plants. Overcrowding leads to weak growth and makes plants prone to disease.
If you’ve started seeds indoors, transplanting successfully involves a few careful steps. First, “harden off” your seedlings by gradually exposing them to outdoor conditions for a week—start with a couple of hours in dappled shade and slowly increase sunlight and time outside. This prepares them for wind, sun, and temperature changes.
Handle seedlings by their leaves, not stems, as stems can bruise easily. When planting out, dig a hole large enough for the root ball and set each plant at the same depth as it grew indoors. Water well to settle the soil and aim to transplant in the late afternoon or on a cloudy day to reduce stress. With patience and attention to these details, your garden will get off to a vigorous, healthy start.
Ongoing Kale Care & Maintenance
Keeping your kale thriving throughout the season comes down to consistent care, starting with proper watering. Kale prefers soil that’s evenly moist but never soggy—aim to water deeply whenever the top inch of soil dries out, usually about once or twice a week depending on the weather. Early morning is best to prevent fungal diseases.
Mulching is a game-changer: apply a 2- to 3-inch layer of straw, shredded leaves, or grass clippings around your plants. This helps the soil retain moisture through hot days, suppresses weeds from sprouting, and even keeps soil temperatures stable, giving your kale a strong foundation.
For healthy, lush leaves, feed your kale with a balanced, slow-release fertilizer or a compost tea every 4-6 weeks. Go easy on high-nitrogen fertilizers, which might overstimulate leaf growth and lead to weaker plants.
If you’re working with container-grown kale, remember potted soil dries out faster and nutrients wash away quicker, so be diligent with both watering and feeding. Consider staking taller varieties to prevent wind damage.
Pest and Disease Management
Pests and diseases can creep in, but a few natural tricks can keep your harvest safe. To deter hungry birds, drape lightweight netting or mesh over your kale. Handpick any caterpillars you spot—especially cabbage worms—or introduce beneficial insects like ladybugs.
Regularly check the undersides of leaves for clusters of eggs or tiny larvae. For a gentle homemade spray, mix water with a drop of dish soap or neem oil and apply it to affected leaves to disrupt pest life cycles.
Disease prevention starts with good air circulation: space your plants well and avoid wetting the foliage when watering. Rotate where you plant kale each year to prevent soil-borne problems, and promptly remove and discard any yellowing or damaged leaves to limit the spread of disease. Don’t compost leaves with signs of rot or heavy pest damage.
With a little attention and these proactive steps, you’ll keep your kale healthy, productive, and ready for the kitchen table no matter where you’re growing it.
Harvesting Kale for Best Flavor
Harvesting kale at the right moment makes all the difference in flavor and texture. For the sweetest, most tender leaves, start picking once the leaves reach about the size of your hand—usually 6 to 8 inches long—and before they get tough or develop yellow spots.
Young, baby kale leaves are perfect for salads and are ready as soon as they’re big enough to snip, usually about 25–30 days after planting. For mature leaves, harvest when they’re firm and richly colored, ideally before the heat of summer, which can make them bitter.
When it comes to harvesting methods, the “cut-and-come-again” approach is a gardener’s favorite: using clean garden scissors, snip outer leaves from the bottom of the plant, leaving the center intact so kale keeps producing new leaves for weeks.
If you want to clear the bed or the plant is nearing the end of its season (especially after a light frost, which actually improves the flavor), you can pull up the entire plant and harvest all the leaves at once.
After picking, wash your kale and let it dry thoroughly before storing it in a loosely sealed bag with a paper towel in the refrigerator—this keeps it fresh and crisp for up to a week. If you’re overloaded with kale, blanch and freeze it for smoothies or soups later on.
In the kitchen, try tossing fresh young leaves into salads, sautéing larger leaves with garlic and olive oil, or baking them for easy homemade kale chips. With a little care in harvesting and storage, you’ll enjoy garden-fresh kale from your own backyard for months.
Common Problems & How to Fix Them
Growing kale can be incredibly rewarding, but it’s normal to run into a few problems along the way. Pests like aphids, cabbage worms, and flea beetles are common culprits. Check the undersides of leaves for clusters of tiny bugs or small holes, and use a strong spray of water or pick them off by hand. Floating row covers also work wonders to keep both insects and birds at bay.
If leaves start turning yellow, overwatering or nutrient deficiencies could be to blame. Let the soil dry out between waterings and top-dress with compost or an organic fertilizer to give your plants a nutrient boost.
Stunted growth often points to poor soil or overcrowding. Thin seedlings to allow space for air and sunlight, and make sure the bed is enriched with compost before planting.
Diseases like downy mildew and black rot thrive in damp conditions, so water at the base of plants in the morning and remove any infected foliage right away.
Bolting, or premature flowering, usually happens when kale is exposed to sudden heat. To prevent this, try planting kale early in the spring or late summer, and use mulch to keep the soil cooler.
For all-around plant health, rotate crops every year and keep your garden free of weeds, which can harbor pests and disease. By staying observant and using these natural remedies, you’ll keep your kale healthy and thriving throughout the growing season.