Introduction
bell pepper growth stages are a crucial concept for anyone hoping to enjoy crisp, colorful peppers straight from their garden. Bell peppers have exploded in popularity among home gardeners, prized for their versatility in the kitchen and vibrant appearance. But growing these flavorful crops isn’t just about planting seeds and waiting. Understanding each phase—starting from seed germination, through seedling development, flowering, and finally fruit maturation—can mean the difference between a disappointing yield and a bountiful harvest.
Each stage of growth has its own unique requirements, from watering routines to sunlight needs, and even the timing for fertilization. In this article, we’ll walk you through all the main stages of bell pepper growth so you know exactly what to expect and how to give your plants the best care possible every step of the way. Let’s get started on the journey from tiny seeds to delicious peppers!
Seed Starting and Germination
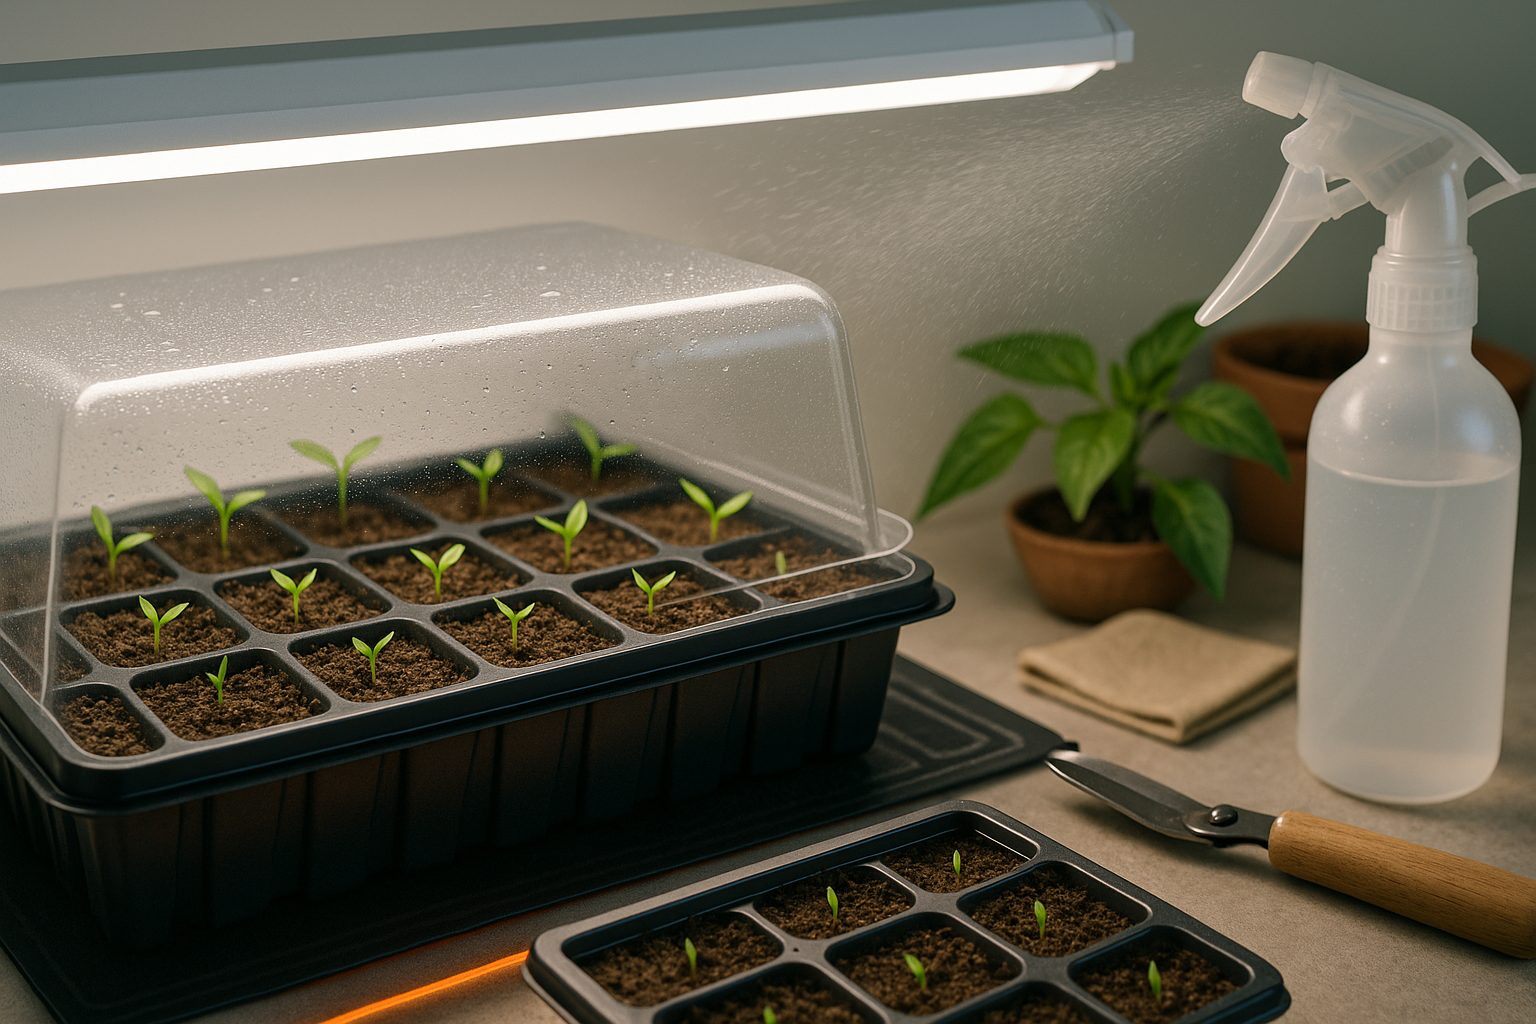
Starting bell peppers from seed is a rewarding way to grow healthy, productive plants, but timing and conditions are key. Begin seeds indoors 8-10 weeks before your area’s last expected frost date, as peppers take time to mature.
Use a quality seed-starting mix in trays or small pots, filling them about three-fourths full. Plant seeds about 1/4 inch deep and gently water them to settle the soil. Bell pepper seeds need warm soil—ideally between 75-85°F (24-29°C)—and steady moisture to germinate. If your house is cool, consider using a heat mat beneath your trays.
Keep the soil damp but not soggy by misting regularly and covering trays with a humidity dome or plastic wrap until seeds sprout. Germination typically takes 7-14 days.
Light is crucial; once seedlings emerge, move them under grow lights or place them near a sunny window for at least 14-16 hours a day. Rotate trays daily to ensure even growth.
To encourage strong roots, avoid overwatering and let the top of the soil dry slightly between waterings. For healthy seedlings, thin out the weakest sprouts. When plants develop their first true leaves, feed them with a diluted, balanced fertilizer.
Finally, acclimate young plants gradually to outdoor conditions before transplanting.
Seedling and Early Growth Stage
In the first four weeks, healthy seedlings should appear sturdy with bright green, unblemished leaves and strong, upright stems. They typically show two to four true leaves after the initial cotyledons, signaling active growth. Each seedling should look compact—not tall or spindly—which indicates it’s getting enough light and airflow.
To encourage robust early growth, water seedlings consistently with just enough moisture to keep the soil damp but never soggy; overwatering can quickly lead to root rot. Boost airflow by running a small fan nearby, which helps prevent fungal problems and encourages stems to strengthen—mimicking gentle outdoor breezes.
Lighting is crucial: if you’re growing indoors, keep grow lights just a few inches above the seedlings, adjusting them upward as they grow, aiming for 14–16 hours of light per day. To prevent seedlings from stretching, avoid positioning light sources too far away.
For bushier growth, gently pinch off the very tips of the tallest seedlings once they have at least three sets of true leaves—this encourages side shoots and creates a more compact plant.
When it’s time to transplant, start the hardening off process about a week in advance by placing seedlings outdoors for a few hours each day, gradually increasing the time and exposure. This helps them adapt to sunlight, wind, and changing temperatures.
During transplanting, handle seedlings gently by their leaves (not stems), plant them at roughly the same depth, and water them well. This careful approach minimizes transplant shock and sets your seedlings up for strong, continued growth.
Vegetative and Maturation Stage
During the vegetative stage, which typically spans weeks 4 to 8, plants prioritize rapid growth, channeling energy into developing sturdy stems, lush leaves, and a healthy root system. This phase sets the foundation for later flowering and fruiting, so it’s vital to ensure the soil is rich in organic matter and well-draining—amending with compost or aged manure can boost nutrients essential for growth.
Fertilization should focus on nitrogen, as it fuels leafy development; a balanced fertilizer labeled for vegetative growth can be used every couple of weeks, but take care not to overfeed, as this may stress your plants. Whether you’re growing in a container or garden bed, make sure each plant has adequate space—crowding can limit airflow and stunt development, so follow spacing recommendations on seed packets or plant tags.
Weed control is also crucial; weeds compete for sunlight and nutrients, so regularly hand-pull or use mulch to suppress their growth without resorting to harsh chemicals. Be vigilant for early pests like aphids or spider mites—yellowing leaves or sticky residue can be warning signs. Natural solutions, such as releasing ladybugs or using insecticidal soap, are effective and eco-friendly.
Also, watch out for fungal issues, especially in humid climates; watering at the base of plants and providing good airflow help prevent disease. By staying proactive with soil health, pest management, and proper care, your garden will be well-positioned for robust growth as it enters the maturation phase.
Flowering and Pollination
Flowering is a crucial stage for any fruiting plant, typically triggered by a mix of environmental factors like daylight length, temperature, and humidity. Most plants flower when days get longer and temperatures warm up—think of garden tomatoes bursting into bloom as summer arrives. However, some plants may need specific cues, such as cool nights or increased watering, to kickstart flowering.
For successful pollination, natural agents—such as bees, butterflies, or even gentle breezes—transfer pollen from one flower to another. In gardens or greenhouses with fewer pollinators, hand pollination can dramatically improve fruit set. Using a soft paintbrush or cotton swab, you can mimic bees by gently collecting pollen from one flower and dabbing it onto the stigma of another. This technique is especially helpful for plants like squash or peppers, which often don’t receive enough attention from insects indoors.
Flower drop—when blossoms fall off before fruits develop—is a common frustration. It often results from stressors like extreme heat, erratic watering, or poor nutrition. To support healthy fruit set, maintain steady moisture levels in the soil, feed your plants with a balanced fertilizer, and ensure good airflow around the flowers. Mulching can help regulate soil temperature and retain moisture.
If you’re still seeing lots of flowers but few fruits, try hand pollinating during the coolest part of the day when flowers are open and receptive. Strong, consistent plant care combined with a little pollination know-how can make all the difference in enjoying a plentiful harvest.
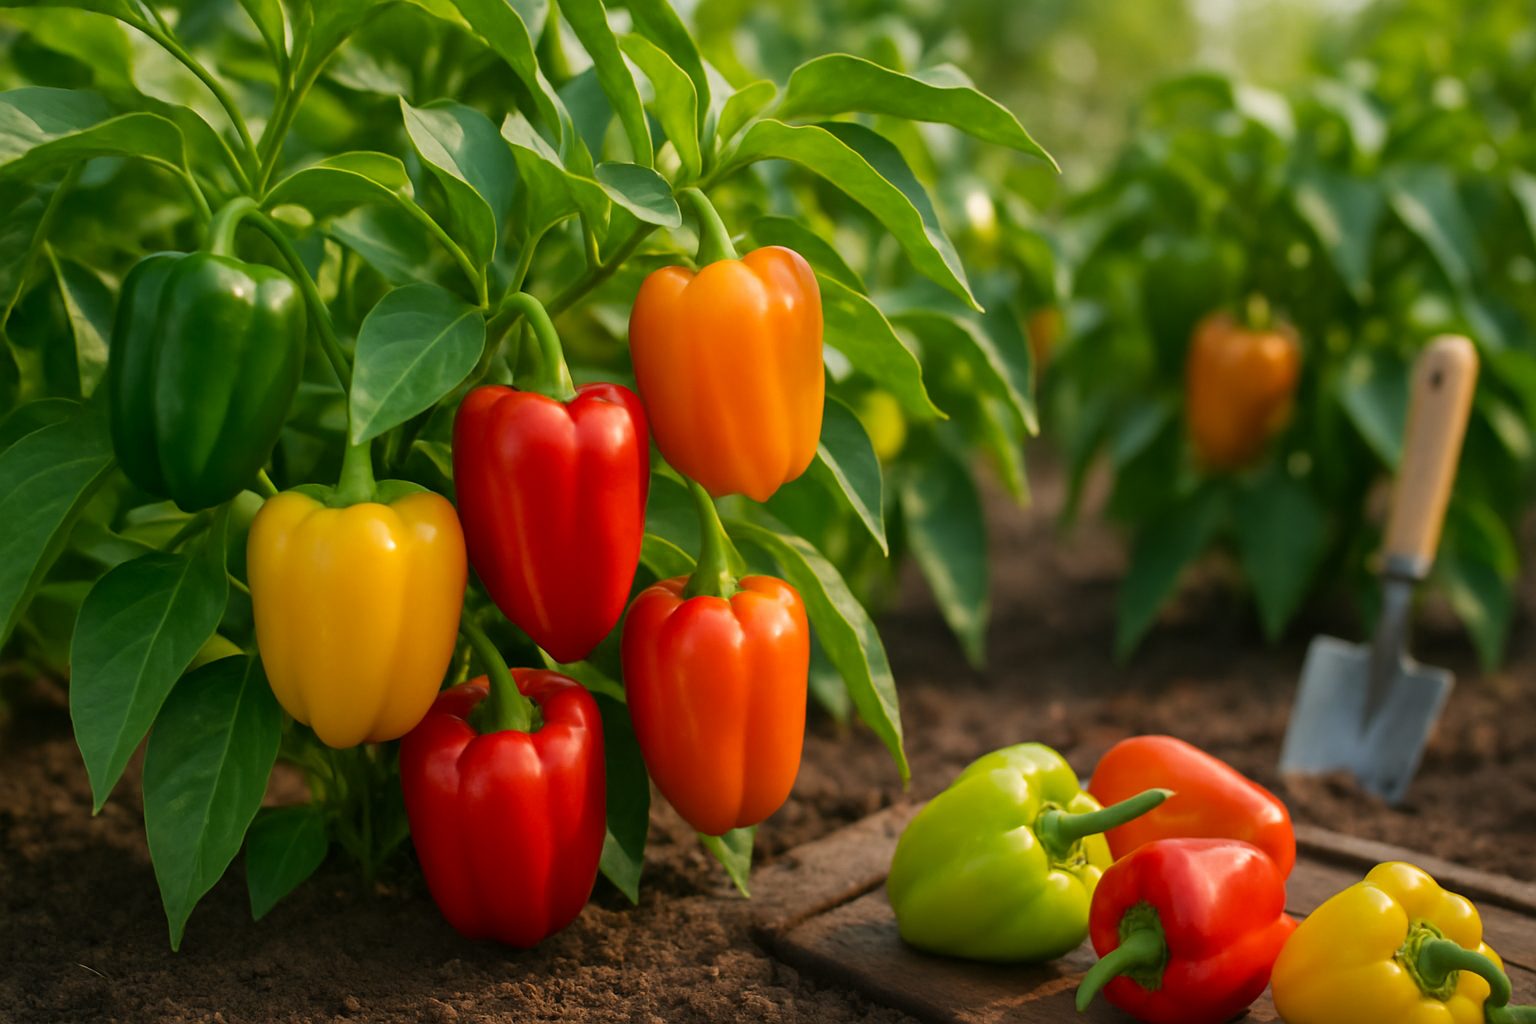
Fruiting and Ripening Stage
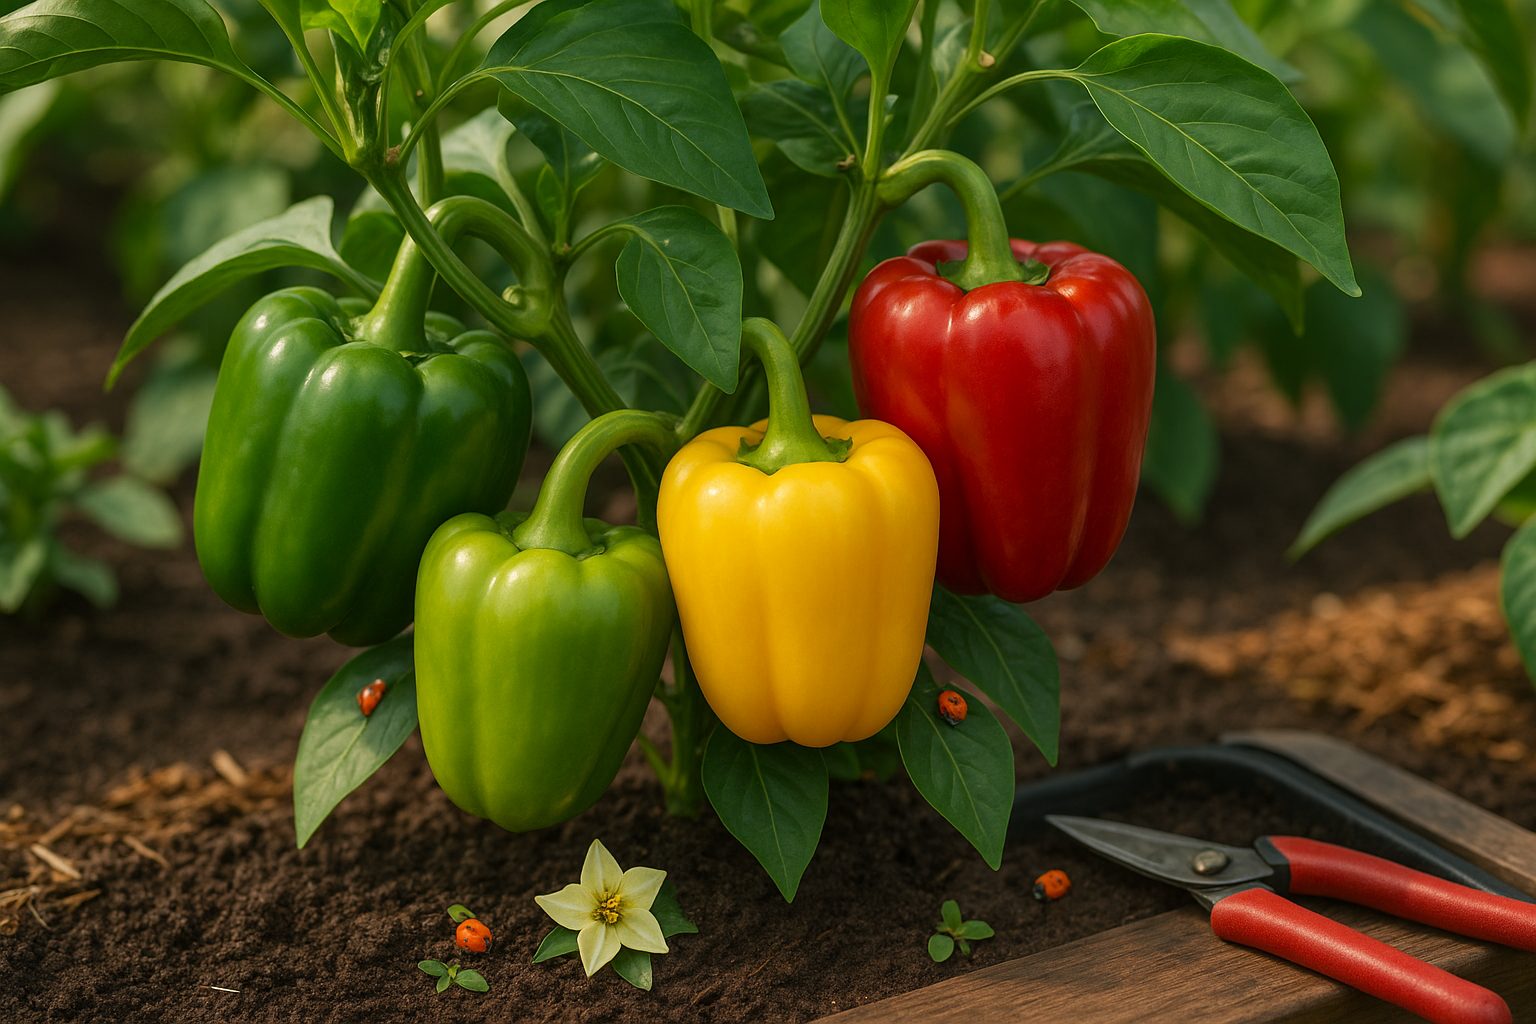
Once your pepper plants have moved past the flowering stage, you’ll notice small, green fruits forming where the blossoms once were—a sign that the fruiting and ripening process has begun. At this critical stage, it’s important to maintain consistent soil moisture, as irregular watering can lead to issues like blossom end rot or cracked peppers.
Aim for deep, even watering about once or twice per week, depending on weather conditions, to keep the soil damp but not soggy. Fertilizer needs change, too; switch to a product lower in nitrogen and higher in phosphorus and potassium to encourage robust fruit development rather than leafy growth.
During fruiting, peppers can attract pests like aphids, spider mites, or caterpillars. Check the undersides of leaves regularly and remove any pests by hand, or spray with insecticidal soap if needed—avoid harsh chemicals to prevent residue on developing fruit.
As peppers ripen, they undergo visible changes in color, shifting from green to vibrant shades of red, orange, yellow, or even purple, depending on the variety. This ripening process is more than cosmetic: fully ripe peppers are usually sweeter, more flavorful, and pack more nutrition.
For the best taste, let peppers reach their final color on the plant before harvesting, but don’t wait too long, as overripe fruits can become soft or attract pests. By monitoring water, feeding appropriately, and keeping an eye on pests, you’ll help ensure a healthy crop of delicious, colorful peppers ready for harvest.
Harvesting and Troubleshooting Common Issues
Knowing when to harvest your plants can make all the difference in flavor and yield. For most fruits and vegetables, maturity is signaled by changes in color, firmness, and aroma—tomatoes deepen to a rich red, melons give slightly at the stem, and peppers reach full size and vibrancy. Always use clean, sharp scissors or pruning shears to avoid damaging the plant, and harvest in the early morning when produce is crisp and cool.
Despite your best efforts, you might encounter issues like poor fruit set, stunted or small fruits, pest infestations, or plant diseases.
Common Problems and Solutions
- Poor fruit set: Often caused by improper pollination. Try planting flowers nearby to attract beneficial pollinators or gently shake blossoms to encourage pollen movement.
- Small fruits: Can signal nutrient deficiencies. Regularly amend soil with compost and ensure even watering to prevent stress.
- Pest infestations: Keep pests like aphids and caterpillars at bay by handpicking or using neem oil.
- Plant diseases: Rotate crops yearly to disrupt the life cycle of soil-borne diseases.
Quick responses to discolored leaves, wilting, or mold—such as improving airflow or removing affected plants—can prevent bigger outbreaks. Remember, a proactive approach with regular monitoring and maintenance will help ensure a healthy, bountiful harvest season after season.
Conclusion & Final Tips
Understanding the growth stages of bell peppers helps you time your care for the best results—from sprouting seeds to enjoying crisp, colorful fruits. Knowing when to start seeds, when to transplant, and how to support flowers and fruiting gives your plants the best shot at thriving.
Remember to keep the soil consistently moist but not soggy, provide plenty of sunlight, and feed with a balanced fertilizer as buds form. Pinch off the first few flowers if you want bigger fruit later on, and watch carefully for pests.
Every garden is a bit different, so don’t be afraid to try new techniques or adjust your routine—keep notes on what works. The more you observe and tune into your pepper plants, the better your harvest will be. Patience and consistency are your biggest allies for sweet success!