Introduction to Growing Arugula
Baby arugula growing has quickly become a favorite hobby for home gardeners and kitchen enthusiasts alike, thanks to this leafy green’s peppery flavor and its reputation as a nutrient powerhouse. Just a few years ago, you might have only found arugula as an exotic topping in upscale restaurants, but today it’s showing up in home gardens and apartment window boxes everywhere.
Why the surge in popularity? For starters, arugula is astonishingly easy to grow—requiring little more than a pot of good soil, some sunlight, and regular watering. Even those with limited space or minimal gardening experience can enjoy a steady crop of tender baby leaves within a few weeks. Its adaptability makes it perfect for raised beds, containers, or even simple window sills.
Plus, baby arugula matures quickly, letting you snip fresh greens for salads, sandwiches, or homemade pesto in record time. In this article, we’ll cover everything you need to know to start baby arugula growing at home, from soil preparation and ideal conditions to harvesting tips and clever kitchen uses. We’ll explore how homegrown arugula not only saves you money but also provides fresher, safer, and more flavorful greens than store-bought options.
With just a little guidance, you’ll soon experience the satisfaction—and taste—of picking your own vibrant arugula right outside your door.
Choosing the Best Arugula Varieties
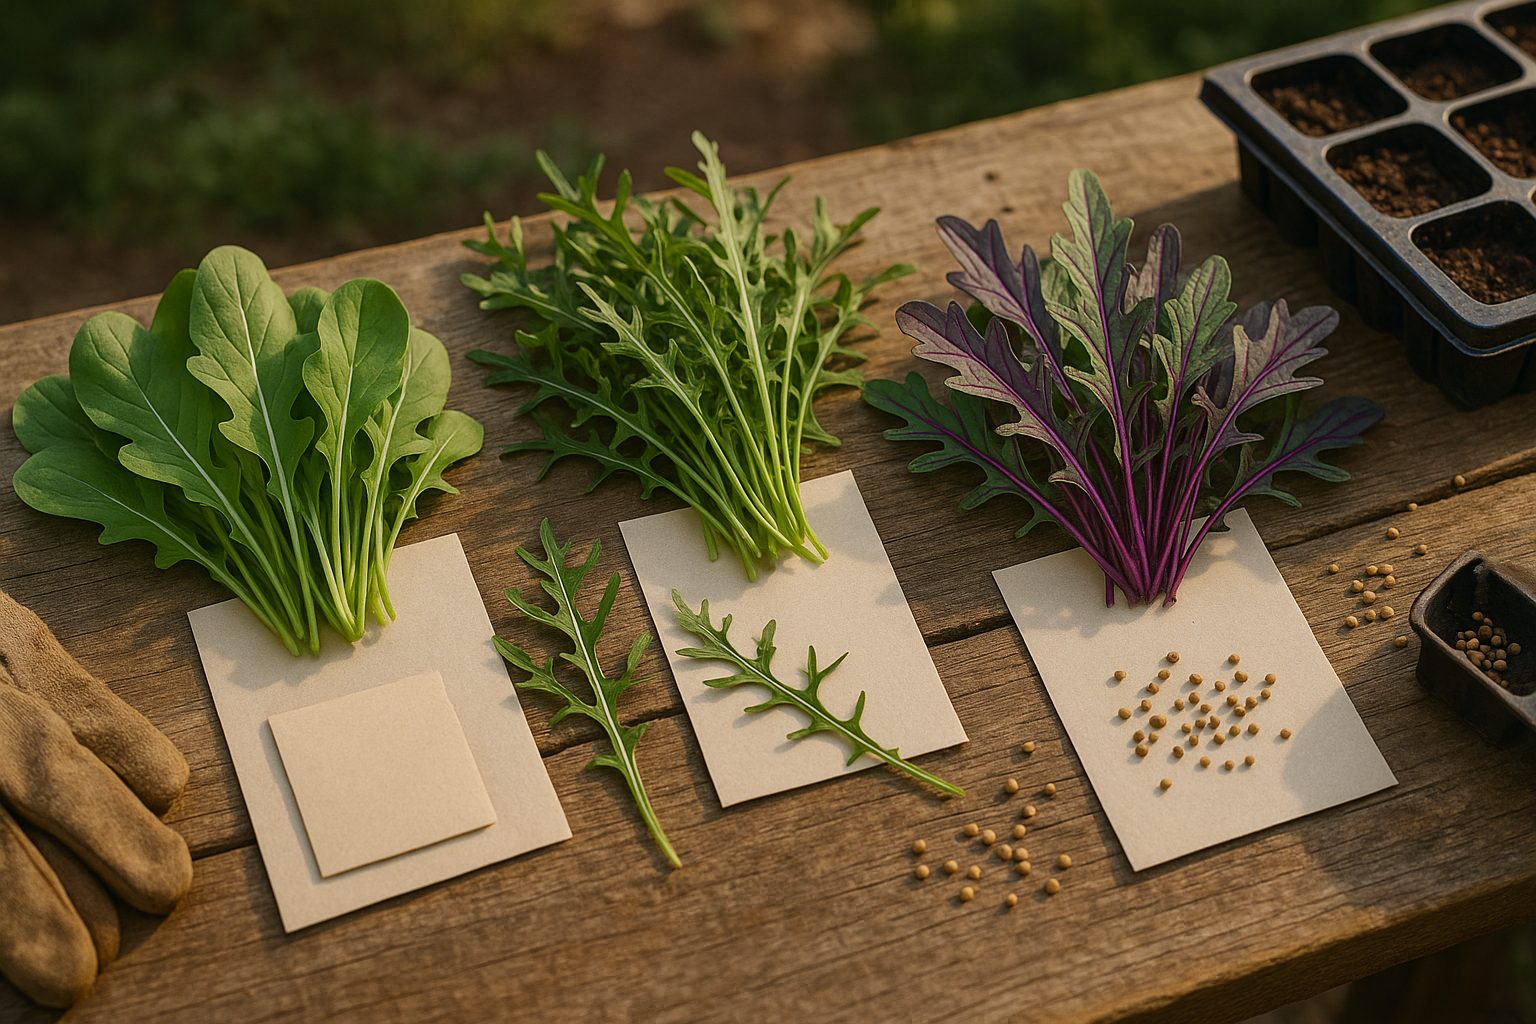
When selecting arugula varieties, it helps to know that flavor and growth traits can vary widely, making it easy to find one that fits your garden and palate. Classic salad arugula—sometimes called “Rocket” or “Roquette”—is known for its peppery, slightly nutty bite and rapid growth, maturing in as little as 20 days.
Wild arugula (Diplotaxis species) is a spicier, more intense option with lacy or deeply lobed leaves and a slower, more heat-tolerant growth habit. It’s perfect if you love strong flavors or plan to harvest during warmer months when regular arugula tends to bolt.
For a milder taste, “Astro” is popular with home gardeners and chefs alike thanks to its broad, tender leaves and gentle pepperiness—ideal for those who prefer a subtler green in mixed salads.
If you’re short on time or space, or curious about microgreens, arugula microgreens can be grown year-round on a sunny windowsill. Just sprinkle seeds thickly in a shallow tray and harvest within 7–10 days for an extra kick in sandwiches, wraps, or garnishes.
Specialty varieties like “Wasabi,” with its horseradish-like punch, or “Dragon’s Tongue,” which boasts beautiful purple-veined leaves, bring excitement both in taste and appearance.
When choosing your seeds, consider your climate and intended use:
- Heat-tolerant wild varieties work best for summer gardens.
- Quick-growing rocket types suit spring and fall plantings.
- For cut-and-come-again harvesting, select varieties bred for regrowth, such as “Runway.”
- If your main goal is garnish and color, add red-stemmed or patterned arugulas for a visual pop.
Mixing several types in your garden not only widens your flavor options but also helps ensure a steady harvest throughout the season, no matter the weather or appetite.
Planting Arugula: When and Where to Start
To get the best results when planting arugula, timing and location matter. In cool or mild climates, sow arugula seeds outdoors in early spring as soon as the soil is workable. You can do a second planting in late summer for a fall harvest. Gardeners in warmer climates should wait until fall or even winter, since arugula tends to bolt quickly in hot weather.
If you want fresh arugula year-round or live in a region with unpredictable weather, try starting seeds indoors anytime using trays or small pots placed near a sunny window or under grow lights.
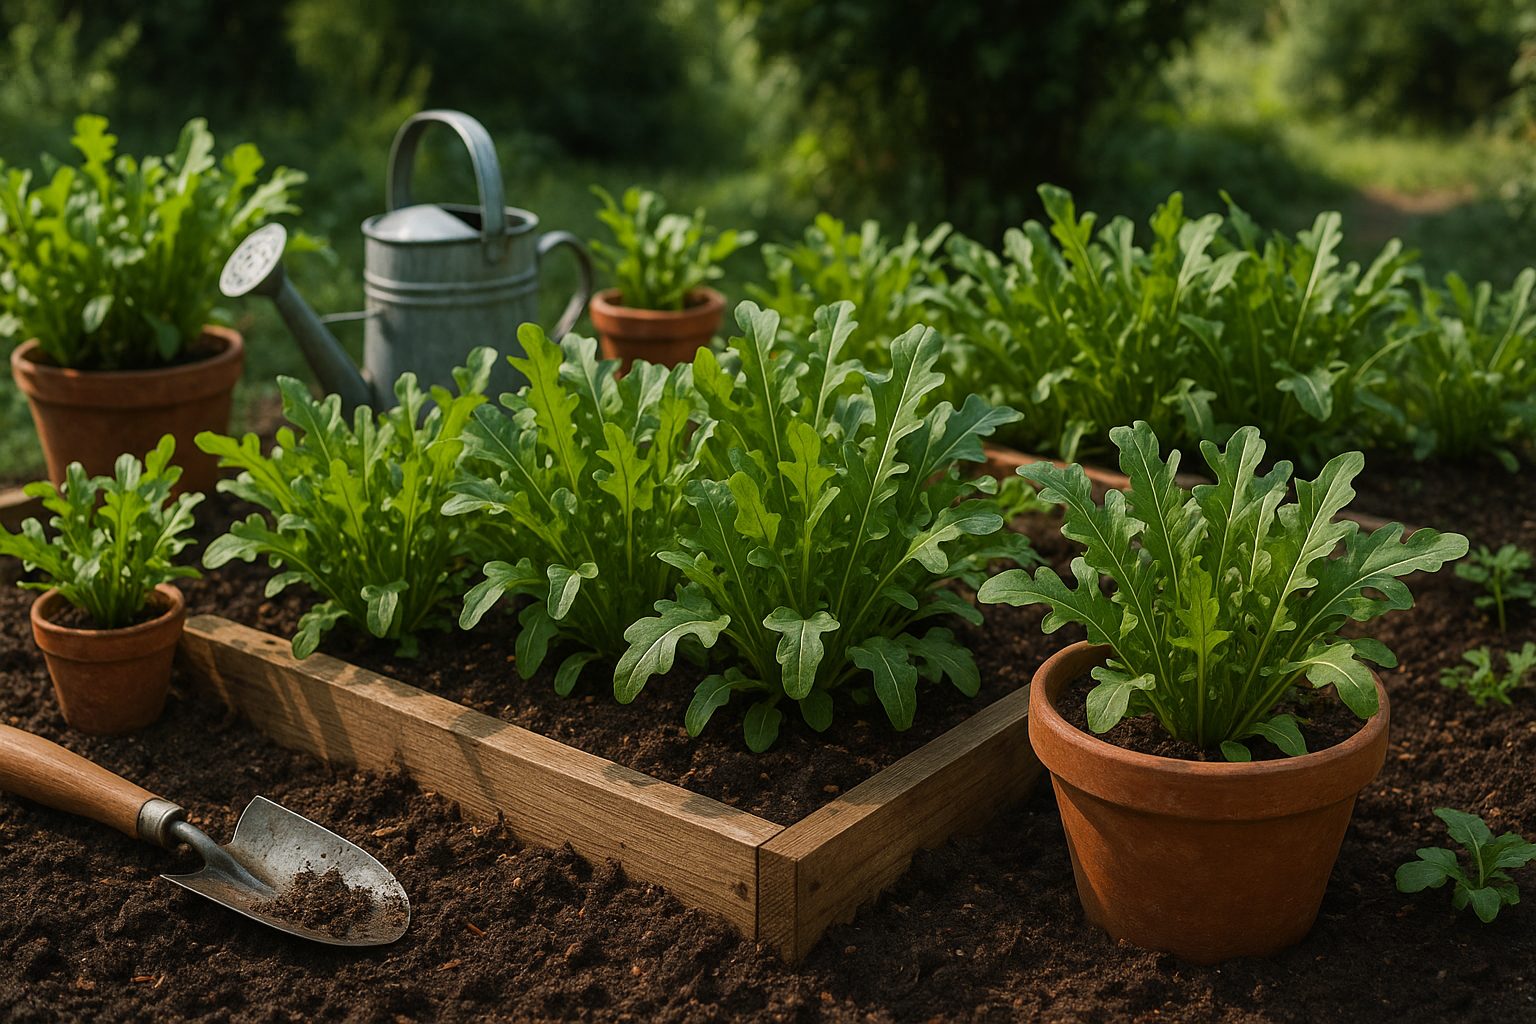
As for location, arugula grows well in traditional garden beds, raised beds, and even containers—just make sure your containers are at least 6 inches deep and have drainage holes.
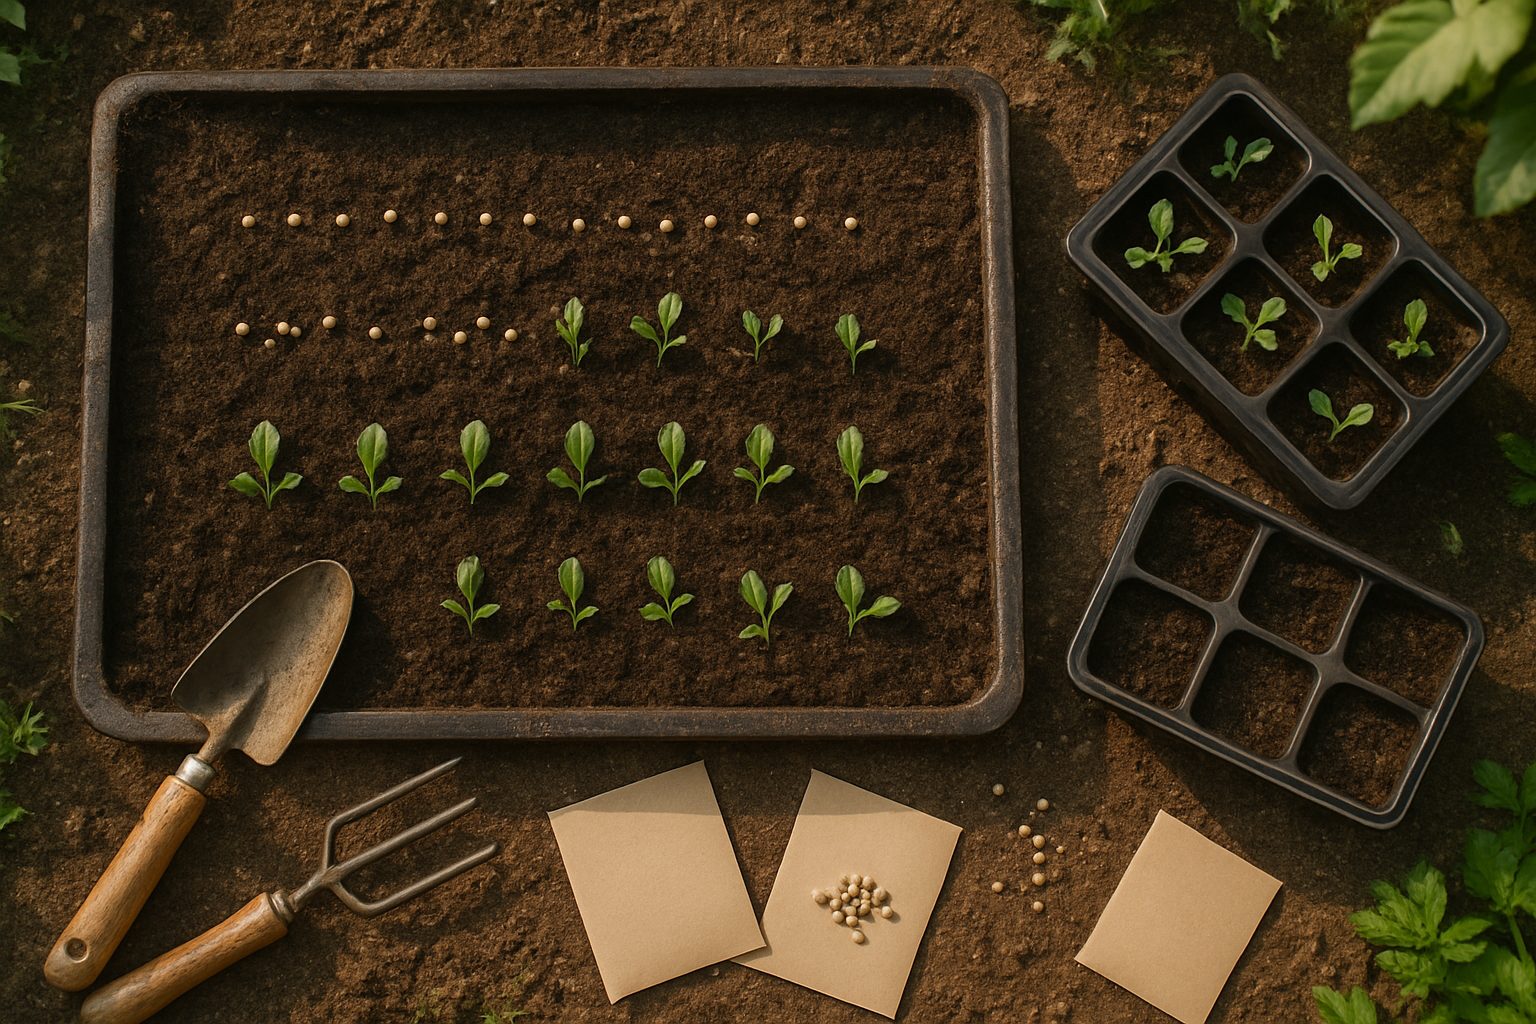
Before planting, prepare loose, well-drained soil rich in compost or organic matter, and rake it smooth. Sow seeds about ¼ inch deep and 1 inch apart, thinning seedlings to 4 inches apart for leafy, full plants.
Arugula loves bright, direct sunlight but tolerates partial shade—especially helpful during hotter months to prevent premature flowering. Regular watering is key; keep the soil consistently moist, but not soggy, to encourage tender, flavorful leaves.
For easy harvesting and a steady supply, try succession planting by sowing a few seeds every couple of weeks. Whether in a backyard bed or a sunny kitchen windowsill, with just a little attention to timing and location, you’ll enjoy fresh, peppery greens in no time.
Soil, Water, and Light: Meeting Arugula’s Needs
For arugula to thrive, start with loose, well-drained soil rich in organic matter, ideally with a pH between 6.0 and 7.0. Mixing compost or aged manure into your garden bed boosts nutrients and encourages healthy root growth, which is important for the fast pace at which arugula grows.
Pay attention to drainage—roots rot quickly in soggy conditions. If your soil is dense or heavy clay, consider raised beds or adding sand for better aeration.
Watering arugula requires balance; aim to keep the soil consistently moist but never waterlogged. Give your plants about one inch of water each week, adjusting based on rainfall and temperatures. A simple way to check is to poke your finger into the soil—if it feels dry an inch down, it’s time to water.
Wilting leaves or yellowing are often signs of improper watering—too little causes limp, dry leaves, while too much promotes root rot and stunted growth. Regular, even watering using a watering can or drip hose is more effective than heavy, infrequent soaking.
As for lighting, arugula prefers full sun but tolerates partial shade, especially during sizzling summer afternoons when a bit of shade prevents leaves from turning bitter. If you’re growing arugula indoors, place containers near a bright south-facing window or use LED grow lights set about 6 inches above the plants.
Run the lights for 12-14 hours a day to mimic natural sunlight; some models even have timers to help automate this process. Whether outdoors or inside, providing the right mix of rich soil, steady moisture, and plenty of light gives your arugula the best chance for a crisp, flavorful harvest.
Tips for Healthy Growth and Troubleshooting
Growing healthy, flavorful arugula starts with recognizing the most common issues gardeners face, such as flea beetles, aphids, and fungal leaf spots. Flea beetles leave tiny holes in the leaves, while aphids cluster along stems and undersides, weakening the plants.
Combat these pests naturally by spraying a diluted soap solution or introducing ladybugs, which feast on aphids. Row covers can also keep beetles at bay, especially during the young seedling stages.
For fungal diseases, avoid overhead watering and improve airflow by thinning seedlings to about four inches apart—this also helps leaves grow larger and prevents overcrowding.
Leaf bitterness, another frequent concern, is often caused by heat stress or plants bolting (flowering) too soon. To keep arugula tender and less bitter, succession plant every two to three weeks in spring and fall, ensuring a continuous harvest of young leaves.
Mulch around plants to retain cool soil moisture and provide shade during hot spells using shade cloth or taller garden companions like tomatoes. Regularly harvest outer leaves so the plant puts its energy into new, mild-tasting growth.
Finally, water consistently, as dry soil can signal plants to bolt and develop tough, bitter foliage. With these organic tips and attentive care, you’ll enjoy crisp, peppery arugula all season long.
Harvesting and Storing Arugula
To get the best taste and texture from your arugula, try the cut-and-come-again harvesting method. Use clean scissors to snip the outer leaves about an inch above the soil once they reach 3–4 inches long, leaving the center of the plant intact. This encourages fresh growth and can keep your arugula producing for weeks.
For a continuous harvest, pick only what you need every few days. Frequent, light harvesting helps leaves stay tender and sweet, while letting them grow too large can make them tough and bitter.
After harvesting, gently rinse the leaves under cool water and spin or pat them dry. To keep arugula as fresh as possible, store the clean, dry leaves in a breathable produce bag or wrap them loosely in a paper towel inside an airtight container. They should last up to a week in the fridge.
If you want to save seeds for next season, let a few plants bolt and flower, then allow the seed pods to dry on the stem. When the pods turn brown and brittle, collect and crack them open to retrieve the seeds. Store the seeds in a cool, dry place for future planting. This way, you’ll enjoy homegrown arugula for years to come.
Culinary Uses and Health Benefits
Arugula is more than just a peppery addition to salads—it’s a nutritional powerhouse packed with vitamins A, C, and K, along with folate, calcium, and antioxidants. These nutrients support bone health, boost immunity, and help reduce inflammation. Its high fiber content aids digestion, while being low in calories, making it a smart choice for weight management.
You don’t have to be a gourmet chef to enjoy arugula’s flavors or its health perks. Toss a generous handful into salads for a spicy bite, blend it into homemade pesto for a zesty twist, or quickly wilt it in soups, pastas, and pizzas for an instant nutrient boost. For an easy weekday lunch, try layering arugula on sandwiches or mixing it with grains like quinoa or farro.
The best part? Arugula thrives in pots or small garden patches, and harvesting your own means fresher, more flavorful greens, plus the guarantee that you’re getting the most nutritional value possible. Even if you have limited space, a sunny windowsill is enough to grow arugula year-round. This way, you’ll always have crisp, vitamin-rich greens on hand—perfect for making simple, healthy meals in minutes.