When to Plant Arugula

Learning how to grow arugula is one of the simplest (and most satisfying) ways to kick off your home gardening journey. Timing, however, is everything.
Spring and fall are both ideal seasons for arugula—if you’re planting in spring, aim to sow your seeds as soon as the soil is workable, usually about 2–3 weeks before your last expected frost. Arugula thrives in cool weather, so if you want a fall harvest, count backwards about 40 days from your region’s first expected hard frost and plant then.
The climate requirements are surprisingly flexible: arugula tolerates a touch of cold, but it really loves soil temperatures between 45°F and 65°F for optimal germination. If temperatures climb above 75°F, arugula tends to bolt (go to seed) quickly, which makes the leaves bitter—so it’s best grown before summer heatwaves set in or as summer wanes.
For continuous leafy harvests, try succession planting: sow a small batch of seeds every two to three weeks instead of all at once. This simple trick ensures you’re never overwhelmed with too much at one time, and you can enjoy fresh leaves throughout the season.
Even if you’re new to gardening, following these steps for how to grow arugula means you’ll soon be snipping fresh greens straight from your backyard or windowsill—no green thumb required!
Choosing the Right Location and Soil
Picking the perfect spot for your garden starts with understanding your plants’ sunlight requirements. Most vegetables and flowers thrive in full sun, meaning at least six hours of direct sunlight daily. However, some leafy greens and herbs like parsley or mint do well in partial shade, especially in hot climates.
If your space is limited or shaded, consider moving containers around to catch the best light.
When it comes to soil, aim for loamy, crumbly earth that drains well—roots can’t tolerate soggy conditions. You can test drainage by digging a hole, filling it with water, and making sure it empties within a few hours.
The ideal soil pH for most garden plants falls between 6.0 and 7.0. Testing kits are affordable and easy to use, letting you amend soil with lime to raise pH or sulfur to lower it if needed.
For urban gardeners or those with poor native soils, raised beds or deep, wide containers are smart solutions. Fill them with a mix of compost, topsoil, and a little sand for drainage, ensuring your plants have fertile, loose ground to grow.
Don’t forget to use pots with proper drainage holes. If you’re short on sunlight, try elevated plant stands or vertical gardens to maximize your light exposure in small yards, patios, or balconies.
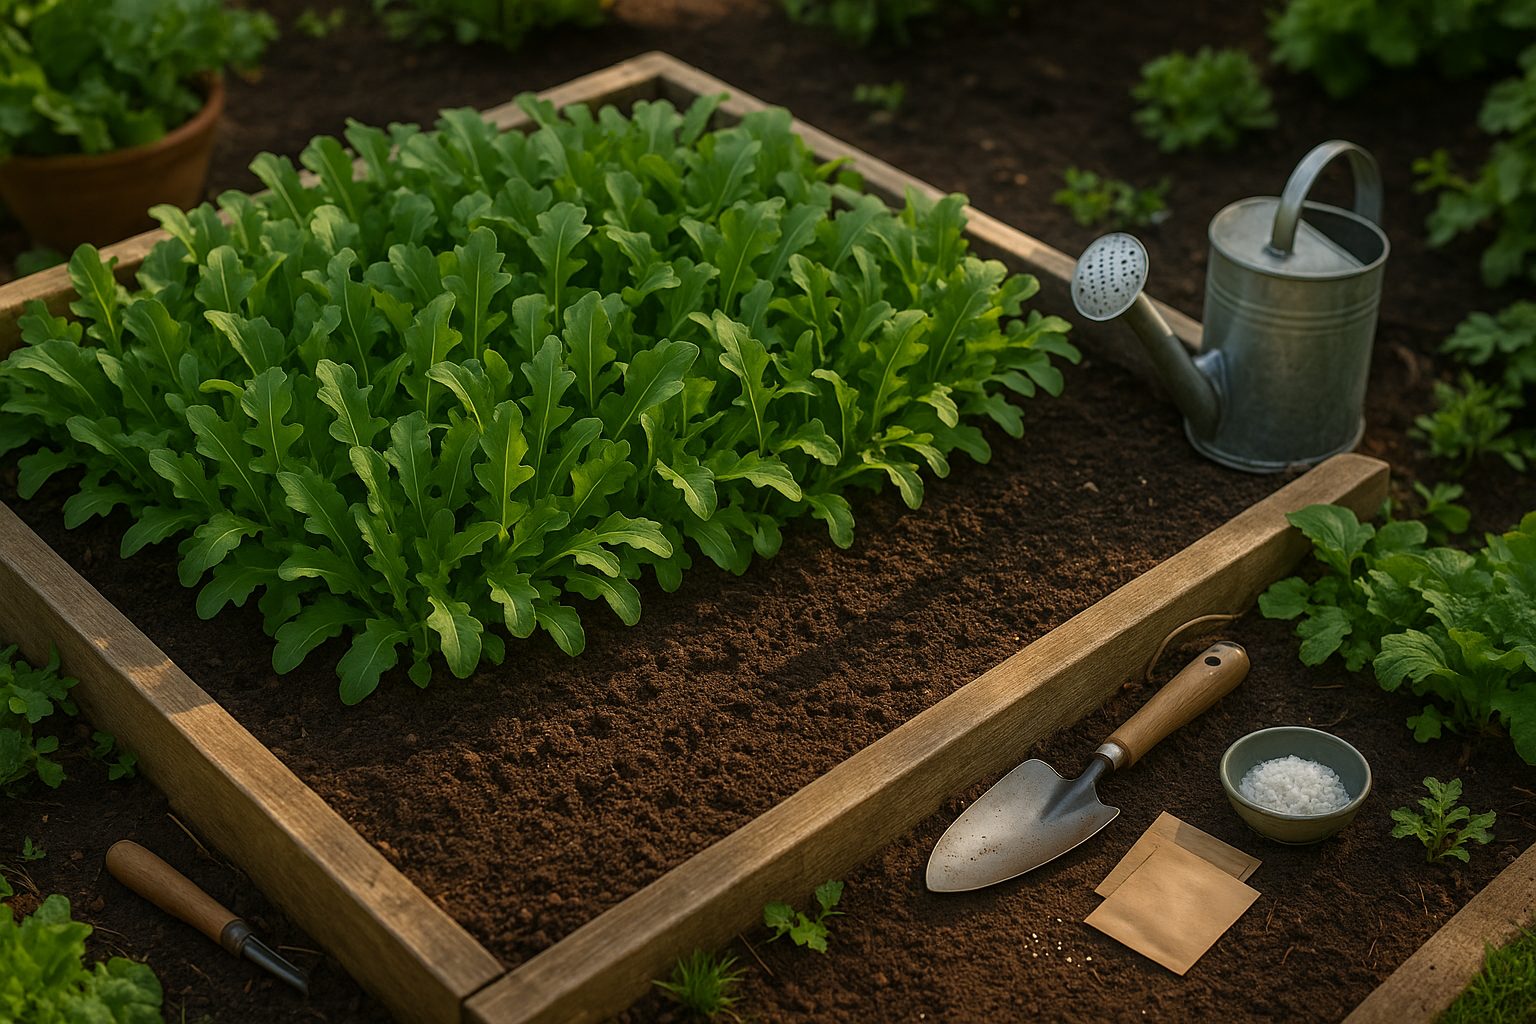
How to Plant Arugula (Seed to Harvest)
")
Planting arugula is easy and rewarding, even for beginner gardeners. Start by choosing a sunny spot or a container with good drainage. Sow arugula seeds directly in the soil about 1/4 inch deep and 1 inch apart; rows should be spaced around 10-12 inches apart for good airflow.
If you’re planting in pots, give each seed enough room since arugula grows quickly and can get crowded fast. After sowing, water gently but thoroughly—keep the soil consistently moist without making it soggy.
Seeds typically germinate in 5-7 days, so you’ll see the tiny, bright green seedlings emerge within a week. Healthy seedlings look upright with two well-shaped cotyledons (the rounded seed leaves) and no yellowing or wilting.
Once your seedlings are about two inches tall, thin them so there’s about four inches between plants; this gives each arugula enough space to mature, and you can use the thinnings in salads so nothing goes to waste.
Arugula doesn’t love being transplanted, but if you started seeds indoors, transplant young seedlings outdoors when they have two true leaves, gingerly handling the roots.
The entire growth cycle is pretty quick—baby arugula leaves can be harvested as soon as 20 days from planting, though you can let the plants grow another week or two for larger, spicier leaves.
Harvest by cutting outer leaves and letting the center regrow for a continued crop. For the best taste, harvest before the plant bolts (starts flowering) since this makes the leaves much more bitter.
With these steps, you can enjoy a steady supply of fresh, peppery arugula all season long, even with minimal gardening experience.
Caring for Your Arugula Crop
Proper care is key to keeping your arugula crop healthy and productive. Water your arugula regularly to keep the soil consistently moist but never soggy—aim for about an inch of water per week, adjusting for rainfall. Overwatering can cause root rot, so let the soil surface dry slightly between waterings. Always water at the base instead of overhead to prevent fungal diseases.
To maintain even soil moisture and suppress weeds, add a layer of organic mulch, such as straw or shredded leaves, around the plants. This simple step also helps keep leaves clean from rain-splattered soil.
Watch for common pests like flea beetles and aphids. Hand-pick them or try a simple organic spray like neem oil or insecticidal soap if infestations get out of hand. Downy mildew and leaf spot are the main diseases to watch for; remove affected leaves promptly and avoid overhead watering to limit their spread.
For strong growth, feed your arugula every two weeks with a diluted fish emulsion or a compost tea—both are rich in nutrients but gentle on young greens. If using compost, mix it into the soil before planting and side-dress during the growing season.
By following these straightforward practices, you can enjoy a thriving, organic harvest with minimal fuss.
Harvesting and Storing Arugula
For the best flavor and a continued harvest, arugula should be picked when the leaves are young and about 3–4 inches long—usually just three to five weeks after planting. At this stage, the leaves have a peppery taste and tender texture, perfect for salads and sandwiches.
Harvesting in the cool of the morning helps lock in moisture and crispness. You can either pick individual outer leaves, allowing the inner leaves to keep growing for future harvests, or cut the entire plant about an inch above the soil.
Picking leaves as needed is best if you want a prolonged harvest season, letting your plants “regrow” for several rounds. However, if you’re dealing with a big crop or want a uniform yield, cutting whole plants is faster, though it essentially ends that plant’s productivity. Whichever method you use, it’s important to handle the leaves gently—arugula bruises easily.
Once harvested, wash the leaves lightly to remove any dirt or bugs, then dry them thoroughly with a salad spinner or clean towel to prevent sogginess.
For storage, loosely wrap the dried leaves in a paper towel and keep them in a perforated plastic bag or breathable storage container in the fridge. Properly stored arugula stays fresh for up to a week; check regularly and remove any wilted pieces to prevent spoilage of the rest.
For best results, avoid washing arugula until just before you use it, as excess moisture can speed up decay.
Top Arugula Varieties to Try
If you’re ready to branch out from basic arugula, there are several standout varieties worth adding to your garden.
Wild Rocket (Diplotaxis tenuifolia) is a favorite among chefs for its deeply lobed, slender leaves and bold, peppery bite. It’s slow to bolt in hot weather, making it a great pick for warm climates or late spring sowing.
Classic Arugula (Eruca vesicaria) is what most people picture: broad, tender leaves and a milder, nutty flavor that’s delicious in salads and easy for beginners to grow.
For something unique, try ‘Wasabi,’ which isn’t actually related to the wasabi root but packs a spicy, horseradish-like punch—perfect for sandwiches or sushi-inspired dishes.
If you like extra crunch, ‘Apollo’ offers smoother, less lobed leaves and a crisp, less spicy taste that holds up well in stir-fries.
Purple-tinged ‘Dragon’s Tongue’ adds visual flair and a slightly sweeter twist.
In cooler climates, stick with classic or wild types, as they can handle chilly nights and even survive light frosts. In hot areas, prioritize slow-to-bolt choices like Wild Rocket or ‘Astro,’ which matures quickly and is less likely to turn bitter.
If you enjoy bold flavors, opt for wasabi or wild types; for milder salads, try ‘Apollo’ or ‘Astro.’ Don’t be afraid to mix and match—different shapes and flavors make for a more interesting garden and a vibrant salad bowl.