Introduction to Homemade Garlic Powder
Homemade garlic powder is a simple pantry staple that can transform any dish with its bold, savory flavor. Made by drying and grinding garlic cloves into a fine powder, it’s commonly used in everything from soups and stews to marinades, spice rubs, and salad dressings.
While you can easily pick up a jar at any grocery store, making garlic powder at home offers some major advantages. Freshness is one—homemade garlic powder packs a punch that store-bought options often lack, especially since commercial versions can sit on shelves for months. You’re also avoiding preservatives, anti-caking agents, and other additives, so your homemade batch is pure garlic.
Best of all, the process is surprisingly easy and requires just a few kitchen tools—a knife or slicer, an oven or dehydrator, and a spice grinder or blender. Even if you’re new to DIY pantry staples, you’ll find the task approachable and satisfying. Once you taste the difference, you might never go back to store-bought again.
Homemade garlic powder is a small kitchen project with a big flavor payoff—making it well worth your time for tastier, healthier cooking at home.
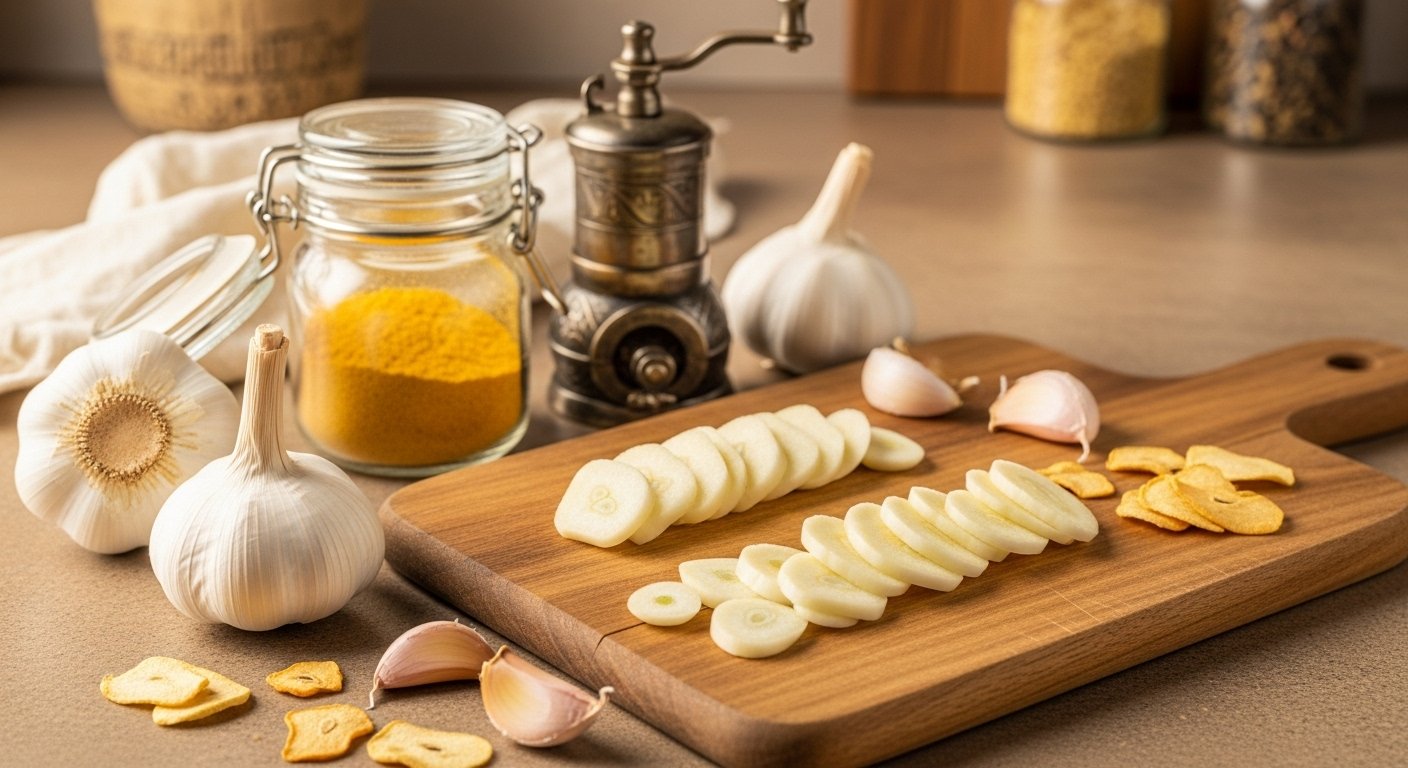
Choosing and Preparing Garlic
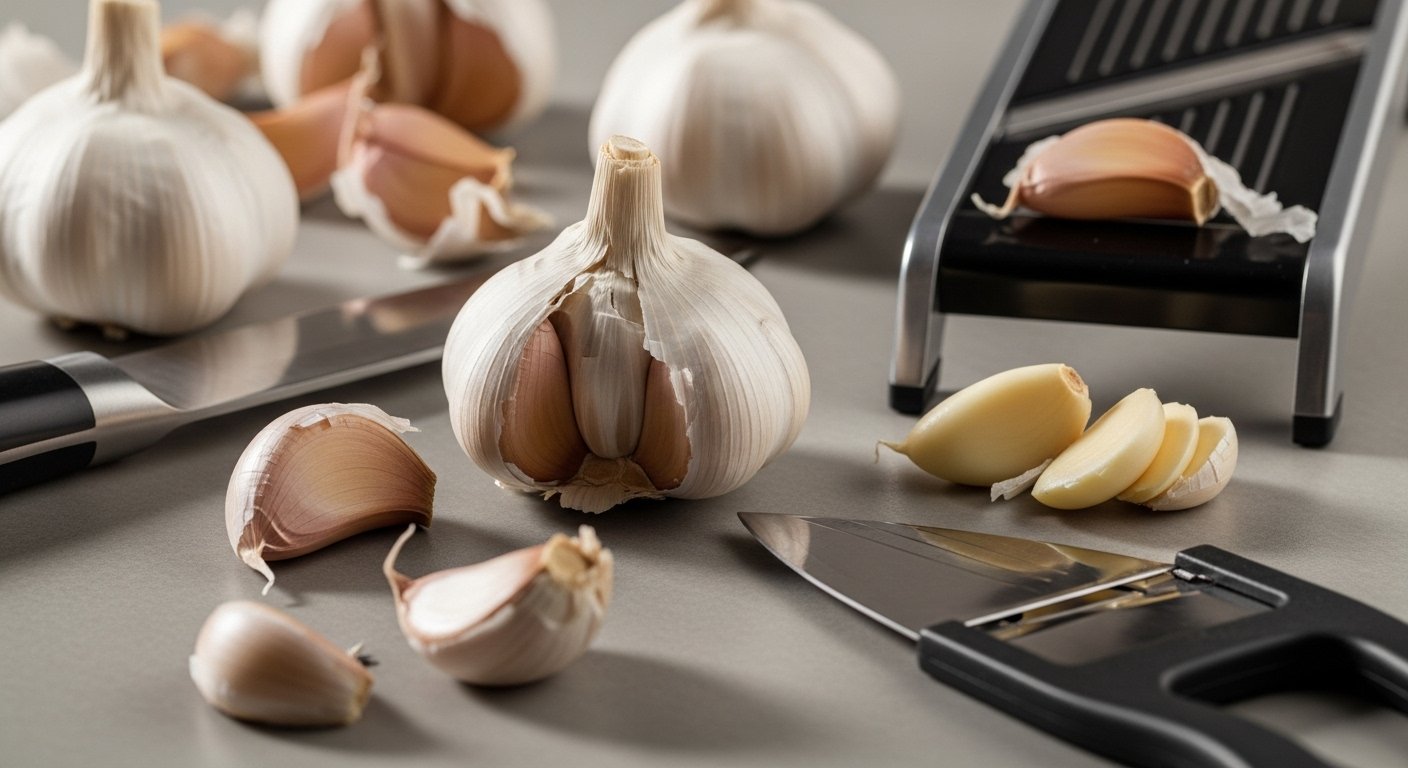
Selecting the right garlic is crucial for both flavor and storage. Look for bulbs that feel firm and heavy for their size, avoiding any with soft spots, sprouting green shoots, or wrinkled, dry skins—these are signs of age and inferior taste. Fresh, quality bulbs will have tight, papery skins, and the cloves inside should be plump, not shriveled.
Once you’ve picked your garlic, preparing it properly will ensure the best results for any use, especially before drying. Start by gently breaking apart the bulb into individual cloves, then peel each clove by pressing on it with the flat side of a knife; the skin should come away easily. Next, trim off both the root end and the pointed tip of each clove.
At this stage, you can choose to either leave the cloves whole or slice them lengthwise—slicing increases the surface area and helps the garlic dry faster and more evenly, which is ideal if you plan to store it as dried flakes or powder. To enhance the flavor and reduce the risk of bitterness, avoid using bruised cloves and keep preparation gentle; rough handling releases sulfur compounds that can make garlic taste harsh.
If you’re slicing the garlic, a sharp knife or mandoline will give clean cuts and prevent unnecessary cell damage. For an extra boost in flavor, let sliced or chopped garlic rest for a few minutes before use or drying—this allows the compounds (like allicin) responsible for its signature aroma to develop fully. Remember to keep prepared garlic away from moisture and heat to preserve its fresh character until you’re ready to dry or use it.
Following these steps will maximize the sweet, robust flavor garlic adds to your dishes, whether you’re cooking, preserving, or simply enjoying it fresh.
Drying Garlic: Methods and Tips
When it comes to drying garlic, you have a few practical options, each with its own pros and cons.
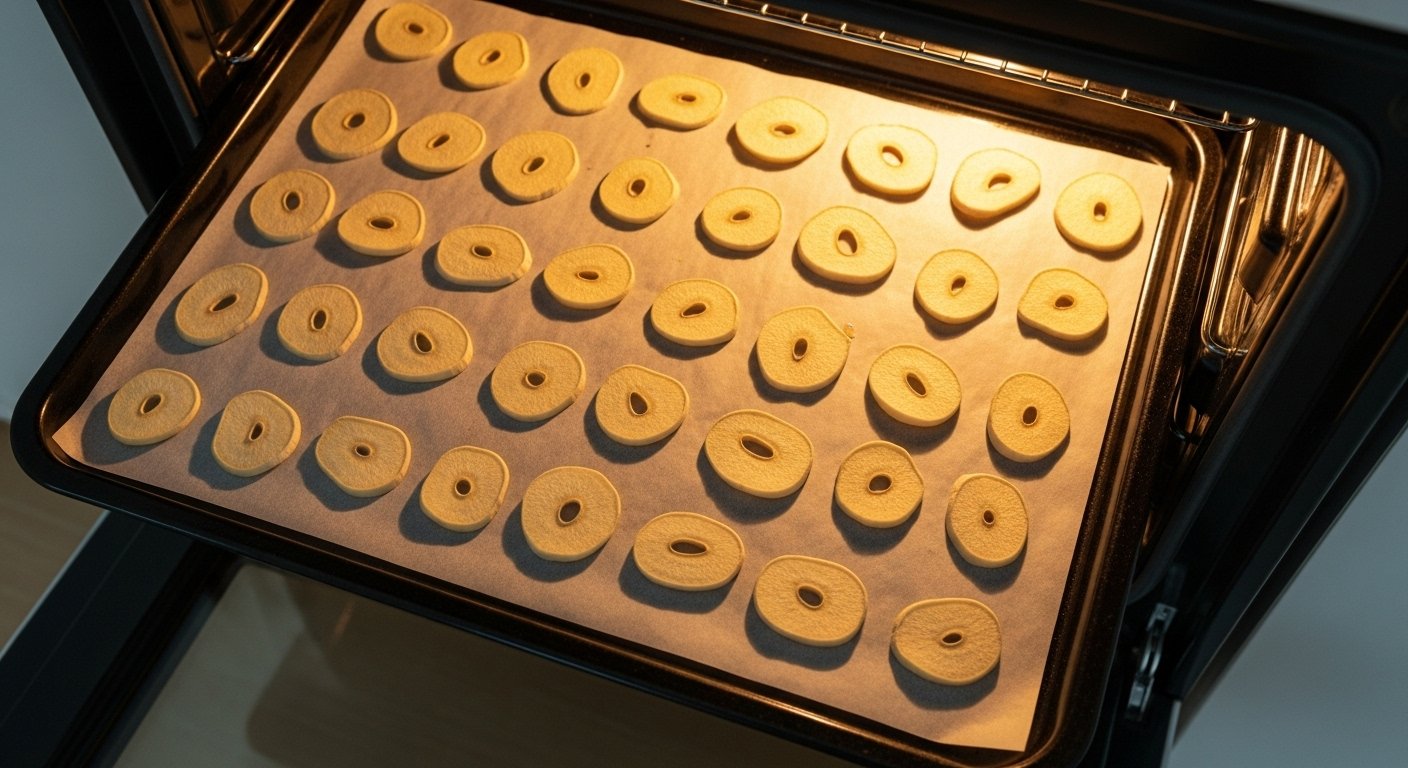
Oven drying is one of the quickest methods—just preheat your oven to its lowest setting, ideally around 140°F (60°C). Slice the peeled garlic cloves thinly and arrange them in a single layer on a baking sheet lined with parchment paper. Leave the oven door slightly open to allow moisture to escape, and check every 30 minutes; drying usually takes 2–4 hours.
For those with dehydrators, simply spread out the garlic slices on the dehydrator trays and set the temperature to 125°F (52°C). It typically takes 6–12 hours for the garlic to become crisp, but times can vary depending on humidity and the thickness of the slices.
Air-drying is a more traditional method, ideal for whole garlic bulbs or braided stalks. Find a cool, dry, well-ventilated space—like a garage or shed—and hang or spread out the garlic on a rack. This method takes patience, as full bulbs may require two to four weeks to dry completely.
Regardless of the method you choose, be sure to avoid high humidity and damp spaces, as these can cause mold. The best way to tell if your garlic is fully dried is by texture: slices should snap cleanly rather than bend, and bulbs should feel papery and dry to the touch.
Always store your dried garlic in airtight containers, away from direct light and heat, to maintain freshness and flavor. With a little care, drying garlic at home is a safe, easy way to preserve your harvest for year-round use.
Grinding and Making Garlic Powder
Turning your dried garlic chips into powder is simple with a few tools you likely have in your kitchen. Start by letting your garlic chips cool completely; if they’re even slightly warm, they can clump during grinding.
For the smoothest texture, use an electric spice grinder—just load small batches and pulse until you reach a fine, sandy consistency. If you’re working with a blender, use the lowest setting and periodically shake or scrape down the sides for even grinding. For a more hands-on approach, a mortar and pestle works well; crush the chips firmly and grind in a circular motion until you see a fine powder.
No matter your method, make sure your tools are bone dry, as any residual moisture can lead to clumping. To prevent uneven grinding, avoid overloading your grinder or blender and sift the finished powder through a fine mesh strainer to catch any larger bits—simply grind these again and repeat.
If your garlic powder seems to be sticking together, try adding a teaspoon of uncooked rice to your storage jar; it naturally absorbs excess moisture. Finally, store your homemade garlic powder in an airtight container in a cool, dry place, and you’ll have a fresh, clump-free ingredient whenever a recipe calls for an extra punch of flavor.
How to Store and Use Homemade Garlic Powder
Homemade garlic powder is best preserved by storing it in airtight containers—think small glass jars or BPA-free plastic bottles, which help lock out moisture and protect its flavor. To maximize shelf life, keep your garlic powder in a cool, dark place like a pantry or cupboard, away from direct sunlight or heat sources that can degrade its potency.
When properly stored, homemade garlic powder lasts about 6 to 12 months, although its flavor may diminish over time. You can test its freshness by giving it a quick sniff; if the aroma is weak or stale, it’s time to make a new batch.
Creative Uses for Garlic Powder
Garlic powder is incredibly versatile in the kitchen—beyond sprinkling on pizza or stirring into soups, try using it to:
- Season homemade snacks like popcorn or roasted nuts
- Blend it into salad dressings
- Dust it onto bread before baking for a savory boost
- Mix it into rubs for grilled meats
- Add it to marinades
- Incorporate it into veggie dips and hummus for an extra punch
With careful storage and creative use, your homemade garlic powder will become an indispensable ingredient in your cooking routine.
Garlic Powder Conversions and Recipe Variations
Getting your garlic conversions right can make a big difference in your recipes, especially if you’re using pantry staples like garlic powder instead of fresh cloves. A general rule is that one fresh garlic clove equals about 1/2 teaspoon of minced garlic, or 1/8 teaspoon of garlic powder. If a recipe calls for a tablespoon of minced garlic, you can swap in one teaspoon of garlic powder for a similar flavor. These conversions help keep flavors balanced, especially in soups, dressings, and rubs.
Beyond regular garlic powder, consider using smoked or roasted garlic powder for an extra dimension. Smoked garlic powder adds subtle campfire notes, perfect for grilled vegetables, barbecue rubs, or chili. Roasted garlic powder, with its sweeter, milder taste, transforms mashed potatoes, hummus, or creamy dips without overpowering other ingredients.
For a quick flavor boost, try these ideas:
- Sprinkle garlic powder over popcorn with a dash of parmesan
- Mix it into softened butter for garlicky toast
- Add to scrambled eggs or roasted nuts
When making a marinade, whisk garlic powder into oil and vinegar with herbs; it dissolves quickly and evenly. Because garlic powder is more concentrated, start with less and adjust to taste—it’s easy to add more but hard to take away.
Stocking different types in your spice rack lets you experiment and find what works best for your favorite dishes, whether you want bold, smoky, or subtle garlicky notes.
FAQs and Troubleshooting
Clumping is a common issue with garlic powder, usually caused by exposure to moisture or air. To prevent this, always store garlic powder in a tightly sealed container in a cool, dry spot—avoid keeping it near the stove or dishwasher, where humidity is high.
If your garlic powder does clump, try placing a food-safe moisture absorber or a few grains of uncooked rice in the container to soak up excess moisture.
Another frequently asked question is how long garlic powder lasts. Generally, it maintains its best flavor for 1-2 years, but it may lose potency over time. Check for a strong aroma—if you can barely smell the garlic, it’s probably time to replace it.
If you notice a change in color, an odd smell, or signs of mold, discard it right away.
For fresher results, buy smaller amounts more frequently instead of large containers that linger in your pantry. Remember to use a dry spoon when scooping out the powder to further avoid introducing moisture.
By following these simple best practices, you can keep your garlic powder fresh, free-flowing, and flavorful in all your recipes.
Conclusion & Next Steps
Making garlic powder at home is simple, cost-effective, and can significantly enhance the flavor of your dishes compared to store-bought options. With just fresh garlic, patience, and your oven or dehydrator, you’ll have a versatile seasoning that’s free from additives.
Don’t hesitate to experiment with batch sizes or try mixing your homemade garlic powder into different recipes to discover your favorite uses. Share your results with friends or family—they might want to try making their own!
Once you’re comfortable, consider exploring other homemade spice mixes, like onion powder or Italian seasoning, to further elevate your culinary creations.