Choosing the Right Cauliflower Variety

If you want to direct sow cauliflower for a productive harvest, choosing the right variety is a crucial first step. Not every cauliflower type will thrive in the same conditions, so think about what matches your local climate and your garden’s unique environment. For instance, some varieties are more heat-tolerant, making them suitable for gardeners who face warmer springs or shorter winters. Others perform best when sown early for a late summer or fall harvest, thanks to their preference for cool weather.
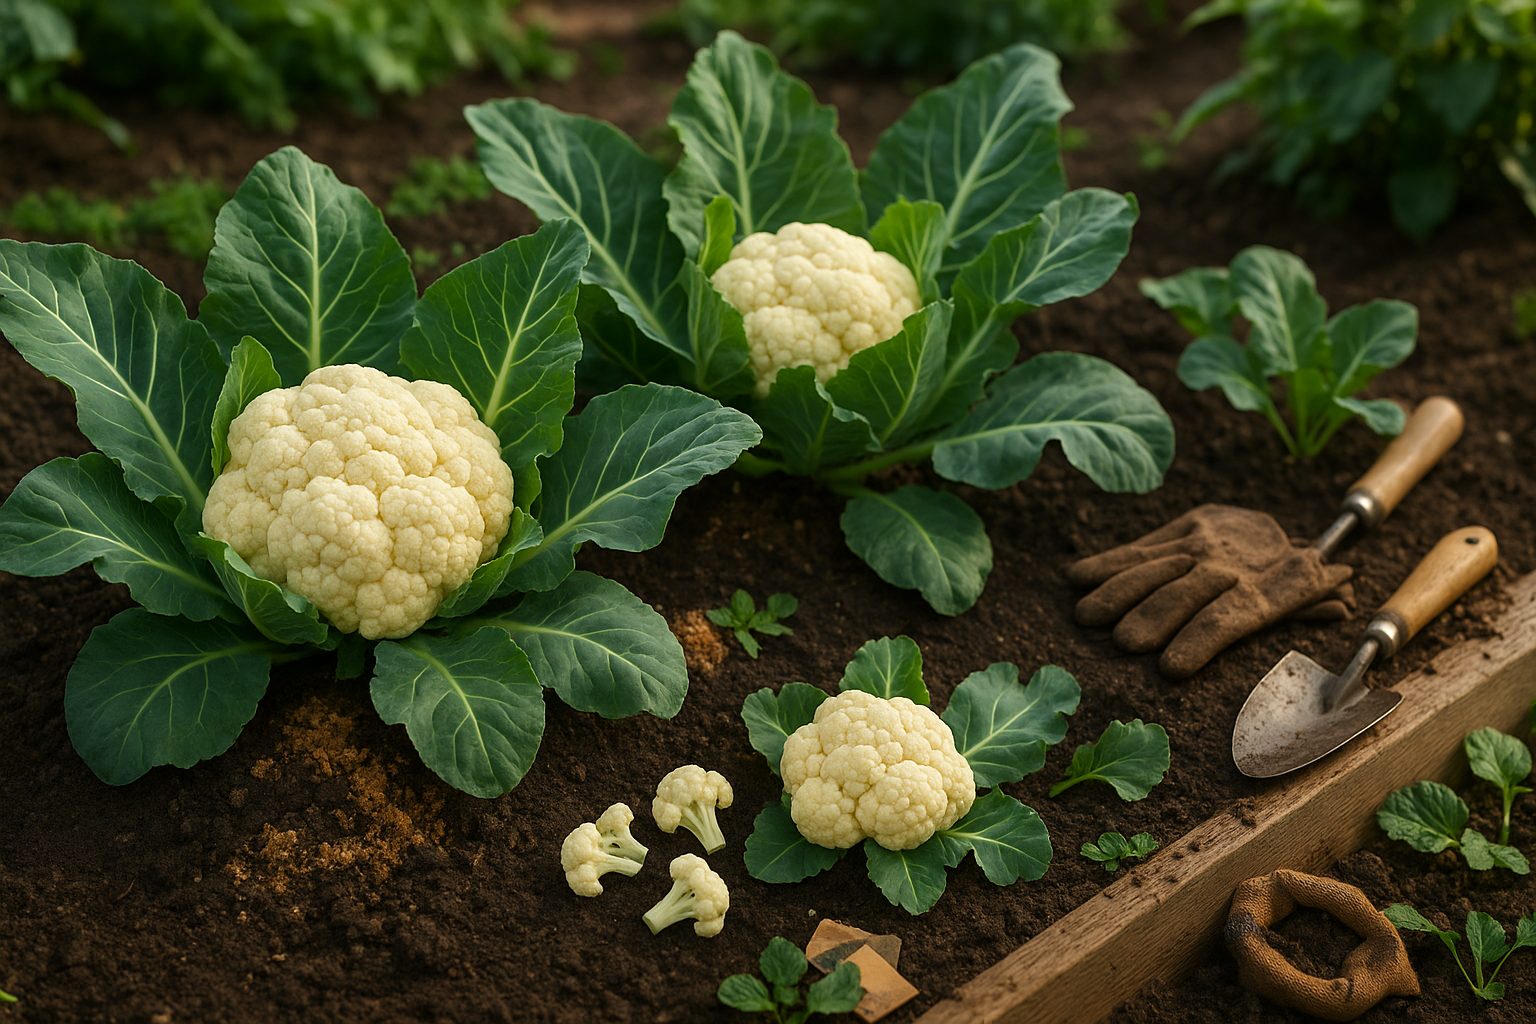
Size and color variety also play a role in your decision. Classic white cauliflower is popular for its dense heads and delicate flavor; look for reliable choices like ‘Snowball’ or ‘Self-Blanche’ if you want consistency. Romanesco stands out for its striking spiral pattern and nutty taste—a favorite for both culinary experiments and visual appeal. Purple cauliflower varieties, such as ‘Graffiti,’ don’t just add color to your plate—they’re also packed with beneficial antioxidants.
When sourcing seeds or seedlings, opt for suppliers known for fresh stock and high germination rates. Always check the seed packet for expiry dates and detailed growing instructions. Additionally, consider if the seeds are organic or non-GMO, especially if you prioritize eco-friendly gardening. If buying seedlings, inspect them for sturdy stems and healthy, pest-free leaves. By weighing these factors and starting with quality seeds, you’ll set yourself up for cauliflower success—all from that satisfying first direct sow.
Preparing the Soil and Site
For successful cauliflower growth, start by choosing soil that is rich, loose, and well-draining. Heavy clay or waterlogged spots can stunt roots and trigger disease. Aim for a soil pH between 6.5 and 7.5—slightly acidic to neutral—as this helps cauliflower absorb key nutrients and prevents issues like clubroot. Test your soil’s pH with an affordable home kit and amend with garden lime if it’s too acidic.
Cauliflower thrives on fertile ground, so mix in 2–3 inches of well-rotted compost or aged manure before planting to create a lush, nutrient-rich base. Pick a site that receives at least six hours of direct sunlight daily; shaded spots can lead to leggy plants and undersized heads.
If your garden tends to be windy, try planting near a natural windbreak like a fence or use temporary row covers to protect young seedlings from stress. Minimize the risk of pests and disease by rotating cauliflower with non-brassica crops—avoid planting it where cabbage, broccoli, or kale have recently grown.
Before planting, clear the bed of old roots and weeds, loosen the soil to about a shovel’s depth, then rake it level. Mix in a balanced vegetable fertilizer according to label directions for an extra boost. Taking these steps sets the foundation for robust, healthy cauliflower and can make a big difference in your garden’s harvest.
Sowing and Transplanting Cauliflower
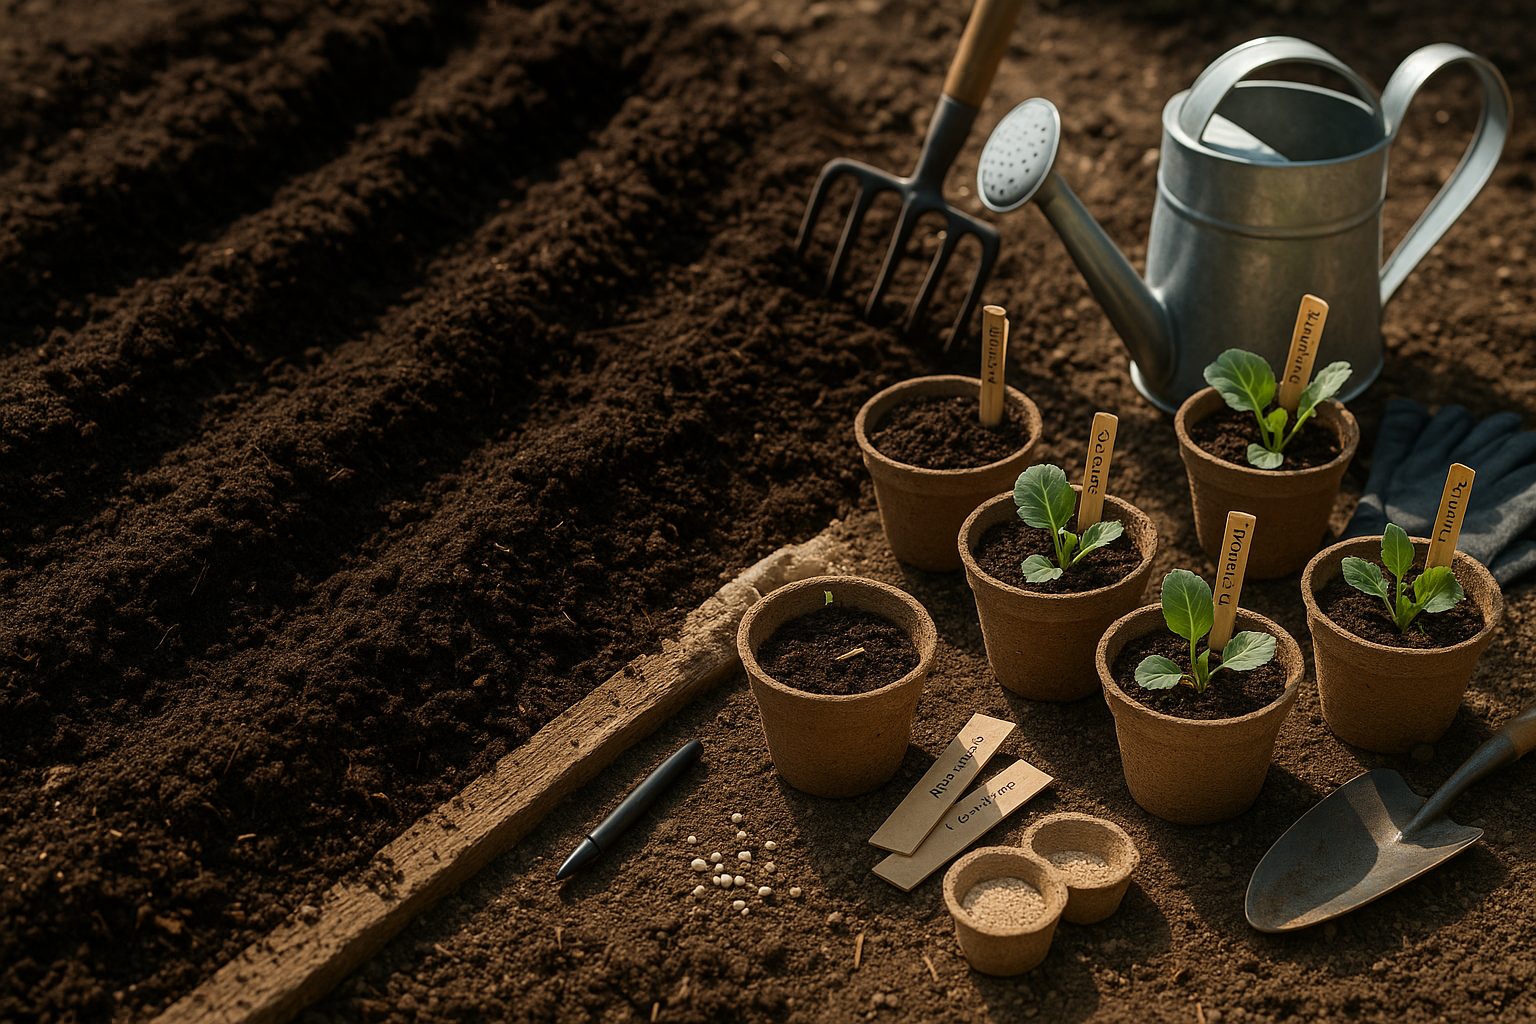
Starting cauliflower from seed gives you a head start on the growing season and helps ensure a healthy, productive crop. For most regions, it’s best to sow seeds indoors about 6-8 weeks before the last expected frost. Use small containers or seed trays filled with a good quality, moist seed-starting mix. Sow seeds about ¼ inch deep, and keep them in a warm spot (around 65°F/18°C) until they sprout.
If you prefer to sow directly outdoors, wait until 2-4 weeks before your area’s last frost date. Prepare the soil by breaking up clumps and mixing in compost for a fertile, well-drained bed. Space seeds 3 inches apart in rows 12-18 inches apart, and thin to one seedling every 15-18 inches once they are a few inches tall.
Transplant indoor seedlings when they have 4-5 true leaves and about 4-6 weeks of growth; this usually means moving them outside about 2 weeks before the last frost. To avoid shocking the plants, harden off seedlings by gradually exposing them to outdoor conditions over 7-10 days, starting with a few hours in a sheltered spot and slowly increasing sun exposure.
When transplanting, plant each seedling or plug at the same depth it grew previously, spacing them 18-24 inches apart to allow for mature heads. Water gently but thoroughly after transplanting, and consider using row covers for the first week to shield them from wind and temperature swings. Mulch around the base to keep roots cool and moist, and keep an eye out for sudden wilting—a sign of transplant stress.
If you start with healthy, well-acclimated plants and give them a bit of extra care during their transition, your cauliflower will be off to a strong, successful start.
Caring for Cauliflower Plants
To keep your cauliflower plants healthy and productive, consistent care is key. Start by watering regularly—cauliflower thrives with about 1 to 1.5 inches of water per week, so aim to keep the soil moist but not soggy. Deep watering in the morning helps the roots grow strong and prevents fungal diseases.
When it comes to fertilizing, use a balanced fertilizer or work in plenty of compost at planting time. For an extra boost, side-dress the plants with a nitrogen-rich fertilizer once they’re established and forming heads.
Mulching is another simple step that goes a long way: lay down a 2-3 inch layer of straw, shredded leaves, or grass clippings to lock in moisture, keep soil temperatures steady, and suppress weeds.
Speaking of weeds, pull them out by hand early and often, as cauliflower’s shallow roots are easily disturbed; a clean bed keeps your plants from competing for nutrients and water.
For certain white-headed varieties, blanching is essential. When the cauliflower head is about 2 to 3 inches across, gently gather the outer leaves over the curd and secure them with a soft tie, rubber band, or clothespin. This shields the developing head from sun exposure, preventing discoloration and bitterness, and helps it stay sweet and tender.
Regularly check the plants for signs of pests like cabbage worms or aphids, and remove any yellowing leaves or spent growth to keep airflow high and the patch tidy.
With a steady routine of watering, feeding, weeding, and a little extra care for the heads, you’ll set yourself up for crisp, flavorful cauliflowers by harvest time.
Managing Pests, Diseases, and Common Problems
Cauliflower can attract pests like aphids and cabbage worms, as well as diseases such as clubroot and downy mildew. Spotting trouble early is key: aphids cluster on the undersides of leaves and leave a sticky residue, while cabbage worms chew large holes in the foliage. Clubroot causes plants to wilt and develop swollen roots, and downy mildew appears as yellow patches with fuzzy white growth underneath the leaves.
To manage these issues naturally, encourage beneficial insects—ladybugs love to snack on aphids, while birds help control worms. Regularly inspect your plants and hand-pick any pests you spot. Floating row covers also block insects from laying eggs.
For disease prevention, rotate crops every couple of years to prevent soil-borne pathogens from building up, and avoid overwatering to reduce mildew risks. Neem oil or insecticidal soap can help if infestations get out of hand. Clearing away old plant debris will remove places for pests and diseases to overwinter.
Watch for warning signs like yellowing leaves or poorly formed heads—these can also indicate stress from inconsistent watering or poor soil. To correct this, check soil moisture regularly and feed your plants a balanced fertilizer if they look pale or weak. Healthy, well-tended cauliflower is much less likely to suffer setbacks, so keep up with basic garden hygiene and monitoring.
Harvesting and Storing Cauliflower
Knowing when to harvest cauliflower is key to enjoying its crisp texture and mild flavor. Look for tight, compact heads that are pure white and about 6 to 8 inches across. Avoid waiting too long—heads that start to loosen or develop a yellowish tint have passed their prime.
Use a sharp knife to cut the head from the main stem, leaving a few outer leaves attached. These leaves help protect the curd during handling and storage. Handle the heads gently to avoid bruising, which can speed up spoilage.
For storage, wrap the heads loosely in a damp paper towel and place them in a perforated plastic bag in the crisper drawer of your fridge. This method keeps them fresh for up to two weeks. Check stored cauliflower regularly—any black spots, unpleasant odors, or slimy patches mean it’s time to discard or trim those areas.
For longer storage, you can blanch florets in boiling water for a few minutes, cool them quickly in ice water, drain, and freeze. By harvesting at the right time and using careful storage, you’ll enjoy garden-fresh cauliflower long after picking.