Introduction to Growing Cauliflower in Raised Beds
Raised bed cauliflower is quickly becoming a favorite among home gardeners who love nutritious, versatile veggies that thrive with a little extra attention. Cauliflower is packed with vitamins, fiber, and antioxidants, making it a smart addition to any meal—whether you’re whipping up cheesy bakes, roasting florets for a healthy snack, or adding crunch to salads.
Growing cauliflower in raised beds brings a host of benefits: improved drainage protects the sensitive roots from soggy soil, while better soil control lets you tweak nutrient levels and pH for optimal growth. Raised beds also make gardening chores easier by reducing bending, deterring weeds, and providing some protection from pests.
If you’ve struggled with compacted ground or soggy garden patches in the past, you’ll love how raised beds provide the perfect environment for healthy cauliflower heads to form. Plus, you can extend your growing season by warming up the soil earlier in spring and keeping things tidy even in small spaces.
In this post, you’ll learn everything you need to know about successful raised bed cauliflower, from selecting the right spot and ideal soil mix to spacing tips, watering techniques, and preventing common problems like bolting or pests. We’ll also share real-world advice based on gardening successes and slip-ups, so you can enjoy plump, crisp cauliflower from your own backyard—whatever your experience level.
Whether you’re a beginner or seasoned grower, get ready to transform your garden with thriving raised bed cauliflower.
When and Where to Plant Cauliflower
Cauliflower thrives best when planted in cool weather, making early spring and fall the ideal seasons for sowing seeds or transplanting seedlings. For spring harvests, start seeds indoors 6-8 weeks before your last expected frost date, or transplant seedlings outdoors as soon as the ground is workable and daytime temperatures consistently range between 60°F and 70°F.
For a fall crop, sow seeds directly in the garden or transplant seedlings in midsummer, about 6-8 weeks before your region’s first frost. This timing allows cauliflower to mature in cooler conditions, helping prevent premature bolting and producing tastier heads.
When it comes to sunlight, cauliflower prefers full sun—at least 6 hours of direct light daily—but can tolerate partial sun, especially in hot southern climates where some afternoon shade might help reduce stress and bitterness in the heads.
Choosing the right location is vital, especially if planting in raised beds. Raised beds offer excellent drainage and tend to warm up faster in spring, giving your crops a head start. Ensure your raised bed is located in a spot with ample morning light and is sheltered from harsh winds, which can damage delicate seedlings.
Also, avoid planting cauliflower where other brassica vegetables like broccoli or cabbage have recently grown to reduce the risk of soil-borne diseases. Amending raised bed soil with plenty of compost beforehand provides the rich, well-draining conditions cauliflower needs.
With a little planning around timing, sunlight, and location, you’ll set the stage for a healthy and productive cauliflower harvest.
Preparing Your Raised Bed for Cauliflower
The foundation of success with cauliflower in a raised bed starts with creating the right soil environment, as these plants can be a bit picky about where they grow. Cauliflower prefers well-draining, loamy soil rich in organic matter, with a slightly acidic to neutral pH between 6.0 and 7.0. You can easily check the pH using a simple home test kit from a garden center. If your pH is off, agricultural lime can be mixed in to raise it, while elemental sulfur helps lower overly alkaline soils—just be sure to follow the package directions.
Nutrient-rich soil is essential. Before planting, work in at least two to three inches of well-rotted compost or aged manure to boost fertility and improve texture. If your soil needs extra nutrients, sprinkle a balanced organic fertilizer—aim for one high in phosphorus and potassium—across the bed and lightly mix it in.
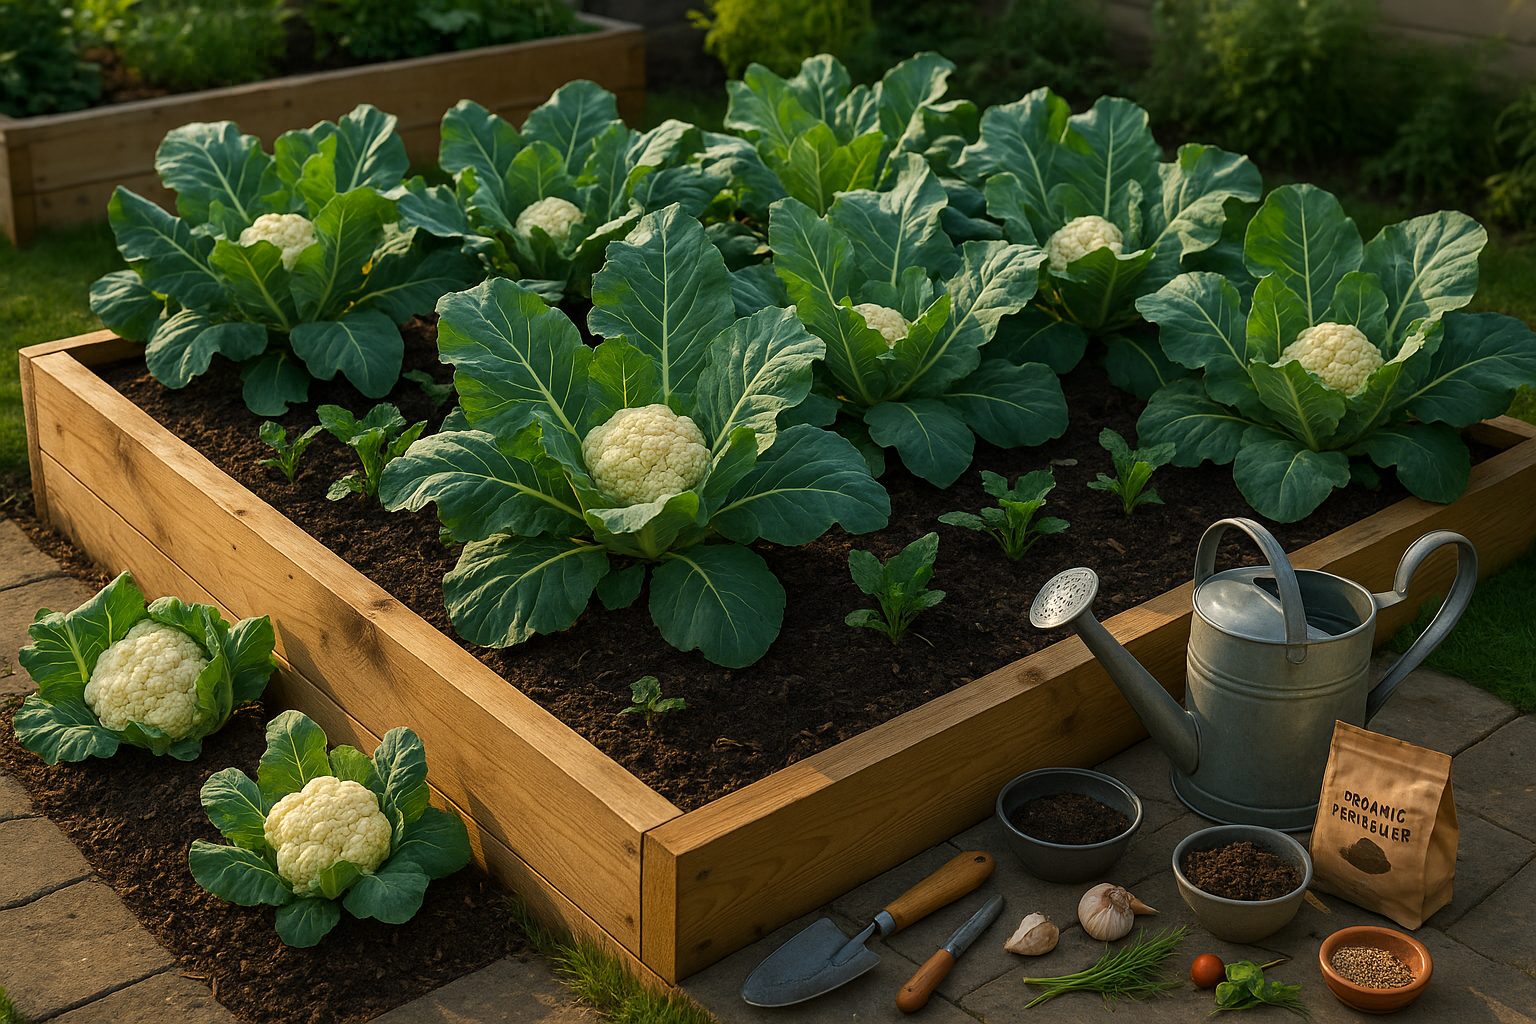
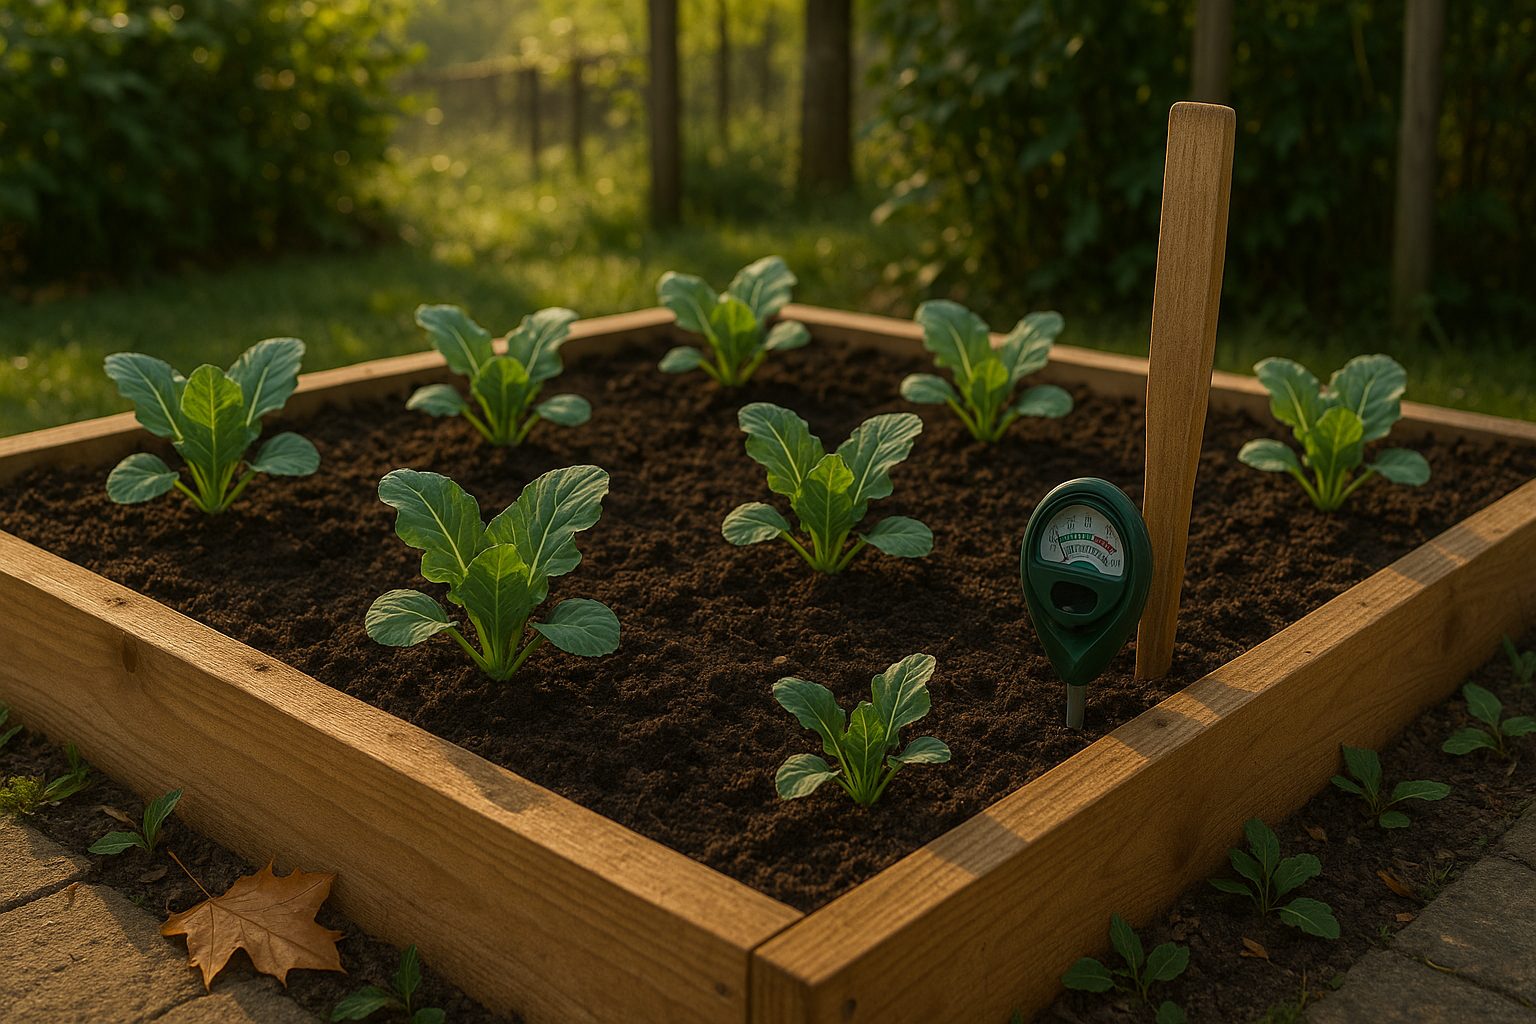
A raised bed for cauliflower should be at least 12 to 18 inches deep to provide ample space for roots to spread and ensure good drainage, which helps prevent disease from excess moisture. Cauliflower is a large, leafy plant when mature, so leave about 18 to 24 inches between plants and rows to allow airflow and reduce competition for nutrients.
For best results, use a tape measure to mark planting spots and avoid overcrowding, which can lead to smaller heads and an increased risk of pests. Taking the time to set up your raised bed this way gives cauliflower the head start it needs to grow strong, healthy, and productive all season long.
Starting and Planting Cauliflower
When growing cauliflower, you have two main options for getting started: sowing seeds indoors or planting them directly in your garden beds. Starting seeds indoors is preferred in most climates because cauliflower thrives in cooler weather but needs a head start to mature before summer heat sets in.
About 6-8 weeks before your area’s last expected frost, sow seeds in trays filled with seed-starting mix, placing them about half an inch deep. Keep seedlings in a bright spot and water regularly, ensuring the soil stays moist but not soggy. Once seedlings have two to three true leaves and outdoor temperatures consistently reach at least 50°F (10°C), it’s time to prepare them for life outside.
Begin the hardening off process a week before transplanting by gradually introducing the young plants to outdoor conditions—start with just an hour or two outdoors on mild days, increasing the time daily to avoid shock or stunted growth.
For direct sowing, plant seeds about ½ inch deep and 18-24 inches apart, as cauliflower needs plenty of elbow room. If you’re using a raised bed, this spacing helps manage airflow and prevent disease.
When transplanting, handle seedlings gently by the leaves (not the delicate stems) and water them well to reduce stress. Adding a layer of mulch around the plants helps retain moisture and discourage weeds, giving your cauliflower the best chance for strong, healthy development.
Caring for Cauliflower in Raised Beds
Cauliflower thrives on consistent moisture, so aim to keep your raised bed’s soil evenly damp but never soggy. Water deeply whenever the top inch of soil feels dry—usually two to three times per week, depending on heat and rainfall. Drip irrigation or soaker hoses are great investments, as they minimize water on leaves (reducing disease risk) and provide steady moisture near the roots where it’s needed most.
To feed your cauliflower, start with rich, compost-amended soil at planting time, then side-dress with a balanced vegetable fertilizer (such as 10-10-10) when plants are four to six weeks old and again just before heads begin to form. If you prefer organic methods, a layer of well-rotted manure or regular fish emulsion feedings can supply nutrients throughout the season.
To lock in moisture and keep weeds at bay, spread two to three inches of straw, chopped leaves, or grass clippings around your cauliflower—but keep mulch a few inches away from the stems to prevent rot and pests.
As heads develop, protect them from sun and pests using simple support techniques: gently lift outer leaves over the head and secure them loosely with twine or a clothespin, a process known as blanching, which helps heads stay crisp and white. For extra security from caterpillars or rabbits, use floating row covers, lifting them only for pollinating or harvesting.
With these steps—regular watering, thoughtful feeding, smart mulching, and a little hands-on protection—your cauliflower raised bed can reliably produce big, beautiful heads.
Common Pests, Diseases, and Problems
When growing cauliflower in raised beds, several common pests and diseases can threaten your crop, so proactive management is key. Cabbage worms often chew ragged holes in leaves, while aphids cluster on stems and undersides, causing yellowing and curling foliage — both can be deterred by covering beds with fine mesh netting and encouraging beneficial insects like ladybugs.
Check plants regularly for small white or green caterpillars and sticky honeydew residue, removing pests by hand when possible.
Downy mildew is another frequent problem, appearing as yellow or brown spots on leaves with fluffy white growth underneath, especially in damp conditions. To prevent it, water at the base and ensure good airflow around your plants.
Clubroot causes wilting and stunted growth, with swollen or misshapen roots. Using disease-resistant seed varieties, rotating crops, and maintaining a soil pH above 7.0 can help keep it at bay.
Early signs of plant stress — such as limp leaves, discoloration, and poor head development — often point to issues like nutrient deficiency, overwatering, or pest infestations. Troubleshoot by inspecting roots for rot, checking soil moisture, and feeding with an organic balanced fertilizer if needed.
Monitoring your cauliflower daily allows you to catch problems early, and removing affected leaves promptly helps prevent the spread of disease, ensuring a healthier, more productive harvest.
Harvesting and Using Your Cauliflower
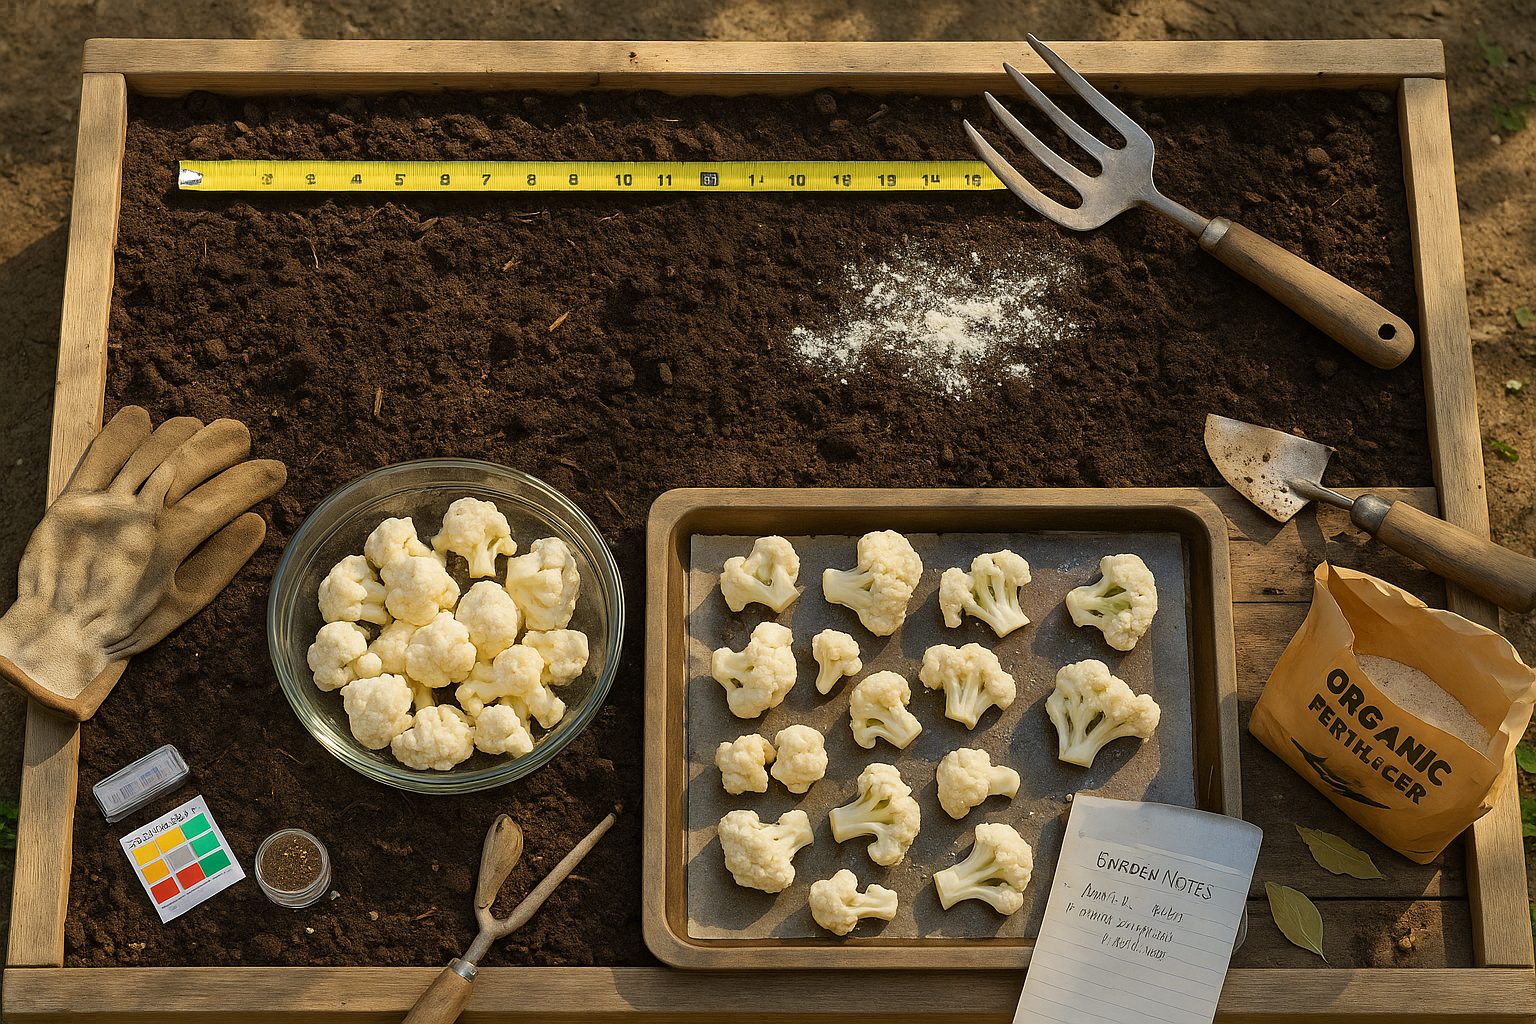
Knowing the right time to harvest cauliflower is key for the best flavor and texture. Check your plants when the heads look firm, compact, and white—about 6-8 inches across for most varieties. If the curds start to loosen or separate, it’s time to pick!
Always harvest in the cool of the morning to keep heads crisp. To harvest, use a sharp knife to cut the main stem just below the head, leaving a few leaves around it for protection. Try not to damage the surrounding leaves or roots so your plant can keep producing side shoots if it’s a variety that allows that.
Once harvested, gently brush off soil and store the heads unwashed in a plastic bag in your refrigerator’s crisper drawer; they’ll stay good for up to a week. If you have more than you can use right away, blanch and freeze florets for future meals.
Fresh cauliflower from your garden shines in stir-fries, roasted dishes, salads, or even as a low-carb rice substitute. Try tossing florets with olive oil and your favorite spices, then roast at 425°F for 20-25 minutes for a sweet, nutty snack or side.
With a little care at harvest, your raised bed cauliflower will be a versatile addition to lots of meals.
Bonus Tips for Success & Troubleshooting
To get the best cauliflower harvest from your raised beds, start by giving each plant plenty of breathing room—about 18-24 inches apart. Overcrowding leads to small heads and invites disease.
Keep an eye on soil pH, which should stay between 6.5 and 7. If it dips too low, add lime to bring it up. Consistent moisture is key; cauliflower thrives on even watering rather than the occasional soak. Use mulch to retain moisture and reduce weeds.
Watch for common pests like cabbage worms and cover plants with row covers if needed. Don’t forget to feed your cauliflower with a balanced fertilizer, especially once heads start to form.
Avoid harvesting too late—heads should be compact, white, and tight. For more tips, check out university extension websites or join local gardening groups on social media, where you can learn from neighbors who’ve mastered cauliflower in your area.
Don’t hesitate to reach out to your local Master Gardeners’ office for advice on troubleshooting—their insight can make the difference between a mediocre and a magnificent crop. With a little attention and the right resources, your raised bed cauliflower can become the envy of your garden!