Understanding Broccoli Growth Stages
broccoli growth stages are the backbone of a successful harvest. Understanding how your broccoli develops—from a tiny seed to a full, vibrant head—is essential for any gardener aiming for impressive yields. Whether you’re sowing your first broccoli seeds or fine-tuning your vegetable patch, knowing what to expect at each stage can make all the difference.
Broccoli goes through a distinct lifecycle, starting with germination, where seeds sprout delicate roots and shoots eager to break through the soil’s surface. This is quickly followed by the seedling stage, where small, leafy greens begin to form, requiring careful attention to light and watering.
As your plant matures, it enters the vegetative stage, marked by rapid leaf growth and a strong, thickening stem. This is when your care efforts really count, as proper feeding and spacing can boost both size and flavor later on. The final stretch is the flowering or harvest stage, where you’ll see tight green buds forming the broccoli head. Timing is crucial here; harvesting at the right moment ensures a sweet, tender crop and prevents those buds from opening into flowers, which can compromise texture and taste.
In this article, we’ll guide you through each of these broccoli growth stages in detail, offering practical tips, common mistakes to avoid, and real-world examples so you can nurture your plants at every turn. By mastering these essential phases, you’ll set yourself up for healthier plants and more abundant, flavorful harvests season after season.
Let’s explore how recognizing the rhythms of broccoli’s lifecycle can transform your growing experience and set you up for gardening success.
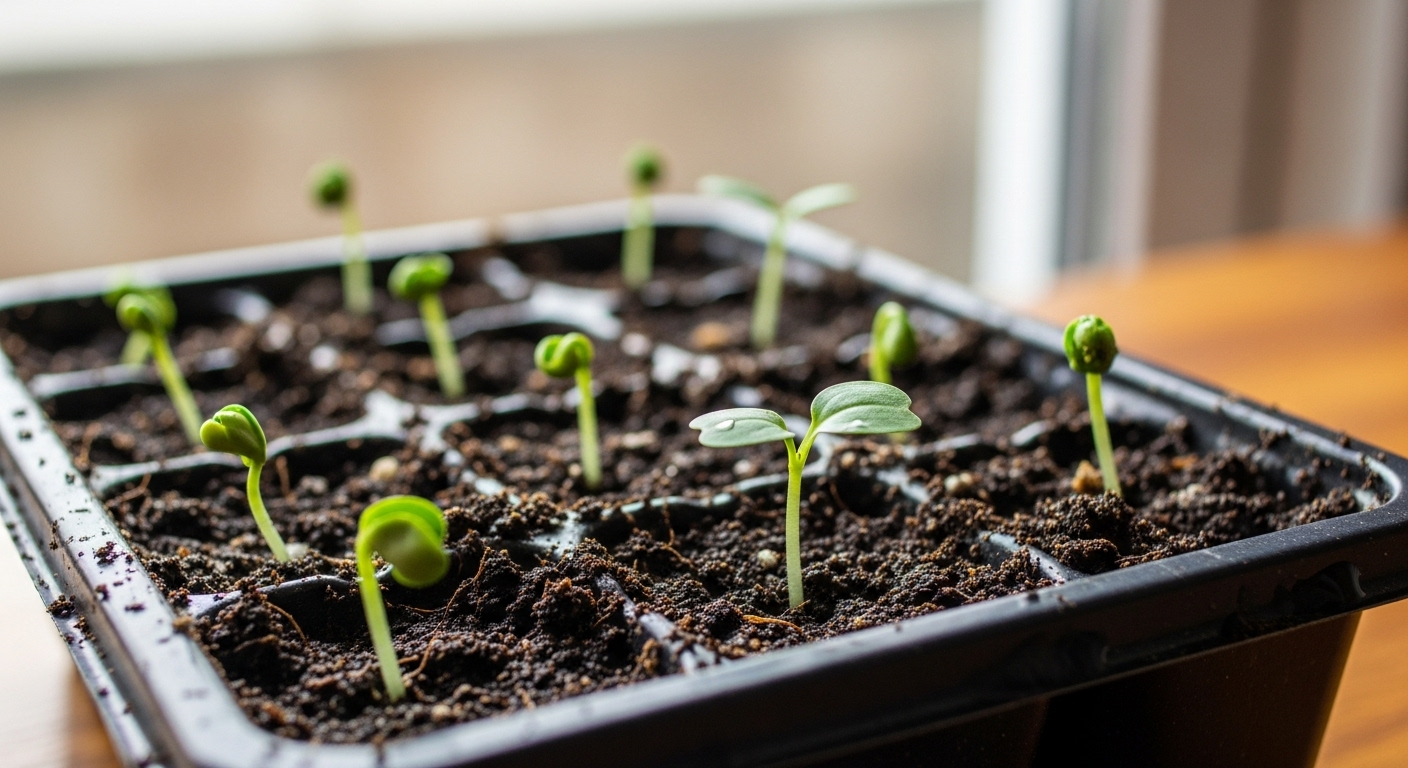
Stage 1 – Seed Germination (5-10 Days)
Starting broccoli seeds is an exciting first step, and you can do it indoors or outdoors depending on your space and climate. For the best results, sow seeds about a quarter-inch deep in well-draining, fertile soil, aiming for a soil temperature between 65–75°F (18–24°C). This range gives seeds the best chance of sprouting.
Indoors, use seed trays filled with quality potting mix and place them in a bright spot or under grow lights. Outdoors, choose a location with plenty of sunlight and loose, crumbly soil. Water the soil gently so it feels moist but never soggy—too much water can rot seeds, while too little can dry them out.
Over the next 5–10 days, you’ll notice tiny green shoots breaking through the surface. Successful germination is easy to spot: look for sturdy, vibrant sprouts with two little seed leaves.
To boost your germination rate:
- Start with fresh seeds.
- Pre-moisten the soil before sowing.
- If planting outdoors early in the season, cover beds with a clear plastic dome or row cover to keep the soil warm.
Keep seeds evenly moist and give them plenty of indirect sunlight; too much shade results in spindly seedlings. With the right temperature, steady moisture, and a little patience, you’ll soon have a tray or garden bed full of healthy broccoli sprouts ready for the next stage of growth.
Stage 2 – The Seedling Phase (2-3 Weeks)
During the seedling phase, which lasts about 2-3 weeks, healthy broccoli seedlings stand upright with sturdy, green stems and a pair of broad, flat leaves called cotyledons, soon followed by their first “true” leaves.
Keep an eye out for common issues like “damping off,” a fungal disease that causes stems to collapse and die. This often occurs due to overly wet, cold soil and poor airflow. To prevent this, use sterilized seed-starting mix, ensure containers have drainage, and provide adequate light and ventilation.
Another challenge is leggy, stretched seedlings with thin stems, usually caused by insufficient light. To counteract this, place seedlings under a bright grow light a few inches above the plants and rotate trays daily for even growth.
As your seedlings grow, you may notice crowding—thin them out by carefully snipping weaker ones at the base, leaving only the strongest plants about 2 inches apart to promote robust development.
Broccoli seedlings are typically ready to transplant outdoors when they have 2-3 true leaves, look stout and healthy, and outdoor temperatures reliably stay above 50°F (10°C). Preparing them by gradually exposing them to outdoor conditions—a process called hardening off—over a week will help boost their resilience for a smooth transition into your garden.
Stage 3 – Vegetative (Crown) Growth
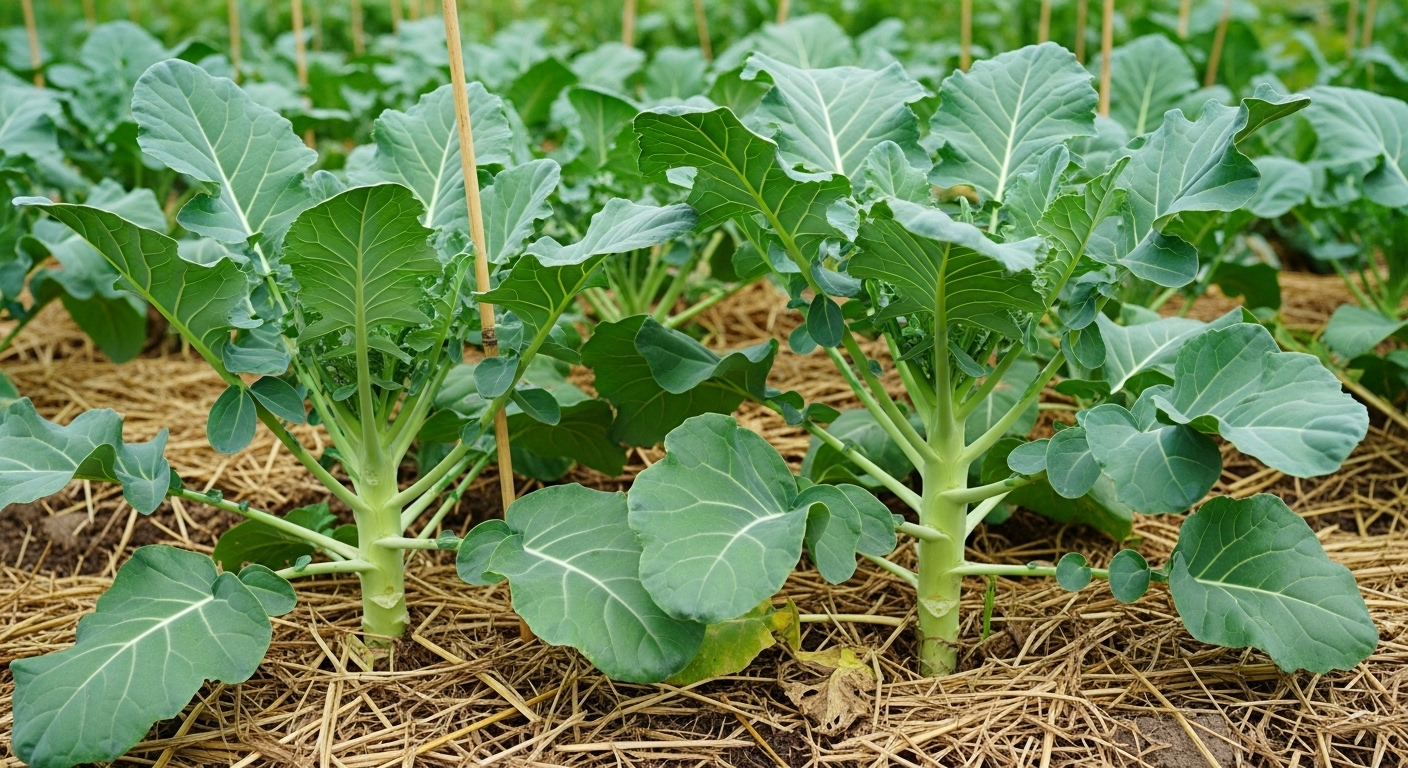
During the vegetative (crown) growth stage, your plants rapidly shift energy into building a solid foundation. The roots dig deeper and expand, anchoring the plant while helping it absorb more water and nutrients. Above ground, you’ll notice a burst of lush, green leaves and the formation of the central stem—often called the “crown”—which supports future flowering.
To support robust growth, keep soil consistently moist but not soggy; overwatering can suffocate developing roots, while underwatering may cause leaves to wilt or curl. A nitrogen-rich fertilizer encourages leafy growth—just be sure to follow application instructions to avoid fertilizer burn.
As the central stem thickens, tall or top-heavy plants might need gentle staking for support, especially in windy areas. Early in this stage, hand-pulling or shallow hoeing keeps weeds from competing for resources; mulch can also help suppress unwanted growth.
Watch for healthy, upright leaves and a strong main stem as good signs your plants are thriving. You’ll know they’re nearing readiness to transition to flowering when top growth slows and side shoots—or pre-flower structures—begin to form.
If growth looks stunted, leaves pale, or stems seem weak, double-check for compacted soil, nutrient deficiencies, or pest damage. A quick inspection beneath leaves and at the base often reveals problems early. With attentive care, your plant’s “crown” becomes the sturdy core it needs to support vibrant flowering ahead.
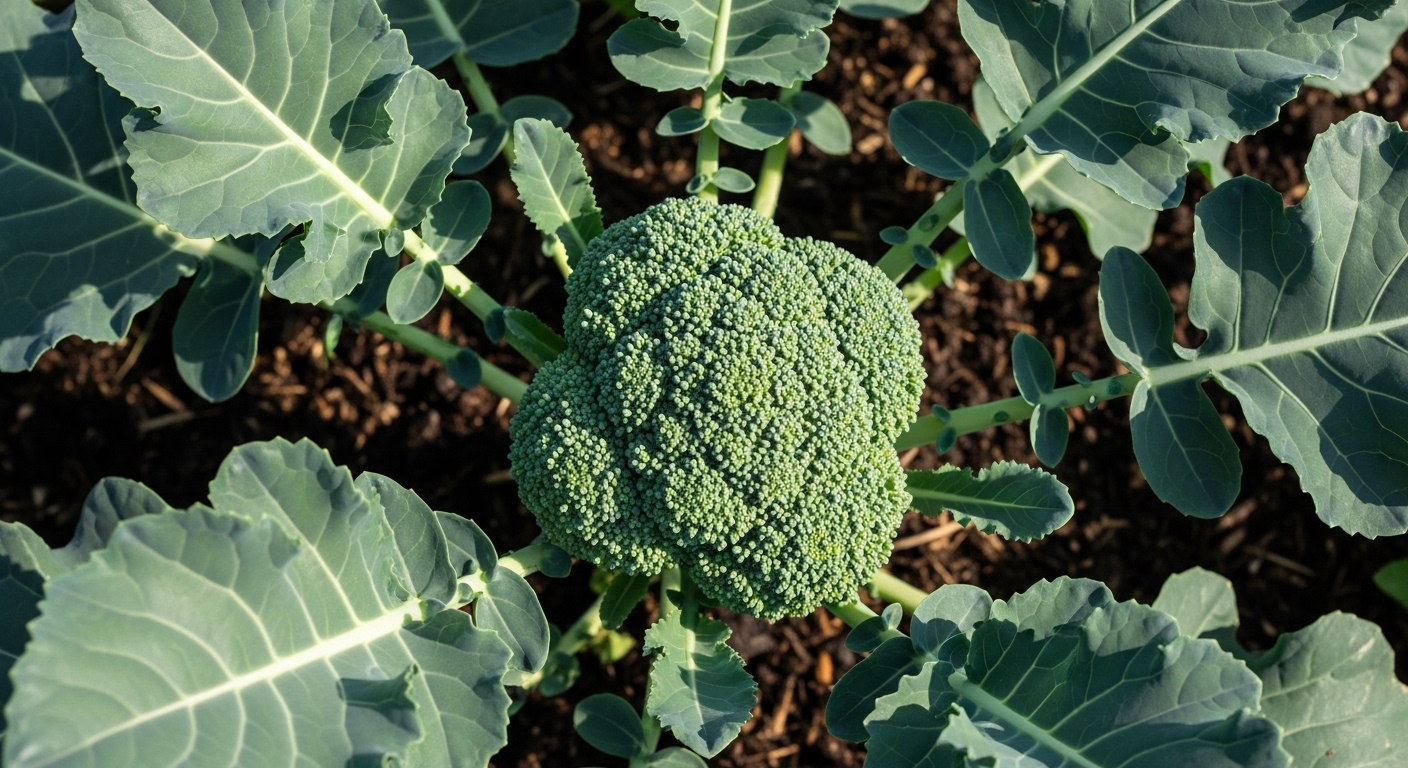
Stage 4 – Flowering and Harvesting Broccoli
Knowing when your broccoli is ready to harvest is key for the best flavor and yield. Look for a firm, compact central head with tightly grouped, dark green buds—this is your main clue that it’s time. The ideal head size varies by variety, but most are ready when they reach 4 to 7 inches across. Don’t wait for the buds to open or show yellow, as this means the broccoli has started to flower and will be tougher and less tasty.
Generally, broccoli heads are best harvested about 60–100 days after sowing or 7–10 days after the central head appears. To harvest, use a sharp knife or pruners to cut the main stem about 5–6 inches below the head, ideally in the morning when the plants are crisp and hydrated. Be sure to angle your cut to prevent water from pooling on the stalk, which helps avoid rot. Try not to cut into the developing side shoots, as these will produce smaller heads in the coming weeks.
After the main head is removed, leave the plant in the ground and water it well; this encourages side shoots to grow more vigorously. Apply a diluted liquid fertilizer to give the plant a boost. Harvest these side shoots as they mature—just like the main head—by cutting just above a leaf node to keep the plant healthy.
For post-harvest care, refrigerate your broccoli soon after cutting to maintain freshness and crispness. Lightly mist the heads with water and store them unwashed in a perforated plastic bag for up to a week. By recognizing the right time to harvest, using gentle techniques, and encouraging side shoot growth, you can maximize your broccoli harvest season after season.
Essential Tips for Healthy Broccoli Plants
Growing thriving broccoli starts with well-prepared, nutrient-rich soil—aim for loose, well-draining earth amended with compost or aged manure to give young plants a strong start.
Sow seeds or transplant seedlings in early spring or late summer, spacing them about 18 inches apart to allow good air circulation, which helps deter disease.
Broccoli prefers consistent moisture, so water deeply 1–2 times per week, keeping the soil evenly moist but not soggy; mulching around plants can help hold moisture and suppress weeds.
Feed your broccoli lightly with a balanced fertilizer every 3–4 weeks to support steady growth, but avoid over-fertilizing, which can lead to leafy plants with small heads.
Pests like cabbage worms and aphids are common threats—check leaves regularly and hand-pick invaders or spray with an organic insecticidal soap if needed.
To reduce disease risk, plant broccoli in a different location each year and promptly remove any yellowing leaves or debris.
For best yield and flavor, try companion planting: growing broccoli alongside herbs like dill or aromatic plants such as onions can help repel pests.
Regularly harvest heads while they are tight and before yellow flowers appear, which encourages the plant to produce side shoots for an even bigger crop.
With these simple practices, you’ll be well on your way to healthy, high-quality broccoli from your own garden.
Frequently Asked Questions About Growing Broccoli
Growing broccoli at home brings up lots of questions, especially for beginners. A common one is how long it takes to mature—generally, you can expect your broccoli to be ready for harvest 60 to 100 days after planting, depending on the variety and climate.
If your plants start producing flowers too soon, don’t panic; this “bolting” is often caused by sudden heat or stress. While the florets become less tender, the plant is still edible.
Speaking of edibility, don’t toss those leaves! Broccoli foliage is nutritious and can be sautéed or used in salads, just like kale or collards.
To help your broccoli grow faster, keep the soil consistently moist, feed regularly with a balanced fertilizer, and ensure the plants get at least six hours of sunlight daily. But skip the myth that extra fertilizer will speed things up dramatically—too much can actually harm growth.
If you’re wondering about trimming, it’s best to harvest the central head first and then let side shoots develop for additional harvests.
There’s also a misconception that broccoli can’t be grown outside cool climates; with the right timing and care, it’s possible almost anywhere.
For detailed troubleshooting—like dealing with pests, yellowing leaves, or slow growth—and advanced tips to maximize your yield, check out reputable gardening sites like your local extension office or trusted blogs from experienced growers.