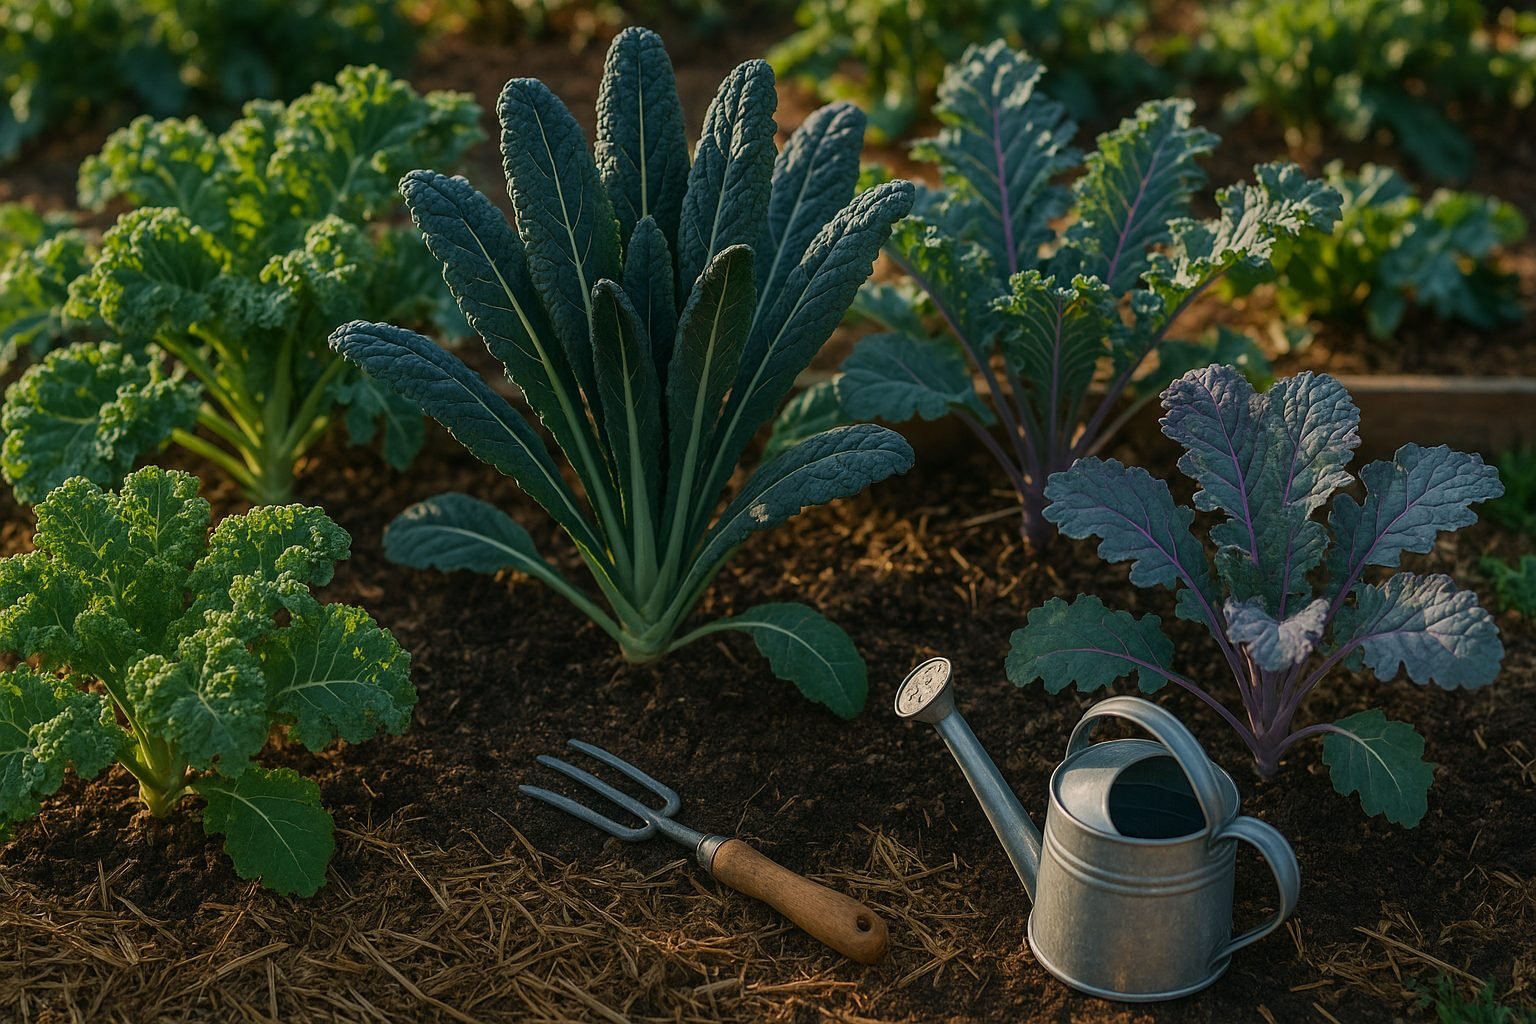
Choosing the Right Kale Variety for Zone 9
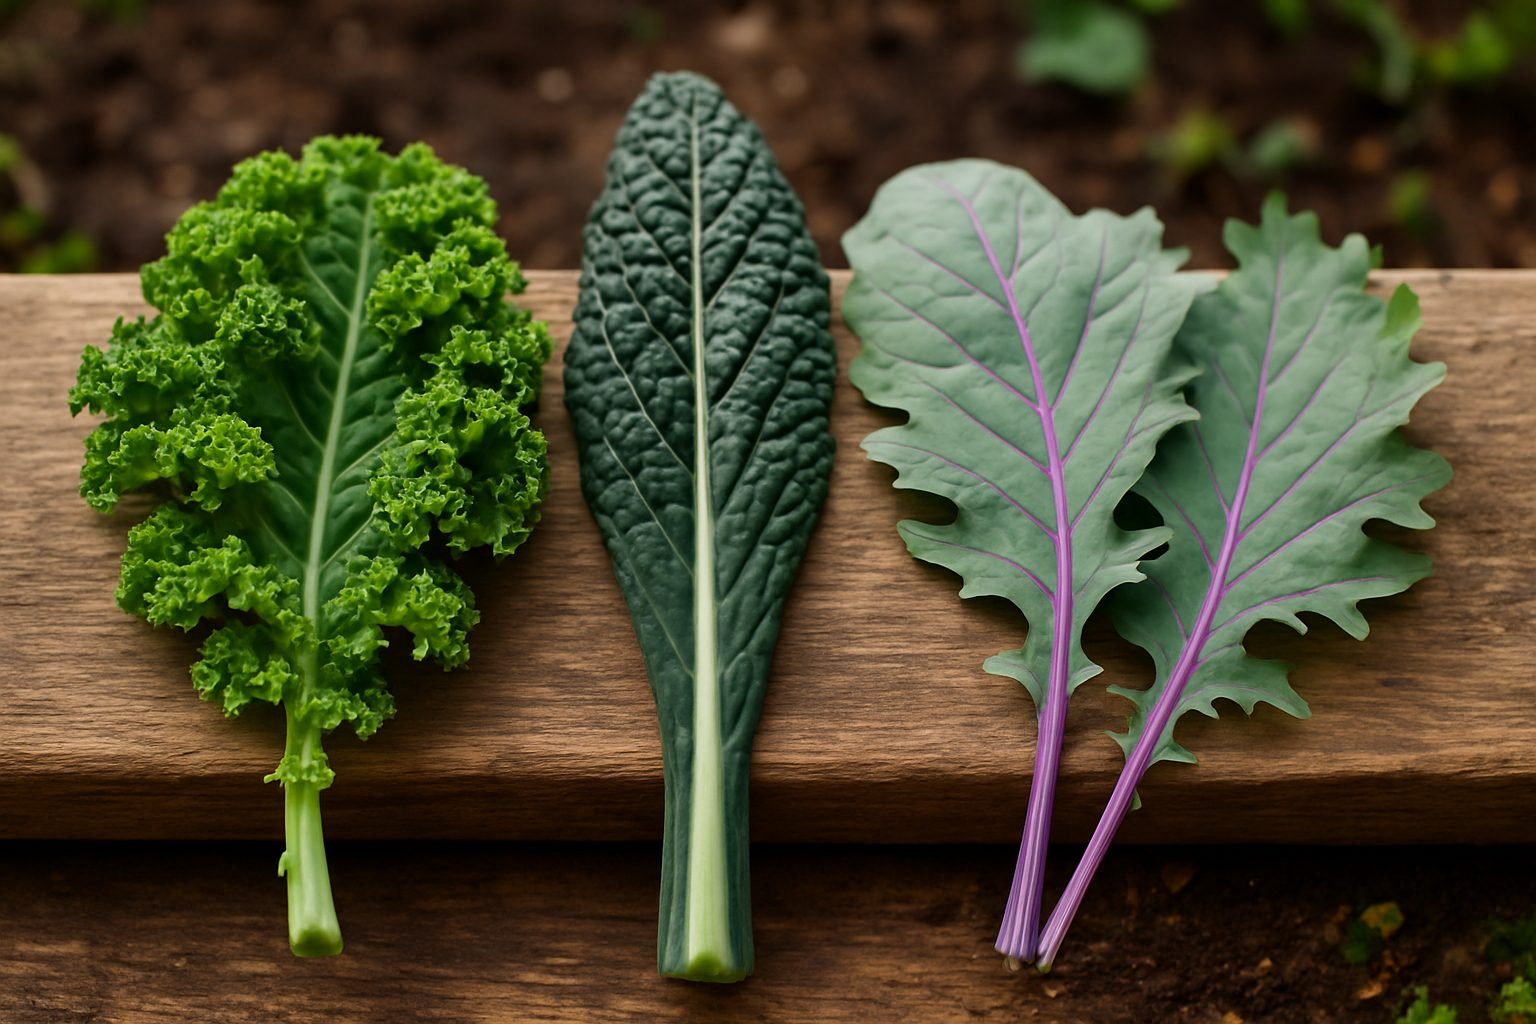
Growing kale in hot climates might sound challenging, but with the right variety and a few smart strategies, you can enjoy a lush, nutritious harvest—even through Zone 9’s warm, mild winters. Not all kales are created equal, and some types handle the heat better than others. Curly kale, with its trademark ruffled leaves and slightly peppery kick, is a staple in many gardens but can turn bitter if temperatures soar. Lacinato kale (sometimes called dinosaur or Tuscan kale) boasts long, dark blue-green leaves that hold up better when the mercury climbs and cooks down beautifully in soups or sautés. Red Russian kale offers tender, sweet leaves with attractive purple veins but tends to bolt quicker in persistent heat.
Kale Varieties Suited for Zone 9
In Zone 9, where summers can be long and sultry but winters are gentle, you’ll want kale varieties known for heat tolerance. Lacinato and hybrid varieties bred for resilience, like ‘Vates’ or ‘Premier’, tend to thrive where days are hot and nights stay mild. Redbor and Siberian kales are also solid performers in warm zones, providing strong growth into late spring or even summer if you offer afternoon shade or mulch to keep roots cool.
Collard Greens: A Reliable Alternative
If kale simply refuses to cooperate, collard greens are a robust, dependable alternative for Zone 9 gardeners. Collards withstand higher temperatures and still provide a bountiful source of leafy greens. Plus, they’re less likely to bolt or turn bitter from heat stress. Many folks in the southern United States rely on collards for exactly this reason.
Tips for Sourcing and Growing Kale in Warm Climates
- Source seeds or seedlings locally or from reputable suppliers specializing in southern or subtropical vegetable gardening.
- Look for varieties specifically labeled as heat-tolerant or suitable for warm climates.
- Consult local nurseries or agricultural extension offices for region-specific advice.
- Participate in seed swaps to find tried-and-true cultivars adapted to your area.
Choosing the right kale in hot climates starts with understanding your options and sourcing seeds adapted to your unique growing conditions.
Best Time to Start Kale in Zone 9
In Zone 9, timing your kale planting can make a big difference in your harvest. The most reliable windows for sowing seeds or setting out transplants are early fall, from late September through October, and again in late winter, typically February. Since Zone 9 has mild winters but hot, early summers, these periods allow your kale to enjoy cool weather, which improves both flavor and texture.
Kale can handle light frosts—sometimes tasting sweeter afterward—but prolonged heat makes it bitter and prone to bolting. If you’re starting seeds, sow them directly in the ground about 4-6 weeks before your area’s average first frost for a fall crop, or 4-6 weeks before the last frost for a late winter crop. For transplants, set them out two to four weeks after sowing seeds.
To ensure a constant supply of tender leaves, try succession planting: sow a few rows every two or three weeks, so new plants are always coming up as older ones slow down. This not only stretches your harvest well into early summer but also helps you manage pests and diseases by not having all your kale at the same growth stage.
Many gardeners even tuck in a few plants in shadier spots as spring heats up, helping extend the season just a bit longer before scorching summer temperatures arrive.
Where & How to Plant Kale
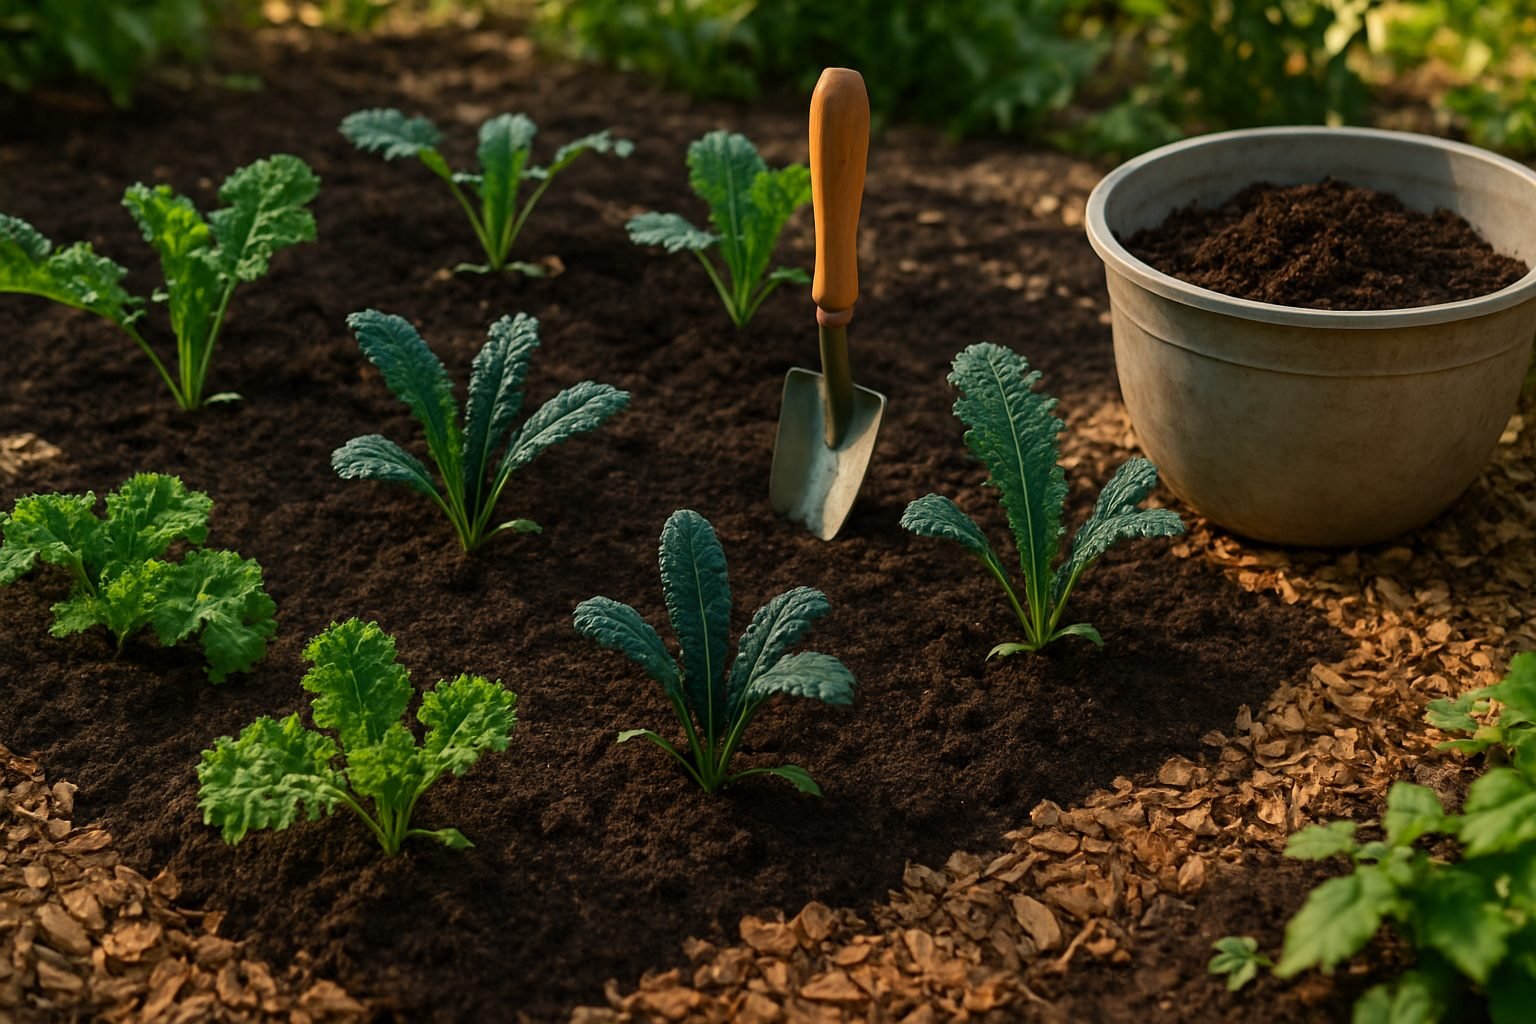
Choosing the right spot to plant kale is key to getting a healthy, abundant harvest. Start by finding a location that gets at least 6 hours of direct sunlight each day. While kale can tolerate some partial shade, full sun encourages fast, robust growth and sweeter leaves.
The soil should be well-draining—kale doesn’t like sitting in water—as well as rich in organic matter for steady nutrients. If you have heavy, clay soil, work in plenty of compost or aged manure to loosen it and improve drainage.
When planting in the ground, space seeds or transplants 12 to 18 inches apart; this gives each plant room to spread out and lets air circulate, reducing the risk of mildew. Sow seeds about ½ inch deep directly in the soil, or plant young seedlings at the same depth they were growing in their pots.
If you’re gardening on a balcony or patio, kale thrives in containers at least 12 inches wide and deep—just make sure they have drainage holes. Use a high-quality potting mix, and add compost or a slow-release organic fertilizer to boost nutrition.
Whichever method you choose, keep the soil consistently moist, and consider mulching around the base of your plants to retain moisture and suppress weeds. Kale is surprisingly tough, but giving it nutrient-rich, well-drained soil and room to breathe will help you enjoy crisp, flavorful greens for months on end.
Kale Care: Watering, Fertilizing & Maintenance
Caring for kale in Zone 9 means paying close attention to heat and moisture, as this region’s warm climate can quickly dry out the soil. Water early in the morning, aiming for about 1–1.5 inches per week. Use drip irrigation or a soaker hose to direct moisture to the roots while keeping leaves dry, which helps reduce the risk of disease.
To boost leafy growth, start with a soil test to understand your garden’s needs. Then fertilize every 4–6 weeks with a balanced fertilizer like 10-10-10 or a high-nitrogen blend, such as fish emulsion. Always water well after applying fertilizer to prevent burning the roots.
Mulching with straw or shredded leaves is a game-changer: it keeps roots cool, retains moisture, and suppresses weeds that can sap nutrients from your kale. Keep an eye out for weeds and pull them promptly, especially in the first few weeks after planting when kale is most vulnerable.
To prevent bolting—which is when kale goes to seed prematurely during heat waves—harvest outer leaves frequently and provide afternoon shade using a row cover or garden cloth.
Try to time your main planting for fall or late winter, as kale thrives in cooler weather and will have a longer, tastier harvest before temperatures soar. With these simple, hands-on techniques, your kale can stay lush, productive, and flavorful all season long in Zone 9’s challenging climate.
Dealing with Pests and Diseases in Zone 9
In Zone 9 gardens, pests like aphids, caterpillars, and whiteflies can quickly target kale, leaving leaves riddled with holes or coated in sticky residue. Watch for curling or yellowing leaves—signs that aphids may be feeding on plant sap—and look for tiny white bugs flitting around when you brush the plant (whiteflies). For caterpillars, check the undersides of leaves for green or brown larvae and their droppings.
Natural control methods work well: blast aphids off with a strong stream of water, encourage ladybugs, or make a DIY insecticidal soap. Remove caterpillars by hand, and invite birds to feast on them by adding bird-friendly garden features.
If you notice yellow patches, dark spots, or powdery growth on leaves, your kale may have fungal diseases like downy mildew or Alternaria leaf spot, which thrive in warm, humid climates. Remove and destroy infected foliage promptly, then increase airflow by spacing out plants and watering at the base (not overhead).
Prevention is your best defense—practice good garden hygiene by removing debris and rotating crops each season, keep weeds in check, and clean tools regularly. Try companion planting kale with aromatic herbs like dill or cilantro to confuse pests or attract beneficial insects.
Finally, use lightweight row covers early in the season to shield young plants from invaders while allowing light and water through. By staying vigilant and using these practical methods, you can keep your kale thriving even in a pest-prone Zone 9 garden.
Harvesting Your Kale and Making the Most of It
Knowing when to harvest your kale is key to enjoying its best flavor and keeping your plants productive all season long. Generally, kale leaves are ready to pick when they’re about the size of your hand and have a deep, vibrant color—usually around 60 days after planting from seed.
To harvest, use gardening shears or gently pinch the leaves off from the bottom of the plant, starting with the oldest, outer leaves. Always leave at least a few healthy leaves in the center to encourage continued growth; this way, your kale can keep producing new leaves for months.
For continuous harvesting, make it a habit to check your plants every few days and remove mature leaves. This prevents overcrowding and encourages bushier growth.
Storing Your Kale for Longer Use
When you have a big harvest or want to keep kale fresh for longer, try freezing or dehydrating it.
- Freezing: Blanch the cleaned leaves in boiling water for two minutes, then cool them quickly in ice water. Dry thoroughly and store in airtight bags or containers. This method preserves nutrients and flavor, making the kale perfect for soups and smoothies later on.
- Dehydrating: Spread chopped leaves in a single layer on a tray in a dehydrator or low oven until crispy. Then crumble and store in sealed jars for easy additions to recipes or homemade smoothie powders.
By combining smart harvesting with proper storage, you’ll enjoy homegrown kale long after the growing season ends.
Quick Tips for Success & Troubleshooting Common Problems
If you’re new to growing kale in Zone 9, start by planting in well-drained soil and giving your crop a bit of morning shade—the southern sun can get intense! Mulch around your plants to keep moisture in and weeds out, and water consistently, especially during hot spells.
If your kale looks limp, pale, or its leaves start curling, the plant could be stressed from heat, under- or overwatering, or pests. Check the soil:
- If it’s dry, offer a deep drink.
- If it’s soggy, ease up on watering to prevent root rot.
Keep an eye out for pests like aphids or cabbage worms—look for small holes or clusters of tiny bugs and remove them by hand or spray with a gentle soap solution.
Surprise cold snaps or heat waves can also stress kale; during cold nights, cover young plants with a light fabric, and for scorching days, use a shade cloth.
Most importantly, don’t worry about every little leaf—gardening is about experimenting, learning, and having fun. Even if you run into a few problems, each challenge teaches you more for next time, and who knows? You might discover an unexpected trick that works perfectly for your own backyard.
Enjoy the journey and celebrate your homegrown harvests, no matter how big or small.