Common Issues in Home-Grown Garlic

If you’re frustrated by garlic not forming bulbs, you’re not alone—many home gardeners face this puzzling issue along with yellowing leaves and stunted growth. Garlic is one of the most rewarding crops, but even a small misstep can leave you with leafy plants and disappointingly tiny or missing bulbs.
Real-world causes often include environmental factors like overwatering, insufficient sunlight, or poor soil drainage, all of which can block healthy bulb development. For example, planting garlic in heavy clay soil or in spots that never fully dry out often leads to stunted or misshapen bulbs.
Choosing the right variety is also crucial—some types are better suited to your region’s climate, and growing the wrong one can mean healthy green tops, but no bulbs beneath the soil.
Garlic follows a specific timeline for growth: after fall planting, roots develop before winter dormancy, then leaf growth resumes in spring, with bulbs finally swelling in early summer. Recognizing these milestones helps you spot early warning signs of trouble and intervene before harvest time disappointment.
In this post, we’ll dive into the exact causes behind common garlic problems and the fixes you can try in your own garden.
Understanding Garlic’s Growth Stages and Readiness
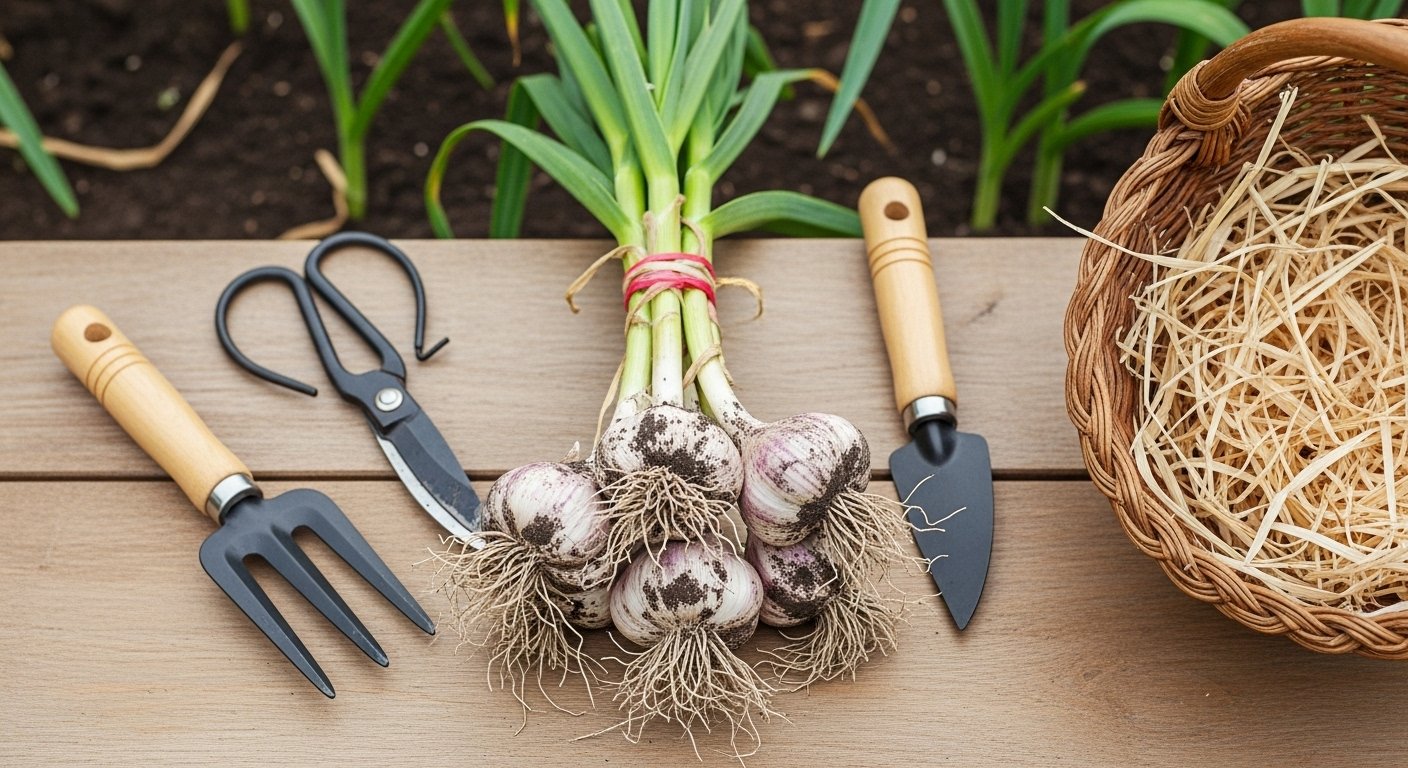
Growing garlic successfully means recognizing each stage in its lifecycle and knowing what to expect along the way. It all starts with planting, usually in the fall before the ground freezes—choose healthy, firm cloves and plant them pointed side up about two inches deep.
Over winter, you won’t see much happening above ground, but the cloves are developing roots in the soil. When spring arrives and temperatures rise, garlic enters its next phase: rapid leaf growth. Green shoots will break through the soil and multiply, forming tall, lush leaves—healthy plants typically produce around five to eight sturdy leaves.
Around late spring to early summer, you’ll notice a curled stalk emerging from the center of hardneck varieties—this is the scape. It’s important to snip off scapes once they coil, as doing so channels the plant’s energy into enlarging the bulb underground; plus, scapes themselves are tasty and can be used in stir-fries or pesto.
Bulb formation kicks in after scape removal; the leaf tips may begin to yellow as energy shifts below ground. During this bulbing stage, the cloves swell and take on their mature form, ideally around mid to late summer.
The last stage, maturation, is critical for harvest timing. Watch for about one third to one half of the leaves to turn brown while the lower stems remain somewhat green—this signals the bulbs are fully formed but not yet splitting.
Harvesting too early, when most leaves are still green, can result in undersized, watery bulbs with poor storage quality; wait too long, after most leaves are dead, and bulbs may split or lose their protective skins, making them more likely to spoil in storage.
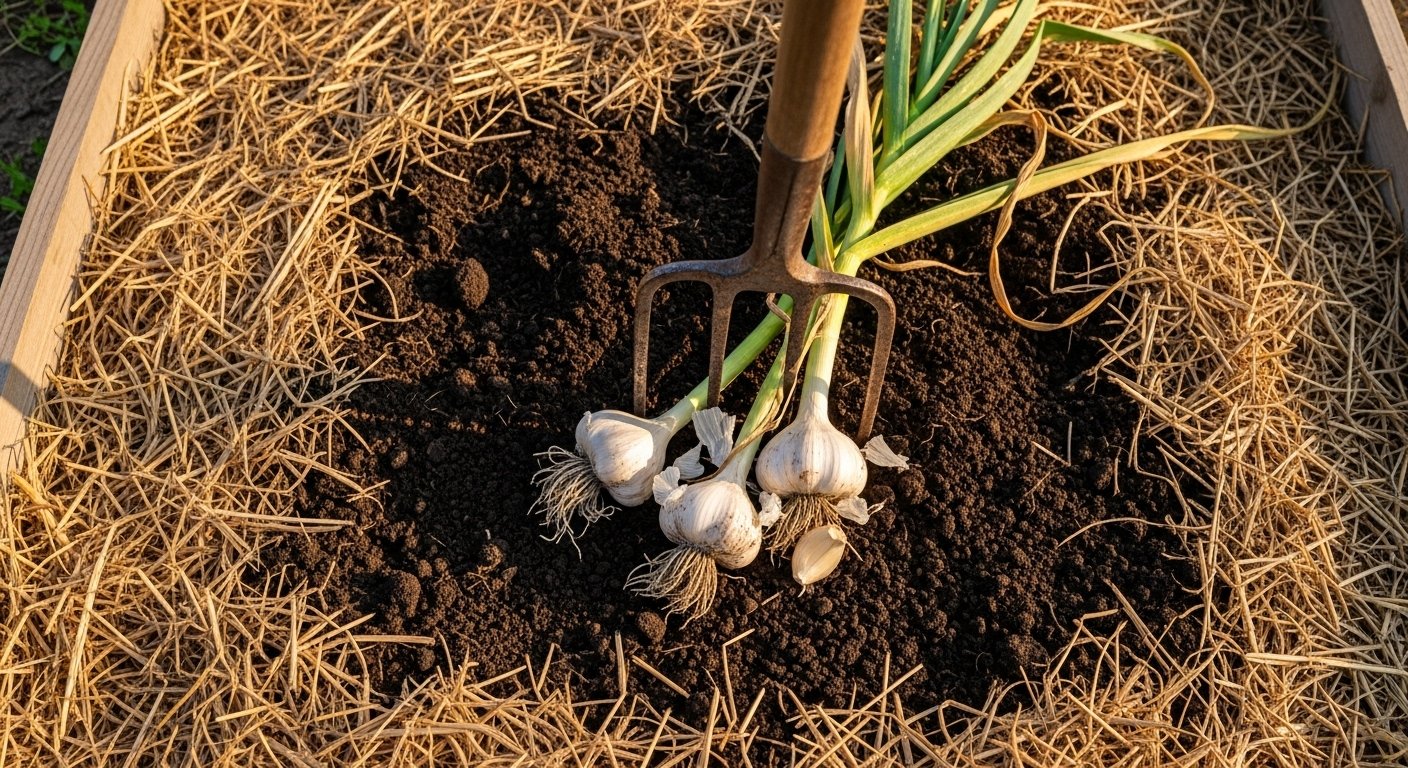
Take the garlic out gently with a fork or shovel, brush off excess soil, and cure the bulbs in a dry, airy place for a few weeks. Understanding this timeline—from fall planting, to spring leaf surge, to scape management, bulbing, and well-timed harvest—helps ensure big, flavorful bulbs that last for months in your pantry.
Water Woes: Overwatering, Underwatering, and Drainage Fixes
Watering can make or break your garlic harvest, and both too much and too little lead to trouble. Overwatering is a common culprit, often causing garlic bulbs to rot underground—a problem that’s hard to spot until it’s too late. Signs include persistently soggy soil, drooping yellow leaves, or a sour smell from the bed.
Conversely, underwatered garlic develops dry, dusty soil, with leaves that brown and curl, and may produce small, shriveled bulbs that never fully form. One quick soil check is to stick your finger about two inches into the dirt; it should feel cool and just slightly moist—not soaking, not bone-dry.
Morning is the best time to water garlic, allowing surface moisture to evaporate and reducing fungal risks. For most climates, aim for deep, infrequent watering—about once a week—rather than light daily sprinkles, adjusting for rainfall or extreme heat.
Good drainage is vital to avoiding waterlogged roots. If your soil stays puddled after a rain, consider growing garlic in raised beds, adding sand or compost to loosen heavy clay, or mixing perlite into the soil to boost aeration. Mulching can also help balance moisture levels and keep roots from drying out too quickly between waterings.
By tuning in to soil texture and how your plants look, and refining your approach with a thoughtful watering schedule and improved beds, you’ll be well on your way to healthy, robust garlic bulbs.
Fungal Diseases and Pest Challenges in Garlic
Growing garlic can be incredibly rewarding, but it also comes with its fair share of fungal diseases and pest problems that can quickly ruin a crop if left unchecked. Two of the most common fungal threats are white rot and downy mildew.
White rot often shows up as yellowing, wilting leaves and white, fluffy fungal growth at the base of your garlic plants, sometimes accompanied by a soft rot on the bulb. If you spot this, your soil may be harboring sclerotia, tiny survival structures from the fungus.
Downy mildew usually starts as pale or yellow patches on the upper side of the leaves, while the undersides develop grayish-purple, fuzzy growth. This leads to stunted bulbs and leaf collapse.
Garlic is also vulnerable to pests like onion maggots and nematodes. Onion maggots chew on roots and bulbs, causing yellowing, drooping, and eventually decaying plants. You might even spot tunnels inside bulbs if you dig one up. Nematodes, microscopic worms, produce distorted, swollen bulbs and stunted growth; sometimes you’ll see cracked skin or brownish streaks inside the cloves.
Organic Ways to Manage Garlic Diseases and Pests
Fortunately, there are affordable, organic methods to keep these issues in check:
- Crop rotation: Avoid planting garlic or other alliums in the same area for at least three to four years to prevent disease build-up.
- Garden sanitation: Remove all plant debris at the end of the season and never compost infected plants.
- Mulching: Use clean straw to create a barrier against maggot-laying flies.
- Seed treatment: Soak seed garlic in hot water (about 120°F/49°C) for 20 minutes before planting to kill hidden nematodes and pests.
- Soil health: Use robust compost and organic fertilizers instead of chemicals to boost plant resilience and support beneficial soil life that helps suppress diseases and pests.
- Early removal: Promptly remove affected plants to prevent infections from spreading.
- Companion planting: Interplant with pest-repelling herbs like chives or mint.
Regularly inspect your crop for early signs—catching problems early is the key to saving your garlic and ensuring a great harvest.
Optimizing Soil and Nutrients for Better Garlic Bulbs
Getting the soil right is the foundation for growing healthy, robust garlic bulbs. Garlic thrives best in loose, well-drained soil that’s rich in organic matter and nutrients. Ideally, your soil should have a pH between 6.0 and 7.0—slightly acidic to neutral—which helps garlic access all the minerals it needs.
If your soil is heavy clay or compacted, work in plenty of compost or well-rotted manure to loosen it up and boost fertility. Raised beds are a smart solution for gardeners dealing with drainage issues, especially after heavy rains.
Before planting in the fall, mix in a balanced, slow-release fertilizer—look for one with slightly higher phosphorus (like a 5-10-5 NPK), since that supports good bulb development. Side-dress with a nitrogen-rich fertilizer, such as blood meal or fish emulsion, when green shoots emerge in spring, but stop fertilizing about a month before harvest to avoid lush growth at the expense of bulb size.
Mulching: A Garlic-Growing Hack
Mulching pays off in several ways. Spreading a 2-4 inch layer of organic mulch—like straw, shredded leaves, or grass clippings—helps regulate soil temperature, retain moisture, and suppress weeds all season long. As the mulch slowly breaks down, it feeds the soil, too, giving garlic a steady trickle of nutrients.
For gardeners dealing with stubborn or depleted soils, building up organic content year over year is key. After harvesting your garlic, add more compost or plant a green manure crop like clover or buckwheat to replenish lost nutrients and improve tilth for next time.
Even if your starting soil isn’t perfect, these steps will lead to bigger, healthier garlic bulbs each season and set your garden up for future success.
Harvesting Garlic: Knowing When and How for Best Results
Harvesting garlic at the right time makes all the difference between plump, flavorful bulbs and disappointing, puny ones. One of the clearest signals that garlic is ready is found in its leaves: wait until the lower leaves have turned yellow and begun to dry out, while the top three to five leaves remain green.
For hardneck varieties, watch for scapes—the curly flower stalks—that appear in late spring; cut these off when they’re young to encourage bigger bulbs and use them in stir-fries or pesto.
Timing is key: harvest too early and the bulbs will be small with thin skins, but wait too long and they may split or become susceptible to rot.
When you’re ready to dig, use a garden fork to gently loosen the soil about 6 inches from the base, carefully lifting bulbs without bruising them. Shake off excess dirt without washing the bulbs; moisture can invite fungal issues.
Cure garlic by hanging the plants in a dry, well-ventilated area out of direct sunlight for two to three weeks—air circulation is crucial to prevent mold. Once the leaves and stems are fully dry, trim roots and cut stems to about an inch above the bulb, then store in mesh bags or baskets somewhere cool and dark.
A common frustration is finding bulbs that are too small or with poorly formed cloves. This often results from planting too late, overcrowding, or insufficient water in spring.
For a better crop next season, plant in the fall using the biggest, healthiest cloves spaced 4–6 inches apart, mulch heavily to protect from winter cold, and fertilize lightly in early spring.
Garlic is forgiving, but careful timing and a few good habits set you up for a harvest that’s as satisfying as it is delicious.