Introduction to Growing Kale
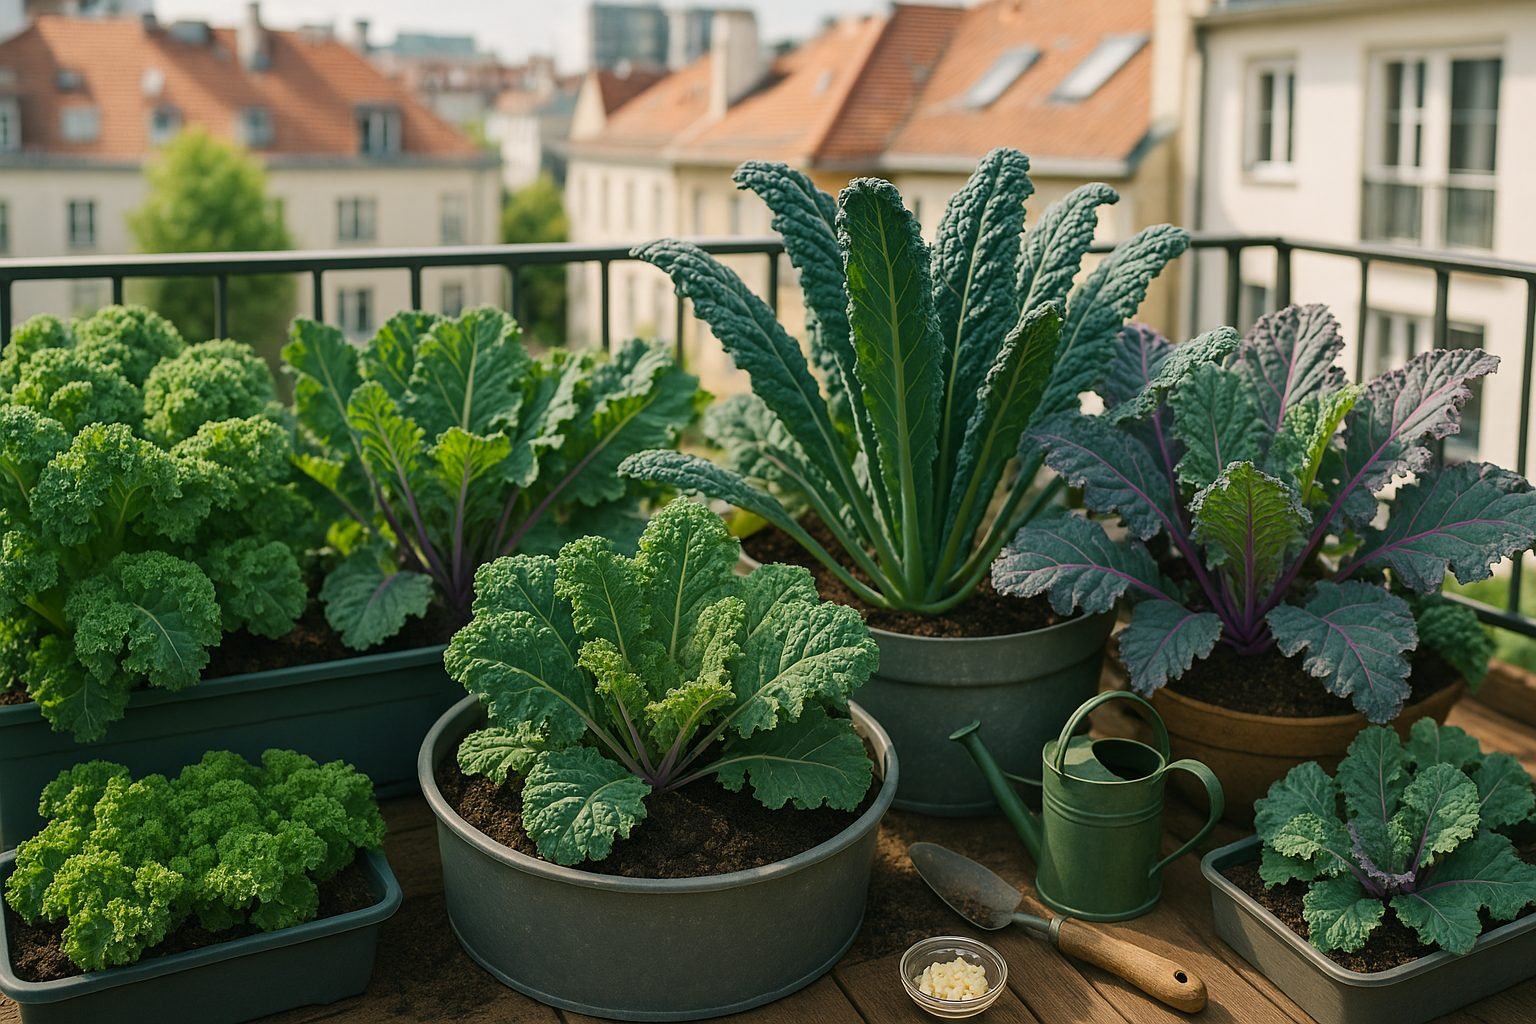
Urban kale gardening makes it possible for anyone, even with limited space, to enjoy fresh, homegrown greens right in the heart of the city. Kale, a hardy leafy green from the brassica family, has surged in popularity—not just for its vibrant taste but also for its stunning resilience and adaptability.
Often called a “superfood,” kale is packed with nutrients—think vitamins A, C, and K, along with calcium and powerful antioxidants—making it a top choice for health-conscious gardeners looking to boost their diets.
In city environments where space is tight, varieties like curly kale, lacinato (also known as dinosaur kale), and Red Russian kale shine, thriving in containers on balconies, rooftops, or sunny apartment windowsills.
Each type brings its own unique texture and flavor:
- Curly kale: robust and frilly, perfect for crisp salads
- Lacinato: delivers a tender bite and deep green hue
- Red Russian: offers purple-stemmed beauty and a mild taste that’s great for stir-fries or smoothies
For beginners, urban kale gardening is especially rewarding—the plant tolerates cooler temperatures, resists many pests, and keeps producing gorgeous leaves after multiple harvests. Seasoned growers also appreciate kale’s forgiving nature, allowing experimentation with sowing, pruning, and companion planting.
Plus, nothing beats the convenience of snipping a handful of leaves just steps from your kitchen, creating a direct farm-to-table experience even in the most crowded neighborhoods. Whether you’re starting with a single pot or planning a rooftop oasis, kale’s versatility makes it a star of any urban garden.
Choosing the Right Kale Variety
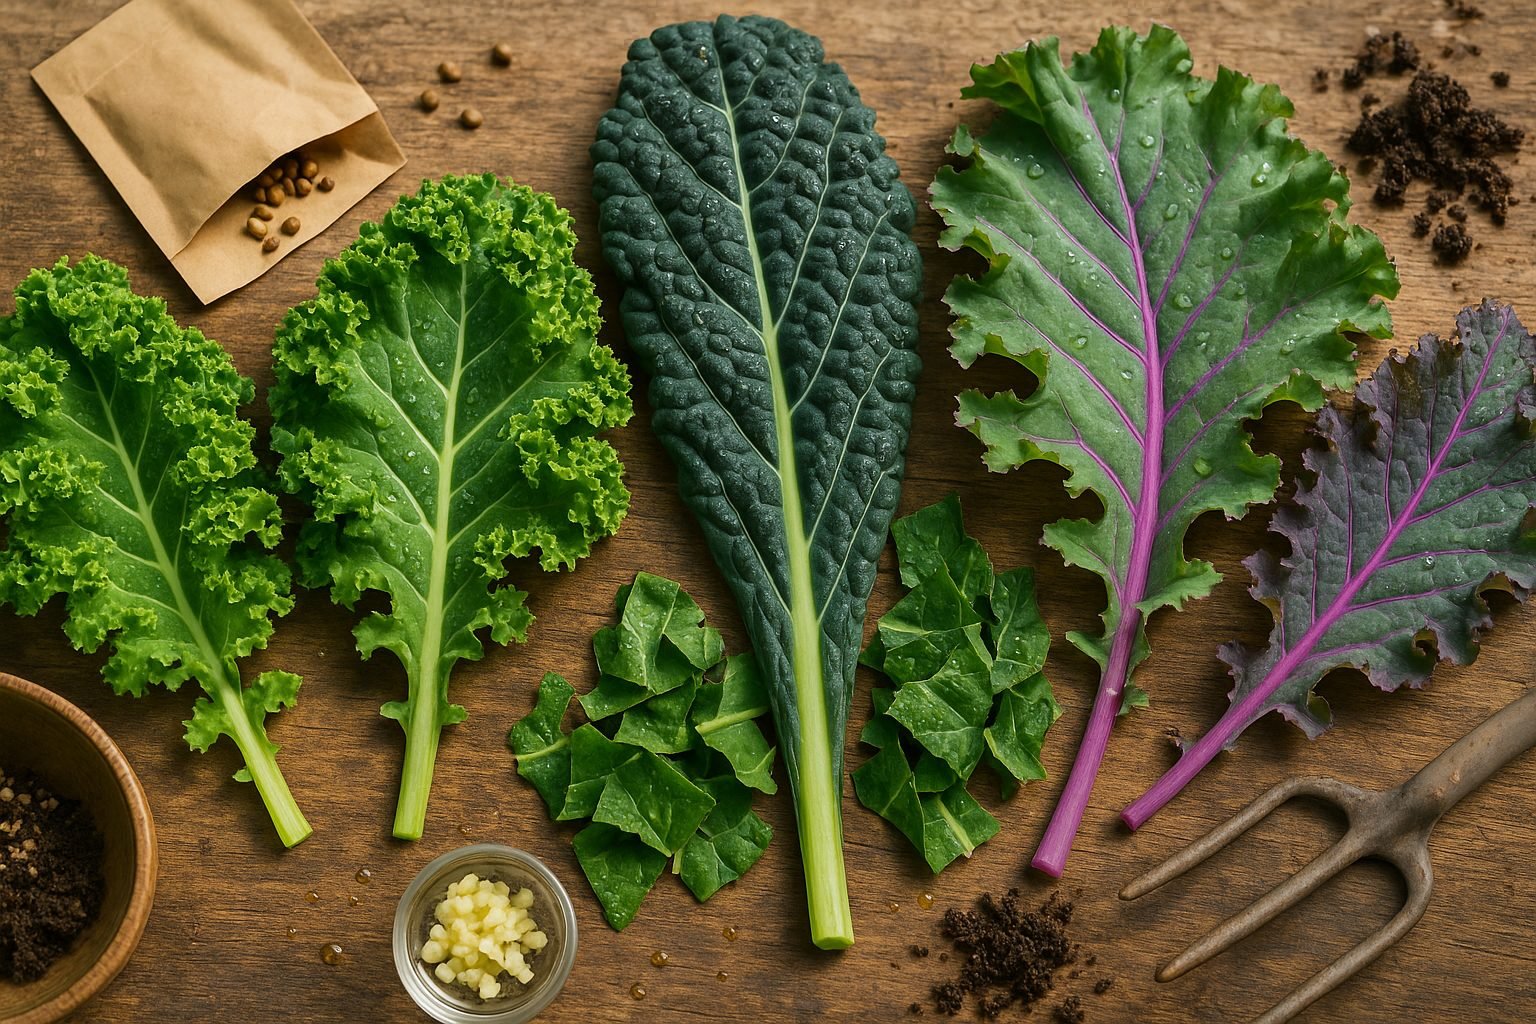
When it comes to picking the perfect kale for your garden or kitchen, knowing the popular varieties can make all the difference.
Curly kale, with its ruffled, bright green leaves, is widely available and works well raw in salads or blended into smoothies thanks to its mildly peppery flavor.
Lacinato kale, also known as dinosaur or Tuscan kale, stands out with its dark, bumpy leaves and slightly sweeter, earthier taste, making it a favorite for sautés or adding to soups.
Red Russian kale, recognized by its tender, flat leaves and striking purple veins, is more delicate and offers a mild, almost sweet taste, ideal for salads or quick stir-fries.
When selecting a variety, consider your climate—curly and Red Russian kale generally tolerate cold snaps better, whereas Lacinato prefers milder weather.
Think about your favorite dishes too: choose sturdy curly kale if you like chips or hardy greens, or Lacinato if you’re after a silkier texture.
For the best yields and flavors, always buy seeds or seedlings from reputable local nurseries or online seed companies like Baker Creek or Johnny’s Selected Seeds.
Check for organic or certified disease-free options and avoid seeds that look faded or damaged. A simple way to test freshness is by looking at package dates—newer is better.
Chatting with local gardeners or reading regional garden forums can also help you discover varieties that thrive in your area.
This thoughtful approach ensures your kale plants will be healthy, tasty, and suited to your needs.
Soil Preparation and Planting Tips
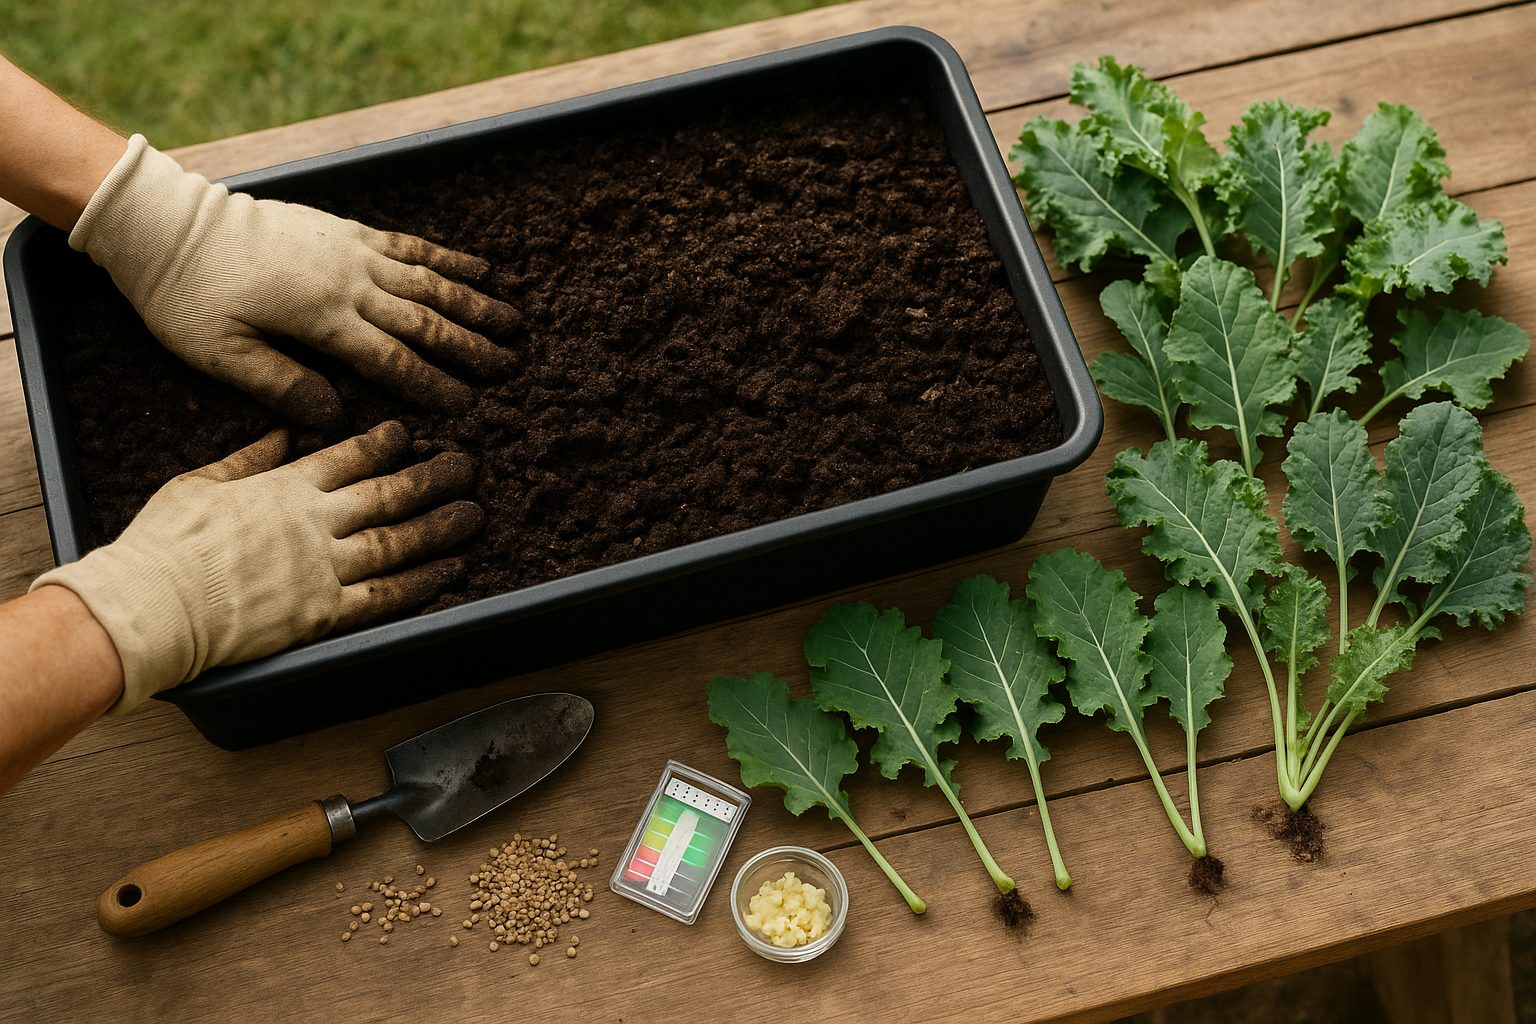
To grow healthy, productive kale, start by preparing the right soil. Kale thrives in rich, loamy soil that drains well and holds moisture—avoid clay-heavy or sandy patches that either get waterlogged or dry out too fast. Aim for a slightly acidic to neutral pH between 6.0 and 7.0; a quick soil test kit from your local garden center can help you check this.
Before planting, work in 2-3 inches of compost or well-rotted manure to boost nutrients and improve soil texture. You can also add a balanced organic fertilizer for an extra kick. Good drainage is crucial, so if your garden tends to stay soggy, try raising your garden beds or working in coarse sand or perlite to help excess water move away from the roots.
When it comes to planting, kale is hardy and can be started by direct seeding outside about 2 weeks before your last expected spring frost, or by growing seedlings indoors 4-6 weeks beforehand and transplanting them into the garden.
- Direct seeding: Sow seeds about 1/2 inch deep and thin to the strongest plants once they sprout, leaving 12-18 inches between each.
- Transplanting: Set seedlings at the same depth they grew indoors, maintaining the same spacing of 12-18 inches.
Crowded kale tends to be spindly and more prone to disease, so resist the temptation to plant too close.
For healthy, leafy growth, site your kale where it gets at least 6 hours of direct sunlight per day; a spot with morning sun and some afternoon shade works well in particularly hot climates. Consistent moisture—not soggy soil, but regular deep watering—will keep kale sweet and tender. Mulching with straw or shredded leaves helps regulate moisture, control weeds, and protect roots as young plants get established.
With careful soil preparation and smart planting, you can set your kale up for a lush, productive season.
Essential Care and Maintenance
Kale is hardy and surprisingly low-maintenance, but it thrives with a bit of thoughtful care. Start by watering consistently—usually about 1 to 1.5 inches per week is ideal, either from rainfall or supplemental watering. The best way to check? Stick your finger into the soil; if the top inch feels dry, it’s time to water.
Signs of underwatering include drooping, crisp leaves, while yellowing and overly soggy soil can indicate too much water.
For feeding, kale loves a nutrient boost. Mix in a balanced organic fertilizer, like compost or aged manure, at planting, then feed with a liquid fish emulsion every month, or use a slow-release synthetic fertilizer following package directions.
Mulch around the plants with straw or leaf mulch to retain moisture, keep weeds down, and protect the roots from temperature swings. Make weeding a weekly habit, as kale suffers when crowded by competitors.
If you’re growing tall varieties or live in a windy area, don’t hesitate to add stakes or simple support hoops to prevent plants from toppling.
Container and raised-bed gardeners should use high-quality potting mix and select a container at least 12 inches deep to give roots plenty of room. Raised beds warm up faster in spring and drain well, cutting down on root rot risks. In hot climates, move containers into partial shade in the afternoon to prevent wilting.
With these practical steps, you’ll keep kale flourishing from seedling to harvest.
Common Problems and Troubleshooting
Gardeners often encounter a few typical challenges when growing leafy greens: pests like aphids and cabbage worms, and diseases such as powdery mildew and black rot.
Aphids are tiny bugs that cluster on leaves, sucking sap and leaving behind sticky residue. You might notice curled, yellowing leaves. Cabbage worms chew irregular holes in leaves and can quickly decimate a crop.
To control aphids organically, spray plants with a strong stream of water to dislodge them, or introduce beneficial insects like ladybugs. For more serious infestations, neem oil or insecticidal soap works well. For cabbage worms, handpick them off or use Bt (Bacillus thuringiensis), an organic treatment.
Conventional methods include applying targeted insecticides, but always follow label instructions and prioritize non-chemical solutions when possible.
Diseases like powdery mildew appear as white, powdery spots on leaves, thriving in humid conditions. Improve air circulation, avoid overhead watering, and remove affected leaves for organic control. For severe cases, fungicides labeled for edibles can be used.
Black rot, on the other hand, shows up as V-shaped yellow lesions on leaf edges. It spreads through water and tools, so promptly remove infected plants and sterilize garden tools between uses.
To spot general plant stress, look for symptoms like wilting, leaf discoloration, or stunted growth—often caused by inconsistent watering, nutrient deficiencies, or overcrowding.
Regularly inspect your plants, mulch to retain moisture, and ensure proper spacing for airflow. Rotating crops each season also helps prevent buildup of pests and disease. Taking these simple steps makes it much easier to keep your greens healthy, thriving, and ready for harvest.
Harvesting and Storing Kale
Knowing when to harvest kale can make all the difference in taste and plant health. Kale leaves are best picked when they are about the size of your hand and have a rich, deep green—or purple, depending on the variety—color. Younger leaves tend to be more tender and mild, perfect for salads, while larger, mature leaves are heartier and ideal for sautés or soups.
Check for firmness and avoid harvesting yellowed, wilted, or damaged leaves, as these are past their prime. To harvest without harming the plant, use clean gardening shears or simply pinch off the outer leaves, leaving the central bud intact—this allows the plant to keep producing new leaves for months. Try not to strip more than one-third of the plant at a time so it can continue thriving.
For short-term storage, wash the leaves, pat them dry, and keep them in a breathable produce bag or between paper towels inside an airtight container in the refrigerator—this keeps them crisp for up to a week.
For longer storage, blanch the leaves in boiling water for two to three minutes, then transfer them to an ice bath to stop cooking. Dry thoroughly, chop if desired, and pack into freezer bags, removing as much air as possible; frozen kale will retain its nutrients and flavor for up to eight months. This way, you’ll have garden-fresh kale ready to use all year long.
Kale FAQs and Expert Tips
Kale is a resilient and versatile green, but many gardeners wonder about common challenges like bolting, overwintering, and regrowth. Bolting—when kale sends up a flower stalk—usually happens in warm weather or if the plant gets stressed. To avoid this, plant kale in early spring or late summer and keep the soil evenly moist.
Overwintering kale is surprisingly easy in many climates: simply mulch heavily in late fall and harvest leaves as needed—cold actually sweetens kale’s flavor.
For regrowth after cutting, harvest mature leaves from the outer edges, leaving the central growing tip intact; this encourages continuous production.
Expert Tips
- Space your plants well (at least 12-18 inches apart) to allow for airflow and prevent disease.
- Feed with a balanced organic fertilizer every few weeks for lush growth.
Enjoying Your Kale Harvest
Looking for ways to enjoy a bumper crop? Besides the usual salads and smoothies, try:
- Roasting kale chips in the oven for a crunchy snack.
- Massaging raw leaves with olive oil and lemon to soften them for salads.
- Stirring chopped kale into soups, stews, and omelets.
- Finely dicing and sautéing the stems for extra crunch.
With these strategies, both your garden and kitchen will be brimming with vibrant, healthy kale all season long.