Getting Started

If you’re eager to succeed in your vegetable patch, investing in the right brussels sprouts gardening tools can make all the difference—but the journey begins long before you pick up a trowel. Brussels sprouts are cool-season crops that require patience and the right conditions for those signature, tight little buds to thrive. They need plenty of sunlight, fertile, well-draining soil, and consistent watering, especially as sprouts begin to form along the plant’s thick stalks. Before you shop for seeds or tools, it’s crucial to understand how your climate and preferences affect your choices.
There’s no one-size-fits-all answer when it comes to picking the best Brussels sprouts variety for your garden. For gardeners in regions with shorter summers, opt for early-maturing varieties like ‘Jade Cross,’ which can produce harvestable sprouts in as little as 85 days. This type is not only convenient for those hit by early autumn frosts but also boasts natural resistance to common pests. If you live in a milder climate and want a longer harvest, ‘Long Island Improved’ is a time-tested heirloom that matures in about 90-100 days and yields a generous, flavorful crop. Those looking for extra cold tolerance should consider ‘Diablo,’ a robust variety known for holding up to chilly late fall and even light frosts, often resulting in sweetened, cold-kissed sprouts.
Aside from climate, taste and usage matter. If you favor tender, nutty sprouts for roasting, ‘Oliver’ is a favorite among home cooks. Meanwhile, ‘Hestia’ offers reliable uniformity and strong disease resistance—ideal if clubroot or downy mildew is a problem in your garden.
To get the most from these varieties, don’t forget the must-have Brussels sprouts gardening tools: a quality dibber for transplanting seedlings, sturdy plant stakes to support top-heavy stalks, and sharp, sanitized snips or pruning shears for clean harvesting. Choosing with care at every step—from variety to equipment—sets you up for lush, rewarding harvests all season long.
When and How to Plant Brussels Sprouts
For the best Brussels sprouts harvest, timing your planting according to your climate zone is key. In cooler regions (zones 3-6), start seeds indoors about 14-16 weeks before your area’s first fall frost. This typically means beginning in early spring for a late-summer transplant.
Warmer regions (zones 7-10) can sow seeds outdoors in late summer for a winter crop. However, in very hot climates, wait until late summer or early fall to avoid bolting.
Choose a spot with at least six hours of direct sunlight, as Brussels sprouts love full sun and need it for dense, healthy heads. Before planting, prepare the soil by mixing in plenty of compost to enrich nutrients and improve drainage—a loose, well-draining soil prevents roots from getting soggy.
Aim for a soil pH of 6.5 to 7.0; a simple test kit from a garden center can help you adjust it if needed. Sow seeds indoors about ¼ inch deep in seed trays, keeping the soil moist but not saturated.
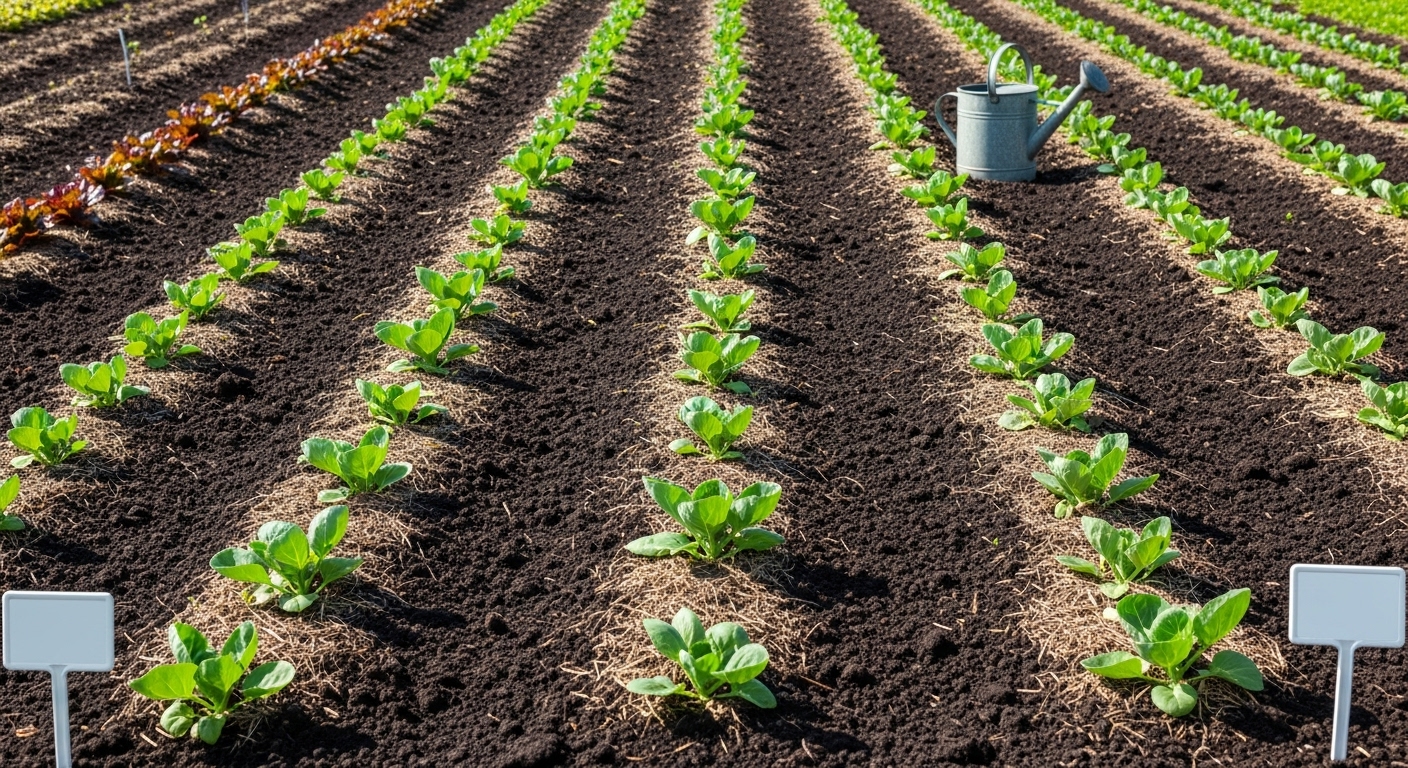
When seedlings have at least two strong leaves and after hardening them off for a week outdoors, transplant them into the garden when nighttime temperatures remain above 45°F. Space plants 18 to 24 inches apart in rows, leaving 30 inches between rows so they have room to grow tall stems and large leaves.
Water immediately after transplanting and apply a layer of mulch to maintain soil moisture and suppress weeds.
For direct outdoor sowing in milder climates, plant seeds ½ inch deep, thin seedlings to the correct spacing once they sprout, and keep the bed consistently moist.
Throughout the growing season, check for signs of pests like aphids and cabbage worms. Remove them by hand or use row covers, and keep feeding plants with balanced fertilizer every few weeks for robust growth.
By matching planting times to your climate, providing the right sunlight and soil conditions, and following these clear steps, you’ll set your Brussels sprouts up for a strong, healthy start.
Essential Growing and Care Tips Through the Seasons
Caring for your garden throughout the year means adapting your approach as the seasons change. Consistent, deep watering is key—early mornings are best to reduce evaporation, and you should adjust frequency depending on rainfall and heat. For most vegetables and flowers, aim for about an inch of water per week, but check soil moisture regularly by sticking your finger an inch or two deep to confirm if watering is needed.
Mulching is one of the simplest, most effective steps you can take; add a two-to-three-inch layer of straw, shredded leaves, or wood chips to help retain moisture, suppress weeds, and regulate soil temperature all year long.
When it comes to fertilizing, start with a balanced slow-release organic fertilizer in spring, then supplement with compost or liquid feed every few weeks, especially for heavy-feeding crops like tomatoes or squash.
Summer brings extra challenges: heat waves can stress plants or cause lettuce, cilantro, and spinach to bolt. Try planting heat-resistant varieties, providing afternoon shade with row covers or shade cloth, and watering deeply to keep roots cool.
Staking or trellising taller plants like beans and tomatoes prevents wind damage and saves space, helping you avoid overcrowding, which can lead to disease. Overcrowding also limits air circulation and sunlight exposure, so thin seedlings as recommended on seed packets and give each plant room to grow.
Avoid common watering mistakes like wetting foliage (which invites disease) or relying on a fixed schedule without considering your local weather, as both can harm plant health. Throughout the season, closely monitor soil moisture and plant needs instead of sticking to rigid routines.
Being adaptive—especially during temperature spikes or dry spells—ensures your garden thrives, producing healthy, resilient plants long after the growing season begins.
Common Pests and Diseases: Prevention and Management
Brussels sprouts can attract several troublesome pests, with cabbage worms and aphids being the most common culprits. Cabbage worms, typically green caterpillars, chew ragged holes in leaves and hide along the undersides, while aphids are tiny, soft-bodied insects that cluster on new growth, leaving plants sticky with honeydew. Keep an eye out for yellowing leaves, curled edges, or visible movement—these are telltale signs of an infestation.
To protect your crops, start with preventive steps like crop rotation, which helps disrupt the life cycles of soil-borne diseases and pests. Also, select resistant Brussels sprout varieties if available and plant them in well-drained, fertile soil to build plant strength.
Major diseases such as clubroot, downy mildew, and black rot can strike, causing wilting, discolored leaves, or stunted growth. Avoid these by watering at the plant base, removing debris, and giving plants enough space for airflow.
For organic and mechanical controls, netting is a great option to physically block flying pests from laying eggs on the plants. Regularly inspect your plants and handpick visible pests—especially effective with larger caterpillars. To manage aphids, blast them off with a strong spray of water or use insecticidal soap that is safe for edible crops. For severe cases, introduce beneficial insects like ladybugs, which feed on aphids naturally.
Always avoid harsh chemicals that can harm pollinators or your soil’s health. By combining these proactive and reactive strategies, you can enjoy a healthier harvest with minimal chemical input, keeping your Brussels sprouts thriving all season long.
Harvesting and Storing Brussels Sprouts
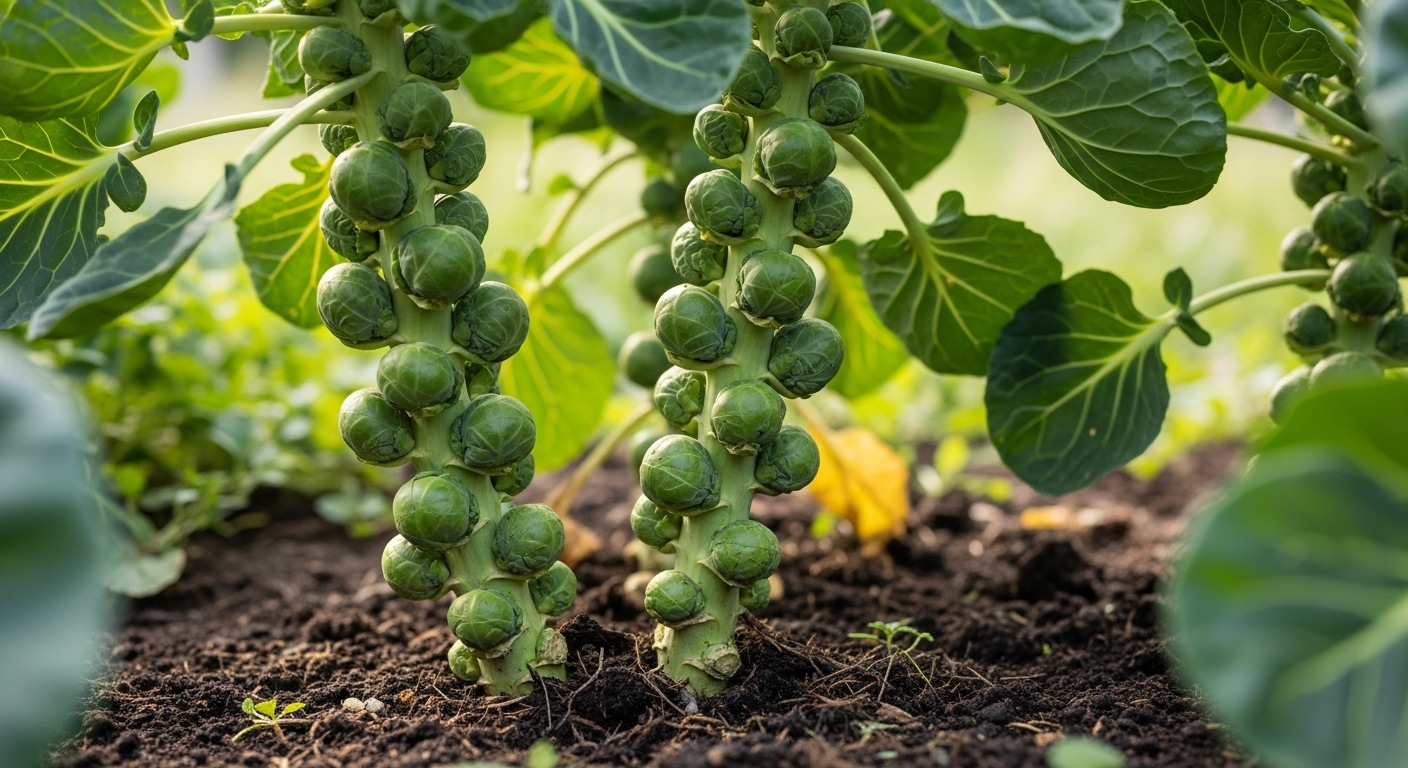
Knowing when to harvest Brussels sprouts is key to getting the best flavor and yield from your plants. Look for firm, round sprouts that are about 1 to 1.5 inches in diameter—roughly the size of a large marble or small walnut. Sprouts that are too small might be bitter, while oversized ones can become mushy or lose their sweet, nutty taste.
Typically, sprouts mature from the bottom up along the stalk, so always pick the lowest sprouts first. When you’re ready to harvest, gently twist each sprout downward or snap them off the stalk with a sharp knife. Leave the upper leaves and smaller sprouts intact so the plant can continue producing.
For a fuller harvest, remove the lower leaves as you pick; this directs more energy to the sprouts above.
Once picked, store freshly harvested Brussels sprouts in a perforated plastic bag in your refrigerator’s crisper drawer, where they’ll stay fresh for up to a week. If you want to keep them longer, blanch the cleaned sprouts in boiling water for three to five minutes, plunge them into ice water, then dry and pack them into airtight freezer bags—this can extend their shelf life by several months.
For best results, only wash sprouts just before you plan to use them to prevent excess moisture that can cause spoilage. With a bit of care, your homegrown Brussels sprouts can deliver crisp texture and fresh flavor well into winter.
Troubleshooting: Solving Common Growing Problems
Even experienced gardeners can run into issues like poor sprout formation, yellowing leaves, or stunted growth, but with a little troubleshooting, most problems are easy to fix.
If your plants aren’t sprouting well, check the basics first: ensure they’re getting enough sunlight and the soil isn’t waterlogged or too dry, as both extremes can hinder germination.
Leaf yellowing often signals nutrient deficiencies, particularly nitrogen, so try adding a balanced fertilizer or compost to rejuvenate the soil.
Stunted growth can result from overcrowding—be sure to thin seedlings so each one has space to breathe and access nutrients—or from compacted soil, which you can gently loosen with a garden fork.
Overwatering is another frequent culprit, so let the top inch of soil dry out before watering again to prevent root rot.
For even healthier plants, regularly prune away dead or diseased leaves to boost airflow, and stake taller varieties early to support their stems against wind or heavy fruit.
If pests are an issue, inspect the undersides of leaves and try organic solutions like neem oil or introducing beneficial insects.
By staying attentive and making these small adjustments, your plants have a much better shot at thriving and producing a lush, vigorous harvest.
Frequently Asked Questions and Expert Tips
If you’re new to growing Brussels sprouts in containers, you might wonder how much sunlight they need and whether pots will limit their growth. Brussels sprouts love sunlight—aim for at least six hours a day—and choose large, deep pots (at least 12 inches wide and deep) to give their roots plenty of room.
Another common concern is nutrition. Container soil can dry out and lose nutrients faster, so use a good-quality potting mix and add a slow-release fertilizer. Don’t forget to water steadily, keeping the soil moist but not soggy.
Expert Tips
- Rotate your crops each year, even in pots. Change what you plant to prevent soil diseases and refresh the soil between plantings.
- Try companion planting: pair Brussels sprouts with herbs like mint or flowers like marigolds to naturally deter pests.
Above all, stay patient! Growing Brussels sprouts can take several months, but the wait is worth it for that homegrown flavor.
For detailed steps on container gardening, check university extension programs or trusted gardening sites like The Spruce or the Old Farmer’s Almanac. They’re packed with beginner advice and troubleshooting guides.