Introduction
Curious about trying a new approach to gardening? Growing straw bale beets is an innovative and surprisingly simple method that’s gaining popularity among both beginner and seasoned gardeners. This technique eliminates the need for traditional soil beds and creates a raised, weed-resistant, and eco-friendly environment perfect for beets. Imagine harvesting sweet, tender beets from compact bales on your terrace, patio, or even a small backyard—no heavy digging or perfect soil required!
In this article, you’ll discover step-by-step how to use straw bales as the ideal growing medium for robust, flavorful beets. We’ll walk you through essential preparation steps—from conditioning your straw bales to ensuring they’re nutrient-rich and moisture-retentive—making the setup process straightforward, even if you’re new to gardening. You’ll also learn smart planting techniques, simple care routines that keep pests at bay, and tips for harvesting at peak freshness. Whether you want to grow food in limited spaces, avoid traditional soil problems, or simply garden in a more eco-friendly way, straw bale beets offer a rewarding solution. Let’s dig into the details and set you up for beet-growing success—no matter your experience level.
Benefits of Growing Beets in Straw Bales
Growing beets in straw bales offers an easy and rewarding alternative to traditional gardening, especially for those dealing with poor, rocky, or compacted soil. Straw bales naturally promote excellent drainage, so your beet roots won’t sit in waterlogged earth. This minimizes the risk of rot and ensures steady, healthy growth.
The organic matter in straw warms up quickly in spring and retains heat longer into fall, creating a cozy microclimate for beets to thrive even when outdoor temperatures dip. Another big plus is weed suppression—straw acts as a mulch blanket, cutting down on weeding chores and giving your crops a better chance to flourish without competition.
With no native soil involved, straw bales sharply lower the risk of soil-borne diseases and pests that often plague root veggies. This leads to cleaner, healthier harvests and reduces the need for chemicals. This method is especially effective for urban or small-space gardeners: you can set up a productive beet patch almost anywhere—on a patio, over concrete, or even on rooftops—with minimal effort and impressive yields.
Plus, at the end of the season, spent bales can be composted or used as mulch, ensuring nothing goes to waste. For anyone looking to enjoy fresh, homegrown beets without the hassle of digging or amending tough ground, straw bale gardening offers a simple and efficient solution.
Choosing and Preparing Your Straw Bales
When starting a straw bale garden, selecting the right type of bale is the first and most important step. Choose straw bales made from wheat, oats, or barley, as these break down well and don’t introduce unwanted weeds. It’s best to avoid hay bales since they’re full of seeds that will quickly sprout and compete with your crops.
Once you have your bales, pick a sunny, well-drained spot for placement. Full sunlight—at least 6 to 8 hours a day—ensures healthy plant growth, while good drainage prevents soggy, rotting bales.
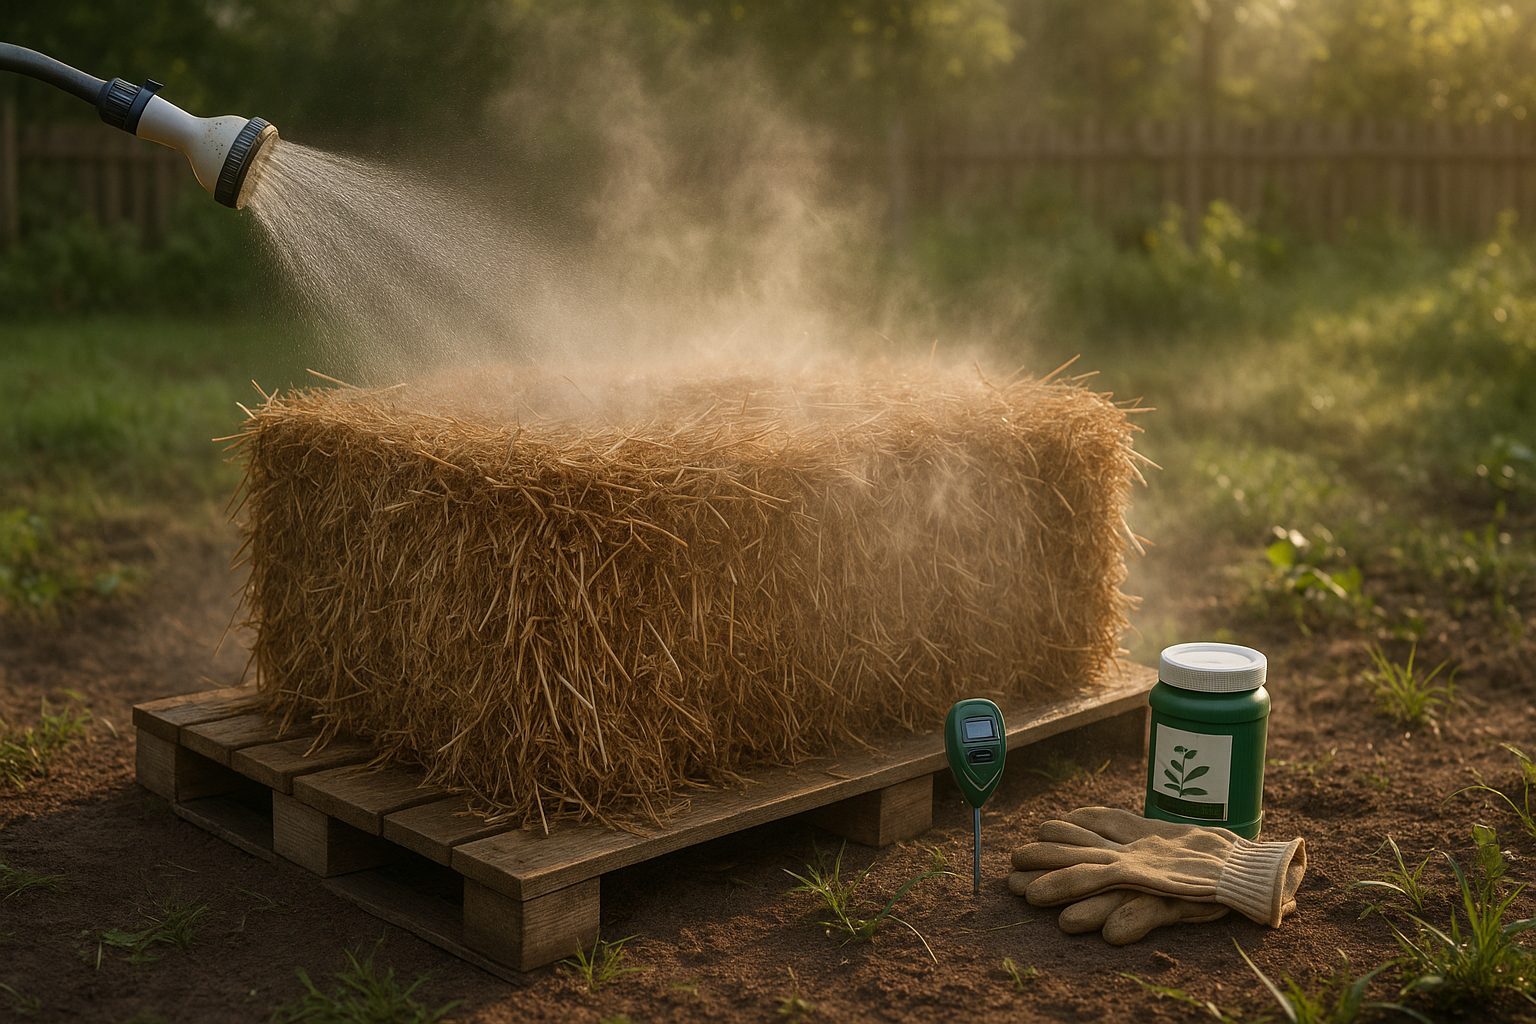
Next, prepare or “condition” your straw bales; this process transforms them into a nutrient-rich, compost-like bed for your plants. Over the course of 10–14 days, keep the bales damp by watering them thoroughly every day. Around days 4 to 6, start adding a high-nitrogen fertilizer (such as lawn fertilizer without weed killer) to speed up the decomposition inside the bale—just sprinkle it on top and water it in.
After a week, you may notice the center of the bale becoming warm, a sign the breakdown process is underway. Continue alternating fertilizer and water for about another week. By the end of this period, your bales should cool down and feel soft inside. At this point, they’re ready for planting.
This conditioning phase is crucial—it ensures that your bales provide nutrients, retain moisture, and encourage plant roots to thrive.
Planting Beets in Straw Bales: Timing, Seed Selection, and Techniques
Growing beets in straw bales starts with timing your planting to suit both your local climate and the condition of your bales. In cooler regions (USDA zones 3-6), aim to sow beet seeds two to four weeks before your average last spring frost, since beets tolerate light frost and cooler soils well. In milder or warmer zones (7-10), you can plant even earlier, using bales as natural insulators, or grow a fall crop by planting in late summer.
However, always wait until your straw bales have gone through a full conditioning cycle—usually about two weeks after starting the composting and watering process—so they’re warm, moist, and beginning to decompose. This creates ideal conditions for root growth.
Seed Selection
For variety, ‘Detroit Dark Red,’ ‘Chioggia,’ and ‘Golden’ beets thrive in straw bales; their robust root systems push easily through the soft bale material. For smaller harvests or tender ‘baby’ beets, consider fast-maturing varieties like ‘Early Wonder’ or any specifically labeled baby beet mix.
Planting Techniques
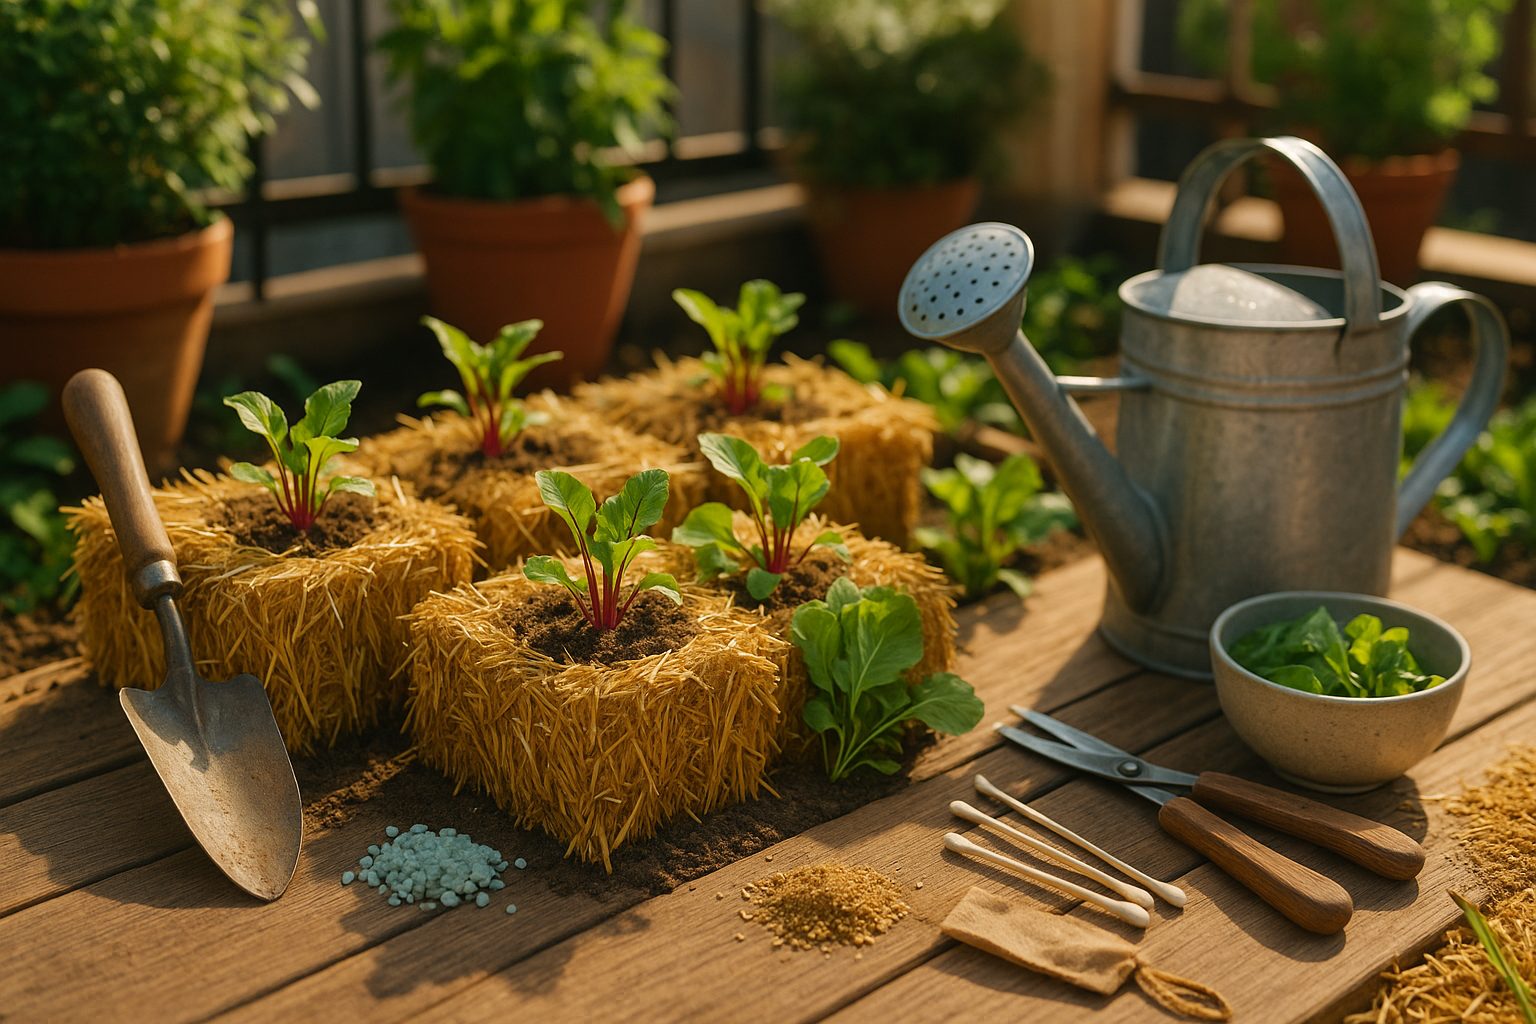
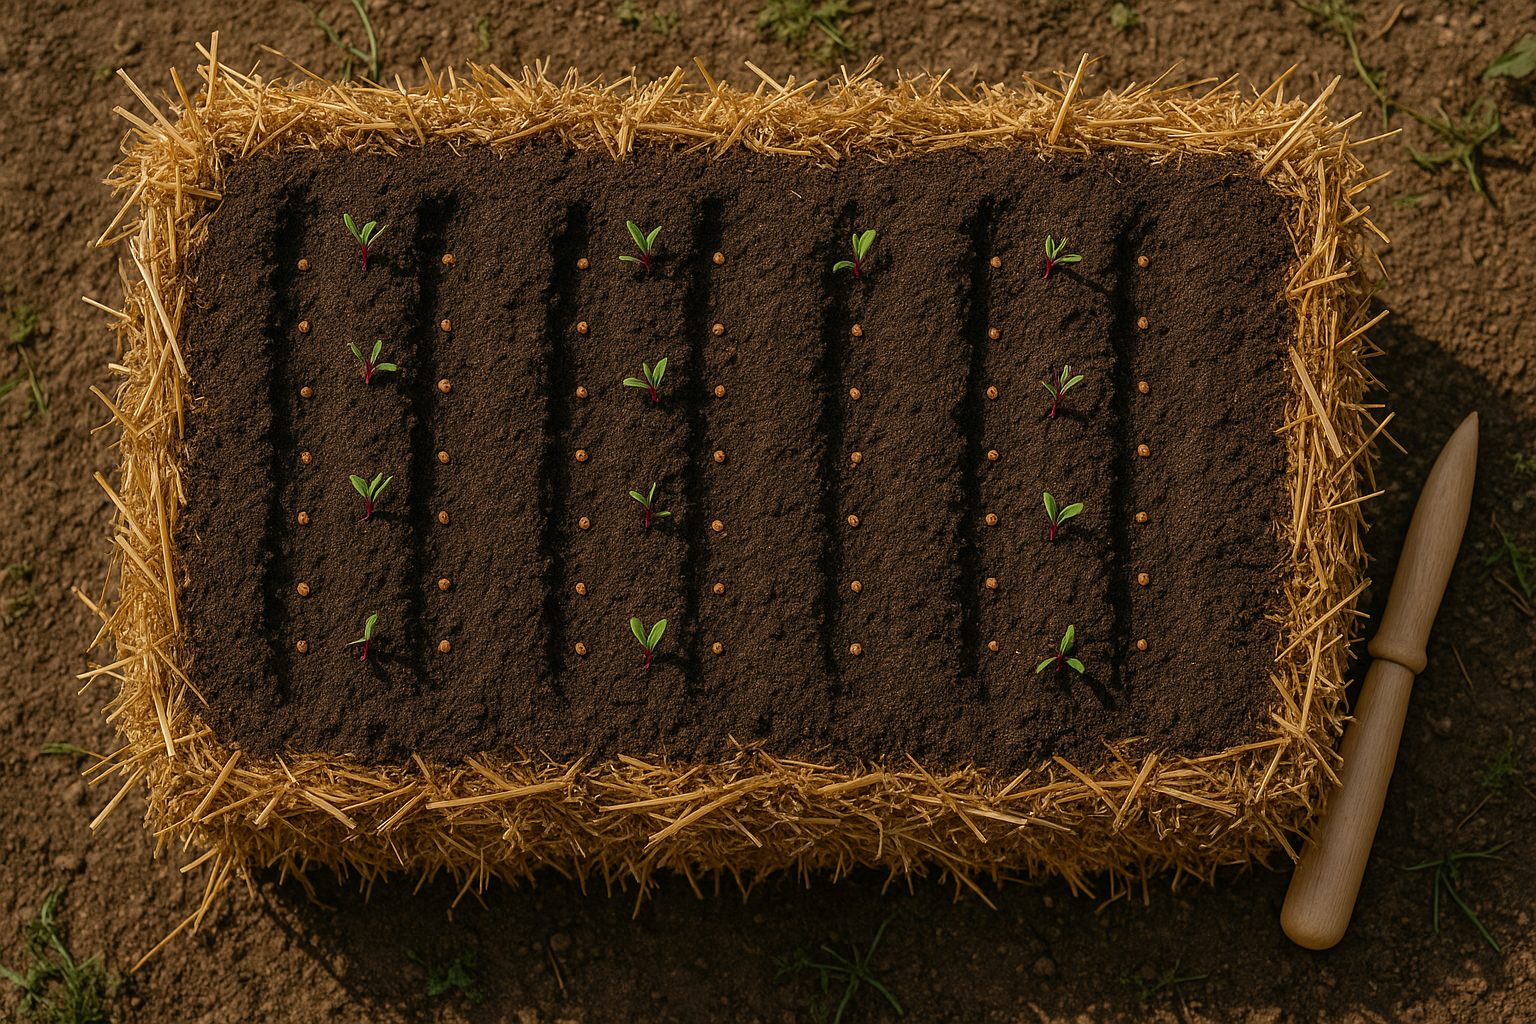
To plant, use your hand or a small tool to make shallow furrows on top of the bale about half an inch deep and 2-3 inches apart. Space each seed about one inch apart within the row. Cover the seeds gently with a light layer of compost or peat moss—just enough to keep them moist and shaded, as straw alone can dry out too quickly.
Mist the surface daily to maintain even moisture; bales lose water faster than traditional soil. When seedlings reach two inches tall, thin them to roughly three inches apart for baby beets, or four inches apart for larger ones, snipping extras at the base rather than pulling to avoid disturbing delicate roots.
Adding a thin layer of compost or potting mix over the straw helps retain moisture and provides extra nutrients, encouraging healthy, sweet beets all season long.
Caring for Your Beet Plants: Watering, Fertilizing, and Troubleshooting
Watering is crucial when growing beets in straw bales because straw dries out much faster than soil, especially during warm, windy days. To keep moisture levels consistent, check your bales daily by sticking your finger about an inch deep; if it feels dry, it’s time to water. Deep, slow watering works best—use a soaker hose or drip irrigation to ensure water penetrates through the bale rather than just running off the surface. Early mornings or late evenings are ideal times, as this reduces evaporation.
As for fertilizing, start with a balanced organic granular fertilizer when planting beet seeds, then supplement every 3-4 weeks with a water-soluble fertilizer, such as fish emulsion or seaweed extract, to give your plants a steady nutrient boost. Beets are heavy feeders and benefit significantly from additional potassium, so consider adding wood ash sparingly if your soil test allows.
Keep an eye out for pests like aphids and leaf miners, which can be deterred by regular checks and prompt removal of affected leaves. Introducing beneficial insects like ladybugs is a natural solution. Fungal issues, such as powdery mildew or damping off, may appear if bales stay too wet; improve air circulation by spacing plants appropriately and avoid overhead watering.
Snails and slugs are also drawn to moist straw—use crushed eggshells or copper tape around the base of the bale as barriers. To maintain bale productivity throughout the season, remove any spent or diseased foliage immediately to prevent the spread of problems, and replenish mulch between rows with grass clippings or additional straw to help conserve moisture and suppress weeds.
Routinely fluffing the bales can prevent compaction and improve drainage, ensuring your beet plants continue to thrive. By closely monitoring moisture and nutrient levels, and staying proactive about common issues, you can enjoy a healthy, productive beet harvest from your straw bale garden all season long.
Supporting and Thinning Beet Seedlings
Thinning beet seedlings is a crucial step for growing healthy, full-sized beets, especially in unique settings like straw bale gardens. When too many seedlings compete in a small space, the roots don’t have room to expand, leading to stunted, misshapen beets and weak tops.
Ideally, once your beet seedlings are about two inches tall, scan for the strongest, healthiest plants and gently remove the extras. In a straw bale, seedlings tend to take root in loose, uneven material, so use small scissors to snip weaker seedlings at the base rather than pulling them, which avoids disturbing nearby roots. Aim to give each beet plant about three inches of space for optimal root development.
As your beets mature, the tops can sometimes get heavy, especially after rain or wind. If you notice any drooping, lightly mound extra compost or straw around the base to support them, or place thin bamboo sticks nearby and loosely tie the stems if needed.
Always water at soil level to keep foliage healthy, and make it a habit to remove any leaves that yellow or crowd others. By thinning early and offering gentle support as your beets grow, you’ll encourage robust roots and harvest a healthier, tastier crop.
Harvesting and Storing Beets from Straw Bales
Knowing when your beets are ready to harvest from straw bales is key to getting the best flavor and texture. Look for beets about 2–3 inches wide that poke slightly above the straw surface—usually, you’ll see the tops of the beet roots peeking out. The leaves often look lush and healthy, but if they start yellowing or growing very large, it’s a sign your beets may be over-mature.
To extract beets without harming their roots or disturbing the bale, gently clear away the straw around the base and use your hands to wiggle each beet loose, pulling straight up. Avoid using tools if possible, as they can slice the roots or break apart the bale.
After harvesting, brush off excess straw and rinse the roots under cold water. Trim the beet greens to about one inch above the root to keep them fresh longer, but don’t toss those greens—they’re excellent sautéed, tossed in salads, or blended into smoothies for a nutrient punch.
Store the cleaned roots in a breathable bag or container in the fridge’s crisper drawer, where they’ll last for several weeks. For longer storage, try roasting or pickling sliced beets. The roots can also be grated raw into salads, juiced for a vibrant drink, or incorporated into soups and baked goods for sweet, earthy notes.
Storing and preparing your beets carefully ensures every harvest from your straw bales delivers maximum taste and nutrition.
Troubleshooting and Frequently Asked Questions
Even experienced straw bale gardeners can hit a few bumps along the way, but troubleshooting common issues is all part of the learning process. If you notice mold growing on your straw bales, don’t panic—it’s usually harmless and often helps break down the straw for your plants. However, if you see black or foul-smelling mold, increase airflow around the bales and water less often until they dry out.
Uneven seed germination is another frequent concern. Be sure to sow seeds at the correct depth and keep bales evenly moist, as dry patches can prevent sprouting. For slow-growing beets or other crops, check that your bales have been properly conditioned and fertilized. Adding a liquid feed can also help boost nutrients.
Many gardeners wonder about crop rotation in straw bales. Each bale is typically used for just one or two seasons, so rotating crops isn’t as crucial as with in-ground beds. However, it’s always smart to plant different families each year if you can.
Bales can be reused for a second year if they remain sturdy, or you can spread them in your compost or directly onto garden beds as mulch or soil amendment. To extend the life of your bales, keep them off bare ground and avoid moving them once planted.
The key to success is experimenting with new techniques each season and embracing small setbacks as opportunities to learn and improve your garden.
Conclusion
Growing beets in straw bales is a rewarding, space-saving method that makes gardening accessible to almost anyone, even if you don’t have ideal soil. By following essential steps—such as conditioning your bales with fertilizer, spacing seeds correctly, and maintaining even moisture—you’ll enjoy easy harvesting, fewer weeds, and improved root development.
This technique is especially helpful for gardeners dealing with clay or rocky soil, and the raised height means less bending over at harvest time. Whether you have a large backyard or just a small patio, straw bale gardening offers a simple way to enjoy fresh, homegrown beets.
Give it a try this season and discover how flexible and productive your gardening can be! If you have questions or want to share your own tips and results, drop a comment below—we’d love to hear from you and help your beet crop thrive.