Introduction
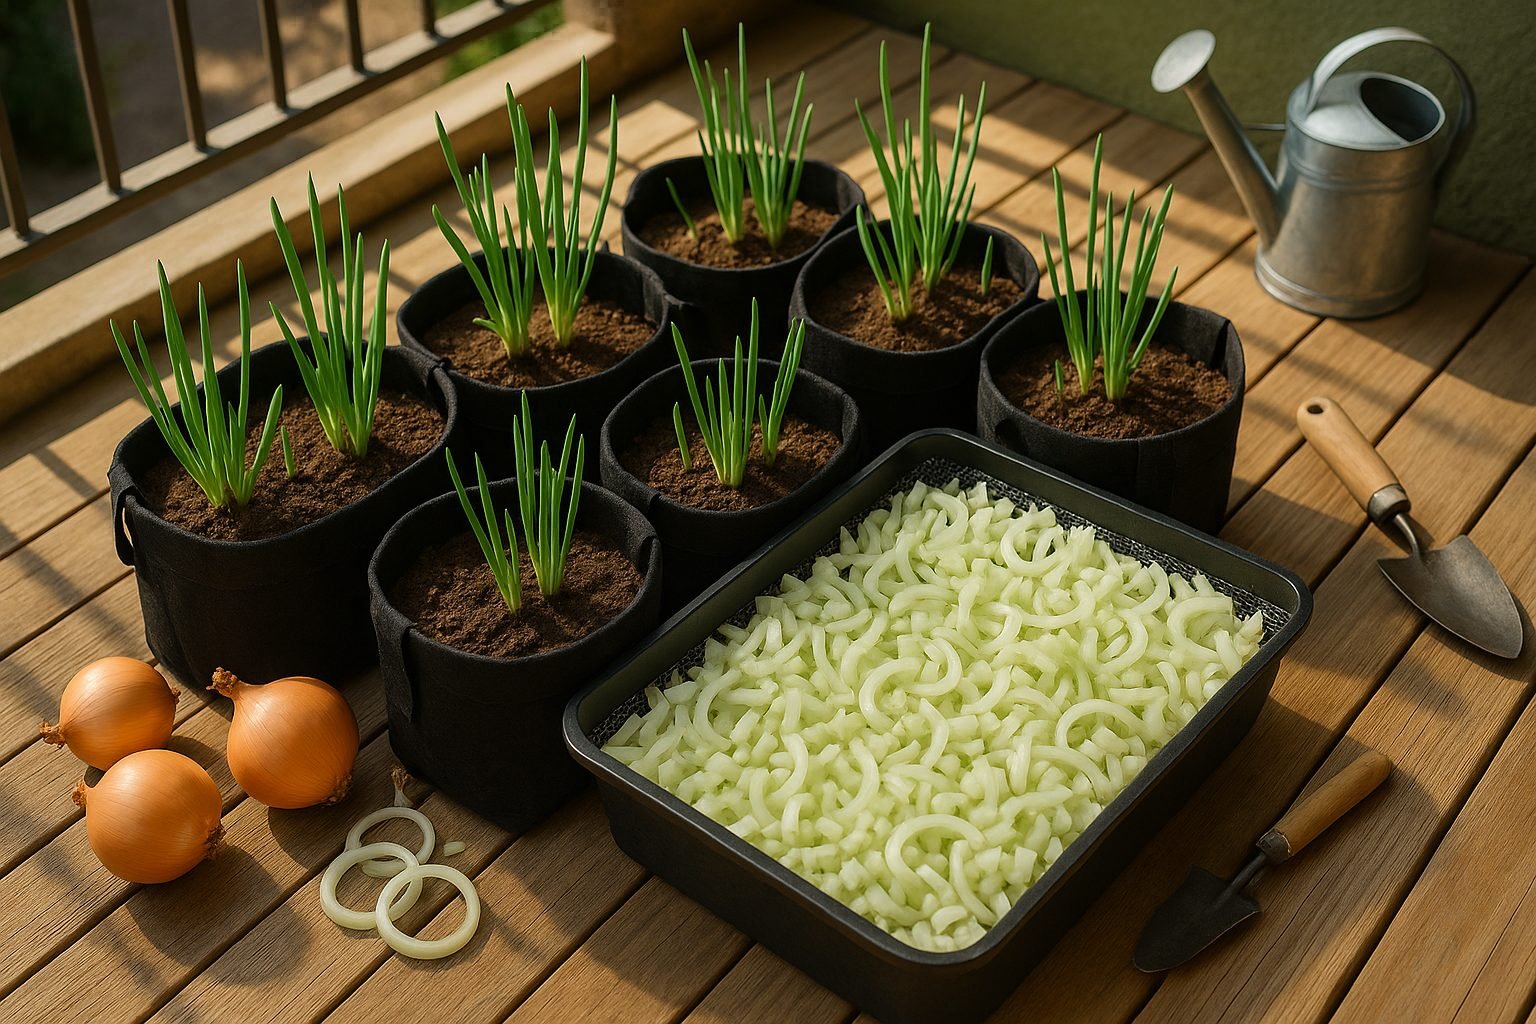
Growing onions in grow bags has quickly become a favorite gardening method for both urban dwellers and traditional gardeners looking to maximize space and convenience. The rise in popularity is no surprise—onions in grow bags offer amazing flexibility, allowing you to cultivate fresh, flavorful bulbs on balconies, patios, or even small courtyards where digging up a garden bed simply isn’t an option.
Unlike heavy garden soil, grow bags are lightweight and portable, so you can shift them around to catch the best sunlight or bring them indoors during a cold snap. Even if you’re brand new to gardening and worried about making mistakes, grow bags help simplify things. They provide excellent drainage and aeration, making it far less likely you’ll overwater and rot your crop.
In this guide, we’ll walk through why grow bags outperform traditional onion beds, which size bags work best, and pro tips on soil mixes, planting, and maintenance. You’ll also find troubleshooting advice for common onion problems and get a realistic harvest timeline. Whether your goal is to stock your kitchen with homegrown onions or just dabble in gardening for the first time, you’ll find all you need to know right here.
Understanding Onion Varieties & Choosing the Right Type
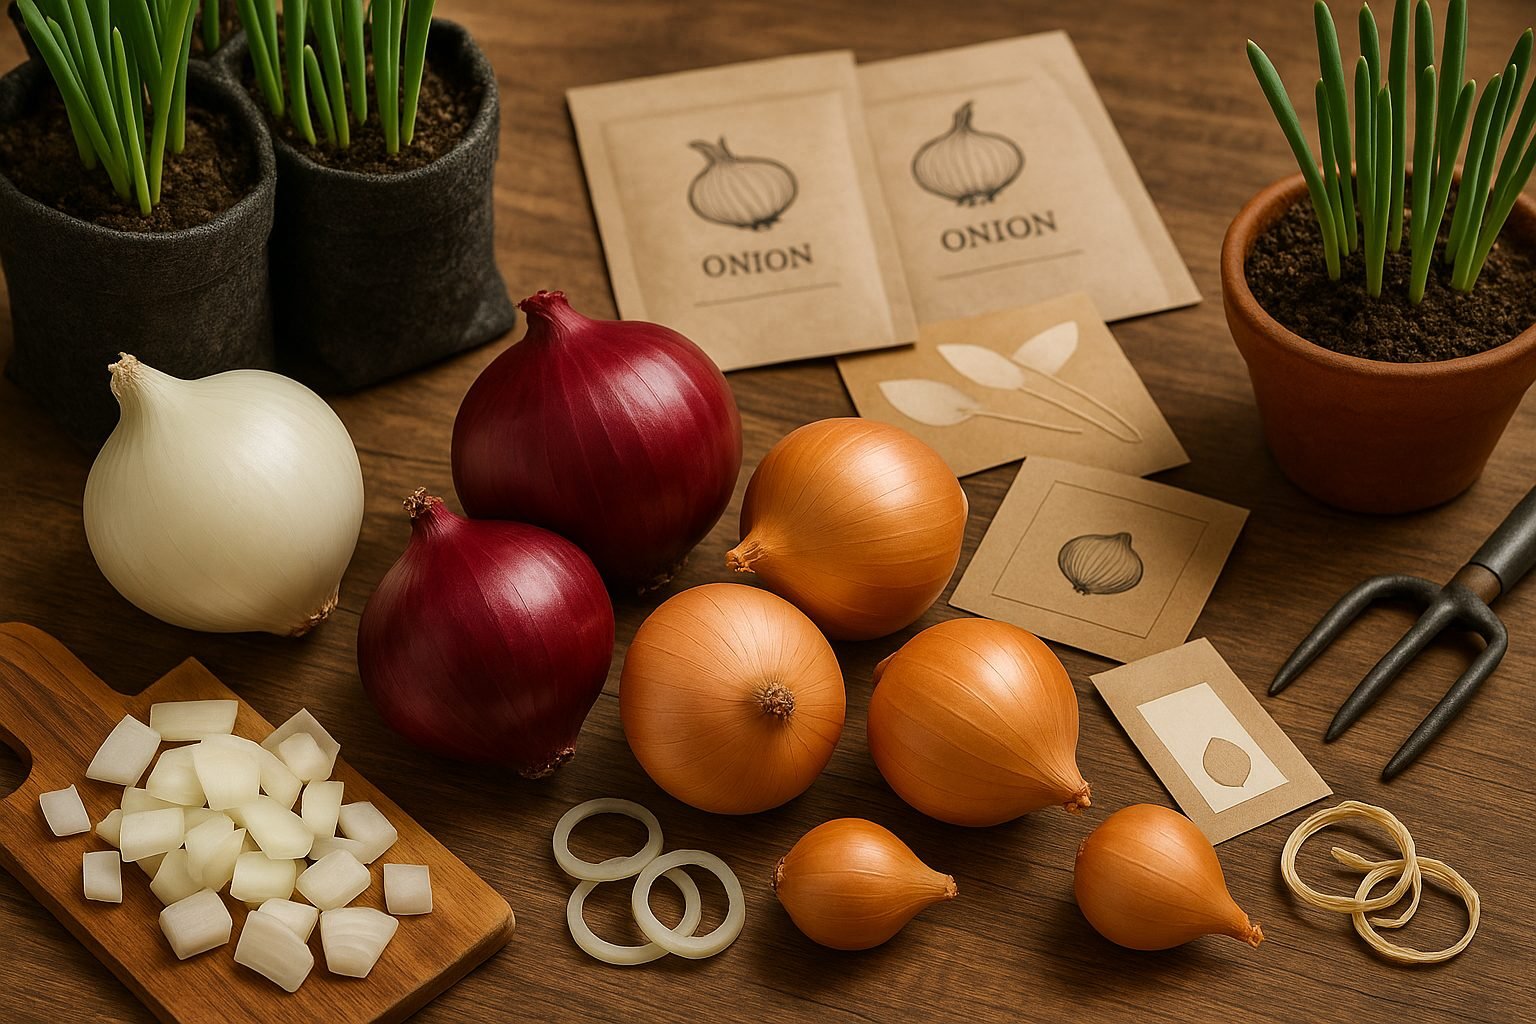
When it comes to selecting onions for your grow bag garden, choosing the right variety makes a big difference. The most common types are green (also known as scallions or spring onions), red, yellow, and white onions—each offering unique flavors and growing requirements.
Green onions thrive in grow bags because they need less space, mature quickly, and can be harvested at almost any stage, making them ideal for small-scale, continuous harvesting. Red, yellow, and white bulbs also grow well, but it’s important to pick varieties that match your region’s day length:
- Short-day onions (like ‘Red Creole’ or ‘Texas Early Grano’) do best in southern areas with early planting.
- Long-day onions (such as ‘Walla Walla’ or ‘Yellow Sweet Spanish’) prefer northern regions with longer summer days.
Yellow onions are generally your best all-purpose choice, offering a rich, balanced flavor and good storage potential—perfect if you want a versatile kitchen staple. Red onions are milder and sweet, great for salads or eating raw, whereas white onions are sharp and crisp, excellent for salsas or Mexican dishes.
When growing in bags, look for “container” or “miniature” varieties which have a compact growth habit and shorter maturation times, increasing your success rates. Ultimately, choosing the right onion type for your climate, flavor preference, and available space will set your grow bag garden up for a thriving harvest and plenty of fresh, homegrown crunch.
Selecting and Preparing the Best Grow Bag
When choosing grow bags for onions, opt for bags that are 10 to 12 inches deep and at least 12 inches in diameter to give the bulbs ample room to develop. Fabric or BPA-free plastic bags are best because they provide good drainage and airflow, helping prevent root rot.
Before planting, make sure the grow bag has enough drainage holes at the bottom, and use a well-draining potting mix with at least 8–10 inches of soil depth. A mix of compost, loam, and some coco coir creates a fluffy, breathable base; avoid heavy garden soil that can compact easily.
For nutrition, work in a slow-release organic fertilizer such as well-rotted manure or worm castings before planting, and sprinkle in a handful of bone meal to support strong root growth. Onion bulbs appreciate soil that’s rich in phosphorus and potassium, so consider amending with a small amount of wood ash or rock phosphate too.
Always pre-moisten the soil before filling your grow bags to improve even settling, and gently firm the soil to remove air pockets—but don’t over-pack it. This careful preparation gives your onions the ideal foundation for healthy growth and bigger, tastier bulbs.
Planting Onions in Grow Bags
Planting onions in grow bags is an easy way to enjoy a fresh harvest, even if you have limited space. You can start with seeds, sets (small onion bulbs), or seedlings—each with its own ideal timing.
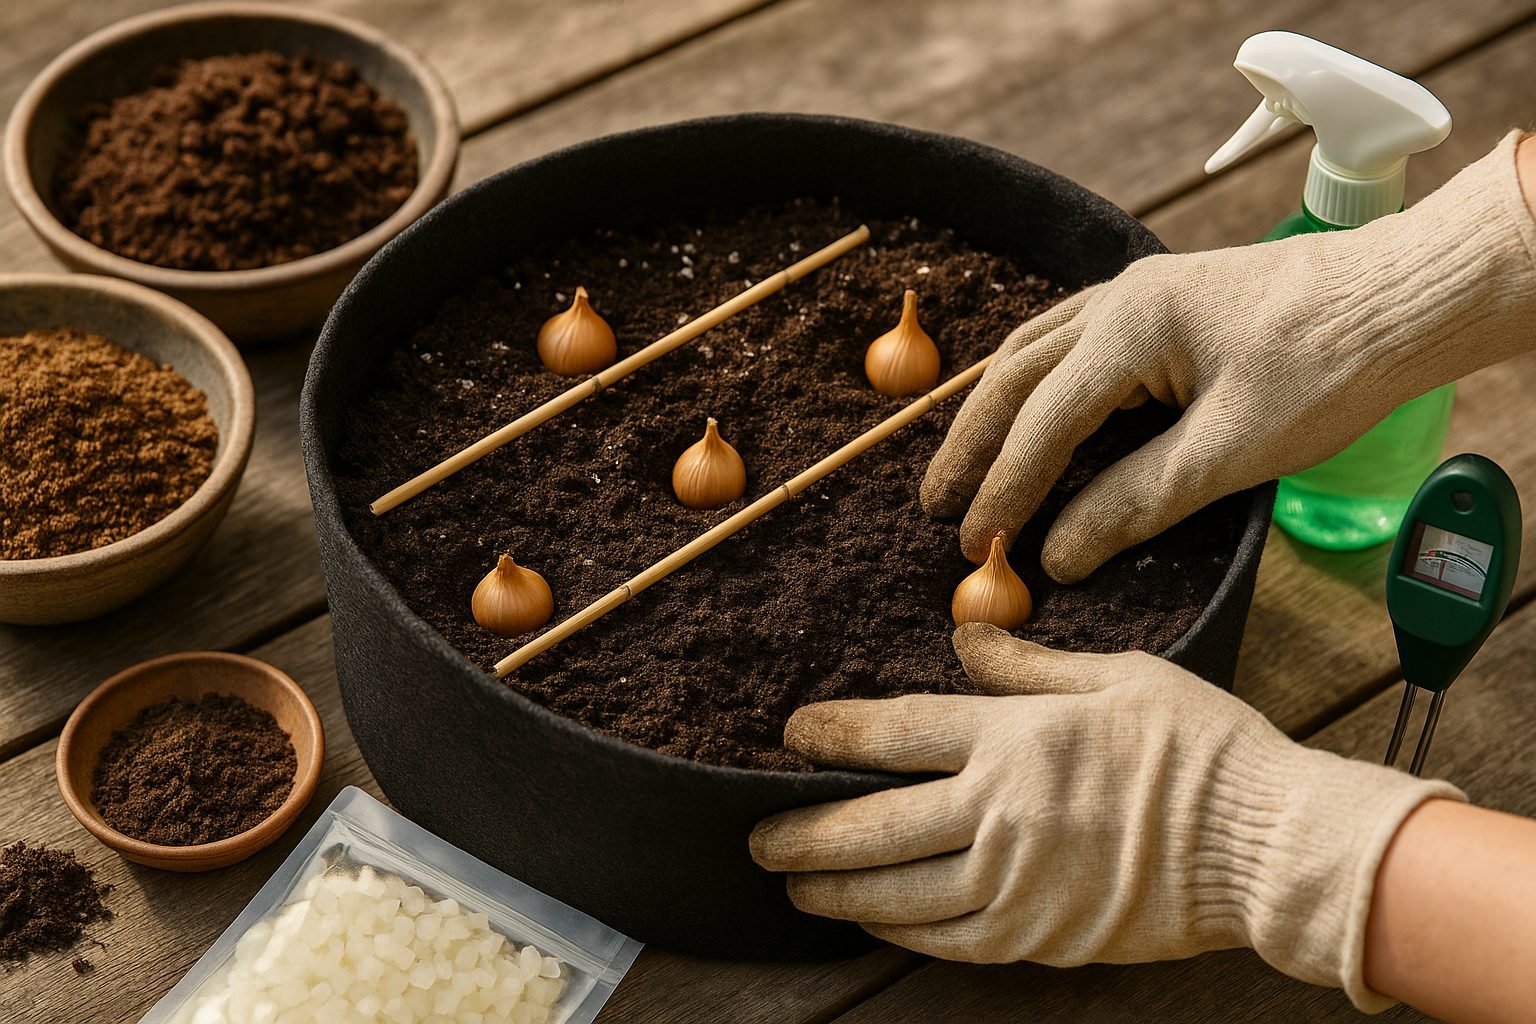
Seeds should be sown indoors 8-10 weeks before the last frost and then transplanted into grow bags once temperatures stay above 50°F. Sets and seedlings can be planted directly into grow bags 2-4 weeks before the last expected frost, as they tolerate a bit more cold.
When filling your grow bag (a depth of at least 10 inches is ideal), use a loose, well-draining potting mix. Position onions 4 inches apart in all directions to give them enough room for the bulbs to swell without crowding. This spacing typically allows for around 6-8 onions per standard 10-gallon grow bag.
After planting, water gently to settle the soil and keep it consistently moist—but not soggy—during the first few weeks. Onions have shallow roots, so they dry out quickly. Place your bags in a sunny spot with at least 6 hours of light daily.
Watch for sprouting within 7-14 days for seeds, or even sooner for sets and seedlings. Lightly mulching the surface can help retain moisture and suppress weeds. If nighttime temperatures dip below freezing, move the bags to a sheltered spot or cover them.
By closely monitoring moisture and temperature in these early weeks, you’ll set your onions up for a strong start and a healthy, abundant crop.
Growing & Maintaining Onions: Water, Light, and Care
Onions have straightforward needs, but a little attention goes a long way, especially if you’re growing them in containers or grow bags. Aim to keep the soil evenly moist—onions like consistent water but hate soggy roots. Stick your finger about an inch into the soil; if it feels dry, add water slowly until the excess drains out the bottom. Over-watering is a common mistake and can cause bulbs to rot, so always ensure your grow bags have good drainage holes.
Place your onions where they’ll bask in full sun for at least six hours a day—more is even better for big, flavorful bulbs. If you’re using grow bags, take advantage of their portability: move them to sunnier spots as the season progresses or to shelter them during heavy rain.
For pests like onion flies or thrips, check your plants regularly and remove any affected leaves; you can also use floating row covers for extra protection. Diseases such as downy mildew are less common in containers with good airflow, but avoid crowding and remove any yellowed foliage promptly.
Weeds can quickly sap nutrients and are easy to spot in confined spaces, so pull them out as soon as you see them by pinching at the base—this protects fragile onion roots. Ultimately, a little daily observation will help you catch problems early and enjoy a rewarding onion harvest.
Harvesting and Storing Onions
Knowing when to harvest onions is key to getting the best flavor and shelf life from your crop. Watch for the tops to start yellowing and flop over naturally—this usually means the bulbs have finished growing.
Gently loosen the soil in your grow bags and pull onions out by their stems, being careful not to bruise them. Shake off excess dirt, but avoid washing at this stage since moisture can cause rot.
Once harvested, cure your onions by laying them out in a single layer in a dry, shaded area with plenty of air circulation for about two to three weeks; covered patios or mesh racks work well for this.
After the outer skins are papery and the necks feel dry, trim the roots and cut the stems down to an inch. Store the cured onions in a cool, dark, and dry spot—mesh bags, baskets, or old pantyhose hung in a basement or pantry are great options.
Long-Term Storage and Preservation
- Dice and freeze onions for later cooking.
- Dehydrate slices for soups and stews.
- Pickle onions in vinegar brine.
Always check stored onions regularly and remove any that show signs of spoilage to keep the rest fresh longer.
“`html
Bonus Tips & Common Problems
If you notice yellowing leaves on your onions, it might be due to overwatering or poor drainage. Make sure your grow bags have drainage holes and allow the soil to dry slightly between waterings.
Bolting, when onions prematurely flower, can be triggered by temperature swings or planting too early. Avoid this by planting after any chance of frost and choosing bolt-resistant varieties.
Poor bulb development is often tied to overcrowding or depleted soil. Thin your seedlings to allow a few inches between each plant and top up with organic compost or a balanced fertilizer halfway through the growing season.
For a bigger harvest, feed onions with a nitrogen-rich liquid fertilizer every two weeks and keep the soil consistently moist.
When the season ends, clean out your grow bags thoroughly and let them dry before storing, so you can reuse them for your next crop.
Companion planting with carrots or lettuce can conserve space and help naturally deter pests, making your gardening process even smoother.
For more in-depth tips and troubleshooting guides, websites like the RHS (Royal Horticultural Society) or local cooperative extension services offer detailed resources tailored to your region.
“`