Introduction
Watering kale might seem like a small detail, but getting it right is crucial for growing lush, vibrant leaves in your backyard or on your windowsill. Kale has earned its spot as a popular, nutritious, and easy-to-grow vegetable, loved by both seasoned gardeners and beginners alike. It’s packed with vitamins, minerals, and antioxidants, making it a superfood that’s not only great for your health but also a fantastic addition to salads, smoothies, and stir-fries.
The best part? Growing kale at home means you’ll enjoy unbeatable freshness, rich flavor, and the ability to harvest leaves continuously throughout the season—far better than anything you’ll find at the grocery store. If you’re new to gardening, you might wonder how much attention your kale actually needs, especially when it comes to watering.
In this guide, we’ll demystify exactly how often you should water kale, share practical tips to keep your plants healthy, and help you avoid common pitfalls like overwatering or underwatering. Whether you have a sprawling vegetable patch or just a few pots on your balcony, you’ll find everything you need here to grow thriving kale and enjoy homegrown greens all season long.
Choosing the Right Kale and Preparing to Grow
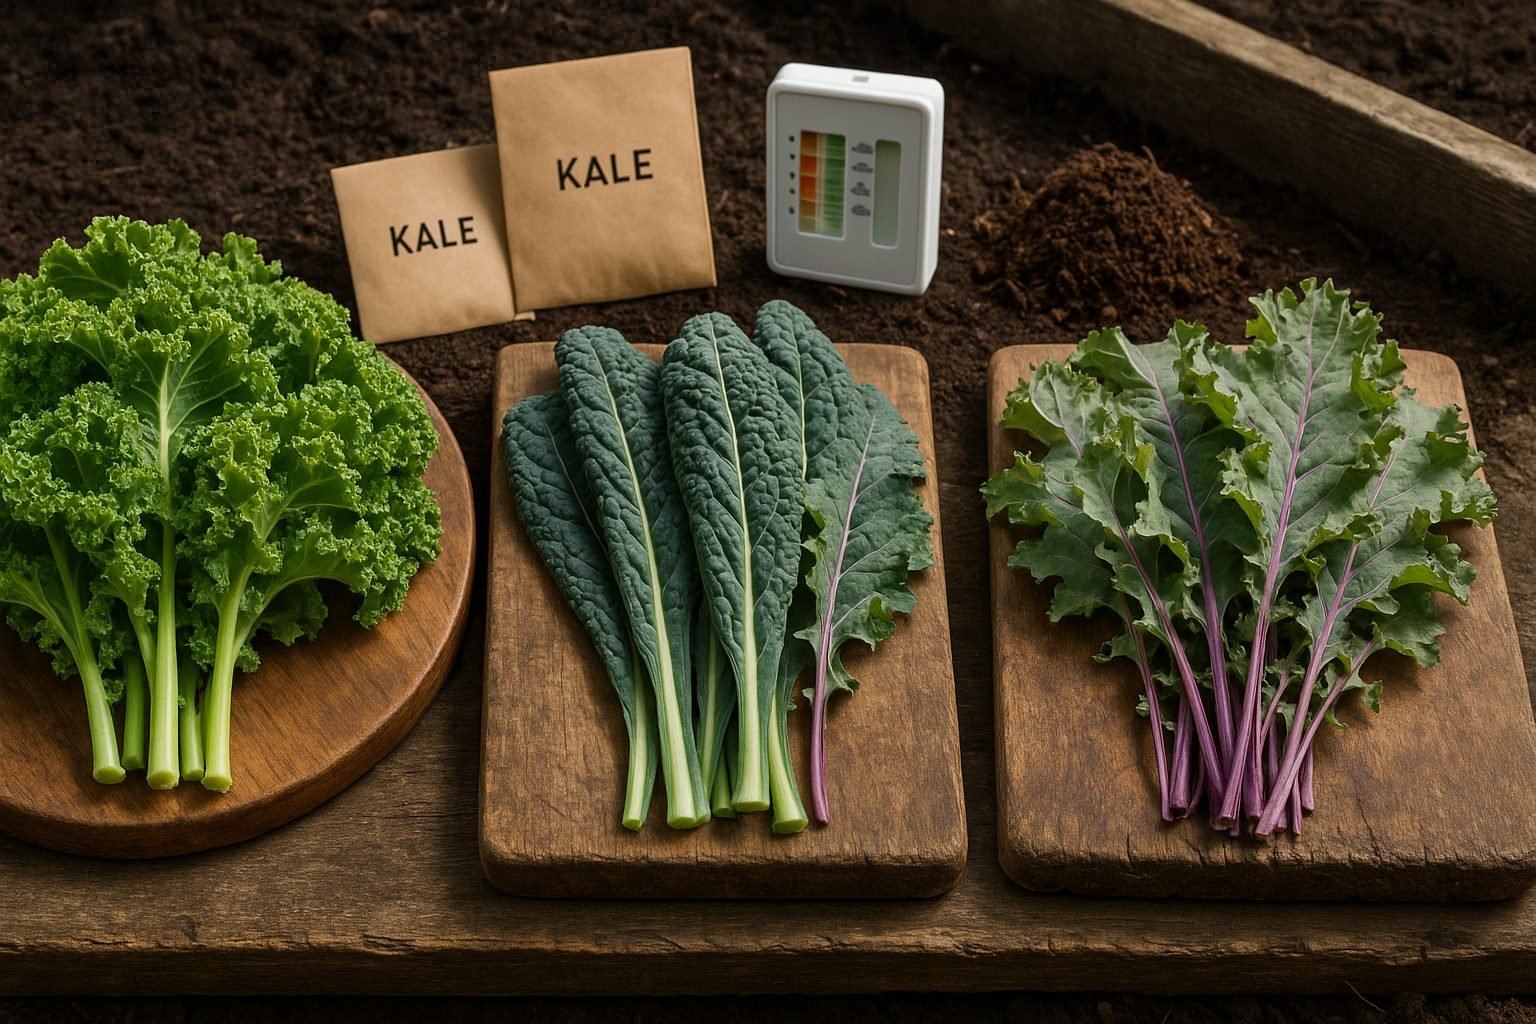
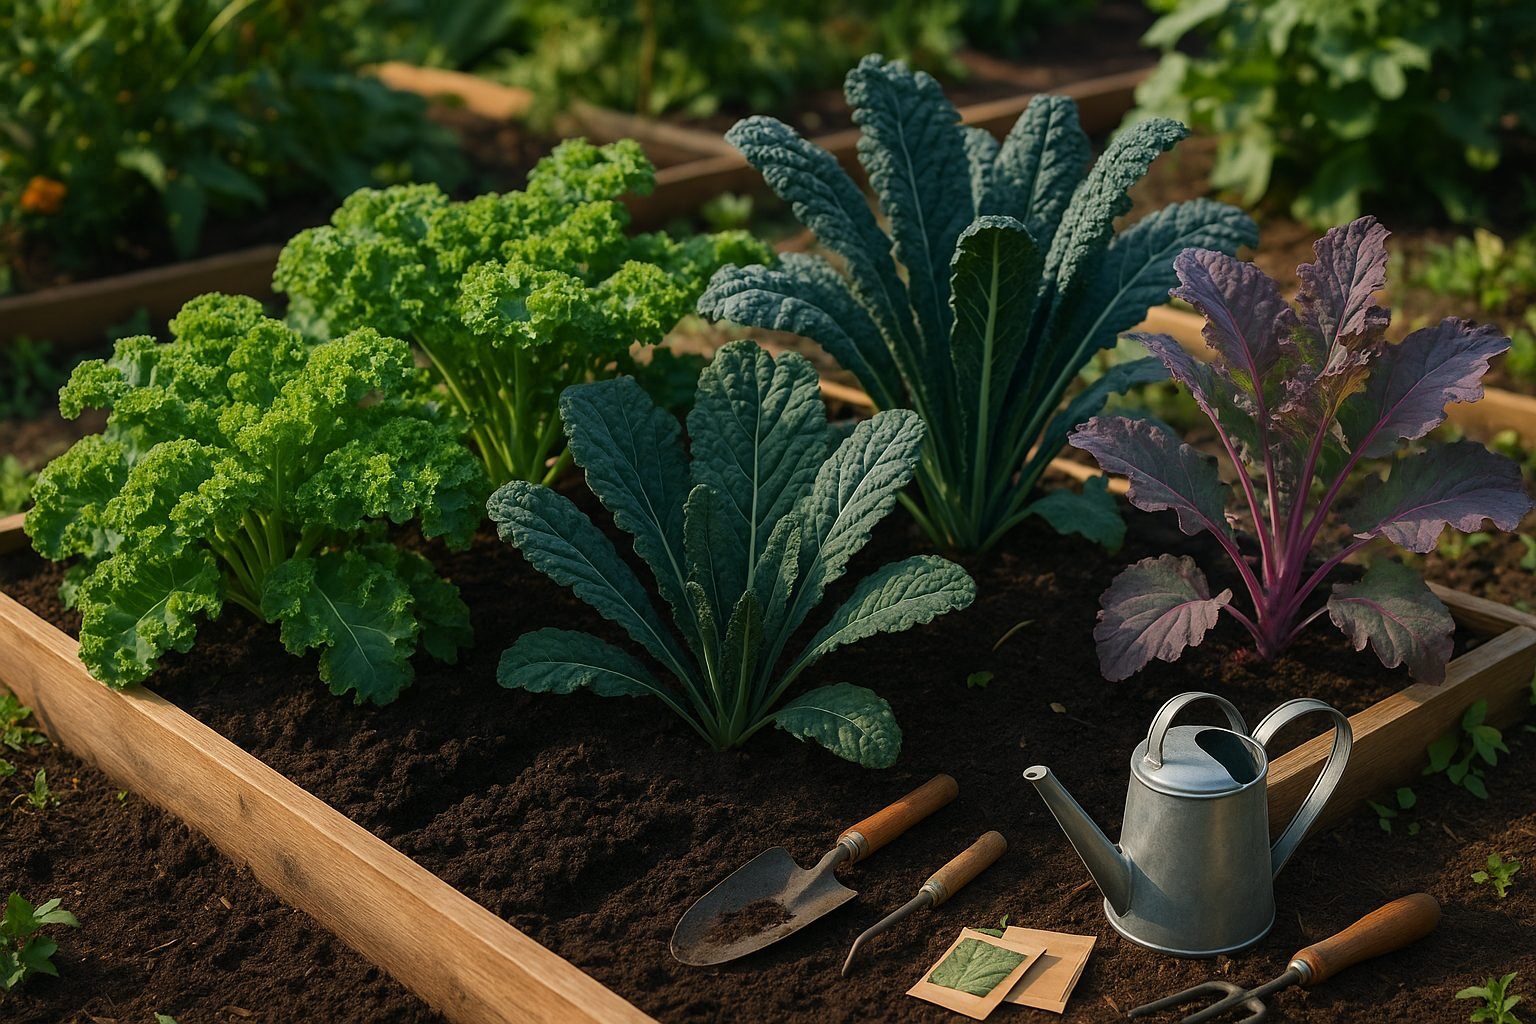
When starting your kale-growing journey, the first step is choosing the variety that suits your taste and garden style. Curly kale is the classic choice, known for its ruffled, deep-green leaves and mild, slightly peppery flavor—it’s great for salads or smoothies. Lacinato, also called Dinosaur or Tuscan kale, features dark blue-green, bumpy leaves and has a sweeter, earthier taste, perfect for sautés or soups. Red Russian kale stands out with frilly, red-stemmed leaves and a tender texture, making it ideal for raw dishes.
When selecting seeds or seedlings, be sure to source them from reputable local nurseries or trusted online suppliers known for quality and disease-free stock. Look for seed packets indicating organic or non-GMO options.
For planting, choose a spot that receives at least six hours of sunlight daily, although kale tolerates partial shade—making it flexible for smaller spaces or containers. Raised garden beds or large pots with drainage holes work well if you don’t have ground space.
The best planting time depends on your climate: in cooler regions, plant in early spring or late summer for a fall harvest; in warmer climates, aim for fall or winter planting to avoid heat stress.
Kale thrives in well-drained, loamy soil with a slightly acidic to neutral pH between 6.0 and 7.0. Test your soil if possible, and work in compost or aged manure to boost fertility and drainage. If your soil is heavy clay or sandy, amend it with additional organic matter such as leaf mold or peat moss to improve structure.
Good soil preparation and seed choice set the stage for healthy, productive kale that tastes great and keeps growing strong throughout the season.
Planting Kale: Sowing Seeds or Transplants
Kale is a hardy green that thrives in cool weather, making it perfect for spring and fall gardens. To start kale from seed outdoors, wait until about 2-4 weeks before your area’s last expected frost. Kale loves cool soil and can handle light frosts.
Sow the seeds about ¼ to ½ inch deep, spacing them an inch apart in rows about 18-24 inches apart. Once seedlings are a couple of inches tall, thin them out or transplant so each plant has 12-18 inches of space to spread.
If you want an earlier harvest, start seeds indoors about six weeks before the last frost date. Use trays or small pots filled with quality seed-starting mix, keep the soil lightly moist, and place the containers near a sunny window or under grow lights.
As seedlings develop two true leaves, harden them off by setting them outdoors for a few hours each day, gradually increasing the time over a week. When transplanting, choose a cloudy day or late afternoon to reduce transplant shock, and plant them at the same depth they grew in their pots.
Water consistently and mulch around the base to keep the soil cool and lock in moisture. For best germination, keep soil temperatures around 60-70°F and avoid letting the soil dry out — moist but not soggy is ideal. If pests like flea beetles are common in your area, consider covering young plants with row covers.
With these steps, you’ll give your kale the best start for a vigorous, productive season.
Caring for Your Kale: Watering, Feeding, and Sunlight

Kale is surprisingly tough, but a little attention to its basic needs can make all the difference between good and great harvests.
When it comes to watering, aim to keep the soil consistently moist but never soggy; about 1 to 1.5 inches of water per week is ideal, either from rainfall or supplemental watering. Check the soil by pressing your finger an inch deep—if it feels dry, it’s time to water. Yellowing lower leaves or wilting are often signs of underwatering, while limp, mushy leaves can point to too much moisture.
Sunlight matters, too: kale loves full sun, at least 6 hours a day, but in very hot or southern climates, it appreciates some afternoon shade to prevent heat stress and bitter leaves.
Feeding your kale is easy—work compost or a balanced organic fertilizer into the soil before planting, then side-dress with a nitrogen-rich boost (like fish emulsion or blood meal) every 3-4 weeks for lush, leafy growth. Healthy, crumbly compost adds important micronutrients and improves drainage, while slow-release granules can keep things simple for busy gardeners.
Mulching is a smart move—spread a layer of straw, shredded leaves, or grass clippings to lock in moisture, keep roots cool, and suppress weeds.
As your kale matures, snip off the lower, older leaves with clean scissors to encourage new growth and airflow, which helps prevent disease. If you’re growing taller varieties, staking or supporting plants with soft ties can keep them upright during wind or heavy rain.
By tuning in to these basics—water, sun, food, and a little maintenance—you’ll help your kale thrive from seedling to harvest, whether you’re working in a raised bed, garden plot, or a patio pot.
Managing Pests and Common Problems
Keeping kale healthy in your garden means staying vigilant against pests and diseases that can quickly take over your crop. Common insects like aphids and cabbage worms are some of the biggest culprits—look for curled, yellowing leaves, sticky residue, small green larvae, or tiny white butterflies fluttering nearby.
Aphids often cluster on the undersides of leaves and leave a trail of honeydew, while cabbage worms chew irregular holes and can hide inside leaf folds. Diseases also pose a threat, with powdery mildew showing up as white, powdery spots on the leaves and clubroot causing swollen, misshapen roots and wilting—even in moist soil.
To prevent these problems, start by practicing good garden hygiene:
- Clear away dead plant debris
- Rotate your crops each season
- Provide good air circulation by spacing out your kale
When trouble strikes, organic methods work well—netting or floating row covers physically block pests before they reach your plants, and sticky traps can help monitor insect numbers. Hand-picking worms or spraying a mild water and dish soap mixture can keep aphids in check.
For fungal issues like powdery mildew, water your plants at the base instead of overhead, and consider neem oil or a homemade baking soda spray as treatment. Clubroot is trickier to handle, but maintaining well-drained soil and adding lime to raise pH can suppress its spread.
Most importantly, make it a habit to check your kale at least a few times a week; early detection is key to stopping small problems before they spiral out of control. If you spot any signs of pests or disease, act fast to nip the issue in the bud—prompt response will help ensure a steady supply of fresh, healthy kale from your garden.
Harvesting and Storing Kale
Harvest kale when the leaves are about the size of your hand but still tender—usually 55 to 70 days after planting. For the best flavor, harvest in the morning after a cool night or following a light frost; cold temperatures actually make kale sweeter.
To keep your plant producing, use a “cut-and-come-again” technique: start at the bottom of the plant, snipping the outermost leaves with clean scissors or gently pinching them off by hand, leaving the central bud and several top leaves intact. This allows the plant to keep growing new leaves for a longer harvest window. Avoid tearing or pulling, which can damage the stem and stunt new growth.
Once harvested, rinse your kale thoroughly and spin it dry if you have a salad spinner. To maintain crispness for up to a week, wrap the leaves loosely in a damp paper towel and store them in a resealable plastic bag or airtight container in your refrigerator’s crisper drawer.
If you have a bumper crop and need to store kale long-term, blanch the leaves for two minutes in boiling water, transfer to an ice bath, drain, then pack into freezer-safe bags, squeezing out excess air. Frozen kale is ideal for soups and smoothies and will keep for up to six months without losing much nutritional value or flavor.
By harvesting leaves regularly and storing them properly, you can enjoy homegrown, nutrient-packed kale all season and beyond.
Kale Growing Tips & FAQs
For ongoing kale harvests, consider succession planting: sow new seeds every few weeks to ensure a steady supply of fresh leaves. In cooler climates, kale thrives well into late fall and can even survive light snow—just mulch around the base for overwintering and enjoy the sweetened leaves in early spring.
Beginners often notice yellowing leaves; this can signal overwatering or a nitrogen deficiency. Make sure your soil drains well and consider supplementing with compost. Aphids and caterpillars can also cause damage, but a gentle blast of water or hand-picking pests helps protect your crop.
Remember, not all kale is created equal! Curly, Tuscan (Lacinato), and Red Russian kale offer different flavors and textures, so don’t hesitate to experiment with varieties to find your favorites.
You can grow kale in raised beds, containers, or directly in-ground—try a few methods the first year to see what fits best with your space and lifestyle. The more you experiment, the more rewarding your kale harvests will become.