How to Grow Carrots in Containers
Growing carrots in pots has become a popular, practical solution for gardeners with limited space or less-than-ideal soil. Whether you’re a balcony gardener, tending a compact urban patio, or simply want more control over your harvest, cultivating carrots in pots gives you fresh, crunchy veggies right at your fingertips.
This beginner-friendly, step-by-step guide is designed for anyone—no matter your gardening experience or where you live—who wants to enjoy homegrown carrots. From choosing the right containers to ensuring a tasty, straight crop, we’ll walk you through each stage, sharing real-world tips for success along the way.
Choosing the Right Carrot Varieties for Containers
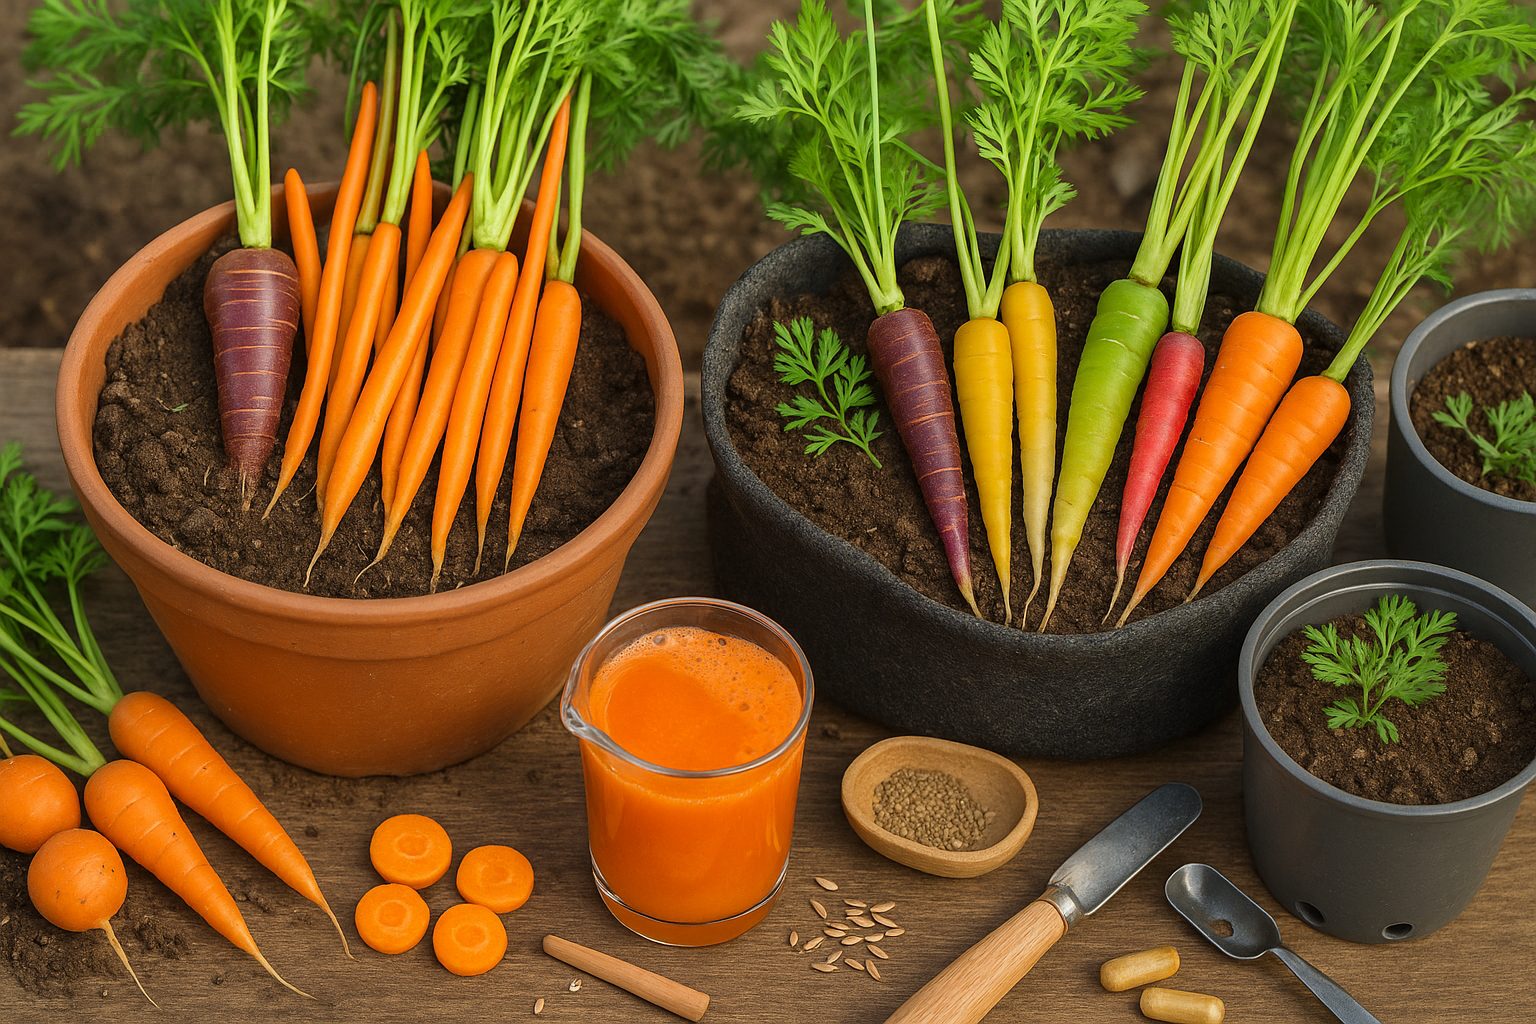
When growing carrots in containers, your best bet is to pick compact varieties that thrive in small spaces and shallow soils. Round or short options like ‘Thumbelina’ and ‘Paris Market’ are perfect for pots, producing cute, golf ball-sized carrots that don’t need deep soil to develop their shape and sweet flavor.
‘Nantes’ carrots are another top choice, growing straight and tender roots that perform well in container environments due to their relatively short and uniform size.
If you love a bit of color on your plate, consider branching out to rainbow carrot mixes, which often include purple, yellow, and white varieties. These not only liven up your harvest visually but also offer subtle taste differences—purple carrots are earthy, while yellow ones tend to be milder and slightly sweeter.
To get the best results, always use a lightweight potting mix and ensure your containers have good drainage, as carrots need loose soil to grow straight and avoid splitting. Succession planting every few weeks can keep your harvest going throughout the season.
By choosing varieties suited to containers and playing with colors and shapes, you’ll enjoy fresh, flavorful carrots right from your patio or balcony, making even the smallest space a productive kitchen garden.
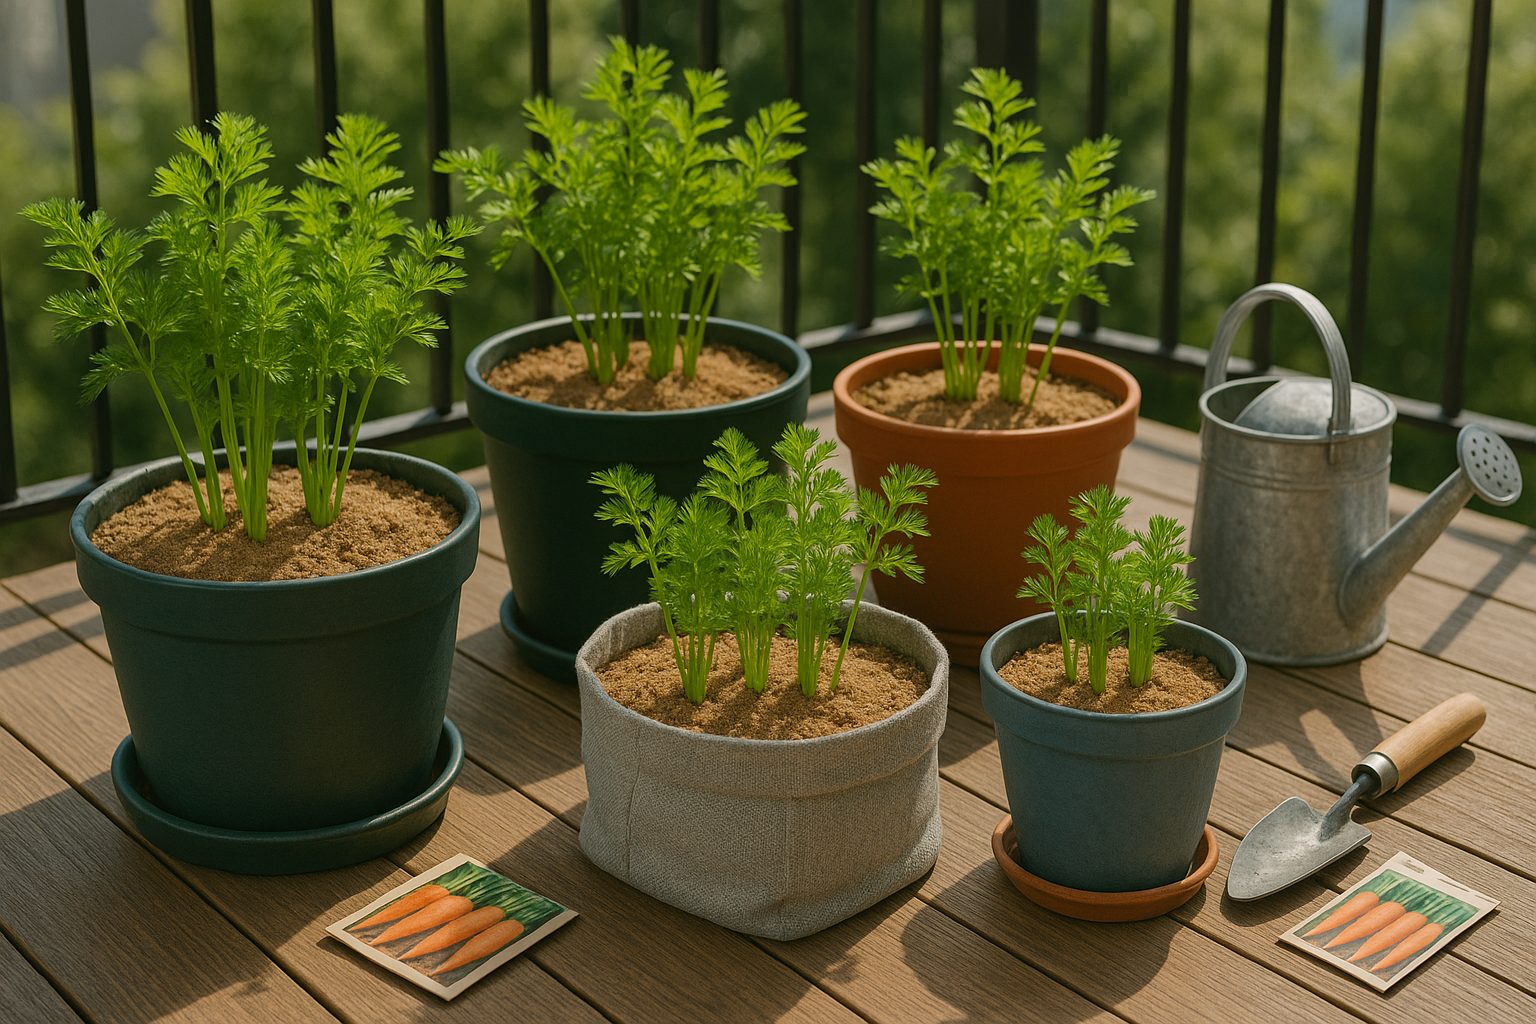
Best Containers and Soil for Carrots
When growing carrots in containers, choosing the right setup can make all the difference in your harvest. Aim for containers that are at least 12 inches deep, as carrots need ample space for their long roots to grow straight—shallow pots often lead to stunted or misshapen carrots.
Materials like plastic, fabric grow bags, or glazed ceramic work well because they maintain moisture while also allowing for good drainage. Make sure your container has several drainage holes to prevent water from pooling around the roots, which can cause rot.
For soil, carrots thrive best in a loose, sandy potting mix that doesn’t compact easily; dense or rocky soils can block root development and lead to forked carrots. You can blend standard potting soil with sand or perlite to improve aeration and drainage. Just avoid mixes heavily enriched with manure, as too many nutrients can cause carrots to split.
Before sowing, fill the container almost to the top, level the soil, and gently pat it down—don’t pack it too tight. Moisten the soil so it’s damp but not soggy, then sow your seeds thinly to give each carrot space to grow.
With the right container and soil, even small patios or balconies can yield crisp, delicious homegrown carrots.
Planting Carrots in Containers: Step-by-Step
Planting carrots in containers is a rewarding way to enjoy homegrown roots, even in small spaces. Start with a deep container (at least 12 inches) filled with loose, well-draining potting mix, as carrots need room for their roots to stretch.
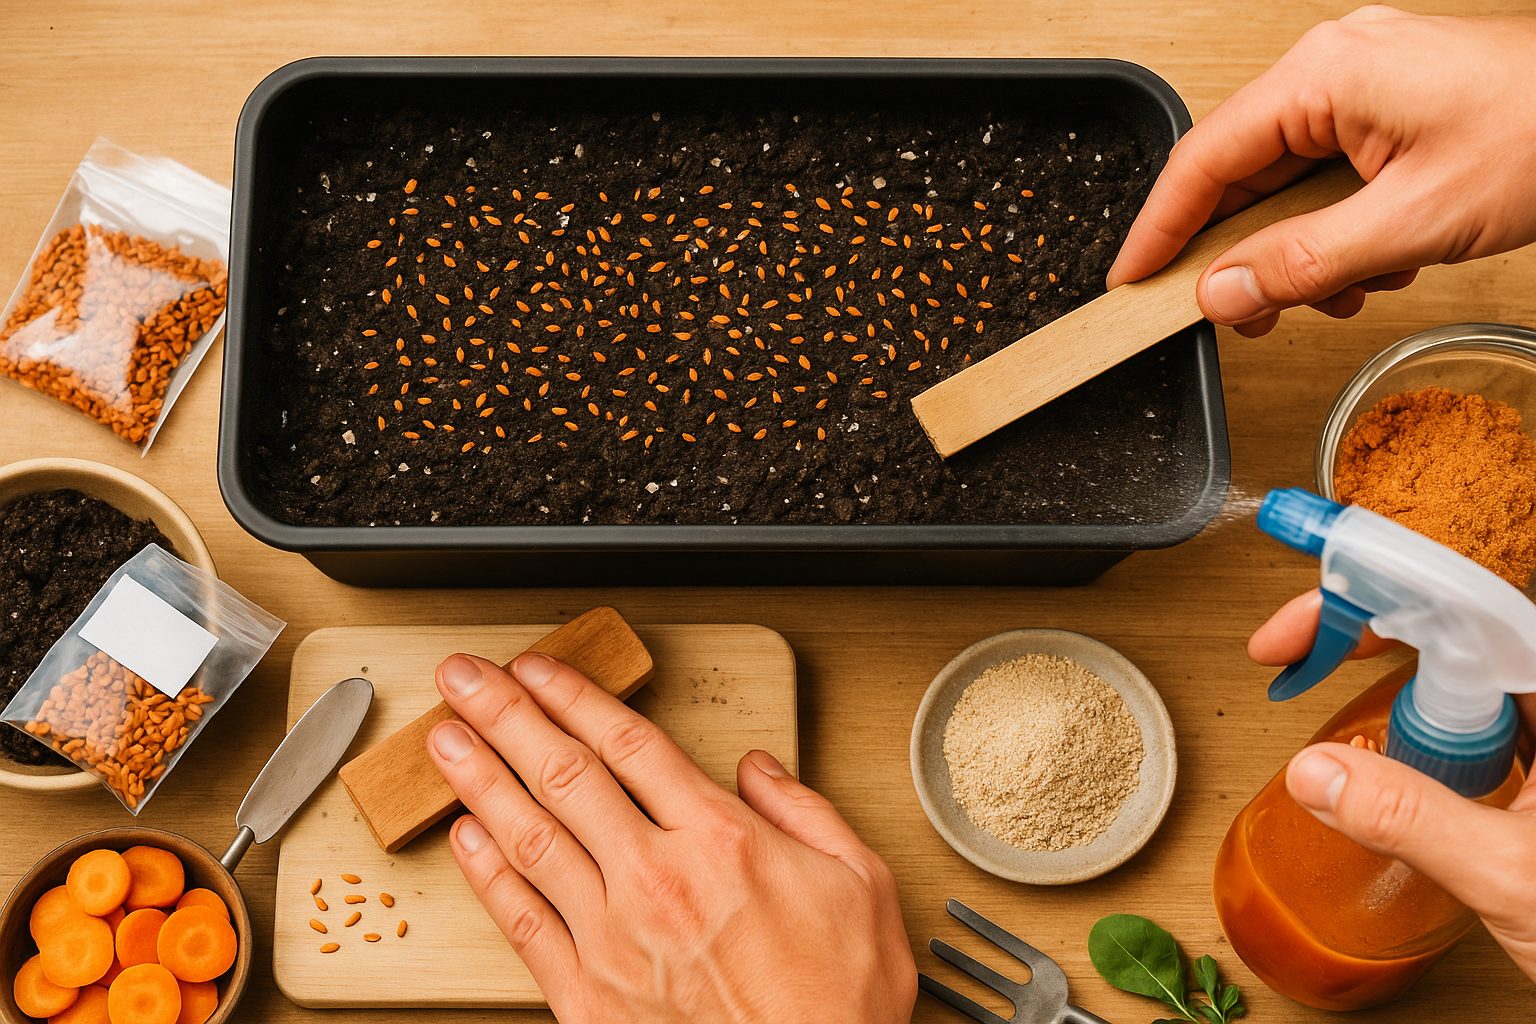
For sowing, direct seeding works best—sprinkle carrot seeds thinly over moistened soil and lightly cover them with about ¼ inch of soil or vermiculite. This helps retain moisture and prevents soil crusting. Vermiculite is especially useful because it resists forming a hard surface, letting delicate carrot seedlings break through with ease.
Keep seeds spaced about an inch apart to reduce the tedious work of thinning later. If you’re sowing in rows, leave at least two inches between them.
Carrots germinate best in cool weather, so try planting in early spring or fall when daytime temperatures hover between 55°F and 75°F. If nights are chilly, cover the container with a plastic dome, cloth, or even a piece of cardboard to trap warmth and keep moisture in—this can speed up germination.
Gently mist the soil surface with water every day to keep it consistently damp, not soggy, as drying out or forming a crust will prevent tiny seeds from sprouting. Press the soil gently after sowing to ensure the seeds make good contact; you can even use a small board to lightly tamp down the surface.
Once your seedlings emerge, thin them to two inches apart so each carrot has room to grow straight and strong. With careful attention to sowing depth, moisture, and warmth, your container carrots will get the vigorous start they need for sweet, crunchy roots at harvest time.
Caring for Carrots: Watering, Fertilizing, and Thinning
To help carrots thrive, it’s important to keep their soil consistently moist but never soggy—aim to water deeply once or twice a week, depending on your weather and soil type. Carrots have long, slender roots that don’t like to dry out, so check the top inch of soil; if it feels dry, it’s time to water. Early morning is best, allowing the foliage to dry during the day and helping prevent disease.
For fertilizing, carrots aren’t heavy feeders, but they do appreciate a dose of balanced, slow-release fertilizer or compost mixed into the soil before planting. About four to six weeks after your seedlings emerge, you can side-dress the rows with a little more organic fertilizer—just avoid high-nitrogen options, as these encourage leafy growth over tasty roots.
Thinning is crucial for plump, straight carrots. Once seedlings are 2 inches tall, gently remove the extras so the remaining plants are spaced about 2 to 3 inches apart. You can pull the weakest ones by hand or snip them at soil level with small scissors so you don’t disturb neighboring roots. Not only does this give each carrot room to grow, but it boosts airflow and reduces the risk of disease.
If you’re reluctant to waste thinnings, toss the tender greens into salads or smoothies—they’re edible and full of flavor. Consistent care with watering, light feeding, and thoughtful thinning sets your carrots up for success, helping you harvest those sweet, crunchy roots come summer or fall.
Common Problems and How to Solve Them
Container-grown carrots can face a few common issues, but with some practical strategies, you can keep your crop healthy and productive.
One frequent problem is poor germination, often caused by dry or unevenly moist soil. Carrot seeds need consistently damp (not soggy) conditions to sprout, so try covering your pots with clear plastic or regularly misting until seedlings appear.
Another challenge is carrot fly, whose larvae tunnel through roots, ruining your harvest. In containers, you can outsmart them by placing pots above knee height or using fine mesh or netting as a barrier.
Stunted or forked roots usually result from rocky or compacted soil or overcrowded seedlings, so always use a deep, loose, stone-free potting mix and thin seedlings to the recommended spacing.
Additionally, don’t let containers dry out completely or become waterlogged; both extremes stress carrots and invite disease.
Finally, feed with a low-nitrogen, balanced fertilizer to avoid lush tops and poor roots.
By monitoring moisture, keeping growing areas clean, and giving your carrots enough space, you’ll sidestep most container-specific issues and enjoy crisp, sweet harvests.
Harvesting and Storing Your Container Carrots
Knowing when your container carrots are ready to harvest is key to getting the best flavor and texture. Look for carrot tops that are bright green and starting to flop over slightly. If you gently brush away some soil, the shoulders of mature carrots will usually be visible and about half an inch wide, depending on the variety you planted.
For a quick test, pull out one carrot to check its size. To harvest without damaging the roots, water the container a few hours beforehand to soften the soil—this makes it easier to gently wiggle the carrots free.
Grasp the tops firmly at the base and twist while pulling upward, taking care not to snap the roots. If the soil is densely packed or your carrots are stubborn, loosen the dirt around them first with a small trowel or your hands.
After harvesting, cut off the green tops about an inch above the carrot to prevent them from drawing out moisture.
Storing Your Carrots
For small harvests, simply store your carrots in a loosely sealed plastic bag or container in the fridge, where they’ll stay crisp for several weeks. If you have a bit more space, layering carrots between damp paper towels inside a lidded box can help maintain freshness.
Remember to only wash them right before use to keep moisture from causing them to spoil early.
Quick Carrot Container Growing FAQ
Growing carrots in containers is surprisingly easy and doesn’t require a garden plot. Yes, you can grow carrots indoors with enough sunlight—aim for 6–8 hours of bright light daily, or supplement with a grow light if your space is dim.
Choose a deep container (at least 12 inches) and use fluffy potting mix to allow roots to develop straight. Carrots typically take 60–75 days from sowing to harvest, depending on the variety.
Keep the soil consistently moist, but not soggy, and thin seedlings so each carrot has enough room to grow. Common issues like stunted growth or pest problems usually come from overcrowding or underwatering; check these factors first if your crop struggles.
For more troubleshooting tips or advice on picking the best carrot varieties for containers, visit reputable gardening sites like the Old Farmer’s Almanac or your local extension office’s webpage.