Introduction
Thinning carrot seedlings is the process of removing some young plants so the rest have enough space to grow strong, straight roots. It might seem counterintuitive—after all, who wants to pull up healthy sprouts?—but skipping this crucial step often leads to crowded carrots that end up small, twisted, or stunted. Many gardeners are tempted to skip thinning, hoping for a bigger harvest, but instead, they end up with a tangle of roots fighting for space and nutrients.
Understanding the ins and outs of thinning carrot seedlings makes the difference between a lackluster crop and a beautiful haul of crunchy, uniform carrots. In this article, you’ll discover exactly when to thin your seedlings, how to do it gently without disturbing those staying behind, and tips to avoid the most common thinning mistakes. Get ready for practical advice that ensures your next batch of carrots reaches its full, delicious potential.
Why Thinning Carrots Matters
Thinning carrots is one of those simple garden chores that makes a big difference in your harvest. The main goal is to give each carrot enough breathing room—if seedlings are packed too tightly, their roots can’t expand properly under the soil.
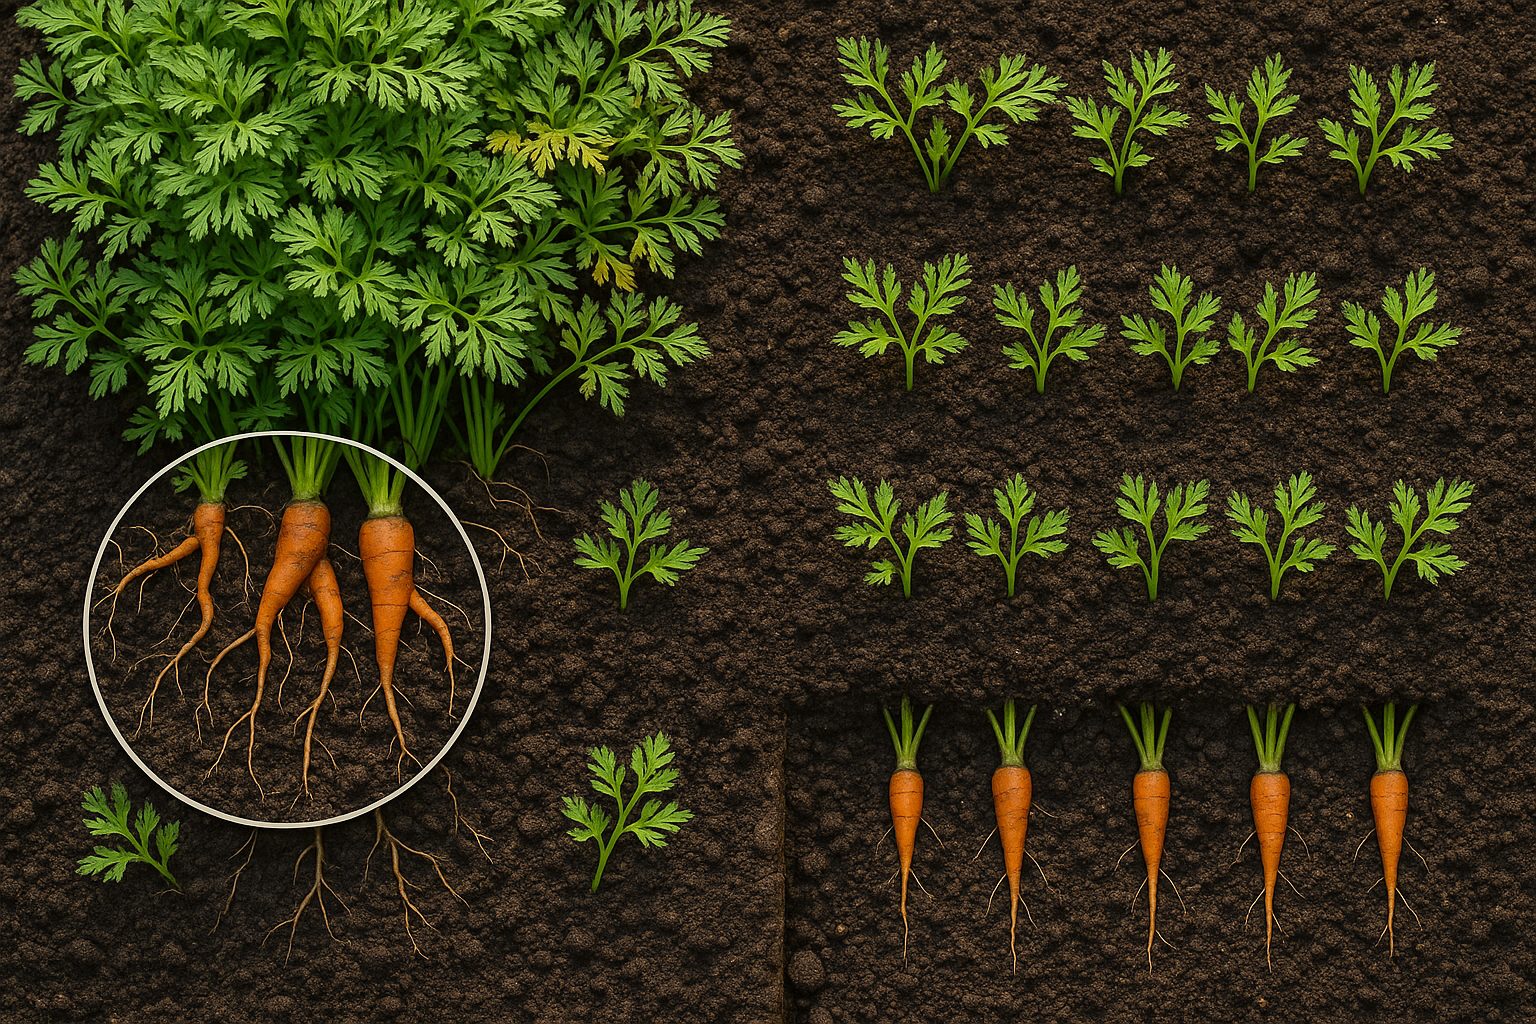
This crowding leads to tiny, twisted carrots competing for space and nutrients, resulting in strange shapes and stunted growth. It’s tempting to skip thinning when those tiny greens pop up in the bed, but imagine a cluster of carrots all jockeying for a limited salad bar: too many mouths, not enough food.
By thinning to the recommended spacing (usually about two inches apart), you help each carrot develop into a robust, straight root. Proper thinning also cuts down on competition for water and sunlight, making your carrots sweeter and more uniform in size—which not only looks nicer but also cooks more evenly.
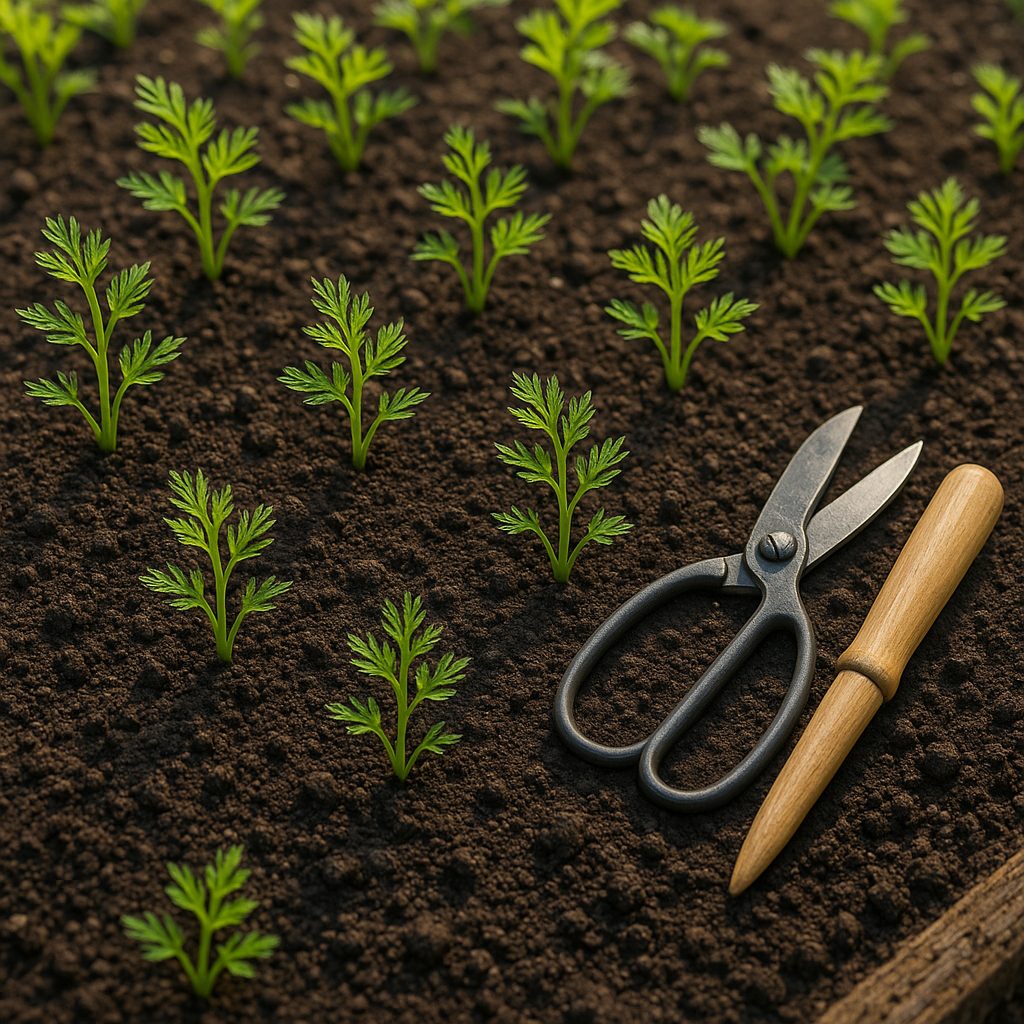
Plus, harvesting becomes a breeze—well-spaced carrots are easier to pull out and less likely to tangle or break. If the idea of tossing young plants bothers you, try snipping the extras above the soil line instead of pulling them out, which avoids disturbing the roots of your keepers. You can even use the thinned sprouts in salads for a peppery crunch.
Ultimately, a little effort up front results in a bigger, healthier, and more rewarding carrot crop.
When and How to Thin Carrot Seedlings
Knowing when to thin your carrot seedlings is key to growing straight, healthy roots, and timing is everything. You’ll know it’s time when your carrots reach about 2 inches tall and display their first set of true leaves (not just the tiny, rounded seed leaves), usually 2-3 weeks after sowing.
Crowded seedlings can’t develop properly, so thinning is a must—even if it feels counterintuitive. Aim to thin carrots so there’s about 2 inches of space between each plant. This allows enough room for the roots to swell and prevents misshapen carrots later on.
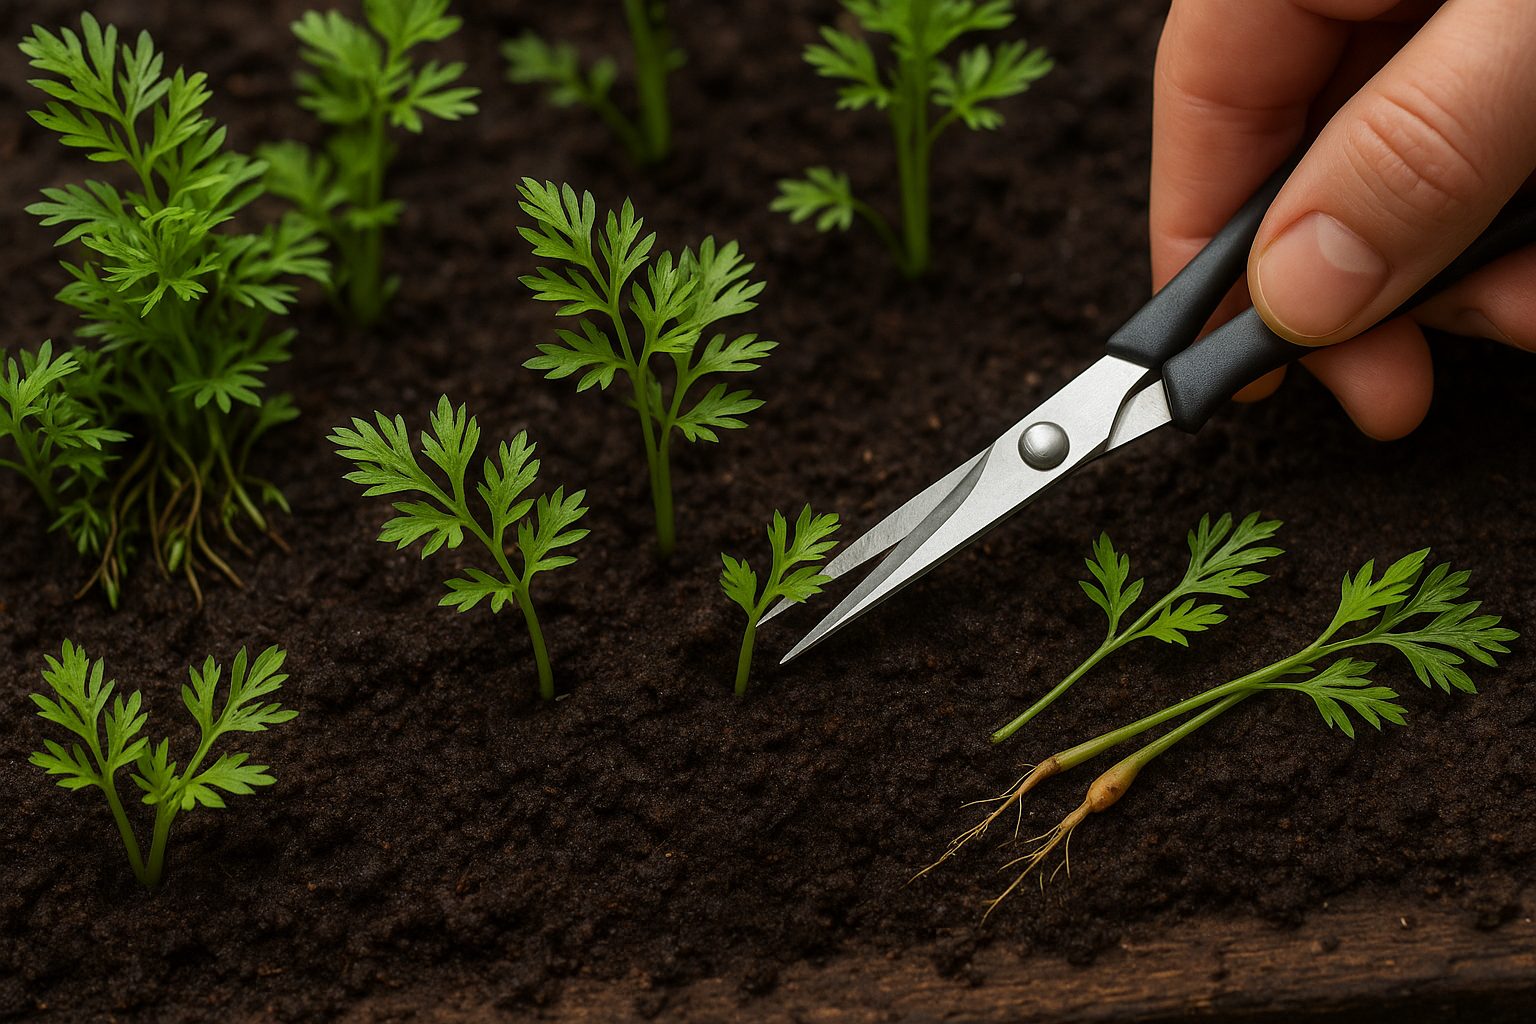
To begin, work on a cool, moist day or gently water the bed beforehand so the soil is soft. This helps prevent disturbing neighboring roots. Rather than pulling up unwanted seedlings, which can tug on and disrupt those you want to keep, use small scissors or garden snips to cut seedlings at soil level. Snipping is much gentler and minimizes root disturbance.
If you prefer pulling, grasp the seedling at its base and wiggle it out as gently as possible—but only if the soil is loose and other seedlings are spaced far enough apart.
If needed, thin again a few weeks later, leaving stronger plants with 3-4 inches of room for full maturity. This careful, staged approach helps ensure a robust carrot harvest without sacrificing young plants that still need a little more space to grow.
Practical Tips for Thinning Without Damaging Plants
When thinning your seedlings, a gentle touch goes a long way to protect both the plants you keep and the tiny roots underground. Instead of pulling unwanted sprouts, which can tug at and disturb neighboring roots, use a small pair of clean scissors to snip off extras right at the soil line.
For especially dense patches, water the soil a few hours beforehand to soften it—this makes sliding lingering seedlings out much easier if you need to pinch or tease them out by hand.
If your seedlings are particularly delicate or planted in tight rows, try using a pair of fine-tip tweezers, or even chopsticks, to carefully lift seedlings without squishing the stems. A damp toothpick or craft stick can also help nudge the right seedling aside for trimming.
Remember: always thin in the cooler part of the day to reduce stress, and transplant right away if you’re saving any outcasts for another spot. Give the remaining plants a gentle drink and a little extra space, and your garden will reward you with healthier, stronger growth all season long.
What to Do With Carrot Thinnings
Don’t toss those delicate carrot thinnings—put them to good use instead! If you’re thinning young seedlings in your garden, some can be gently transplanted to emptier spots. Choose those with tiny, straight roots and move them quickly, keeping as much soil around the roots as possible. Water well after transplanting and expect a few to struggle, but many will adjust and thrive, helping you maximize your harvest.
For the thinnings you can’t replant, think of them as a fresh, homegrown ingredient. The slender baby roots add a sweet crunch to salads or slaws, and they’re also tasty tossed into stir-fries or blended into smoothies for a hint of earthiness.
Don’t forget the feathery greens—they’re loaded with flavor and nutrition! Use the tops as you would parsley: chop them into soups, pesto, chimichurri, or sprinkle onto roasted vegetables for a burst of green. A simple carrot top salsa made with olive oil, lemon, and garlic can transform the greens into a tangy dip.
With just a bit of creativity, carrot thinnings can add freshness to your meals and give your garden a productivity boost at the same time.
Preventing the Need for Excessive Thinning
One of the best ways to avoid the headache of excessive thinning later is to start with proper seed spacing right from the beginning. Carefully checking the seed packet for spacing recommendations—and actually following them—can save a lot of time and prevent wasted plants.
Instead of sprinkling seeds freely, try investing in pelleted seeds or seed tapes. Pelleted seeds are coated to make them larger and easier to handle, allowing you to place each one exactly where it should go. Seed tapes are pre-spaced strips that take all the guesswork out of sowing. Both options greatly reduce the chance of seeds ending up too close, which means fewer seedlings you’ll need to pull out later.
If you’re sowing tiny seeds by hand, use a simple homemade spacer—a ruler, popsicle stick, or even your finger—to help keep the recommended gaps between seeds. There are even garden seed spacing tools available at garden centers that make this process faster and more accurate.
Taking a little extra time to plan and plant with the right technique pays off: you’ll have uniform rows, healthier plants, and less work thinning down the road. Plus, you’ll waste fewer seeds and maximize your harvest!
Common Thinning Mistakes to Avoid
One of the most common mistakes gardeners make when thinning is waiting too long to get started. If you let seedlings grow too big before thinning, their crowded roots may become entangled, making it harder to separate them without causing damage.
Another pitfall is accidentally leaving roots exposed after pulling weaker seedlings. Exposed roots can dry out quickly and stunt the growth of the remaining plants. Over-thinning is also surprisingly common—gardeners sometimes get carried away and remove more seedlings than necessary, leading to sparse rows instead of healthy spacing.
To avoid these issues, start thinning as soon as seedlings develop their first set of true leaves. Use small scissors to snip off extras at soil level rather than pulling them out, which protects the roots of the remaining plants. It’s also helpful to water before thinning to minimize disturbance, then immediately pat the soil back into place and water again afterward.
Remember, making mistakes is a natural part of gardening—each season is a chance to learn and improve. Don’t let an imperfect thinning job discourage you; even experienced gardeners tweak their approach year after year for better results.
Conclusion & Takeaways
Thinning carrots might seem like an extra step, but it’s essential for healthier plants and bigger, sweeter roots. When you remove crowded seedlings, the remaining carrots have space to grow, access to more nutrients, and less competition for water and sunlight.
This simple practice helps prevent stunted, misshapen carrots and encourages even growth across your garden bed. If you feel hesitant, remember that thinning is a completely normal part of gardening—experienced growers do it every season.
Don’t worry if you’re new; take it slow and trust the process. By confidently thinning your carrots, you’re setting the stage for a more abundant and satisfying harvest in a few months’ time.