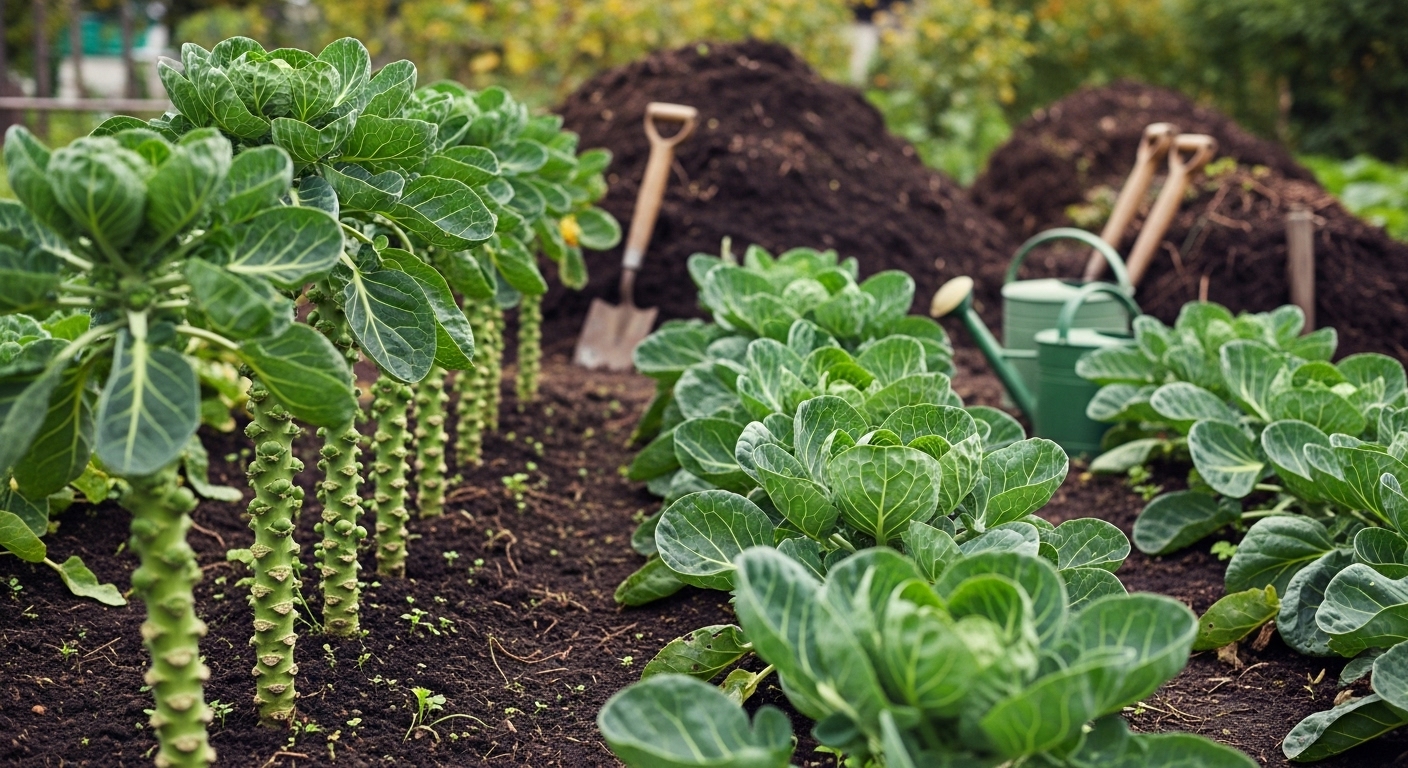
Introduction to Growing Brussels Sprouts
When planning your home garden, understanding the importance of brussels sprouts crop rotation can make all the difference between a thriving harvest and a disappointing season. Brussels sprouts—those miniature cabbage-like vegetables—have earned a special place among gardeners for their robust flavor, nutritional punch, and the way they sweeten after a touch of frost.
Unlike many other brassicas, Brussels sprouts require a long growing season, often needing up to six months from seed to harvest. They prefer cooler temperatures and benefit from consistent moisture, making them a bit more particular than their cabbage or kale cousins.
One of their standout qualities is their nutritional value: packed with vitamin C, vitamin K, and fiber, Brussels sprouts are a powerhouse addition to your table. Their mild, nutty flavor develops nicely with slow cooking or roasting, winning over even reluctant vegetable eaters.
But success with Brussels sprouts hinges on smart practices like crop rotation, since they’re especially prone to soil-borne diseases and pests that accumulate when similar crops are grown in the same spot year after year. By mastering Brussels sprouts crop rotation, you’ll not only boost your garden’s health but also enjoy better yields and tastier sprouts season after season.
Choosing and Sowing Seeds
When it comes to choosing seeds, it’s important to match plant varieties to your climate and growing season. Popular options like tomatoes, peppers, and lettuce are usually available in both early and late-maturing types.
Early varieties—think ‘Early Girl’ tomato or ‘Little Gem’ lettuce—are bred to mature faster, making them ideal for regions with short summers or gardeners eager for a quick harvest. Later varieties, such as beefsteak tomatoes or Romaine lettuce, take longer but often produce larger yields and can handle extended growing seasons in milder climates.
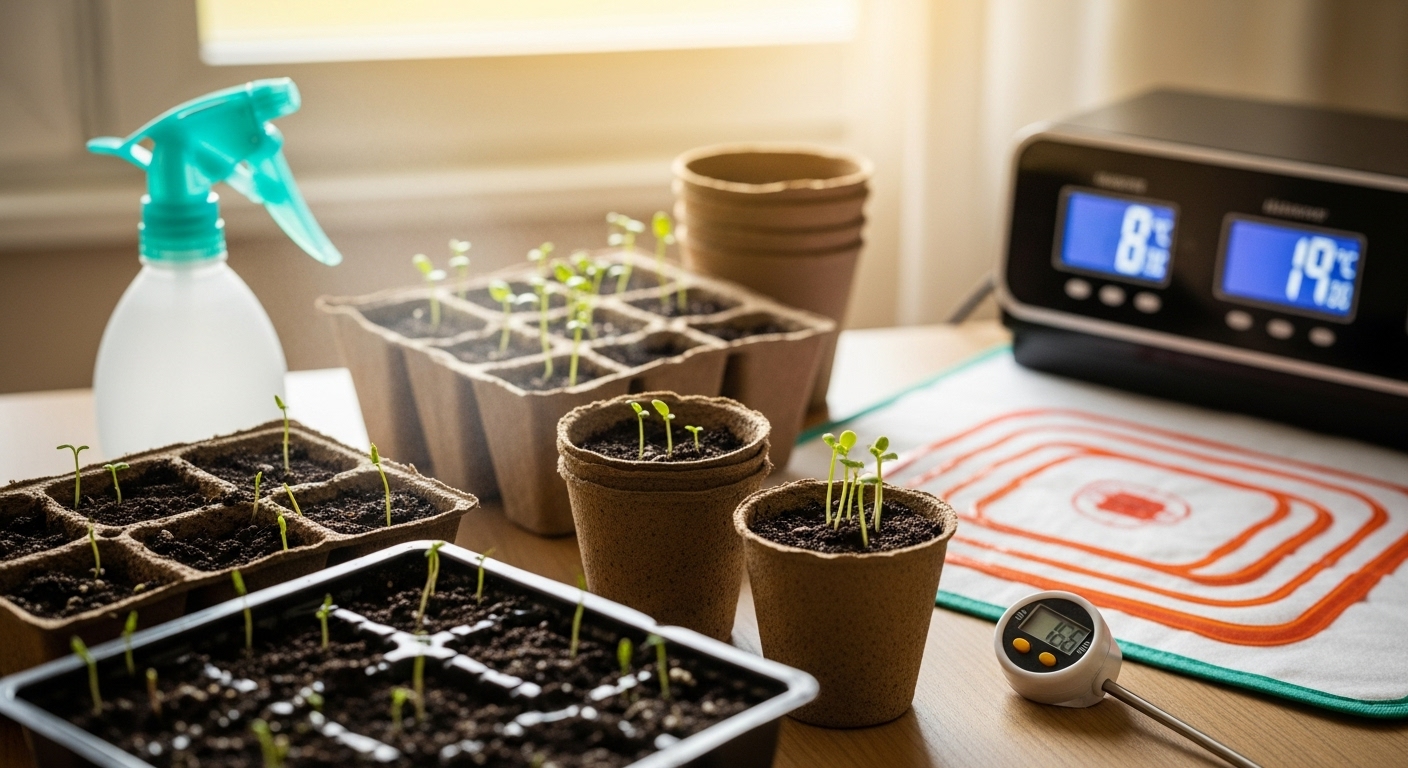
To get a head start, many gardeners sow seeds indoors 6-8 weeks before the last expected frost. Use seed trays or small pots filled with a quality seed-starting mix, lightly mist to keep the surface moist, and place them in a warm, bright location. For heat-loving crops like peppers, using a seed-warming mat ensures faster, more reliable germination.
Outdoors, hardy seeds like peas and radishes can be directly sown as soon as the soil can be worked, while more tender seeds should wait until soil temperatures consistently reach 60°F (15°C) or above. Always refer to your seed packet for precise timing.
As seedlings indoors develop two to three true leaves, gently transplant them into bigger pots to prevent crowding, a process known as “potting up.” Before moving outdoors, gradually acclimate, or “harden off,” your plants by exposing them to the outside environment a few hours each day over a week.
The optimal time for final transplanting is after the risk of frost has passed and seedlings are strong—ideally on a cloudy day to reduce transplant shock. Following these steps helps set your garden up for robust, healthy growth right from the start.
Planting and Garden Planning
When planning your garden, start by ensuring your soil is in top shape—loamy, well-draining soil enriched with organic matter like compost is ideal for most vegetables and flowers. Test your soil’s pH and adjust it with lime or sulfur if needed; most garden crops prefer a slightly acidic to neutral range (6.0–7.0).
Timing is also key—transplant seedlings outdoors after the last frost when soil temperatures reach at least 50°F (10°C). If you’re planting directly into garden beds, make sure each plant has enough space to grow; overcrowding invites pests and disease. Always follow spacing recommendations on seed packets or plant tags—for example, tomatoes need 18–24 inches between plants, while lettuce can be spaced 8–10 inches apart.
For container planting, choose large pots with drainage holes and fill them with high-quality potting mix. Keep in mind that containers dry out more quickly and typically require more frequent watering and feeding.
Rotating crops annually (such as following beans with leafy greens, then root crops) helps prevent soil-borne diseases and nutrient depletion. Try succession planting—sowing new seeds every few weeks—to keep harvests coming all season. Think about companion planting too; marigolds deter pests near tomatoes, basil boosts peppers, and carrots thrive beside onions.
No matter if you’re planting in a bed or a pot, always account for sunlight (6+ hours is ideal for most edibles), airflow, and easy access for maintenance. Beds work well for large, permanent gardens, while pots are perfect for patios or small spaces, allowing you to move plants for optimal light or shelter.
With thoughtful soil prep, timing, smart plant combinations, and rotation, your garden will be healthier and more productive year after year.
Care and Maintenance Through the Season
Keeping your garden thriving from spring through fall requires a consistent care routine tailored to seasonal needs. During the growing months, water deeply in the early morning to help roots access moisture before daytime heat causes evaporation—the general rule is about one inch per week, though sandy soils or containers may need more frequent checks.
Adding a two- to three-inch layer of mulch around your plants helps retain soil moisture, suppress weeds, and even out temperature swings, especially during hot spells. Feed most vegetables and flowering plants with a balanced fertilizer every four to six weeks, but always check the specific needs for each variety to avoid over-fertilizing.
As summer matures, stay on top of staking and tying up tall or vining plants like tomatoes or beans to prevent breakage from wind or their own weight. Regularly scout for yellowing leaves, insect pests, or disease spots so you can act quickly—removing damaged growth or using organic treatments as needed.
Prune back spent blooms and leggy stems to encourage fresh growth and better airflow, which helps prevent fungal issues in humid weather. As fall approaches, start preparing for cooler nights by protecting late crops with row covers or cloches; root vegetables can often stay in the soil with a heavy mulch layer until you’re ready to harvest.
During heatwaves or drought, provide extra shade using fabric or shade cloth, and increase watering frequency while being mindful not to saturate the soil. Consistent observation and timely intervention through each season will keep your garden healthy, productive, and resilient against weather surprises.
Identifying & Preventing Pests and Diseases
Keeping your cabbage patch healthy starts with knowing how to spot trouble early. Common pests like aphids cluster on the undersides of leaves, producing a sticky residue and causing leaves to curl; cabbage worms chew irregular holes and often leave green droppings behind; tiny cabbage maggot larvae tunnel into roots, causing plants to wilt unexpectedly.
To control these pests organically, regularly inspect your plants and handpick any visible caterpillars or worms. A strong blast of water can dislodge aphids, and encouraging natural predators like ladybugs helps keep pest populations down. Try companion planting with herbs like dill or nasturtiums, which naturally deter cabbage pests, and rotate your crops each year to disrupt pest life cycles.
Diseases can also be a challenge. Clubroot causes swollen, deformed roots and stunted growth, so avoid planting brassicas in the same spot and make sure soil drainage is strong. Downy mildew appears as yellow patches with fuzzy undersides on leaves; prevent it by providing good air circulation and watering at the base, not overhead. Remove and destroy infected plant material promptly.
Healthy, biologically diverse gardens with mulched beds, compost, and regular weeding tend to fare better. If you spot early symptoms of pests or disease, act quickly with organic interventions like neem oil or insecticidal soap. Use these sparingly and only as a last resort to protect pollinators and soil health.
With vigilance, a little planning, and these natural strategies, you can minimize chemical use and harvest robust cabbages season after season.
Harvesting, Storage & Use
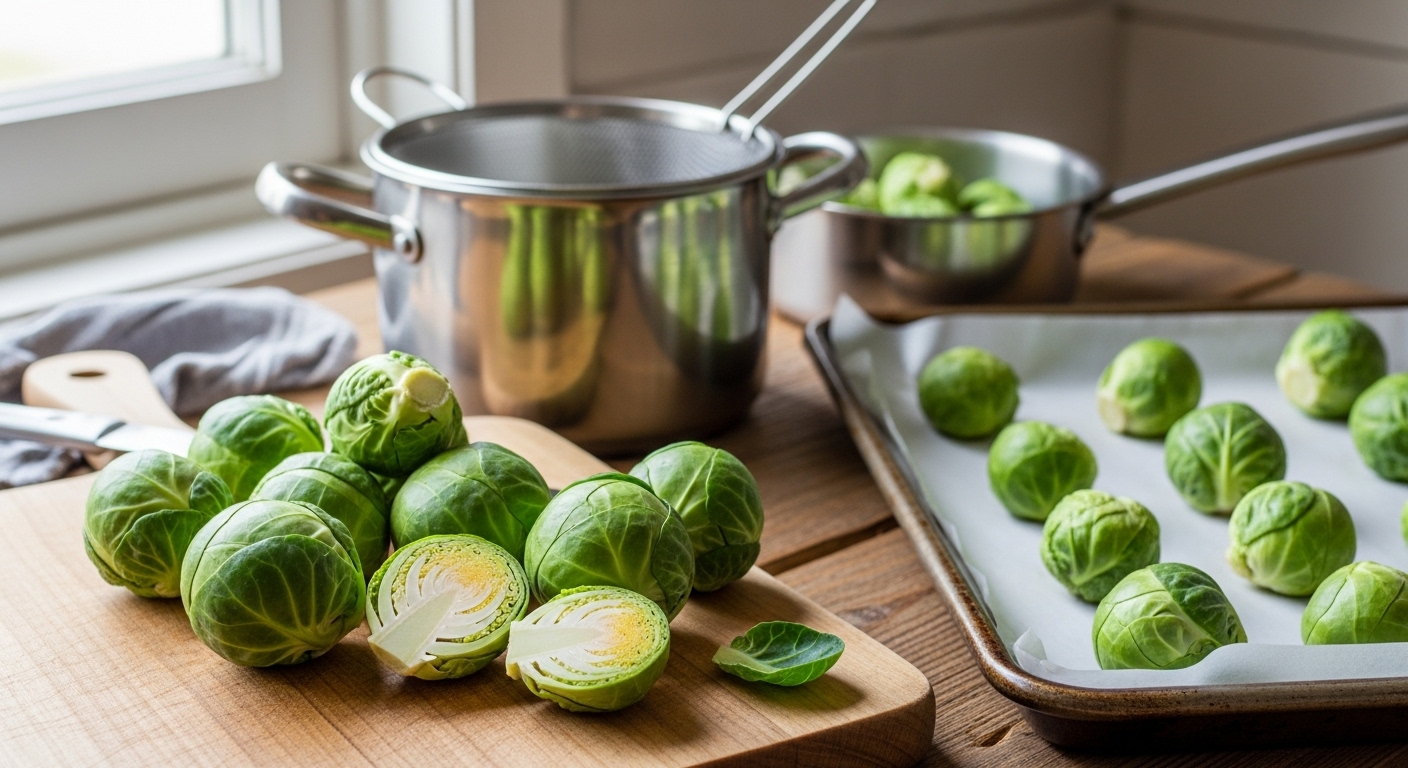
Knowing when to harvest Brussels sprouts is key to getting the best flavor and texture. Sprouts are ready when the small, cabbage-like buds are firm, bright green, and about one to two inches in diameter—usually starting from the bottom of the stalk and progressing upward. To ensure a continuous harvest, pick the lower, mature sprouts first by gently twisting them off or using a garden knife, leaving the upper sprouts to keep growing and ripen gradually.
For the best flavor, try to harvest after a light frost, as chilly weather sweetens the sprouts. Once picked, store unwashed sprouts in a plastic bag in your refrigerator’s crisper drawer, where they’ll keep for up to a week. If you want to extend storage, blanch the sprouts in boiling water for a few minutes, then plunge them into ice water. Once cooled and drained, spread the sprouts on a baking sheet to freeze individually before transferring them to a freezer bag—this ensures they won’t stick together and will stay fresher longer.
For extra-long storage, especially if you grow them yourself, you can cure whole stalks by letting them sit in a cool (32–40°F), humid location for a day or two.
When you’re ready to eat, Brussels sprouts shine in a variety of easy dishes. Roast them in the oven with olive oil, salt, and pepper to bring out their natural sweetness and get crispy edges, or sauté them with garlic and a splash of lemon for a simple side. For extra flavor, toss roasted sprouts with balsamic vinegar or a sprinkle of Parmesan cheese. Shredding raw sprouts for slaws or salads is another quick way to enjoy their crunch and earthy bite.
Don’t be afraid to experiment—these little veggies can fit into countless meals, transforming weeknight dinners with minimal effort.