
Understanding Broccoli
If you’ve noticed broccoli not forming heads in your garden, you’re not alone—this is a common frustration among home growers. Before diving into solutions, it helps to first understand what broccoli is and what makes it such a sought-after crop. Broccoli is a cool-season vegetable prized for its edible flower heads, which are packed with nutrients like vitamin C, vitamin K, and dietary fiber. This cruciferous vegetable is also a great source of minerals such as iron, potassium, and calcium, making it a nutritious addition to any diet.
Broccoli plants have a distinctive structure: the thick central stem supports a dense cluster of flower buds known as the “head,” which is what most people harvest and eat. Surrounding the main head are broad, blue-green leaves that play a vital role in gathering energy through photosynthesis. Once the central head is cut, many broccoli varieties will produce smaller side shoots, allowing for a longer harvest period.
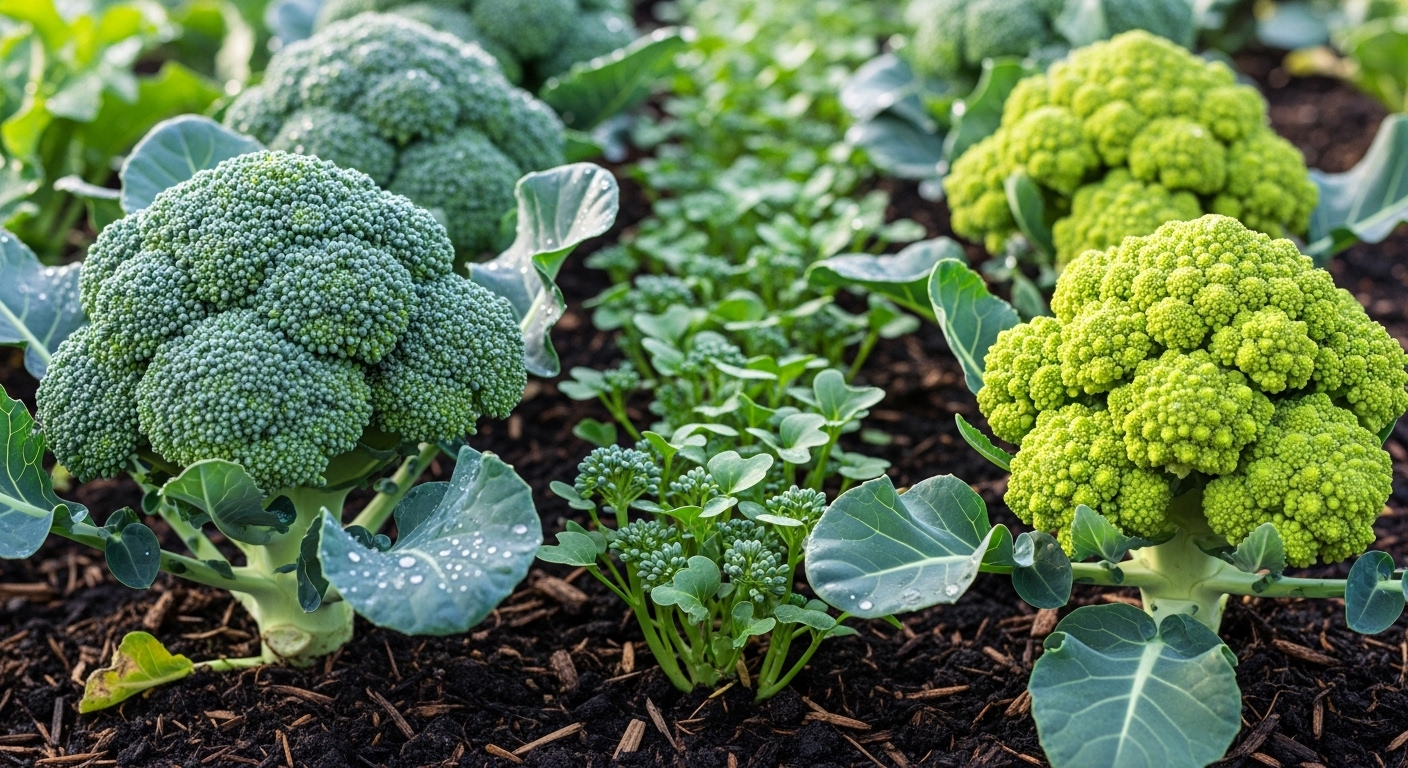
There are a few main types of broccoli that you’ll encounter. Calabrese is the most familiar supermarket variety, defined by its large, domed green heads and thick stalks. Sprouting broccoli, on the other hand, produces smaller, tender florets and numerous shoots, making it ideal for picking over several weeks. Then there’s Romanesco, a strikingly beautiful variety with lime-green, fractal-patterned heads that offer a mild, nutty taste.
Each type is slightly different in appearance and growth habits, but all can face similar issues—such as the much-dreaded scenario of a plant failing to form a head. Understanding these basics of broccoli is an important first step to diagnosing and solving problems in your vegetable patch, and sets the stage for ensuring a healthy, productive crop in the seasons to come.
Ideal Growing Conditions for Broccoli
Broccoli thrives in cool weather, making it perfect for spring and fall gardens when temperatures range from 60°F to 70°F (16°C to 21°C). Hot weather can cause the heads to bolt or turn bitter, so timing is everything. Outdoor planting usually works best a couple of weeks before your area’s last expected frost date in the spring or in late summer for a fall harvest.
Choose a sunny spot where your broccoli will receive at least 6 hours of direct sunlight each day; this helps heads develop densely and keeps flavors sweet. Soil is equally critical: broccoli prefers rich, well-drained soil with a pH between 6.0 and 7.0. If your soil is too acidic, mixing in some garden lime can bring the pH up to an ideal level.
To boost soil fertility, amend with plenty of compost or well-rotted manure before planting, and consider a balanced, slow-release fertilizer to encourage steady growth. Good drainage is essential—broccoli roots dislike soggy conditions, so raised beds or mounded rows can help in heavier soils.
When it’s time to plant, give each broccoli seedling enough space by setting them 18 to 24 inches apart. This allows good airflow to prevent disease and gives each plant ample room to spread out. Crowded broccoli tends to compete for light and nutrients, leading to smaller, less productive heads.
By combining the right climate, soil, sunlight, and spacing, you’ll set the stage for a bumper crop of healthy, delicious broccoli in your garden.
Starting Broccoli: Seeds and Seedlings
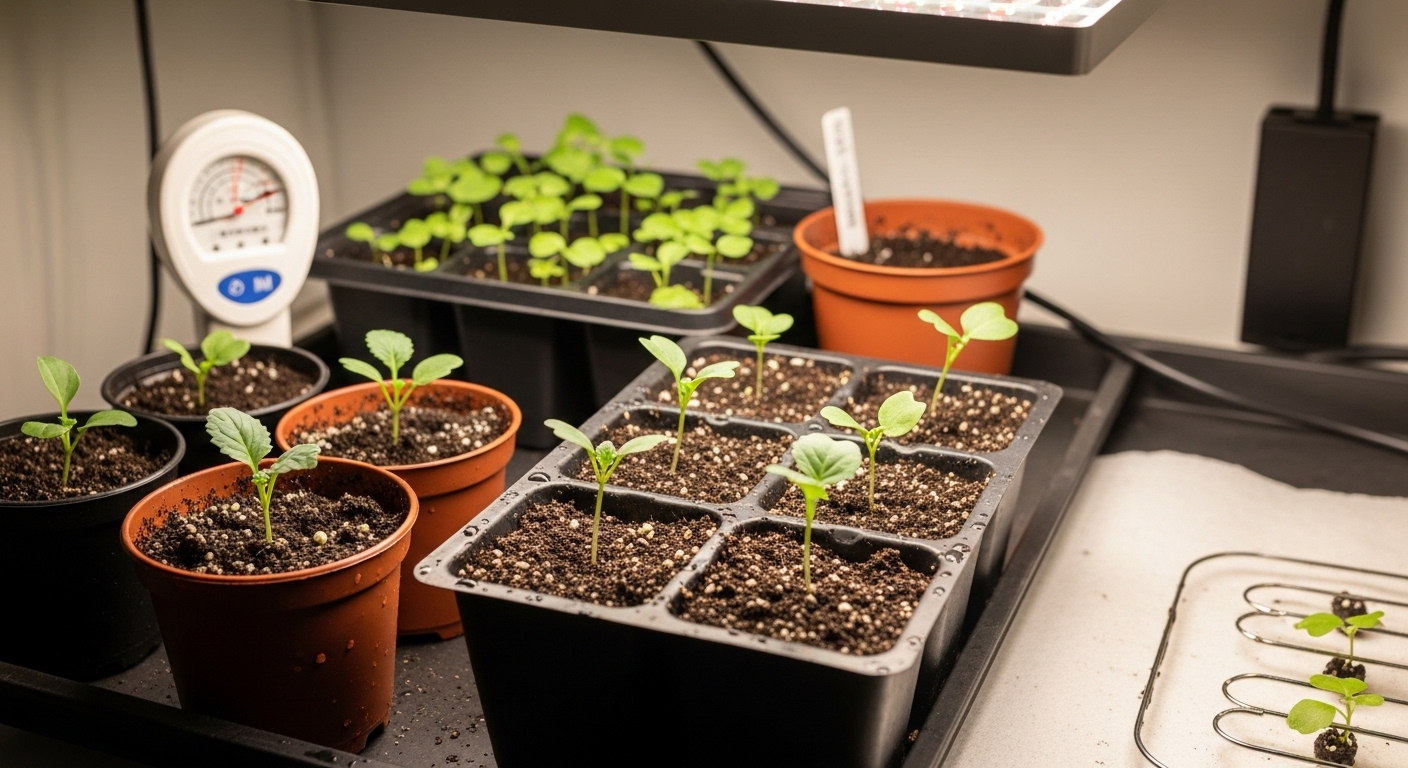
Getting a healthy start with broccoli begins by understanding the ideal conditions for seed germination. Start your broccoli seeds indoors about 6-8 weeks before your expected last frost date. Fill seed trays or small pots with seed-starting mix, and plant seeds about ¼ inch deep.
Broccoli prefers a consistent soil temperature of 65–75°F (18–24°C) for the best germination, so keep your trays in a warm spot—ideally using a seedling heat mat if your home is chilly. Water gently to keep the soil moist but not soggy.
Once the seeds sprout—typically within 5-10 days—make sure they get at least 6 hours of bright light daily. A sunny windowsill works, but a grow light helps prevent leggy, weak plants.
Common Mistakes to Avoid
- Starting too early or too late, which can leave you with transplants that are overgrown and stressed or too small for outdoor conditions.
- Overwatering, which can cause damping off—a fungal disease that makes seedlings wilt and collapse.
Use clean trays, avoid crowding seeds, and water at the soil level rather than overhead to minimize risk.
Hardening Off and Transplanting
When your seedlings have at least two sets of true leaves and are about 4-6 inches tall, start hardening them off—a vital but often skipped step. Gradually expose them to outdoor conditions over 7-10 days by setting them outside for a few hours each day, increasing the time and sunlight exposure gradually. This helps the young plants adjust and reduces transplant shock.
Transplant broccoli outdoors 2-3 weeks before your area’s last frost date, spacing plants 18-24 inches apart in a spot with full sun and fertile, well-drained soil. Plant them slightly deeper than they were in their pots, and water thoroughly after planting. Mulch around the base to retain moisture and discourage weeds.
With careful timing and attention to detail, your broccoli seedlings will thrive and reward you with healthy, robust heads come harvest time.
Broccoli Care Through the Growing Stages
Caring for broccoli through its distinct growth stages—seedling, vegetative, and heading—requires a blend of attentive routines and practical know-how.
As seedlings, broccoli needs consistent moisture to establish roots. Water lightly but often, keeping the soil evenly damp but not soggy; a gentle spray with a watering can or hose attachment works best. Early on, apply a mild, balanced fertilizer (like a diluted fish emulsion or 10-10-10 mix) every two weeks, and mulch with a thin layer of straw or shredded leaves to retain moisture and curb weeds.
During the vegetative stage, once the plants have several true leaves, increase watering to about 1–1.5 inches per week, preferably in the morning. Because broccoli has shallow roots, deep but less frequent watering helps build resilience. Transition to a high-nitrogen fertilizer every three to four weeks to fuel leafy growth, and refresh your mulch layer to keep the soil cool.
As broccoli enters the heading or flowering stage—when the signature green crowns form—dial back the fertilizer to avoid promoting excess foliage over flower development. Switch to a lower-nitrogen blend and maintain steady moisture, as drought stress can cause ‘buttoning’ (tiny heads) or premature bolting.
Throughout, vigilance against pests and diseases is key. Watch for cabbageworms, aphids, and flea beetles, picking them off by hand or using row covers early on. Neem oil or insecticidal soap can also help; spray in the evening to protect beneficial insects. Prevent common diseases like downy mildew by watering at soil level (not overhead), spacing plants for airflow, and rotating crops each year.
With these stage-specific strategies, you’ll keep your broccoli thriving from sprout to harvest-ready head.
Troubleshooting Broccoli Growth Problems
If your broccoli plants are struggling, there are a few common issues to watch for, each with tell-tale signs. One frequent problem is failure to form heads, which often appears as lots of leafy growth but no dense broccoli crown. This can be caused by too much nitrogen, inconsistent watering, or planting when temperatures are too warm.
Broccoli thrives in cooler weather (ideally 60–65°F), so try planting early in spring or late summer for a fall crop. If you notice your broccoli suddenly shooting up with small yellow flowers, it’s bolting—a stress response usually triggered by heat waves, sudden changes in temperature, or lack of water. To minimize bolting, use mulch to keep roots cool and water consistently.
Another prevalent issue is pest damage from offenders like cabbage worms and aphids. Look for holes in leaves, chewed stems, or clusters of tiny green bugs. Check under leaves regularly, handpick pests where possible, or try spraying leaves with a mild soap solution to deter insects.
Overcrowding is another hidden culprit—it stunts growth and increases susceptibility to disease. Ensure broccoli plants are spaced at least 18 inches apart to provide enough airflow and light.
Yellowing leaves or stunted plants may indicate nutrient deficiencies, such as a lack of nitrogen or boron. You can top-dress with a balanced fertilizer or add compost to enrich the soil before planting. It also helps to rotate crops each year to avoid soil-borne diseases.
By keeping a close eye on your broccoli, responding quickly when you spot problems, and following these simple tips—timely planting, good spacing, regular watering, and pest checks—you’ll give your plants the best shot at producing healthy, delicious heads.
Harvesting and Storing Broccoli
Knowing the right moment to harvest broccoli can make all the difference in taste and texture. Look for tightly packed, dark green heads with small buds—once you see yellow flowers starting to peek through, it means the broccoli is past its prime.
It’s best to harvest in the cool morning hours; this helps lock in crispness and slows wilting that can happen under midday heat. For picking, use a sharp knife or garden shears to cut the central head about 5 to 8 inches below the cluster, angling your cut to keep water from pooling on the stem.
Be sure to leave the plant’s main stalk and a few lower leaves intact, as this encourages side shoots to develop and extends your harvest season with bonus mini-heads in the weeks to follow.
After cutting, quickly cool the heads in a sink or bucket of cold water—this removes field heat and keeps broccoli crunchy.
For storage, dry the heads thoroughly and wrap them in a damp paper towel before placing them in a perforated plastic bag in the fridge crisper; this helps maintain moisture without causing rot. Properly stored, fresh broccoli can last up to a week, making it easy to enjoy your garden bounty in salads, stir-fries, or as a crisp snack.
Growing Broccoli Successfully: Final Tips & FAQs
To get the most from your broccoli patch with minimal fuss, focus on a few key care tips. Choose a sunny spot with well-drained, fertile soil, and plant when your area is cool—broccoli thrives in temperatures between 60°F and 70°F. Water consistently (about one to one and a half inches per week), aiming for the base of the plant to avoid wetting leaves, which can lead to disease. Mulching around the base helps retain moisture and keep weeds in check.
Keep an eye out for common pests like cabbage worms; picking them off by hand or covering your plants with lightweight row covers helps protect your crop organically. For the best yield, feed your broccoli with a balanced fertilizer when planting and again as heads begin to form.
Common Questions from Beginners
- Why are my broccoli heads small? This usually comes down to warm weather or overcrowding—make sure plants have 18 inches of space and consider planting in early spring or late summer.
- Can I eat the leaves? Absolutely! Broccoli leaves are tasty and nutritious, perfect for sautés or salads.
- What if my broccoli starts to flower? It’s best to harvest before yellow flowers appear, as this signals the heads are past their prime. However, the florets and even some flowers are still edible.
Growing your own broccoli is not only rewarding but also allows you to try unique varieties you won’t find in stores and harvest fresh, nutrient-rich heads right outside your door. Don’t be afraid to experiment with different planting times, companion plants, or organic pest controls—each season is a new chance to learn and enjoy the benefits of homegrown produce.