Introduction to Growing Dill Indoors
Starting dill indoors is becoming an increasingly popular approach for home gardeners eager to ensure a steady supply of this fragrant, feathery herb. Dill is cherished not only for its delicate, anise-like flavor in dishes like pickles, salads, and seafood but also as a beneficial companion plant in the garden, attracting pollinators and deterring certain pests.
Many gardeners wonder whether it’s worth starting dill seeds indoors, especially since dill has a reputation for not transplanting well. There are several reasons people attempt this method—getting a head start on the short growing season, protecting fragile seedlings from fickle spring weather, or aiming for an earlier harvest.
But does starting dill seeds indoors really pay off, or is it better to sow directly in your garden beds? In this article, we’ll dig into the pros and cons of starting dill indoors, walk you through the best practices for seed-starting success, and share expert tips to maximize your dill harvest wherever you choose to plant.
Whether you’re a seasoned grower or new to herbs, you’ll find practical answers and step-by-step guidance for growing lush, flavorful dill from seed to table.
When and How to Start Dill Seeds Indoors
To get an early start on your herb garden, sow dill seeds indoors about 4 to 6 weeks before your region’s last expected frost. This gives the seedlings enough time to develop before transplanting outside.
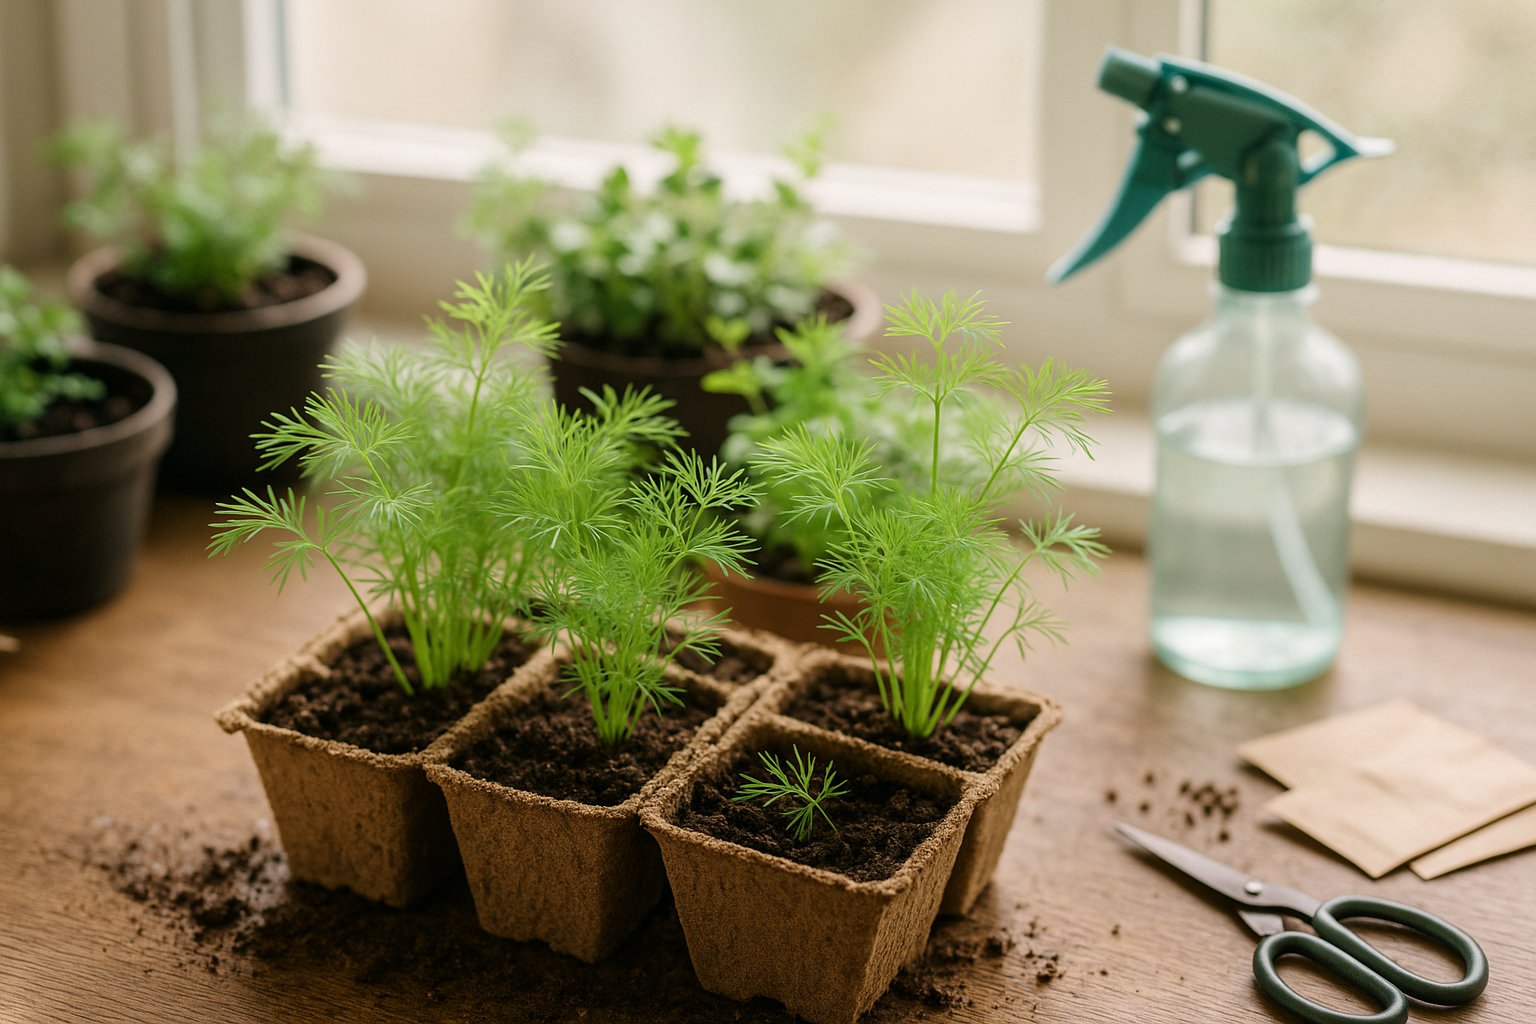
Use biodegradable seed trays or small pots with drainage holes to avoid disturbing delicate roots later. Fill the containers with a lightweight seed-starting mix, not garden soil, to ensure good drainage and a sterile environment that reduces the risk of disease.
Dill seeds prefer a soil temperature of 65°F to 70°F for optimal germination, so place your containers on a seedling heat mat if your home tends to be cool. Keep the soil consistently moist but never soggy—mist the surface with water if needed to maintain a gentle dampness.
Once seeds sprout, usually in 10 to 14 days, move the seedlings to a sunny windowsill or place them under grow lights for about 14 to 16 hours a day so they become strong and stocky.
Indoor germination can be trickier than outdoor sowing because dill naturally dislikes transplanting and is sensitive to dampening off, a fungal disease that affects seedlings in humid, enclosed spaces. To prevent this, ensure good air circulation around seedlings and never overwater.
If you notice any signs of stretching towards light (leggy growth), increase the brightness or adjust your grow lights closer to the seedlings. With these tips, you’ll give your dill plants a healthy head start for a productive season.
Step-by-Step Guide
Starting dill from seed indoors is a simple way to get a head start on your herb garden, but it does require some care to ensure strong, healthy sprouts. Begin by filling small pots or seed trays with a light, well-draining potting mix, and gently moisten the soil before sowing.
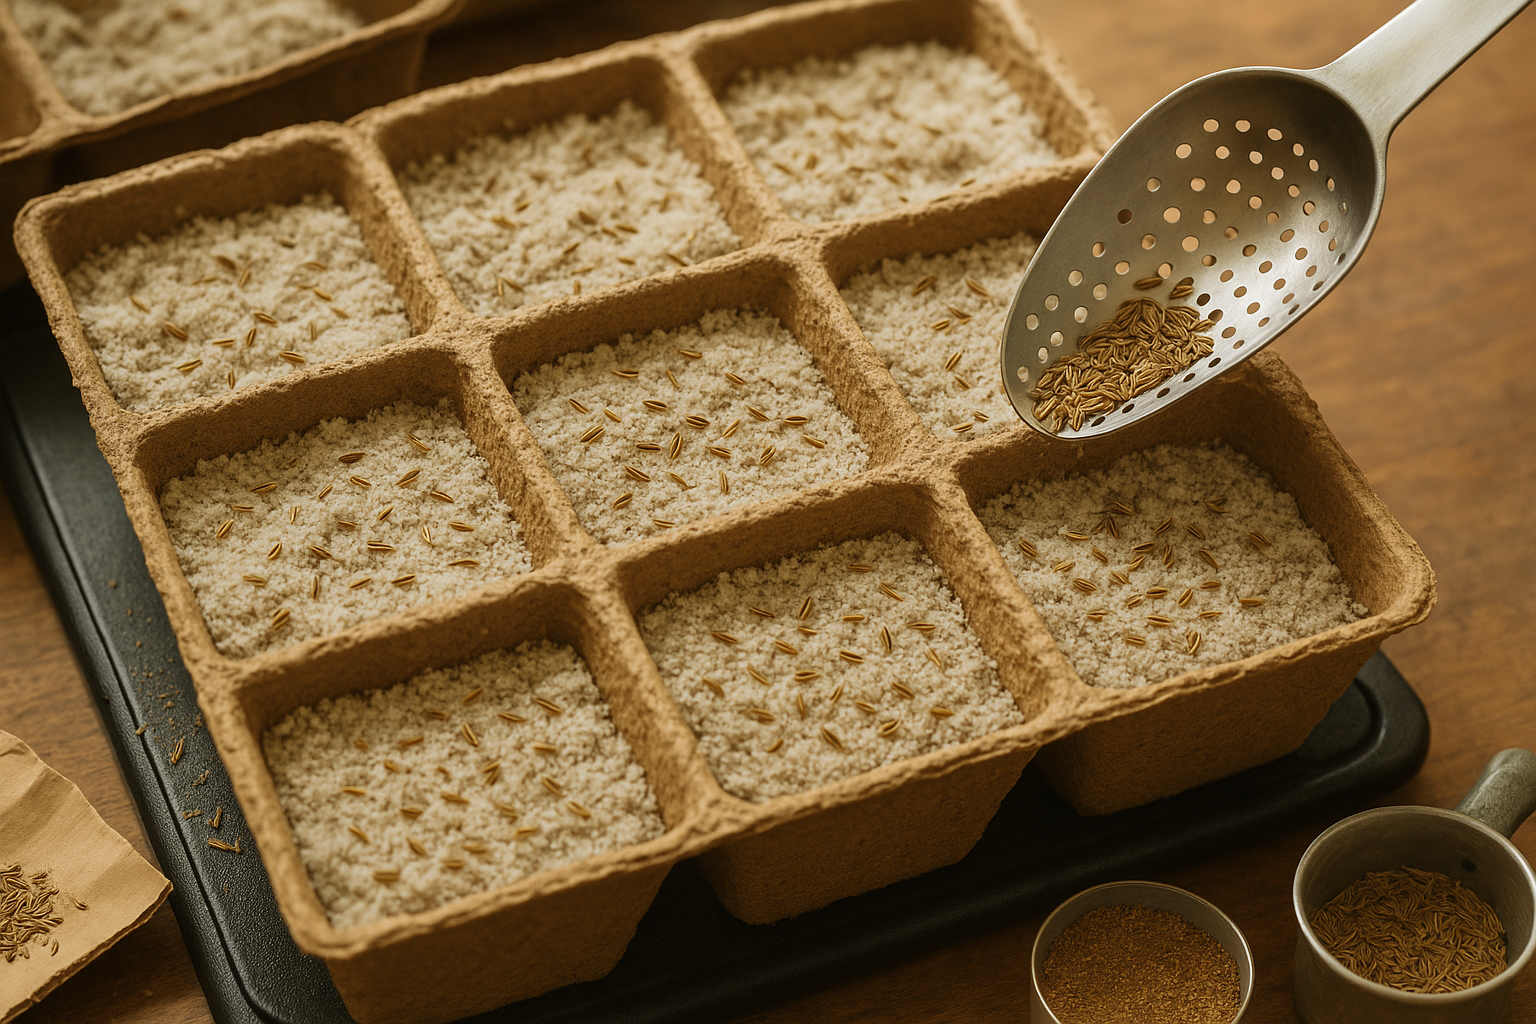
Dill seeds are small, so sprinkle them evenly across the surface rather than burying them deeply—aim for a depth of about 1/4 inch. If you’re sowing in trays, keep seeds about an inch apart; if using small pots, drop 2-3 seeds per pot and thin them later. To ensure even seed distribution, mix the seeds with a pinch of dry sand and scatter the mixture over the soil, which helps avoid clumping.
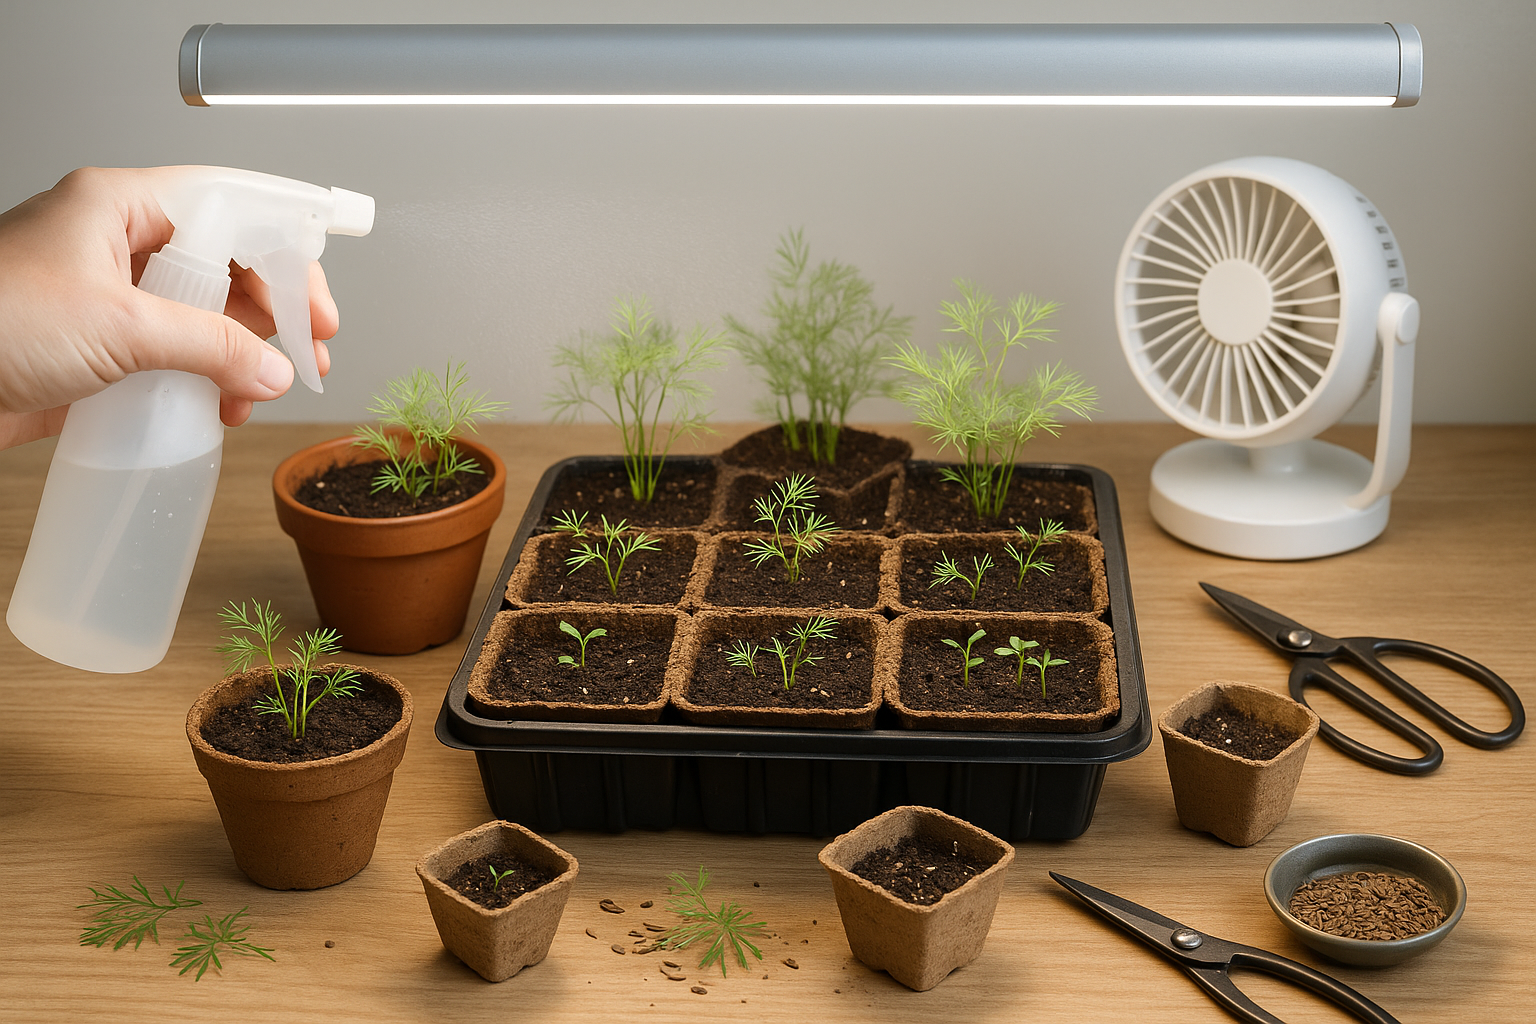
Water gently with a spray bottle to keep the surface moist but not soggy, as waterlogged conditions can rot tiny seeds. Once seedlings emerge, which usually takes about 10-14 days, make sure they get plenty of light—either by placing them on a sunny windowsill or under a grow light for 12-14 hours a day.
Rotate trays regularly and consider using a small fan nearby to promote airflow; this helps prevent leggy, stretched stems and reduces the risk of mold and disease. As seedlings grow to about two inches tall, thin them so only the strongest remain, leaving about two inches between plants. This gives roots room to develop without competition.
By keeping these basics in mind, you’ll have sturdy dill plants ready to move outside when the weather warms.
Caring for Indoor Dill Seedlings
Caring for indoor dill seedlings means giving them the right balance of water, light, and warmth so they thrive from the start. Water dill seedlings when the top layer of soil feels dry to the touch, avoiding both sogginess and letting them dry out completely. A gentle mist or a bottom-watering tray helps keep roots healthy without washing away seeds.
Light is crucial—dill needs at least 6-8 hours of bright, indirect sunlight, so position seedlings on a sunny windowsill or use a grow light if natural light is limited. LED or fluorescent grow lights set 4-6 inches above the seedlings provide an even, reliable source of light and prevent leggy, weak growth by mimicking daylight.
Keep room temperatures steady, ideally between 65°F and 75°F, and avoid cold drafts or dramatic fluctuations.
Watch out for common problems:
- Damping off: Appears as wilted, mushy stems near soil level, often caused by overwatering and poor airflow. Use well-draining seed-starting mix and don’t crowd seedlings to reduce risk.
- Leggy growth: Happens when seedlings stretch for light, growing long and thin. This means they need more brightness or the light source should be moved closer.
Extra fertilizer usually isn’t necessary in the first few weeks if you use a quality seed-starting mix, but if growth slows after the first true leaves appear, a half-strength, balanced liquid fertilizer every 2 weeks can help.
Monitor seedlings daily, adjusting care as needed, and you’ll set up your dill plants for robust, flavorful harvests.
Transplanting Dill Seedlings Outdoors
Dill seedlings are ready to be transplanted outdoors when they’re about 4-6 weeks old and have at least two sets of true leaves. Timing is key—wait until all danger of frost has passed and nighttime temperatures consistently stay above 50°F (10°C).
Before transplanting, it’s important to harden off your seedlings—a gradual process that gets them used to life outside. About a week prior to transplanting, start by placing the seedlings outdoors in a sheltered, shady spot for a few hours each day. Then, slowly increase their time and exposure to direct sunlight and wind. This helps prevent transplant shock and boosts their chances of thriving.
Choose a sunny location with well-draining soil; dill loves full sun and doesn’t do well in soggy spots. When prepping the soil, mix in some compost to boost nutrition and ensure a loose texture for root growth.
Space your seedlings 10-12 inches apart so they have room to branch out and avoid overcrowding, which helps with airflow and disease prevention. Gently remove seedlings from their pots, being careful not to disturb the roots, and water them well after planting. Mulch lightly to help retain moisture and suppress weeds, giving your dill the best start outdoors.
Troubleshooting Common Dill Growing Problems
Growing dill indoors can sometimes be tricky because of a few common issues like damping off, aphids, and powdery mildew.
Damping Off
Damping off usually affects seedlings, causing them to collapse. It often occurs when the soil stays too wet or air circulation is poor. To prevent it:
- Always use sterilized seed-starting mix.
- Avoid overwatering.
- Ensure containers have drainage holes.
Aphids
Aphids are tiny green or black pests that can cluster on dill leaves and stunt growth. To manage aphids:
- Gently rinse them off with water.
- Spray plants with a mild solution of water and a few drops of dish soap.
Powdery Mildew
Powdery mildew appears as a white, powdery coating on leaves. To prevent it:
- Improve air flow around your dill.
- Water at the base of plants instead of from above to keep leaves dry.
Floppy Seedlings
If your seedlings are floppy, make sure your dill is getting at least 6 hours of direct sunlight or supplement with a grow light to keep plants sturdy.
Light and Temperature Needs
Dill is a hardy herb but needs enough warmth and light for year-round indoor growth. South-facing windows work best, or consider an LED grow light if natural light is limited.
Quick FAQ
- Why are my dill seedlings falling over? Likely not enough light or overly damp conditions.
- Can I grow dill indoors all year? Yes, if you provide adequate light and warmth.
Harvesting and Using Home-Grown Dill
Harvesting dill at the right moment ensures maximum flavor and steady regrowth throughout the season. For leafy dill, snip sprigs once plants reach about 8 inches tall, targeting the top 4-6 inches with sharp scissors or garden shears—ideally in the morning after the dew has dried but before the midday heat.
Frequent, light harvesting encourages bushier growth; always avoid cutting more than a third of the plant at once to keep it thriving. If you’re after seeds, let a few flower heads mature and dry on the plant. Once seed heads turn brown and seeds easily fall off when touched, snip the heads into paper bags to finish drying indoors.
To maintain a continuous crop, stagger seed sowings every 3-4 weeks so you have fresh plants ready as older ones bolt.
In the kitchen, finely chopped dill brightens up potato salads, fish dishes, and homemade tzatziki, while the feathery leaves are essential in pickling cucumbers for that classic, aromatic tang.
Beyond culinary delights, dill is a garden multitasker:
- Plant it alongside cabbage or onions to ward off pests.
- Watch beneficial insects like ladybugs flock to its delicate yellow blooms, making it a valuable companion in any edible garden.