
Understanding Carrot Varieties and Choosing the Right Seeds
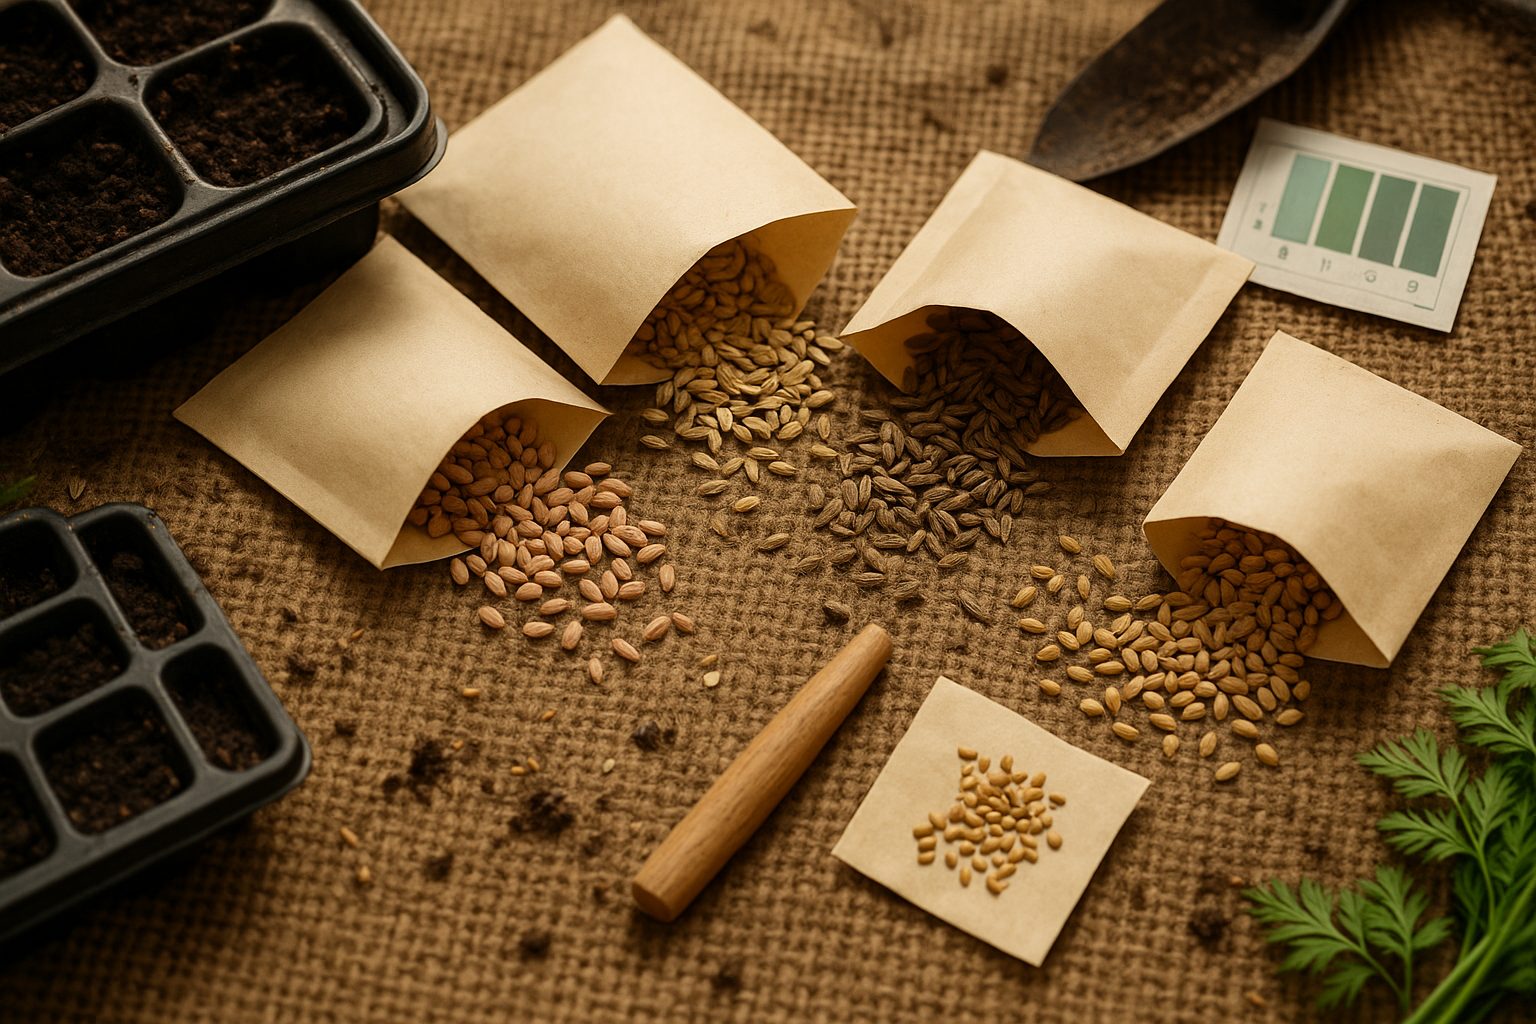
If you dream of harvesting sweet, crisp spring carrots right from your own garden, choosing the right varieties is the first—and perhaps most important—step you can take. With so many types of carrots out there, from slender Nantes and classic Imperators to stubbier Danvers and rugged Chantenay, it’s easy to get lost in the seed catalog maze.
The carrot you select will depend not just on your personal taste, but also on your spring climate, whether your garden’s soil is loose and sandy or rich and clay-like, and how you plan to enjoy your harvest—snacking fresh, juicing, or storing for long-term use. Heirlooms might offer robust flavor and history, while modern hybrids are bred for disease resistance and uniform roots.
To set yourself up for a successful crop, understanding the subtle differences between varieties—and knowing where to buy trustworthy, high-germination seeds—will make all the difference come spring. Let’s dig into the colors, shapes, and traits of spring carrots so your growing season starts off root-deep in confidence.
Preparing and Planting: From Soil to Sowing
Getting your soil right is the first crucial step to growing healthy, straight carrots. Carrots need loose, well-drained soil that’s free from rocks and hard clumps—anything that can obstruct growth will cause carrots to fork or twist. Enrich your soil with plenty of organic matter, like well-rotted compost or aged manure, but avoid adding fresh manure, which can be too rich and lead to oddly shaped roots.
Start by testing your soil’s pH (a simple home kit works fine) and aim for a neutral to slightly acidic range around 6.0 to 6.8; if your soil is too acidic, a scattering of garden lime can help. Double-digging or using a broadfork can help loosen the soil at least a foot deep, which is especially important for long carrot varieties.
Raised beds and deep containers are fantastic options if your garden has heavy clay or rocky soil—just fill them with a sandy, compost-rich blend specifically suited for root vegetables.
Sowing Timing and Methods
When it comes to sowing, timing matters: carrots prefer cool weather, so in most climates, sow outdoors two to four weeks before the last spring frost or at the end of summer for a fall crop. Direct sowing is best, as carrots don’t transplant well.
For planting, you have two common methods—row sowing and broadcast (scatter) sowing:
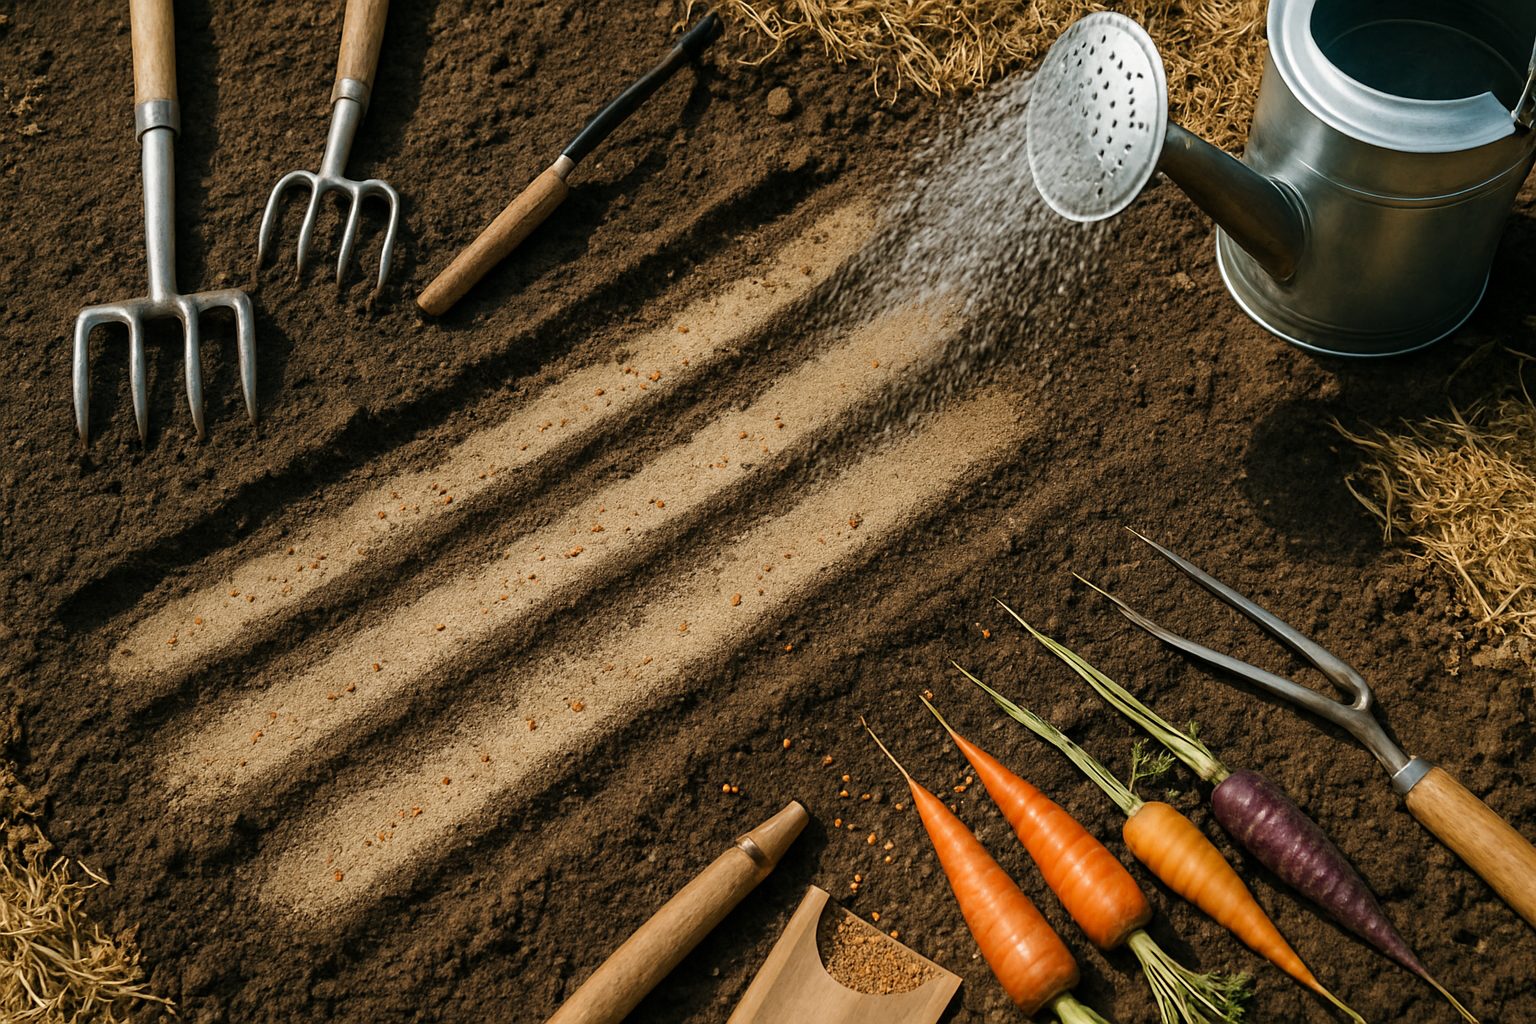
- Row sowing: Make shallow grooves about a quarter-inch deep and space seeds roughly one to two inches apart, with 12 to 18 inches between rows. This makes thinning and weeding easier.
- Broadcast sowing: Scatter the seeds more randomly over a bed, mimicking natural growth. This requires more attention when thinning to ensure each carrot has enough space—aim for a final spacing of about two inches between plants.
After sowing, gently cover the seeds with a fine layer of soil or sand to prevent crusting, and keep the area moist with a soft sprinkler or mist until the seeds sprout, usually within 10-20 days.
With these thoughtful preparations and planting techniques, you’ll be on your way to a bountiful harvest of sweet, straight carrots.
Caring for Growing Carrots: Watering, Fertilizing & Thinning
Proper care is essential for healthy carrot growth, especially when it comes to watering, fertilizing, and thinning your crop. When starting out, carrot seedlings need consistently moist—never soggy—soil, as their tiny roots dry out quickly. Aim to water lightly every one or two days, providing about half an inch of moisture each week during germination.
As carrots mature and start bulking up underground, you can reduce watering frequency to once or twice a week, but increase the amount to ensure the top six inches of soil remain evenly moist. Deep, less frequent watering encourages long, straight roots and prevents splitting. Overwatering can be just as harmful as underwatering, so monitor rainfall and adjust accordingly.
For nutrition, carrots aren’t heavy feeders, but they do need balanced, steady nourishment. Mix in well-rotted compost or aged manure prior to planting to boost organic matter and provide gentle, consistent nutrition. Two to three weeks after seedlings emerge, side-dress with a low-nitrogen fertilizer (like 5-10-10) to encourage robust root development rather than lush tops, since too much nitrogen can make carrots fork or produce lots of foliage at the expense of the root.
Organic gardeners can use compost tea or a sprinkle of bone meal for similar results—just be sure to avoid high-nitrogen feeds.
Thinning Your Carrots
Thinning is a step many gardeners dread, but it’s crucial for plump, healthy carrots. Crowded seedlings compete for light and nutrients, leading to twisted, undersized roots. Once true leaves appear and roots are about two inches tall, gently thin seedlings to stand one to two inches apart.
For less disturbance, try snipping the tops off unwanted seedlings with scissors at soil level rather than pulling them. This keeps the remaining roots intact and undisturbed. You can even use thinned baby greens as a salad garnish. Repeat thinning in a few weeks to ensure mature carrots have about three inches of space each.
Mulching and Weed Control
To help maintain moisture and suppress weeds, mulch your rows with a thin layer of straw, compost, or grass clippings once plants are established. Mulch acts as a protective blanket, keeping the soil cool and damp while discouraging weed seeds from sprouting—particularly valuable for young carrots with fragile roots that are easily overtaken or damaged during weeding.
For persistent weeds, hand-pull carefully or use a small hoe, taking care not to disturb carrot tops or roots.
With gentle, attentive care through watering, feeding, thinning, and mulching, you’ll set up your carrots for a bountiful, crisp harvest.
Managing Challenges: Pests, Diseases, and Environmental Stress
Growing healthy carrots takes more than just planting seeds; it means staying ahead of pests, diseases, and unpredictable weather. Carrot rust flies and aphids are two of the most common enemies you’ll face—watch for adult flies laying eggs near your seedlings and check the undersides of leaves for tiny aphid clusters.
Floating row covers can be your first line of defense, blocking insects without chemicals. For ongoing control, consider introducing beneficial insects like ladybugs to feast on aphids, and keep your carrot beds weed-free to reduce hiding spots for rust flies.
Fungal diseases such as alternaria and powdery mildew thrive in damp conditions, so water early in the day to let foliage dry and avoid overhead watering. Removing infected leaves promptly and rotating crops every year helps keep these pathogens in check; never plant carrots or their relatives (like parsley or celery) in the same spot two years in a row.
Companion planting with alliums—such as onions and chives—can naturally deter harmful insects, while herbs like rosemary and sage confuse pests with their strong scents.
Environmental stressors require vigilance too:
- If a heatwave strikes, mulch thickly around plants and use shade cloth to keep roots cool.
- In areas prone to spring or autumn frost, lay down straw or garden fabric to protect tender shoots.
- Drought can make carrots woody, so ensure even soil moisture by watering deeply once or twice a week rather than frequent shallow sprinkles.
To prevent forked or twisted roots, start by double-digging the soil and sifting out rocks—nothing disrupts a carrot’s growth more than hard clods or stones in its path. Avoid high-nitrogen fertilizers, which spur leaf growth at the expense of root quality, and resist the urge to thin vigorously, since removing seedlings can disturb neighboring roots.
By mixing these practical habits—organic pest management, thoughtful companion planting, and careful planning for the weather—you’ll stack the odds in favor of straight, sweet carrots every time.
Container and Small-Space Carrot Gardening
Growing carrots in containers is a smart solution for gardeners with limited outdoor space, like balconies or small patios. Start by choosing the right container: select one that’s at least 12 inches deep to accommodate long root growth, and make sure it has drainage holes to prevent soggy soil — an absolute must for healthy carrots.
Fill the container with a loose, stone-free potting mix blended with compost for nutrients; avoid heavy garden soil, which can cause stunted or forked roots. Opt for shorter carrot varieties such as Thumbelina or Parisian Market, since these are well-suited to shallower containers, but most standard types will also work in deeper pots.
Plant seeds thinly, spacing them about 2 inches apart to prevent root crowding — a major cause of misshapen carrots in containers. Place your container in a spot that gets at least six hours of direct sun daily, as carrots thrive in bright light.
Keep the soil consistently moist but not waterlogged, watering gently whenever the top inch feels dry. Fertilize with a diluted balanced liquid fertilizer every few weeks, but avoid high-nitrogen options that encourage leafy tops instead of tasty roots. If you notice carrots pushing up or turning green, simply mound more potting mix around the tops.
Common issues like poor drainage can be solved by using a soilless mix and propping containers slightly off the ground with pot feet or bricks to help excess water escape. Remember to thin seedlings early if they become crowded, snipping excess tops at soil level to avoid disturbing neighboring roots.
With these easy steps, even the smallest space can yield crisp, sweet homegrown carrots for your kitchen.
Harvesting and Post-Harvest Handling
Knowing when to harvest carrots is key to enjoying crisp, sweet roots at their peak flavor. Carrots are typically ready for harvest about 60–80 days after sowing, depending on the variety. Check for maturity by brushing away a bit of soil near the top of the root; if it is about 1/2 to 1 inch in diameter and has a vibrant color, it’s ready. For baby carrots, you can pull them earlier.
Lift carrots gently to prevent breakage: use a garden fork or shovel to loosen the soil around the row, being careful not to pierce the roots, and lift the carrots by their tops. Avoid grabbing just the leaves, as this may snap the greens off, leaving the carrot buried or damaged.
Once harvested, brush off loose soil instead of washing carrots right away if you plan to store them, as excess moisture can lead to rot. For immediate use, rinse carrots gently and pat dry.
Storage Options for Carrots
For storage, there are several options:
- Refrigerator: Carrots keep best in the vegetable crisper, stored in a perforated plastic bag to retain moisture without causing condensation. Refrigerated carrots should have their tops trimmed to about an inch to slow water loss but not cut completely flush, which can cause the carrot to dry out.
- Root Cellar: Layer unwashed carrots between damp sand or sawdust in a crate—they can last for months this way as long as the environment remains cool and humid.
Handling Carrot Greens
Carrot greens are edible and impart a fresh, slightly bitter taste to soups, pestos, and salads. Store greens separately from roots: wrap them loosely in a damp paper towel inside a perforated bag and use within a few days. While the greens are nutritious and safe to eat, they spoil faster than roots, so prioritize using them quickly—try adding finely chopped greens to vegetable stocks or as a garnish to minimize waste.
By handling carrots gently, avoiding washing until use, and storing both roots and tops properly, you can enjoy home-grown carrots at their best for weeks or even months after harvest.
Enjoying and Preserving Your Carrot Harvest
Carrots are among the most versatile and rewarding vegetables to enjoy fresh from your garden or local market, and there’s no shortage of tasty ways to incorporate them into your meals. Start simple by washing and slicing carrots into sticks for crunchy, naturally sweet snacks—a much healthier alternative to chips for family movie nights or lunchboxes.
For a richer flavor, try tossing whole or sliced carrots with olive oil, salt, and your favorite spices, then roast them in the oven until they caramelize and crisp on the edges; they make an irresistible side dish for everything from roasted chicken to veggie bowls. Sautéed carrots pair beautifully with ginger and honey in a quick stovetop dish, or you can grate them into salads for a refreshing crunch. If you have a juicer or blender, combine carrots with apples and a squeeze of lemon for a vibrant, vitamin-rich juice the whole family will love in the morning. Carrots also shine in baking—think classic carrot cake, muffins, or even homemade carrot bread that sneaks extra veggies into breakfast.
Preserving Your Carrot Harvest
To avoid waste and savor your harvest year-round, there are several easy ways to preserve carrots.
- Freezing: Peel and chop your carrots, blanch them in boiling water for a few minutes, quickly cool them in ice water, then pack into freezer bags. They’ll maintain their flavor and nutrients for soups, stews, and stir-fries all winter.
- Dehydrating: Dry carrot slices or shreds in a food dehydrator or a low oven to create lightweight snacks or soup mix-ins—a perfect kid-friendly treat for on-the-go.
- Fermenting: Ferment carrot sticks with garlic, dill, and salt to create tangy probiotic snacks that boost gut health and last for months.
- Pickling: Pickling adds a zesty crunch to any sandwich or salad. Try a quick pickling brine of vinegar, water, sugar, and spices for an easy way to enjoy them longer.
These preservation methods not only extend your harvest but also add new flavors and textures to your meals.
Creative Ways to Cook with Carrots
Getting creative in the kitchen is easy with carrots as your star ingredient. Try a family-friendly carrot “fries” recipe by slicing carrots into thin strips, tossing with olive oil, paprika, and a pinch of salt, then roasting until crisp; they’re a guilt-free alternative to French fries that kids devour.
Carrot pancakes—made by folding grated carrots into a classic batter, or even adding them to potato latkes—add a bit of sweetness and color to breakfast or dinner. For a simple soup, simmer chopped carrots with onions, garlic, and ginger, then blend for a creamy, immune-boosting lunch.
Don’t forget classic carrot muffins, which pair beautifully with nuts and raisins and make for wholesome snacks or lunchbox treats. You can even add grated carrots to meatballs, spaghetti sauces, or casseroles to sneak in more veggies without anyone noticing.
Making the Most of Carrots: Nutrition and Greens
Beyond their delicious taste and versatility, carrots are nutritional powerhouses packed with beta-carotene (for healthy eyes and skin), fiber (aiding digestion), and vitamins A, C, and K.
While the orange root is familiar, don’t toss those leafy green tops! Carrot greens taste a bit like parsley and can be used in homemade pesto, stirred into soups for an herbal kick, or blended into smoothies and green sauces. Chop them finely and add to salads, omelets, or even bread dough for a pop of nutrition and flavor.
By using both the roots and greens, you’ll reduce food waste while maximizing the health benefits from your harvest—making carrots a true kitchen MVP all season long.