Introduction
Did you know you can regrow potatoes from peel instead of tossing those scraps in the bin? This surprisingly simple gardening hack is becoming popular among eco-conscious gardeners and anyone eager to make the most of their produce. When you regrow potatoes from peel, you not only reduce kitchen waste but also save money and enjoy the satisfaction of nurturing your own food from what would otherwise be discarded.
Whether you have a large vegetable garden or just a few pots on a balcony, anyone can try this sustainable method. Plus, it’s a fun experiment—watching new potatoes sprout from peels can be especially exciting for kids or new gardeners. In this blog post, we’ll guide you step-by-step through the process: from selecting and preparing the best potato peels, to planting, caring, and finally harvesting your homegrown potatoes.
Ready to turn kitchen scraps into a thriving potato patch? Let’s dig in and discover how you can make sustainable gardening part of your everyday routine.
Understanding Potato Growth
Potatoes are fascinating plants because they reproduce not through seeds but by sprouting new plants from existing tubers. The knobby, dimpled spots you see on a potato are called “eyes,” and they are actually small buds containing all the genetic material needed to form a new plant. Each eye has the potential to sprout roots and shoots, which can grow into a full potato plant producing new tubers underground.
When you want to regrow potatoes from peel, the magic lies in these eyes. If your potato peelings include eyes—especially if they’re starting to look like little bumps or have tiny sprouts—you can plant them. With the right conditions, they’ll begin growing into fresh plants. This is why not all peelings will work; only those with viable eyes will regrow. For best results, look for thick peelings with at least one or two healthy eyes each.
Not all potato varieties are equally suited to this method. Heirloom and “seed” potatoes, which haven’t been treated to prevent sprouting, are ideal. Varieties like Yukon Gold, Red Pontiac, and Kennebec are especially vigorous and tend to sprout easily from peelings. On the other hand, many commercially sold potatoes are treated with growth inhibitors to prevent eyes from sprouting during storage, making them less successful for regrowth.
Whenever possible, opt for organic potatoes or those specifically labeled as suitable for planting, as they tend to have a higher success rate when using peelings to start new plants.
How to Select and Prepare Potato Peelings
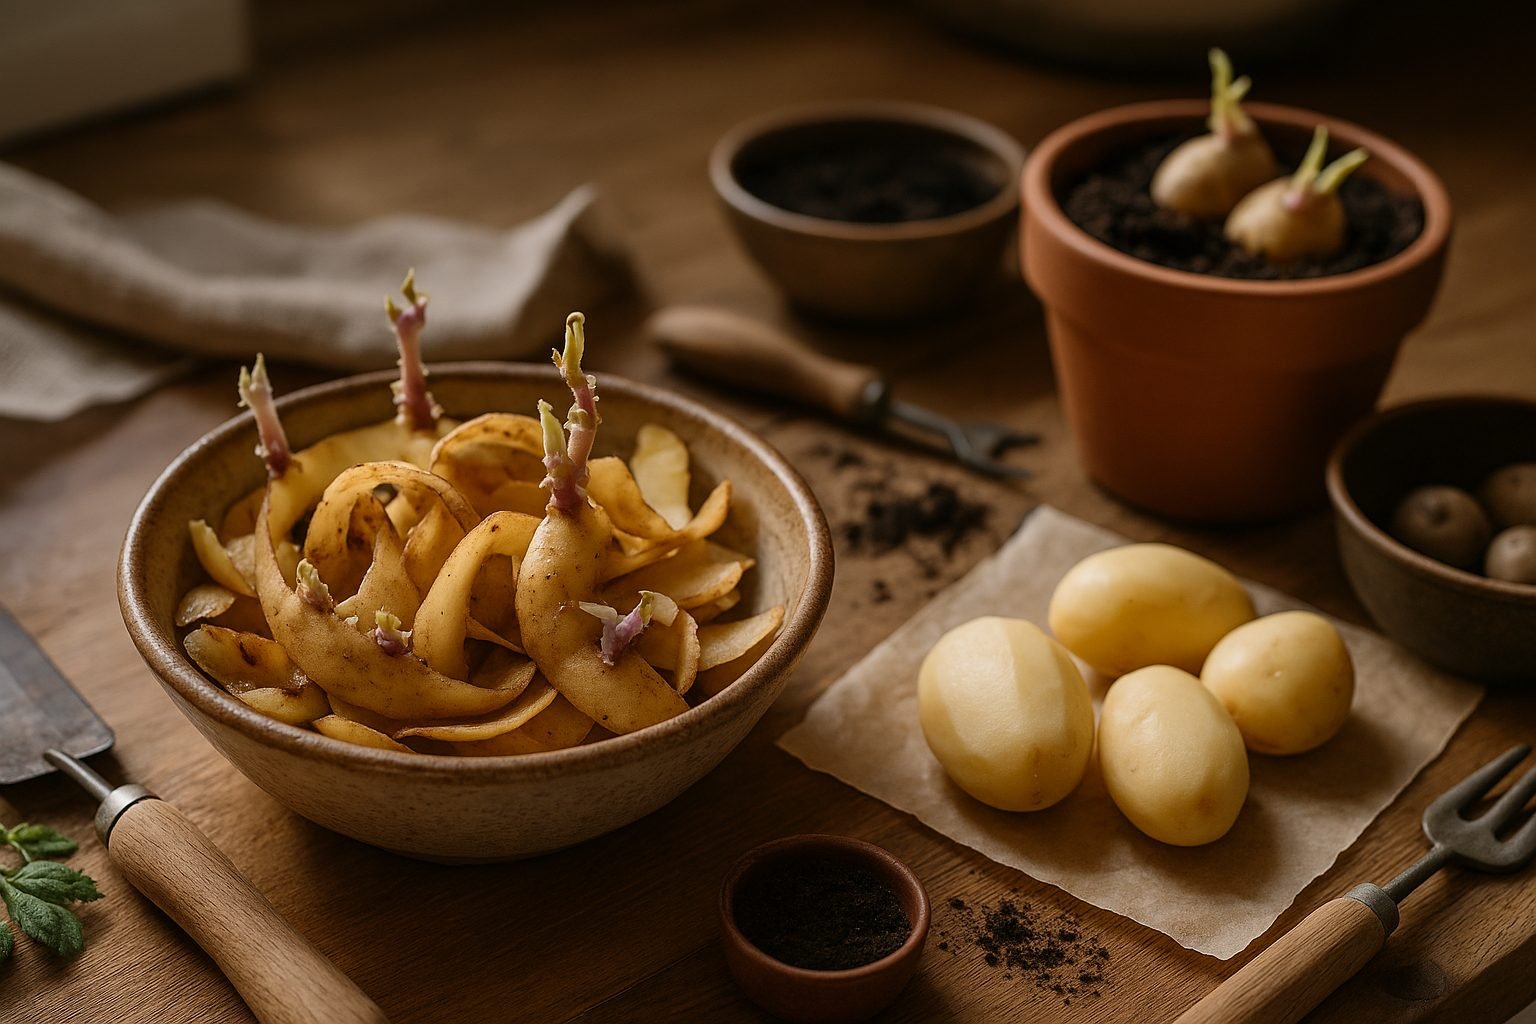
When planning to regrow potatoes from peel, start by choosing potatoes with healthy, well-developed eyes—the small bumps or dimples on the surface where new growth will sprout. Avoid potatoes that are shriveled, moldy, or have dark spots, as these may carry disease or lack the vigor needed for successful regrowth. Look for firm, blemish-free potatoes with eyes spaced an inch or two apart, since strong eyes are essential for vigorous sprouting.
When peeling, aim for slices about half an inch thick; this ensures each peel chunk holds enough flesh to support emerging sprouts and contains enough energy for the initial growth stages. Try to cut your peelings so that each piece includes at least one healthy eye—this is where your new potato plant will develop.
After peeling, gently brush off any soil clinging to the skin, but avoid washing the peelings directly with water, as excess moisture can encourage rot. Instead, let the peelings air dry on a paper towel for several hours to allow the cut surfaces to “callus” or form a protective layer that helps prevent disease. If you’re concerned about potential fungal issues, dust the cut surfaces lightly with garden sulfur powder.
Always use clean, sterilized knives and surfaces to prevent introducing pathogens. Once your peelings are firm, dry, and callused, they’re ready to be planted, maximizing your chances of healthy, disease-free potato sprouts.
Sprouting and Prepping Peelings Before Planting
Once you’ve collected your potato peelings, the first step in learning how to regrow potatoes from peel is encouraging sprouting—a process called chitting. Chitting helps the eyes, or buds, on the potato peels develop shoots before planting, giving your future potatoes a healthy head start.
To do this, lay your potato peels (each with at least one or two healthy eyes) in a single layer in a shallow tray or egg carton. Make sure the eyes face upward and the peels aren’t crowded together. Store them in a cool, bright spot away from direct sunlight—ideally on a north-facing windowsill or a kitchen counter with indirect light. The temperature should stay between 60–70°F (15–21°C) to encourage sprout formation while preventing the peels from drying out or rotting.
Good airflow is essential, so avoid sealing the peels in plastic or airtight containers. Within one to two weeks, you’ll see small, stubby sprouts called “chits” emerging from the eyes. Wait until these chits reach about half an inch long before planting—longer, spindly sprouts tend to be too weak and may break off during handling.
For best results, keep the peels in a place that’s not too humid or damp, as excess moisture can cause mold. Avoid chilling the peels in the fridge, since cold temperatures will slow or stop sprouting entirely. By prepping your peels carefully and creating the right conditions for chitting, you’ll set the stage for a thriving potato patch—even if you’re just regrowing from simple scraps.
Planting Potato Peelings
To regrow potatoes from peel, start by selecting thick peelings with at least one or two “eyes”—those little dimples where new growth sprouts. Lay the peelings out for a day or two to dry, allowing a callus to form over the cut side. This helps prevent rot once planted. For soil, choose a loose, well-draining mix rich in organic matter; potatoes thrive in slightly acidic soil with a pH between 5.5 and 6.5.
Whether you’re using a container or a garden bed, make sure the area gets at least 6–8 hours of direct sunlight daily, as potatoes love warmth and light to grow. In containers, fill the pot about halfway with soil, then arrange the peelings cut side down and eyes facing up, spacing them around 3 inches apart to allow room for tuber development. Cover lightly with 2–3 inches of soil and gradually add more as shoots grow.
For garden beds, plant peelings in shallow trenches about 2–3 inches deep, also with eyes up. Space rows about 12 inches apart and leave 2–3 inches between each peeling. Water gently right after planting to moisten the soil, but avoid overwatering, as soggy soil can cause the peelings to rot.
Keep the soil consistently moist but not waterlogged—check by feeling the top inch; if it’s dry, it’s time to water. As shoots emerge, mound soil or mulch around the base of the plants to encourage more tuber growth and protect them from sun exposure. Following these steps, your potato peelings should start producing leafy shoots within two weeks, turning kitchen scraps into a rewarding harvest.
Caring for Growing Potato Plants
Protecting your young potato plants from pests and diseases is essential for a successful crop when you regrow potatoes from peel. Start by regularly inspecting the leaves for common issues like aphids, potato beetles, or fungal diseases such as blight. Remove any affected foliage immediately and consider introducing beneficial insects—like ladybugs—to naturally control pests.
For an eco-friendly approach to disease prevention, avoid overhead watering and ensure good air circulation by spacing plants properly and not crowding the rows. Mulching around the base of the plants with straw, dried grass clippings, or shredded leaves helps conserve moisture, suppress weeds, and maintain consistent soil temperatures.
As the potato shoots reach 6-8 inches tall, practice hilling by mounding extra soil or mulch around their stems. This encourages more underground stems (and thus, more potatoes) to form, while also protecting developing tubers from sunlight, which can cause them to turn green and toxic. Watering is crucial—aim for about 1-2 inches weekly, keeping the soil evenly moist but not soggy to prevent rot.
For an extra boost, spray your plants with a homemade solution of seaweed extract or compost tea, which provides trace minerals and beneficial microbes. Rotating your potato beds each year and planting alongside disease-resistant herbs like basil or chives can also reduce pest pressure and promote healthy growth. By using these practical, natural methods, you’ll support healthy, productive potato plants and enjoy a more abundant harvest from your homegrown peels.
Harvesting and What to Expect
Knowing when to harvest is key to success when you regrow potatoes from peel. As your potato plants mature, watch for signs like yellowing leaves that begin to die back—this usually means the tubers have stopped growing. Carefully dig around the base with your hands or a small garden fork, taking care not to pierce or bruise the new potatoes.
Start by harvesting one plant to check the tubers. If their skins rub off easily, they might need a little more time in the ground. Once ready, let the harvested potatoes air-dry for a few hours in a shady spot.
For storage, cure your potatoes in a cool, dark place for two weeks to toughen their skins. Then keep them in a paper bag or a breathable crate in a dark, well-ventilated area. Avoid storing them near onions, as this can cause them to spoil faster.
If you plan to regrow potatoes from peelings, set aside a few healthy tubers with at least a couple of “eyes” for sprouting next season. Choosing firm potatoes helps ensure a steady, sustainable crop from your kitchen scraps.
Troubleshooting Common Issues When You Regrow Potatoes from Peel
When you try to regrow potatoes from peel, a few common issues might come up along the way. One frequent problem is mold or rot, often caused by peelings that are too wet or kept in an area with poor air circulation. To prevent this, make sure your peelings have small “eyes” and are partially dried before planting.
Another issue is slow or no sprouting, which can happen if the peel is too thin or severely damaged. For the best results, use thick skin sections with healthy eyes, and avoid very old or wrinkled potato peelings that have lost their vitality.
Pests like gnats or fruit flies may also appear—cover your tray loosely with breathable material and remove any decaying pieces promptly. If you notice a foul smell or blackened peelings, it’s a clear sign to discard those and start fresh with healthy scraps.
Keep in mind, not every peeling will sprout, and some varieties of store-bought potatoes may be treated to prevent growth. Don’t get discouraged; regrowing from peel is a fun experiment, even if yields are smaller than with traditional seed potatoes. Keep trying different methods to find what works best in your environment, and enjoy the process of discovery, no matter the results.