Understanding Garlic Growth
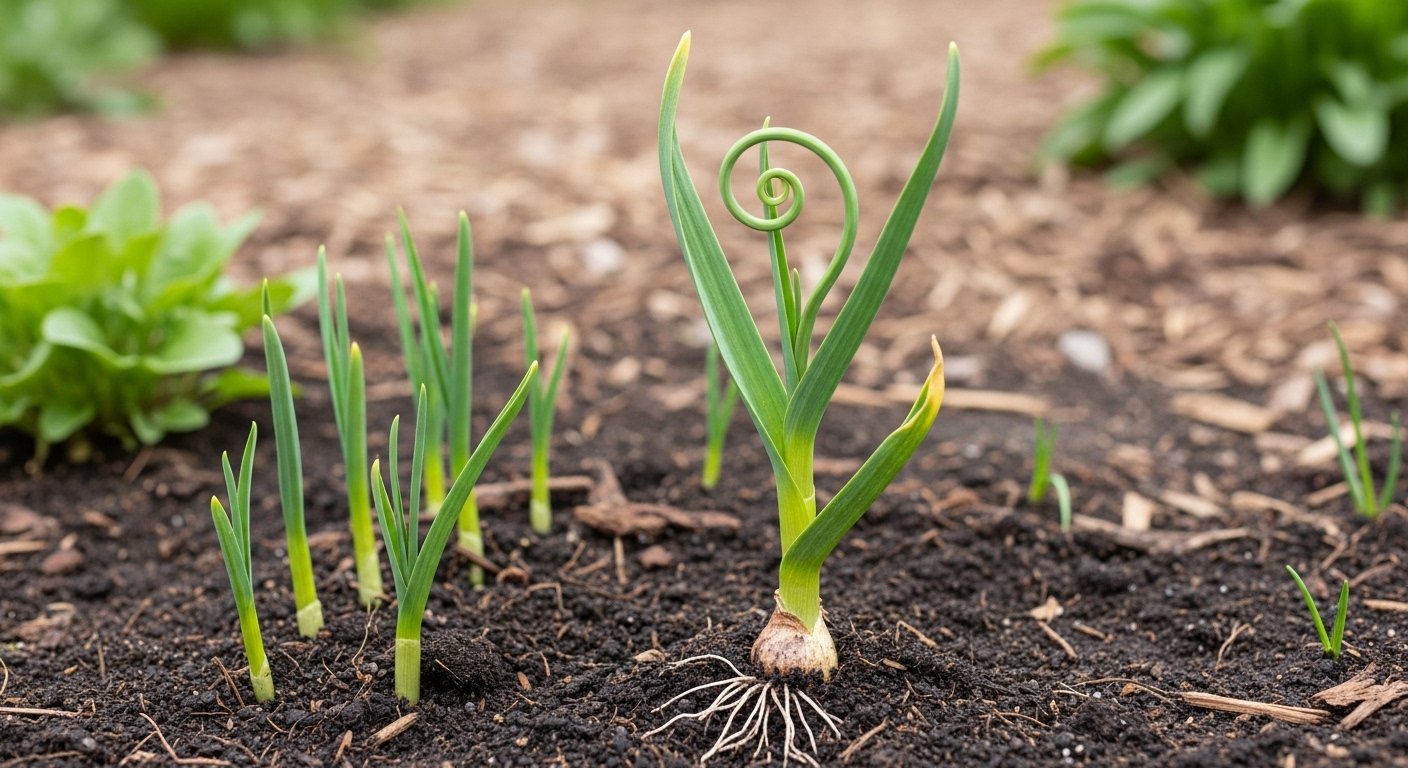
Knowing exactly when to harvest garlic is the key to unlocking the fullest flavor, ideal storage life, and biggest bulbs your garden can offer. Garlic follows a fascinating life cycle, beginning with fall planting when cloves nestle into cool soil, lying dormant through the winter as roots quietly strengthen underground.
In spring, green shoots burst forth, followed by the emergence of a sturdy stalk. Soon enough, many varieties—especially hardnecks—will send up a curly, flowering stem called a “scape.” These garlic scapes are more than just a culinary treat; they signal that the bulbs below are maturing and that harvest time is approaching.
Cutting scapes helps bulbs grow larger, but leave them on too long, and the plant shifts energy from the bulb to the flower. As the season progresses, the leaves begin to yellow from the bottom up—another crucial sign to monitor.
When about half to two-thirds of the leaves have browned, it’s generally time to lift the bulbs. Acting too early can result in small, tender bulbs that are poor for storage, while waiting too long risks tough skins and individual cloves splitting apart, leaving garlic vulnerable to rot.
Softneck and hardneck varieties differ slightly in their harvest cues. Hardnecks reliably produce scapes and typically mature a bit earlier, while softnecks lack scapes but require extra attention to leaf color and firmness of the bulbs. Some, like elephant garlic, can be even trickier, blending characteristics of both.
The perfect timing for harvest comes down to understanding these growth stages—watch for withering leaves, feel for firm bulbs, and pay attention to your specific garlic variety. By syncing with garlic’s natural rhythms, you’ll pull up a crop that truly sings with flavor, stores beautifully, and gives you the best return on your gardening patience.
Signs Your Garlic Is Ready to Harvest
Knowing when to harvest your garlic is all about paying close attention to the plant rather than the calendar. One reliable sign is the color and condition of the leaves: when the bottom third to half of the leaves have turned yellow or brown and started to dry out, your garlic is likely ready to pull.
For example, in most climates this happens in mid to late summer, but weather, soil, and garlic variety can shift the timeline, so don’t just rely on a set date.
To check if the bulbs are mature, gently dig around one plant and feel the bulb through the soil—look for plump cloves and papery skins wrapping the whole bulb. If the bulb looks small or the skin is thin and easily rubs off, wait a bit longer but don’t lose track.
Harvesting too early often means the cloves will be underdeveloped with thin wrappers that won’t store well, while waiting too long risks the bulbs splitting apart underground, making them harder to store and clean.
By watching your plants closely and feeling for well-formed bulbs with dry, intact skins, you’ll enjoy garlic that’s tasty and holds up well on your pantry shelf.
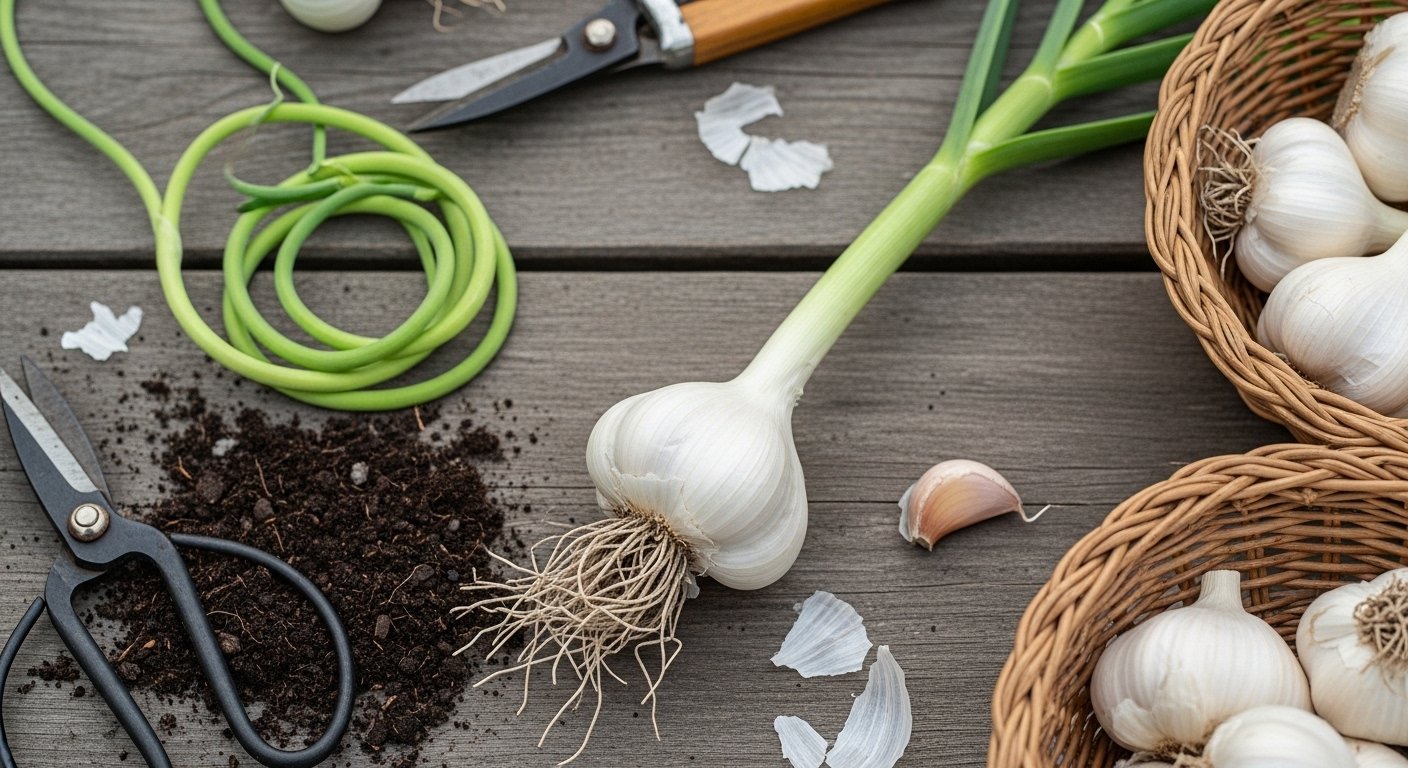
When (and How) to Harvest Garlic Scapes
Garlic scapes are the curly, green flower stalks that emerge from hardneck garlic plants a few weeks before harvest time. Harvesting scapes is important because it redirects the plant’s energy into developing bigger, more flavorful bulbs instead of producing flowers.
The best time to cut garlic scapes is when they form a full loop or coil, typically in late spring or early summer, before the stalks harden and seeds begin forming. To safely remove scapes, use clean garden shears or scissors and snip the stalk just above the top leaf, being careful not to tug on the plant itself.
For easier cutting and less stress on the plant, harvest in the morning when the plants are crisp and hydrated. And don’t toss those fresh scapes—they’re delicious!
Try chopping them up and using them as a garlicky substitute for scallions in pesto, stir-fries, or scrambled eggs. They add a mild, bright garlic flavor that captures the essence of your summer garden.
Step-by-Step Guide: How to Harvest Garlic
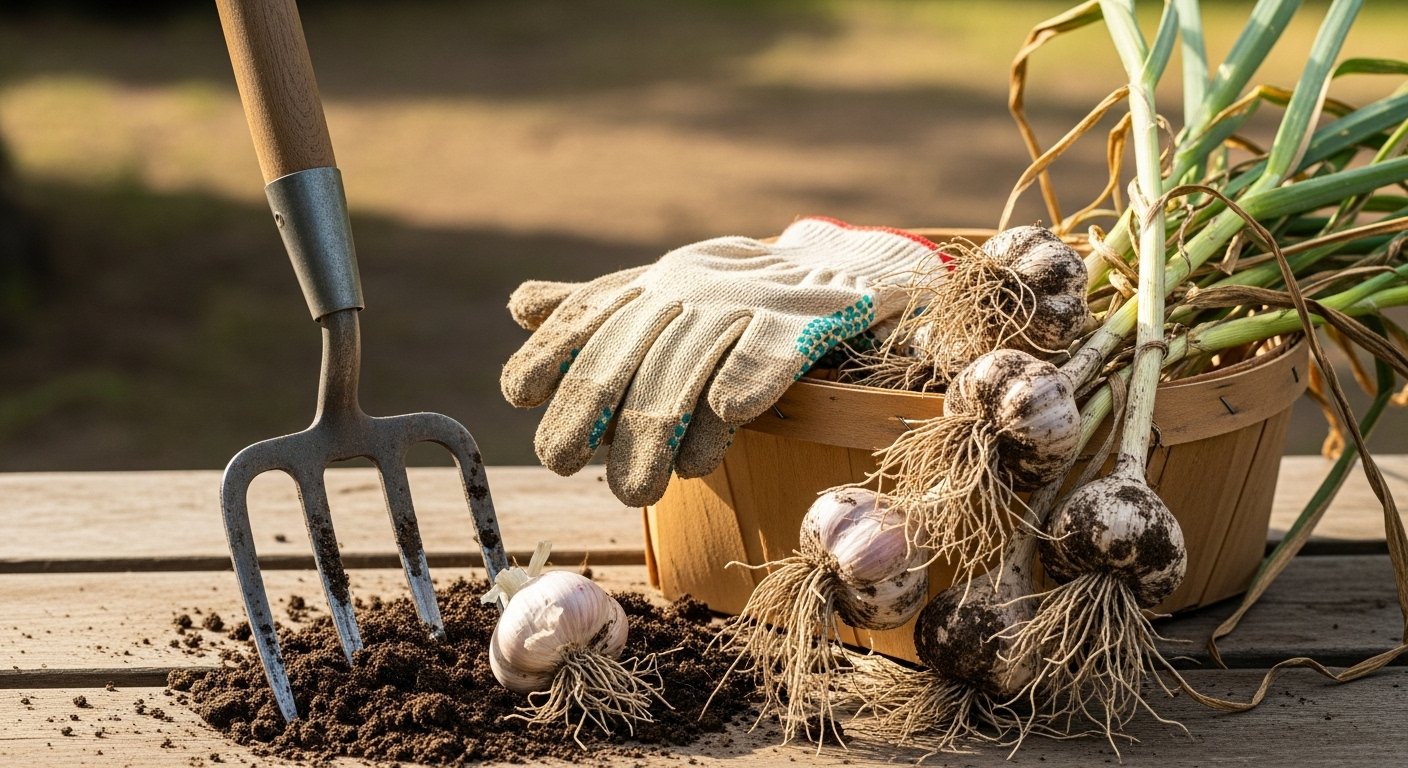
Before you head out to harvest garlic, gather a few simple tools to make the job easier: a garden fork or shovel for loosening soil, a pair of gardening gloves, and some baskets or trays for collecting bulbs.
Harvesting on a dry day is important—wet conditions can encourage rot or make bulbs muddy and hard to clean. Start by gently loosening the soil around each garlic plant with your fork, keeping several inches away from the base to avoid stabbing the bulbs.
Lift the garlic by the lower stem or neck, never tugging by the leaves, as this can cause bruising or snap the neck. Once you’ve pulled the bulbs from the soil, shake off any loose dirt but avoid washing them—garlic stores best when it dries with its skins intact.
Lay the bulbs out in a single layer on a screened rack or a dry, shaded surface with good airflow. As you handle and sort through your harvest, set aside any damaged or bruised bulbs to use first, since these won’t store as long.
For the rest, brush off dried soil with your hands and leave the stalks and roots attached during curing, as this helps the garlic finish drying and keeps bulbs from spoiling. Always handle the bulbs gently and avoid dropping or knocking them together.
With this careful approach, you’ll keep your garlic in great shape for long-term storage and delicious meals all year round.
Trouble Signs: When Garlic Isn’t Ready or Matures Slowly
If your garlic seems stuck in slow motion, don’t worry—several factors can delay bulb development. Some garlic varieties naturally mature later than others, so check the estimated harvesting window for the type you planted.
Weather is another big influence: cool, wet springs and early summers can stall growth, while a sudden heatwave might trick garlic into maturing before it’s ready. Poor or compacted soil also slows bulbs, especially if it drains badly.
To assess whether your garlic is ready, gently scrape away some soil around a bulb and look for well-formed, plump cloves—if the bulbs are still small or feel soft, give them more time.
Avoid common mistakes like:
- Overwatering, which promotes rot
- Adding too much nitrogen-rich fertilizer, which creates leafy growth but small bulbs
- Planting cloves too closely together, which leaves them crowded and undersized
Not sure what’s wrong? Use this checklist:
- Check your variety’s days-to-maturity
- Examine local weather patterns
- Inspect soil for proper drainage
- Review your watering and fertilizing habits
Most importantly, if in doubt, wait a week and check again—patience often pays off with bigger, healthier garlic bulbs.
Drying and Storing Garlic for Long-Lasting Flavor
Curing garlic is essential to lock in its robust flavor, preserve texture, and extend shelf life, so don’t rush this step after harvesting. To cure garlic, gently shake off excess soil without washing. Then, lay the bulbs out in a single layer or hang them in bundles by their stems in a dry, shady, and well-ventilated area—garages, sheds, or covered porches work well.
Let them cure for two to four weeks; you’ll know they’re ready when the roots are brittle, the outer skins are papery, and the cloves feel firm. Once cured, trim the roots close and cut stems to about one inch above the bulb, unless you want to braid softneck types for hanging.
Peel away just the dirtiest outer layer if needed, but avoid exposing the cloves too much, as this shortens shelf life.
Storing Garlic
For storing, cool, dark, and dry spaces are best—think mesh bags or open baskets in a pantry or cellar. In humid climates, consider using a dehumidifier or storing smaller amounts in the refrigerator. Be sure to let refrigerated garlic warm to room temperature before use to prevent condensation and sprouting.
Common Issues to Watch For
- Mold: Appears as fuzzy, discolored spots.
- Sprouting: Green shoots emerging from the bulb.
- Shriveled cloves: Soft or hollow, a sign of dehydration.
Perfectly cured garlic has dry outer wrappers, firm cloves, no visible green shoots, and no soft spots—ready to bring bold, homemade flavor to your cooking for months to come.
Frequently Asked Questions & Quick Tips
Many home gardeners wonder how to get the most from their fresh garlic harvest. When using fresh garlic, remember it’s juicier and milder than dried bulbs—perfect for salsas or quick sautés (just peel and crush).
If your garlic cloves are splitting or sprouting, don’t worry; use cracked bulbs first, and store the rest in a cool, dry, airy place—never in the fridge, as it encourages sprouting. Fresh bulbs can last up to 6 months in ideal conditions.
For next year’s planting, set aside your biggest, healthiest bulbs—they’ll produce the strongest plants. Try rotating where you grow garlic and avoid planting in the same spot as last year, since crop rotation helps prevent soil-borne diseases.
This season’s harvest is your best teacher: note what worked (and what didn’t!), and experiment with planting dates, varieties, or soil amendments for better results next year. Garlic is forgiving, so don’t be afraid to experiment and make each season a little more successful than the last.