Introduction
If you’ve ever had trouble getting your beets to grow or bulk up in your garden, you’re not alone. Beets are a favorite among home gardeners for good reason—their earthy sweetness, vibrant color, and versatility in the kitchen make them a top pick. Not only are beets packed with nutrition, offering plenty of vitamins, minerals, and antioxidants, but they’re also unique because you can enjoy both the tender roots and leafy greens.
Roasted beets add flavor to salads, while the greens are delicious sautéed or tossed into soups. Despite their popularity, many gardeners get frustrated when their beets don’t size up as expected, ending up with small, stunted roots or just leafy tops.
In this guide, we’ll take a close look at why your beets might not be growing or bulking up, covering factors like soil quality, planting depth, watering habits, and proper thinning techniques. You’ll also find practical tips and solutions you can put into practice right away—no green thumb required.
Whether you’re trying to troubleshoot a current beet crop or want to avoid disappointment with your next planting, you’ll find expert advice and real-world strategies here to help your garden thrive.
Choosing the Right Beet Variety
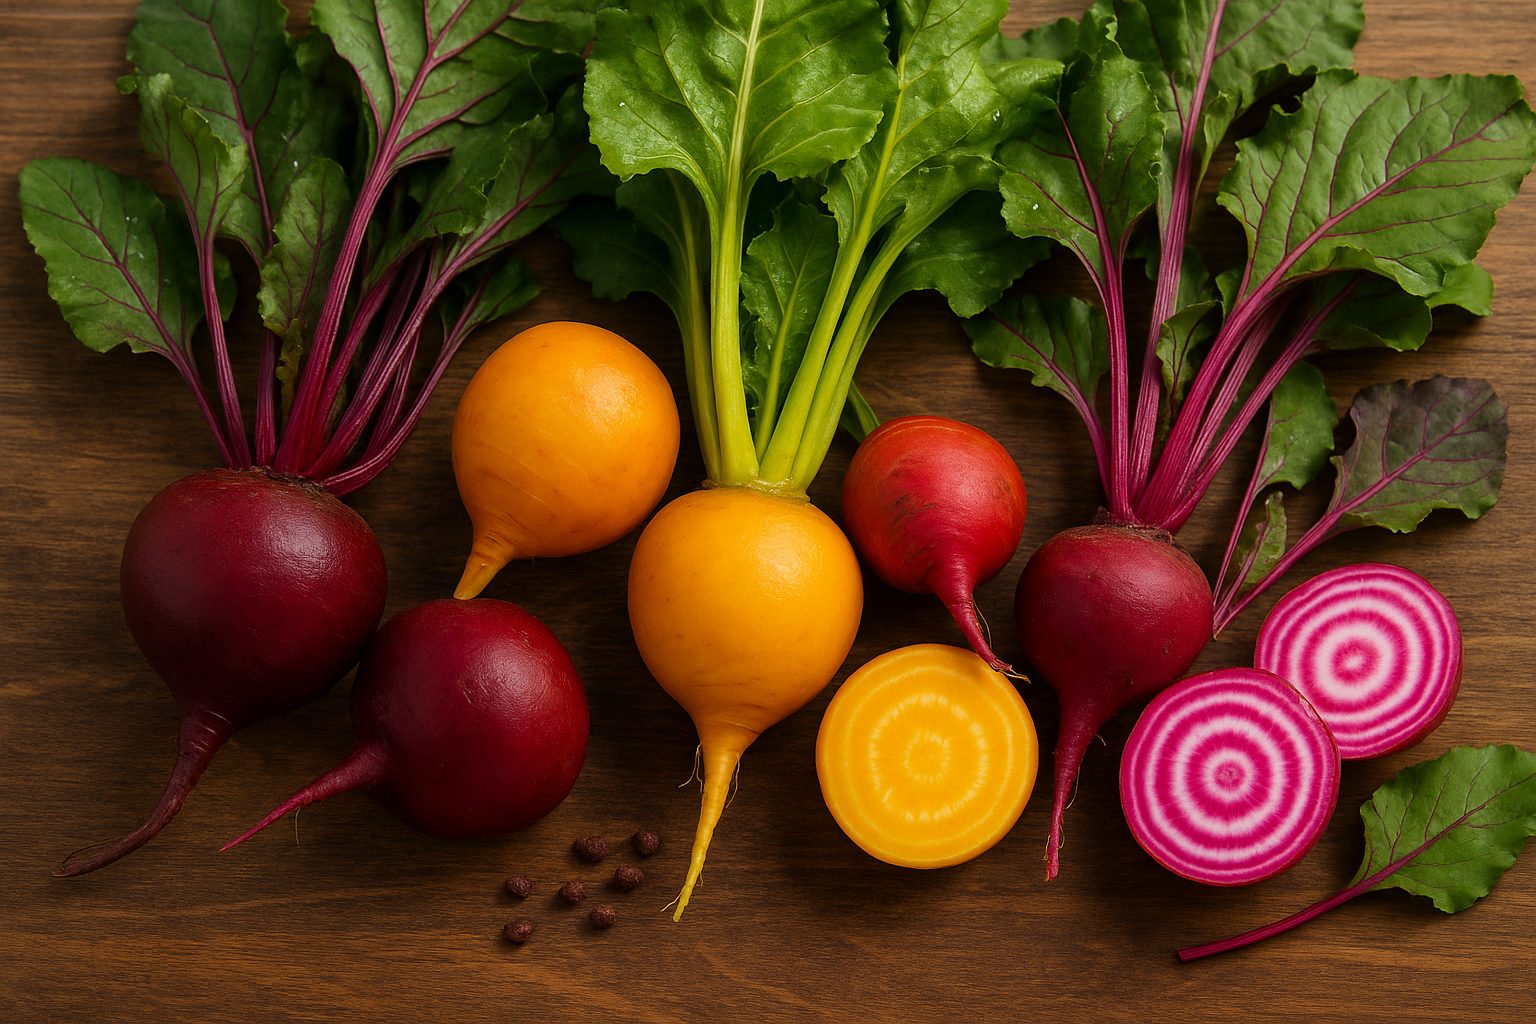
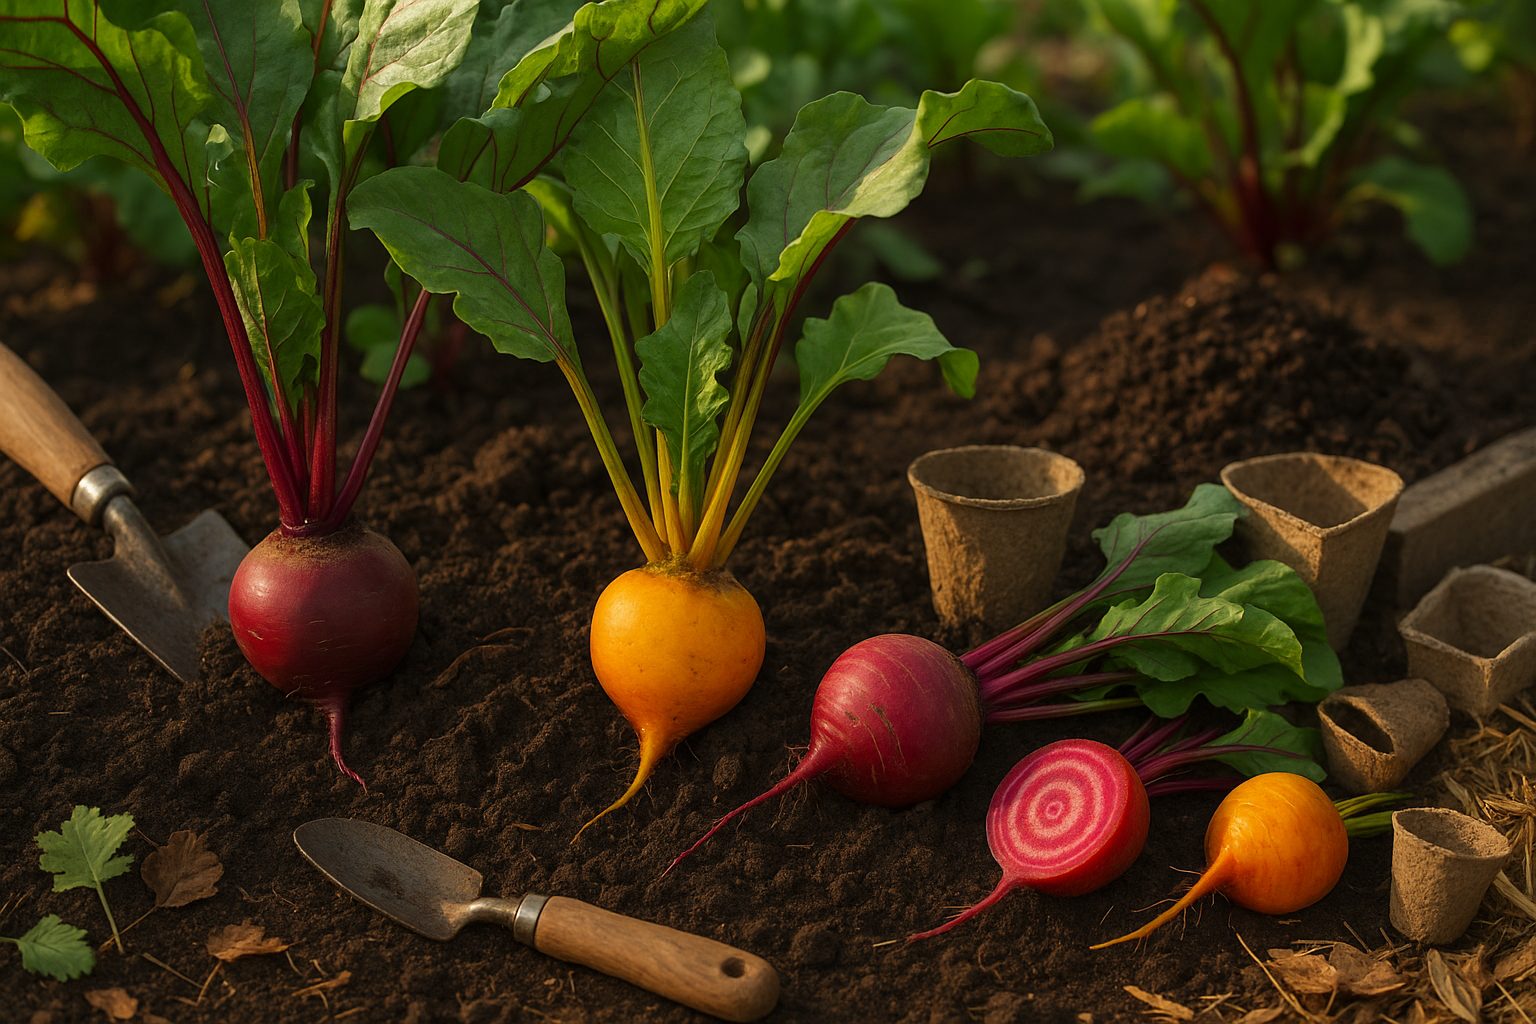
When it comes to selecting the right beet variety for your garden, it helps to consider what you want to grow and enjoy in your kitchen. Classic red beets, like ‘Detroit Dark Red’ or ‘Early Wonder,’ are staples known for their earthy flavor and reliability—they perform well in most regions and are favorites for roasting, pickling, and salads.
Golden beets, such as ‘Golden Boy’ or ‘Touchstone Gold,’ offer a milder, slightly sweeter taste and don’t stain your hands or cutting boards, making them popular with first-time growers. For something eye-catching, consider the Italian heirloom ‘Chioggia,’ also known as Candy Stripe beet, with its striking concentric pink-and-white rings; they taste similar to red beets but are often less earthy and more tender.
There are also specialty varieties like cylindrical ‘Cylindra’ beets, which are great for uniform slices, or miniature varieties like ‘Babybeat’ for container gardening.
Climate and Soil Considerations
Climate plays a big role in what grows best—beets generally thrive in cooler weather, and early-maturing types can be a smart pick for short spring or fall seasons. Soil matters too: beets prefer loose, well-drained soil without stones, as rocks can cause misshapen roots.
Taste and Usage Preferences
Taste preferences are important; some people love the deep earthiness of classic reds, while others prefer the delicate sweetness of golden or Chioggia types. Finally, think about how you plan to use your beets:
- Smaller, tender beets are great for salads and eating raw.
- Larger varieties hold up well to roasting or longer storage.
Recommendations for Beginners
For beginners, ‘Detroit Dark Red’ and ‘Golden Boy’ are excellent choices—they’re forgiving, productive, and widely available as seeds. Start small, experiment with a couple of different types, and you’ll quickly discover which beets fit your garden and your taste buds best.
Best Conditions & Site Preparation
Providing your garden plants with the best conditions starts with understanding their sunlight needs—most vegetables and flowers thrive with at least six hours of direct sun daily. Choose a spot free from shade-casting trees or buildings. Well-draining soil is equally vital, as soggy roots can quickly lead to rot or disease.
To check your site’s drainage, dig a hole about a foot deep and fill it with water; if it drains within a few hours, you’re good to go. For bed preparation, start by loosening the soil to a depth of 10-12 inches, then blend in organic matter like compost or well-rotted manure to boost both texture and nutrients.
If your soil feels heavy and dense, add sand or peat moss to encourage fluffiness and drainage. Sandy soils benefit from extra compost to help retain moisture and nutrients. Aim for a soil pH between 6.0 and 7.0, which suits most garden plants—use a simple at-home soil test kit and adjust as needed with lime to raise pH or sulfur to lower it.
When planting, follow crop-specific spacing guidelines from the seed packet or plant tag so roots and foliage have room to grow—crowding can invite pests and disease. Raised beds or large containers are great options if your native soil is poor; fill them with a mix of topsoil and compost, and make sure they have drainage holes.
If you’ve grown the same crops in the same place before, practice crop rotation by switching plant families each season; for example, follow tomatoes with beans to help break up pest and disease cycles. These foundational steps create a resilient, productive garden that sets you up for growing success.
Sowing & Planting Beets

The best time to sow beet seeds depends on your region, but generally, beets thrive in cool weather and can handle a light frost. In most areas, you can direct sow beets outdoors as soon as the soil is workable in early spring, about two to four weeks before the last expected frost date. For gardeners in warmer climates, a fall planting is also ideal—just aim to get seeds in the ground about eight to ten weeks before your first fall frost for a late crop.
When planting, sow seeds about half an inch deep and one to two inches apart in rows spaced a foot apart. Beet seeds are actually clusters that often contain multiple embryos, so soaking them in water for an hour before planting can help soften the seed coat and speed up germination.
Once seedlings sprout and reach a few inches tall, thin them to about three to four inches apart to give the roots space to develop—the plants you pull can be used in salads as tender microgreens. Don’t skip thinning; overcrowded beets will produce smaller, misshapen roots.
If you prefer to start beets indoors for an early jump on the season, use biodegradable pots and sow seeds in similar conditions as outside. Once seedlings are established and all danger of frost has passed, transplant them into the garden, taking care to minimize root disturbance; try to transplant them at the same depth they were growing indoors.
For a steady harvest, sow small batches every couple of weeks throughout the season. With these tips, you’ll set yourself up for sweet, healthy beets straight from your garden.
Growing Care: Watering, Feeding, and Maintenance
Keeping your garden thriving starts with getting watering right. Most vegetables and herbs do their best with about one inch of water per week, either from rainfall or supplemental watering. Instead of frequent, light sprinkles, water deeply but less often to encourage strong root systems. Early morning is the best time to water, as it allows foliage to dry quickly and reduces the risk of disease.
Consider adding a layer of organic mulch, like straw or shredded leaves, around your plants. Mulch locks in soil moisture, regulates temperature, and can drastically cut down on how often you need to water. It also has the bonus of suppressing weeds, which compete with your crops for water and nutrients.
Fertilization is another key to healthy growth, yet more isn’t always better—especially when it comes to nitrogen. Over-fertilizing with nitrogen can lead to lush foliage but weak roots and fewer fruits. Instead, use slow-release organic fertilizers or compost, applying at planting time and topping up mid-season if your plants look pale or sluggish. Steer clear of quick fixes and heavy doses, as these can cause salt build-up and do more harm than good.
Maintenance tasks like weeding shouldn’t be overlooked—pull weeds while they’re young and before they flower, and keep mulched areas tidy to make it harder for weeds to establish. Watch your plants for signs of trouble; yellow leaves can signal overwatering, underwatering, or nutrient imbalance, so check your soil moisture and consider a soil test if symptoms persist.
If you notice plants bolting (flowering and going to seed prematurely, often in lettuces or herbs), try planting heat-sensitive crops earlier in spring or providing shade during hot spells. Uneven growth can sometimes be traced to crowded plantings, inconsistent watering, or soil compaction; thin seedlings as instructed on seed packets and use a garden fork to gently loosen soil around stunted plants.
By practicing attentive watering, smart feeding, and regular maintenance, you’ll nip most problems in the bud and keep your garden happy all season long.
Dealing With Pests & Diseases
Battling pests and diseases in your garden doesn’t have to feel overwhelming if you know what to watch for and how to respond quickly. Common pests like leaf miners create winding trails on leaves—simply pinch off infested areas and dispose of them to slow their spread.
Aphids, often found clustered on new growth, can be dislodged with a strong spray of water or managed with beneficial insects like ladybugs. Flea beetles, notorious for their tiny holes in foliage, can be kept at bay with row covers early in the season and by sprinkling diatomaceous earth around young plants.
Diseases are just as important to monitor. Downy mildew shows up as yellowish spots on the tops of leaves with a fuzzy gray or white underside—trim away infected parts and improve air circulation by proper spacing. Root rot often strikes when soil stays too wet; prevent this by using well-draining soil and watering only when needed. Leaf spot, which leaves brown or black spots on leaves, is best handled by removing affected foliage and avoiding overhead watering.
Regular preventative steps will make a big difference:
- Rotate crops each year to interrupt pest and disease cycles that build up in the soil.
- Clean up plant debris and sanitize tools to remove places where problems can hide.
- Select disease-resistant varieties whenever possible. For example, choose lettuce labeled as “downy mildew resistant” or tomatoes with “verticillium wilt resistance.”
Healthy plants are naturally less vulnerable, so keeping your garden well-fed and stress-free acts as an extra line of defense. By combining quick action with smart prevention, you’ll keep your plants thriving and reduce the need for chemical interventions.
Harvesting & Storing Beets
Knowing the right time to harvest beets is key to enjoying their best flavor and texture. Beet roots are usually ready to pick when they reach the size of a golf ball to a tennis ball, typically about 1.5 to 3 inches in diameter after 50–70 days of growth, depending on the variety and weather. If roots grow much larger, they may become woody or lose sweetness.
The greens can be harvested earlier—once they’re about 4–6 inches tall—for tender salad leaves, or you can wait until you’re ready to pull the roots for heartier sautéing greens.
How to Harvest
To harvest beet roots, water the soil a few hours beforehand to loosen it. Then, gently grasp the leafy tops near the base and wiggle the root back and forth as you lift; avoid yanking, as this can damage the roots. For stubborn beets, use a garden fork to loosen the soil nearby.
Once pulled, trim off the greens about an inch above the root to prevent moisture loss, but don’t cut too close, which can cause bleeding of color and sap.
Storing Beet Greens
Greens should be stored separately—wash and dry them thoroughly, then wrap them in a paper towel and place them in a perforated bag in the refrigerator, where they’ll stay fresh for about 3–5 days.
Storing Beet Roots
For roots, brush off any excess soil (but don’t wash until ready to use), and store beets in the fridge’s crisper drawer or in a ventilated plastic bag; they’ll last up to two weeks.
For longer storage, beets can be packed in damp sand or peat moss and kept in a cool root cellar at 32–40°F with high humidity—this way, they’ll last several months.
Preservation Methods
Freezing is another option: blanch peeled, sliced beets for a few minutes, then cool and pack into airtight containers.
Don’t overlook preservation methods like pickling or canning, which not only extend shelf life but add a tangy twist—simply slice or dice beets and follow a trusted pickling or canning recipe. Pickled beets can be enjoyed in salads or as a snack, bringing a burst of flavor long after harvest season ends.
With a bit of care during harvest and storage, your beets will stay delicious and versatile for months.
Using Beets in the Kitchen
Beets are a versatile and nutritious addition to any kitchen, offering endless possibilities beyond the classic roasted side dish. Roasting beet roots brings out their natural sweetness—just toss them with a little olive oil, salt, and pepper, then bake until tender. If you’re in a rush, boiling cubed beets is quicker and works well for salads or quick sides.
For a punchy crunch, try grating raw beets into slaws, wraps, or grain bowls; their vivid color and earthy flavor pair wonderfully with citrus or tangy cheeses.
Don’t let the tops go to waste either—beet greens are packed with vitamins A, C, and K, plus minerals like iron and calcium. Sauté the greens with garlic for an easy side, or blend them into frittatas, smoothies, or pestos.
Beets are also fantastic in juices, mixing happily with apples, carrots, and ginger for a nutrient-rich boost.
To prepare, scrub beets well (you can peel them if you like, but it’s not required) and trim the greens for separate use—store them in the fridge and use within a couple of days for the best texture. Embracing both root and leaf means less waste and more nutrition.
Experiment with these kitchen-friendly methods, and you’ll discover just how simple and satisfying it is to make beets a regular star in your meals.
Conclusion
Growing delicious, healthy beets at home is both rewarding and simpler than you might think. Start by selecting a sunny spot with well-drained soil, sow seeds directly in the ground, and keep the area consistently moist while the seedlings get established.
Thinning young plants is important for robust root development, so don’t be afraid to snip out extras as they grow. As your beets mature, keep them well-watered and watch for pests like leaf miners—removing affected leaves early can help prevent their spread.
The fun really begins when you experiment with different beet varieties—try classic red, vibrant golden, or even candy-striped Chioggia to see which you like best. Sharing your gardening adventures and swaps with other growers, neighbors, or online communities can help you discover tips you might not have found otherwise and adds extra joy to the process.
Remember, each growing season is a chance to learn more and get creative in your garden. If you have questions, unique experiences, or favorite beet recipes to share, leave a comment below—we love hearing from fellow beet enthusiasts and building connections within our gardening community!